

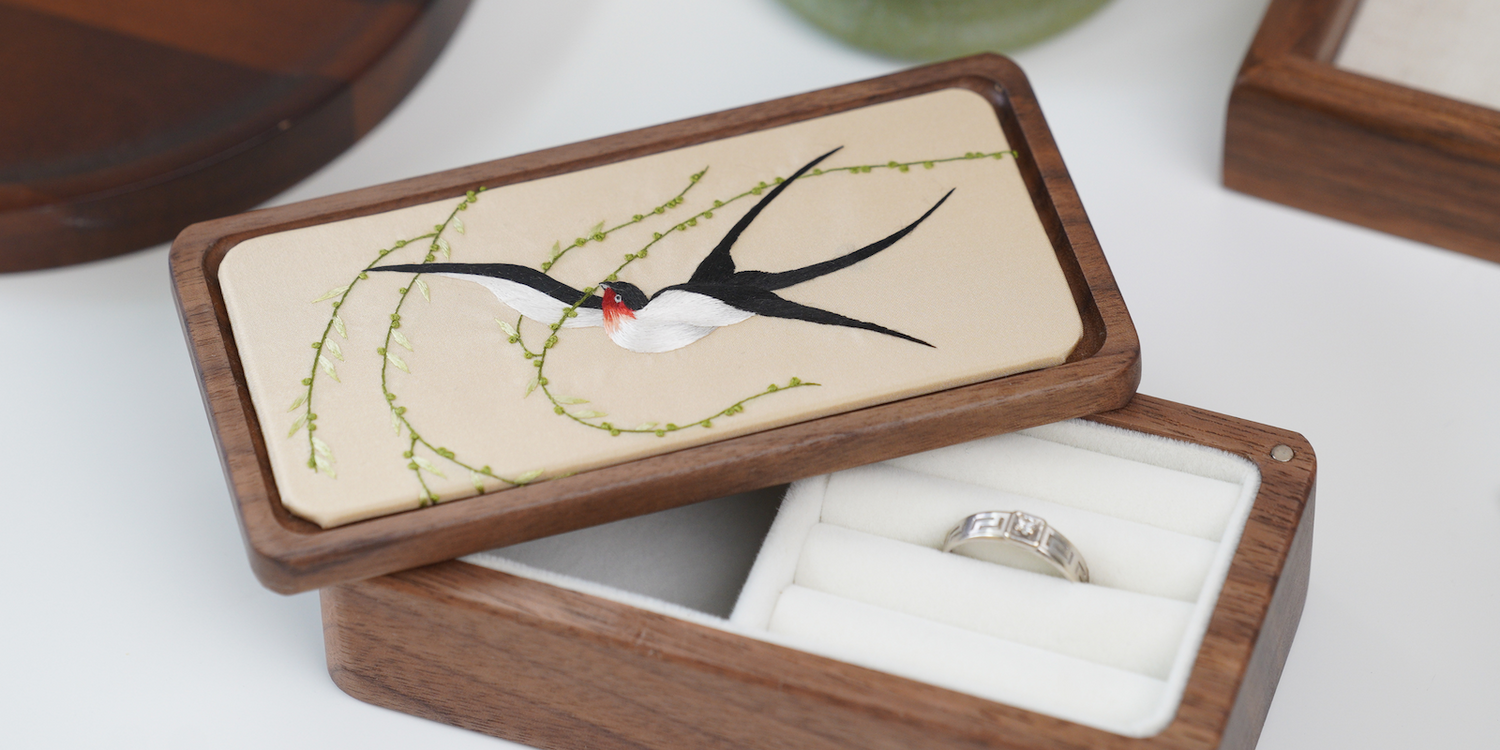
Inspired by the classic Chinese motif of swallows returning in spring, Swallow Carrying Spring captures a lively scene of willow branches swaying in the breeze as a swallow glides through fresh greenery. In Chinese culture, swallows are a symbol of renewal, good fortune, and the arrival of warmer days, making them a beloved subject in traditional art and embroidery.
Materials Kit Overview
This project is a Level 2 embroidery kit, suitable for beginners who already have some basic embroidery experience and would like to learn traditional Shu embroidery techniques such as rolling stitch (滚针), three-three stitch (二三针), turning stitch (车拧针), blending stitch (晕针), and seed stitch (打籽绣).
The kit includes:
- Embroidery frame
- Embroidery fabric
- Connecting fabric
- Pattern outline sheet
- Mounting backing board
- Backing fabric for mounting
- Thick cotton thread
- Thin cotton thread
- Nano adhesive stickers
- Double-sided fabric tape
- Mulberry silk embroidery threads
- Embroidery needles, sewing needles, and pin needles
- Thumbtacks
- Wooden thread organizer
- Heat-erasable pen
Full Tutorial Video
We highly recommend you to check out our video tutorial if you come across techniques that you are not familiar with:)
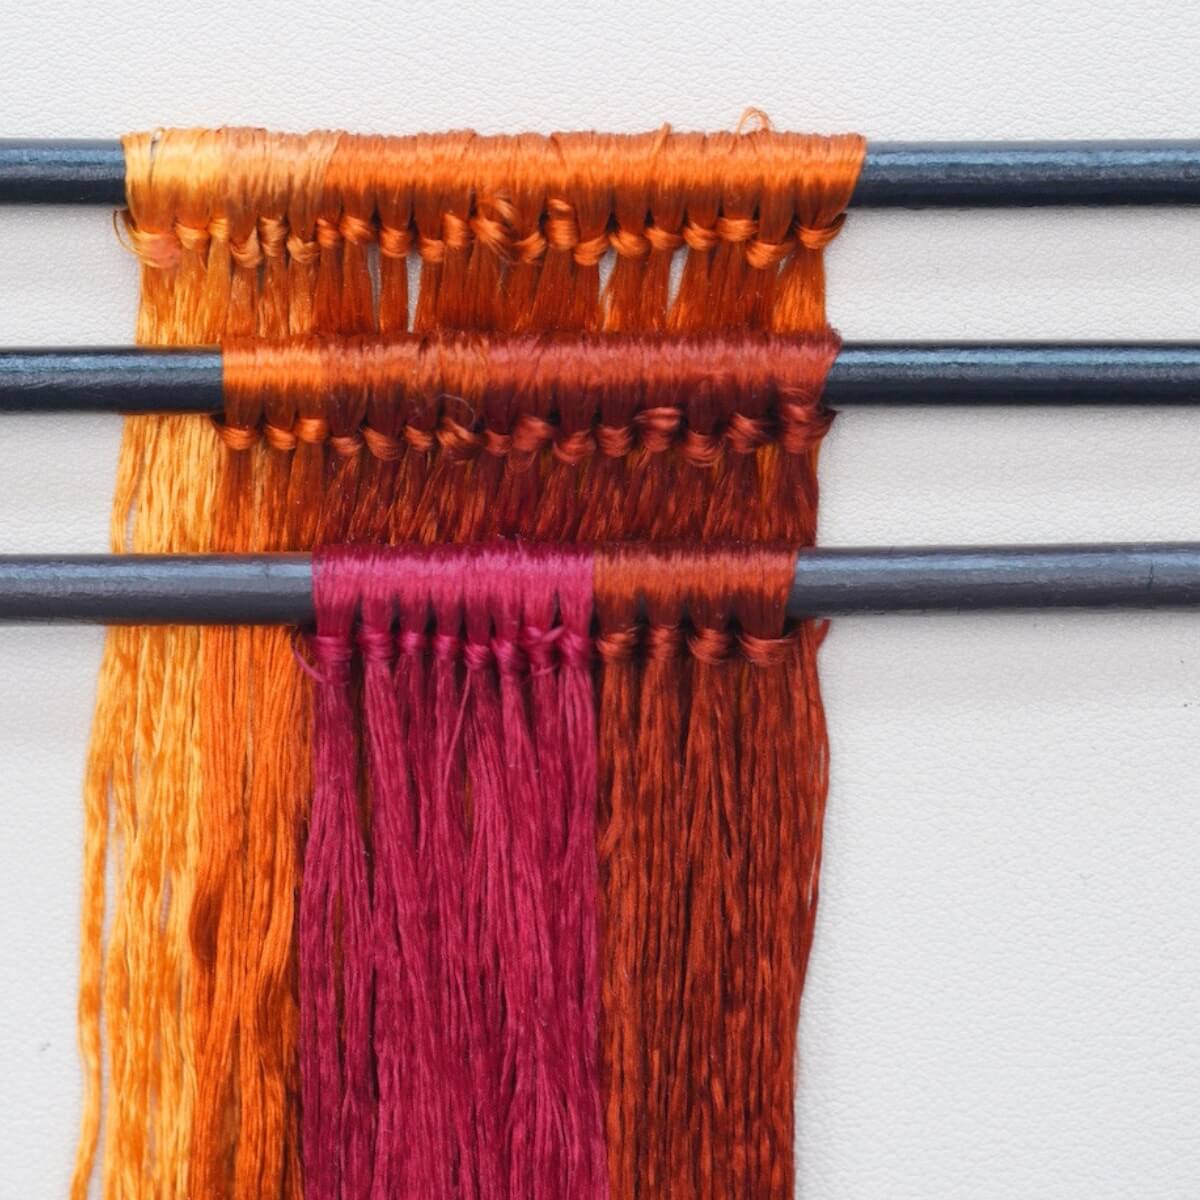
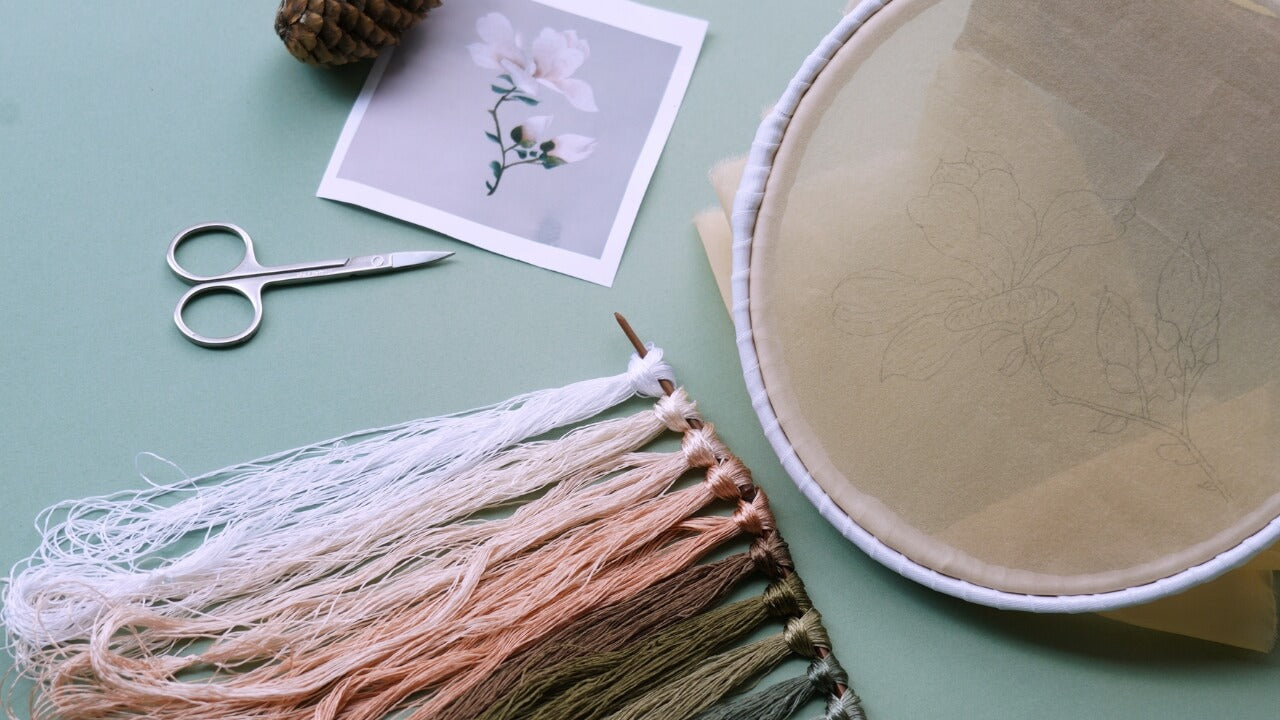
Color Combination
Refer to the diagram below for color combination details.

Step 1. Mount the Fabric onto the Embroidery Frame
Preparing the Embroidery Fabric
Take out the embroidery fabric and connecting fabric.
Align one piece of connecting fabric with the embroidery fabric and sew them together using thin cotton thread and a sewing needle. Simple running stitches are sufficient as long as the connection is secure.
Keep the stitches neat, fine, and evenly spaced. At the end, backstitch a few times to prevent loosening. Repeat the same process for the second connecting fabric piece.
Once both sides are attached, iron the fabric flat. Fold and press the seam allowances to strengthen the edges and prevent tearing when the fabric is stretched later.

Mounting onto the Frame
Fold the excess connecting fabric underneath and wrap it around one long side of the embroidery frame. Pull it smooth and secure both ends with thumbtacks.

Repeat on the opposite side, pulling firmly until the fabric is under tension before securing it.
Continue tightening and adjusting as needed. When viewed from the front, vertical wrinkles are acceptable at this stage, but horizontal wrinkles indicate insufficient tension and should be corrected.

Adding Tension Threads
Cut a piece of thick cotton thread approximately 2.5 times the width of the frame.
Using an embroidery needle, sew tension loops along one side of the fabric. Insert the needle from bottom to top, spacing the loops roughly 4 cm apart. Stitch back near the previous entry point to create a loop.
Secure the thread at the end and trim away excess thread. Repeat on the opposite side.
Insert thumbtacks every 4 cm along the frame edge.

Tie a 1-meter length of thick cotton thread to the first thumbtack. Pass it through each tension loop and hook it around the thumbtacks sequentially. Secure the end temporarily and repeat on the opposite side.
Gradually tighten all tension threads until the fabric is stretched evenly and firmly.
Step 2. Transfer the Pattern
Place the pattern sheet behind the embroidery fabric and center it carefully.
Secure the pattern using pin needles. If available, magnets can also be used to hold the pattern in place.
Using the heat-erasable pen, trace the entire design onto the embroidery fabric.
Check that all lines are transferred clearly before removing the pattern sheet.

3. Embroidery Process (绣制顺序)
3.1 Willow Branches (柳条枝干)
Technique: Rolling Stitch (滚针)
Thread Color: Green 3 and 4
Begin with the willow branches in the background.
Use the pi si (劈丝) technique to split the silk thread. The tutorial demonstrates splitting the thread twice to create a quarter strand.

In Shu embroidery, threads are secured with tiny anchoring stitches rather than knots.
Use the rolling stitch (滚针) method. Bring the needle up from the back of the fabric and insert it approximately one-third into the previous stitch. Maintain smooth, flowing lines throughout the branches.
Continue until all willow branches are completed.

3.2 Willow Leaves (柳条叶片)
Technique: Satin Stitch / Flat Stitch (平针)
Thread Colors: Green #1 and #2
Use the lightest green (#2) thread first.
Split the thread twice into a quarter strand.

Begin stitching from the tip of each willow leaf. Bring the needle up from the center of the leaf and insert toward the tip. The stitch direction should fan outward from the leaf tip.

After completing all leaf tips, switch to light green (#1) and embroider the leaf bases.
3.3 Willow Buds (柳芽)
Use the seed stitch (打籽绣) technique.
Bring the needle up at the bud location, wrap the thread around the needle three times, pull tight, and insert the needle nearby while maintaining tension.
Complete all willow buds before moving on.

3.4 Swallow Tail & Black Areas of the Wings
Technique: Turning Stitch / Three-Three Stitch (车拧针、二三针)
Thread Color: Black
Use black silk thread split twice into a quarter strand.
The swallow tail is embroidered using the three-three stitch (二三针) technique.
Each stitch group consists of:
-
One long stitch
-
Two shorter stitches
Arrange the stitches in a staggered pattern.
After finishing the first row, bring the needle up through the gaps of the previous row and continue building the next layer.
Avoid placing stitches directly on top of each other. Maintain a staggered arrangement to create a smooth feather texture.
Continue the same technique for the black portions of the wings.

When reaching curved areas, gradually adjust stitch direction. This directional adjustment is called turning stitch (车拧针) in Shu embroidery.
3.5 White Section of the Left Wing
Technique: Turning Stitch (车拧针)
Thread Color: White
Use white silk thread split twice into a quarter strand.
Continue using the three-three stitch structure while adjusting stitch direction with turning stitches as the wing shape changes.

As the embroidered area widens, add additional stitches where needed.
Bring the needle up through gaps in the previous row and continue staggering the stitches.
Use the lightest gray (#1) near the wing tip to add subtle layering and dimension.
3.6 Swallow Body
Technique: Turning Stitch (车拧针)
Thread Colors: White, Gray #1, Gray #2
Use blending stitches (晕针) together with turning stitches (车拧针) to create smooth gradients.
Start with dark gray and gradually transition into light gray and finally white.
Continue using quarter-strand silk throughout.
Pay close attention to stitch angles so the feather direction flows naturally with the body shape.
As the embroidered area narrows, gradually reduce the number of stitches. This stitch reduction helps maintain smooth transitions and proportions.
The lower section of the right wing is worked in the same manner, blending from dark gray into white.

Finally, switch to the lightest red thread (#1), split into a quarter strand, to begin the soft red gradient on the swallow’s chest.
Continue building the red gradient using red #2 and then the darkest red #3, both split into quarter strands.

3.7 Head & Right Wing
Technique: Turning Stitch (车拧针)
Thread Colors: Black and White
Use black silk thread split twice into a quarter strand.
For the head, begin at the forehead and gradually add stitches outward to maintain a smooth rounded outline.

Continue embroidering the remaining black areas of the right wing using the same three-three stitch and turning stitch combination.

Where highlights are required, blend into lighter thread colors to create soft transitions.
3.8 Eyes & Beak
Technique: Rolling Stitch (滚针)
Thread Colors: Black and White
The eye is embroidered as a small black circle.
After completing the eye, outline it using gray thread and the rolling stitch technique.

This is one of the most delicate parts of the embroidery, so work slowly and carefully.
For the beak, use the same stitching approach as the willow leaves. Treat the tip of the beak as the focal point and build stitches outward from it.
Finally, use rolling stitch and seed stitch techniques to embroider the willow branches that overlap the swallow's wing.

At this point, the embroidery itself is complete.
Step 4. Remove from the Frame & Mount
Preparing the Backing Board
Cut a piece of double-sided adhesive the same size as the backing board.
Layer together:
-
Backing board
-
Double-sided adhesive
-
Backing fabric
Align them carefully and iron from the backing fabric side for about 20 seconds to bond the layers securely.

Place a heavy object on top while cooling.
Wrapping the Backing Fabric
Cut narrow strips of double-sided adhesive.
Fold the excess backing fabric around the edges of the board and secure it with the adhesive strips.
Iron the edges flat.
Repeat for all four sides.
Add small adhesive pieces into the corners, smooth everything down, and trim away any excess fabric.

Mounting the Embroidery
Place the finished embroidery over the prepared backing board and check the placement carefully.
Cut another piece of double-sided adhesive slightly larger than the backing board.
Position the embroidery accurately before applying heat. This step is irreversible, so confirm alignment first.
Place a thin protective cloth over the embroidery and iron gently to secure it.

Steam can be used to remove minor wrinkles.
Finishing the Back
Trim away the excess embroidery fabric.
Secure the remaining edges to the back of the board using the same adhesive-and-iron method.
Check that the front remains smooth before trimming any remaining excess fabric.
Apply nano adhesive stickers to the back of the mounted panel.

Position it carefully inside the jewelry box lid.
Once satisfied with the placement, press firmly and place a heavy object on top until fully secured.
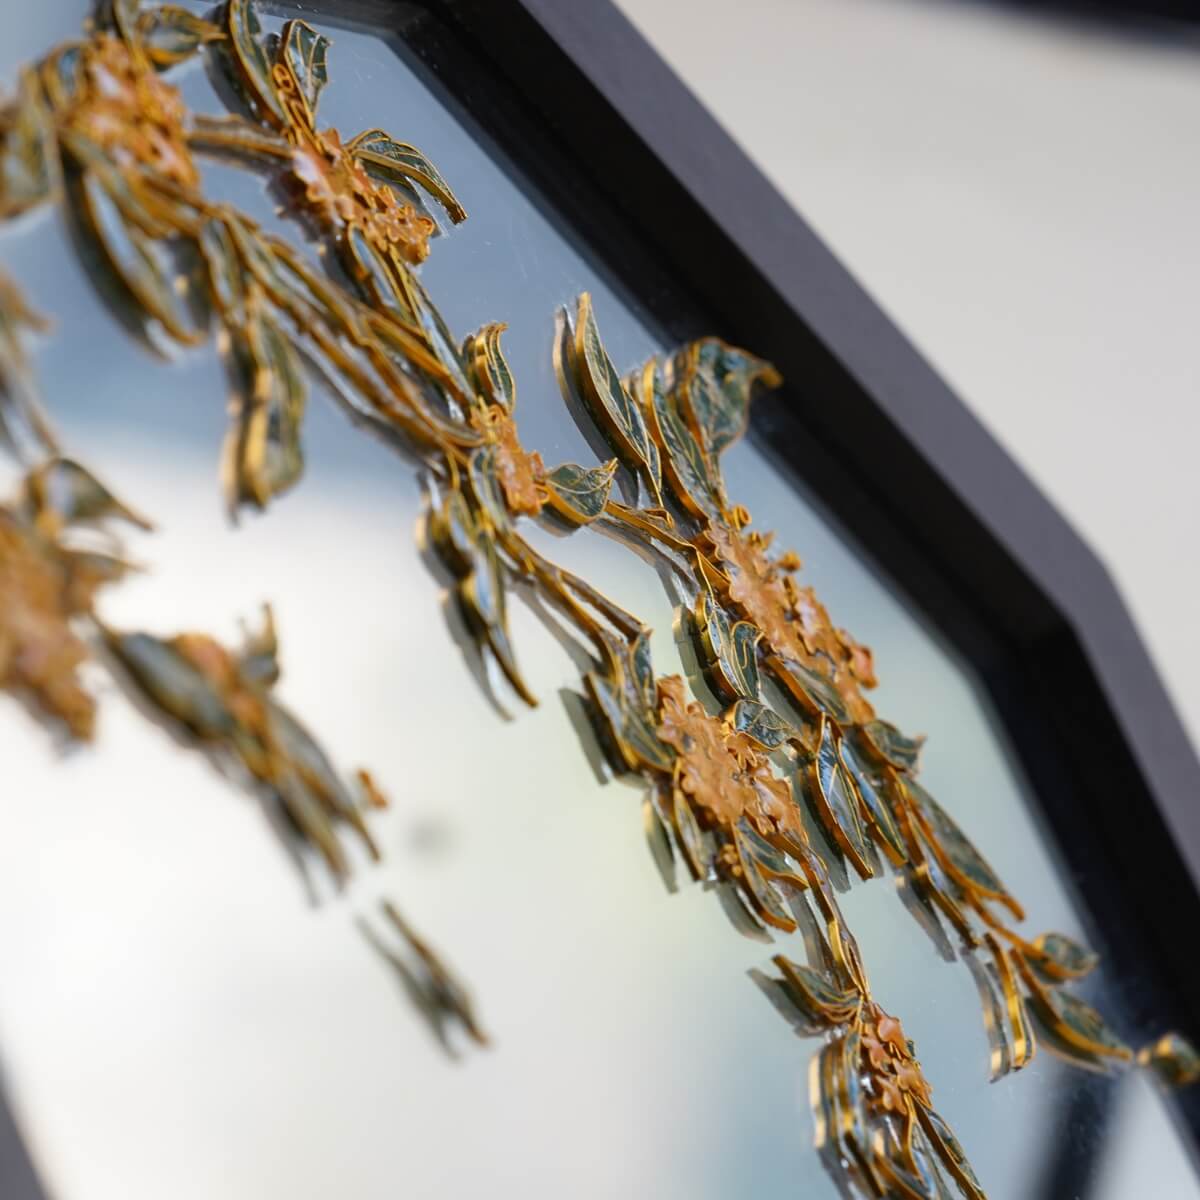
Finished Piece
Your Swallow Carrying Spring embroidered jewelry box is now complete.

This design combines several classic Shu embroidery techniques—including rolling stitch, turning stitch, blending stitch, and seed stitch—to create a lively spring scene of swallows flying among fresh willow branches. Once mounted into the jewelry box, the embroidery becomes both a decorative artwork and a functional keepsake, bringing a touch of traditional Chinese craftsmanship into everyday life.
Deja un comentario
Todos los comentarios son moderados antes de ser publicados.
Este sitio está protegido por hCaptcha y se aplican la Política de privacidad de hCaptcha y los Términos del servicio.