


In this step-by-step tutorial, we’ll guide you through preparing the silk strips, brushing, shaping, and assembling your very own Red Spider Lilies!
Step 1: Organize the silk threads to make a silk strip 00:00~01:36
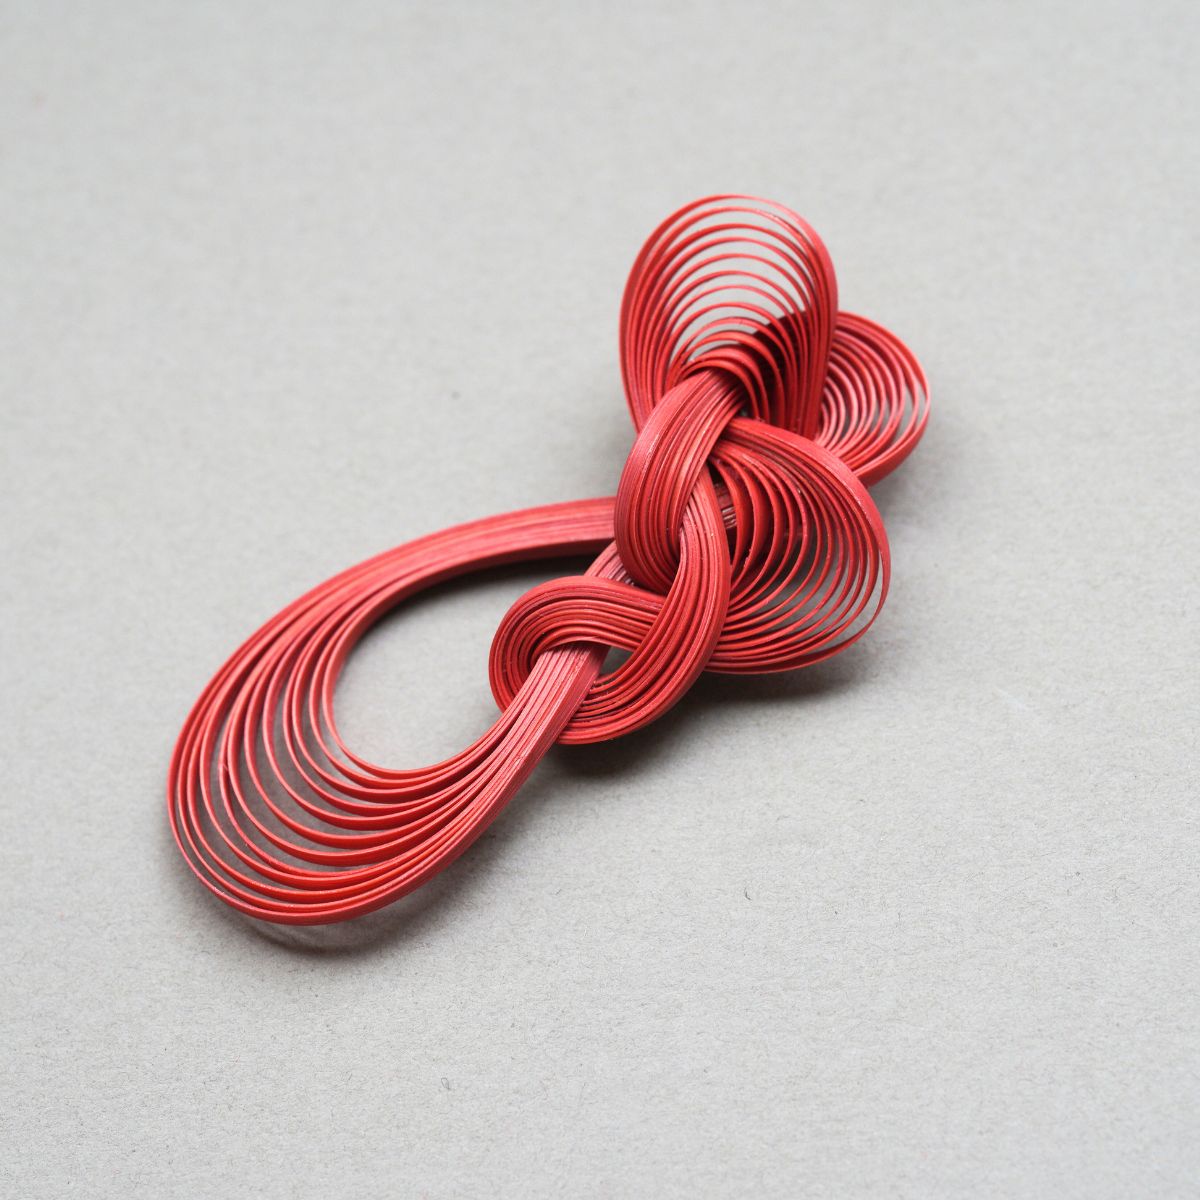
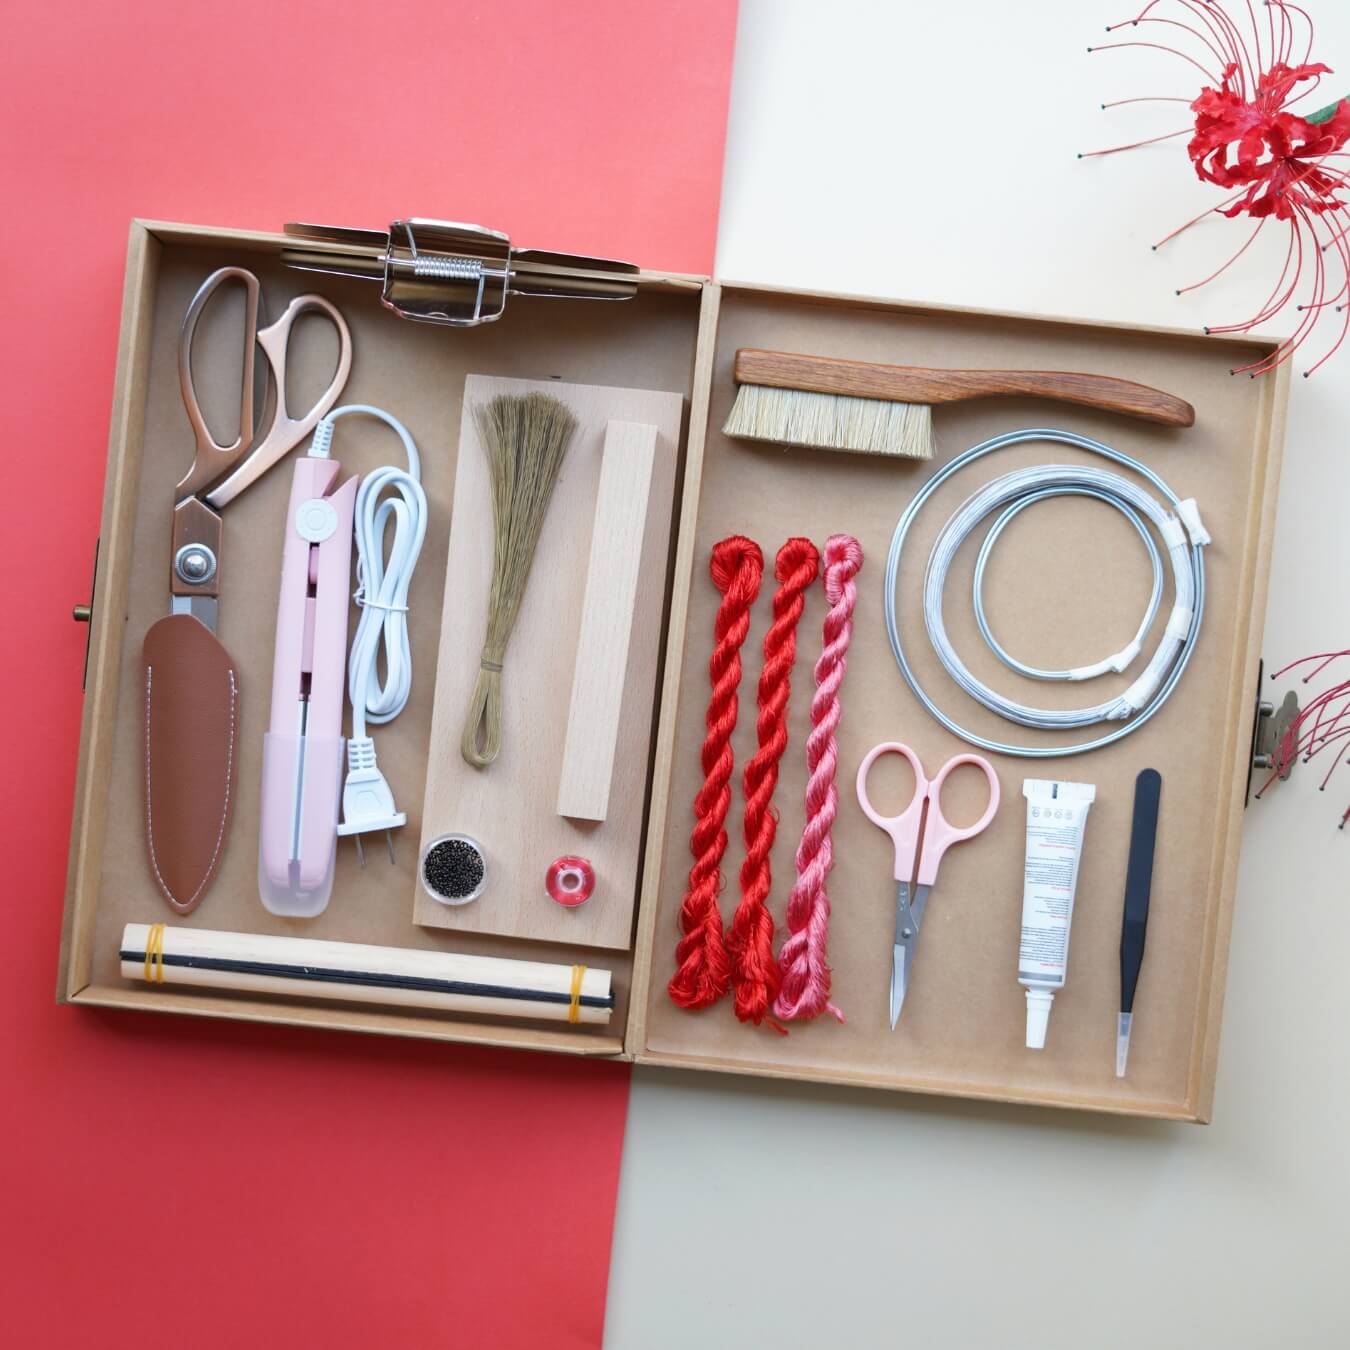
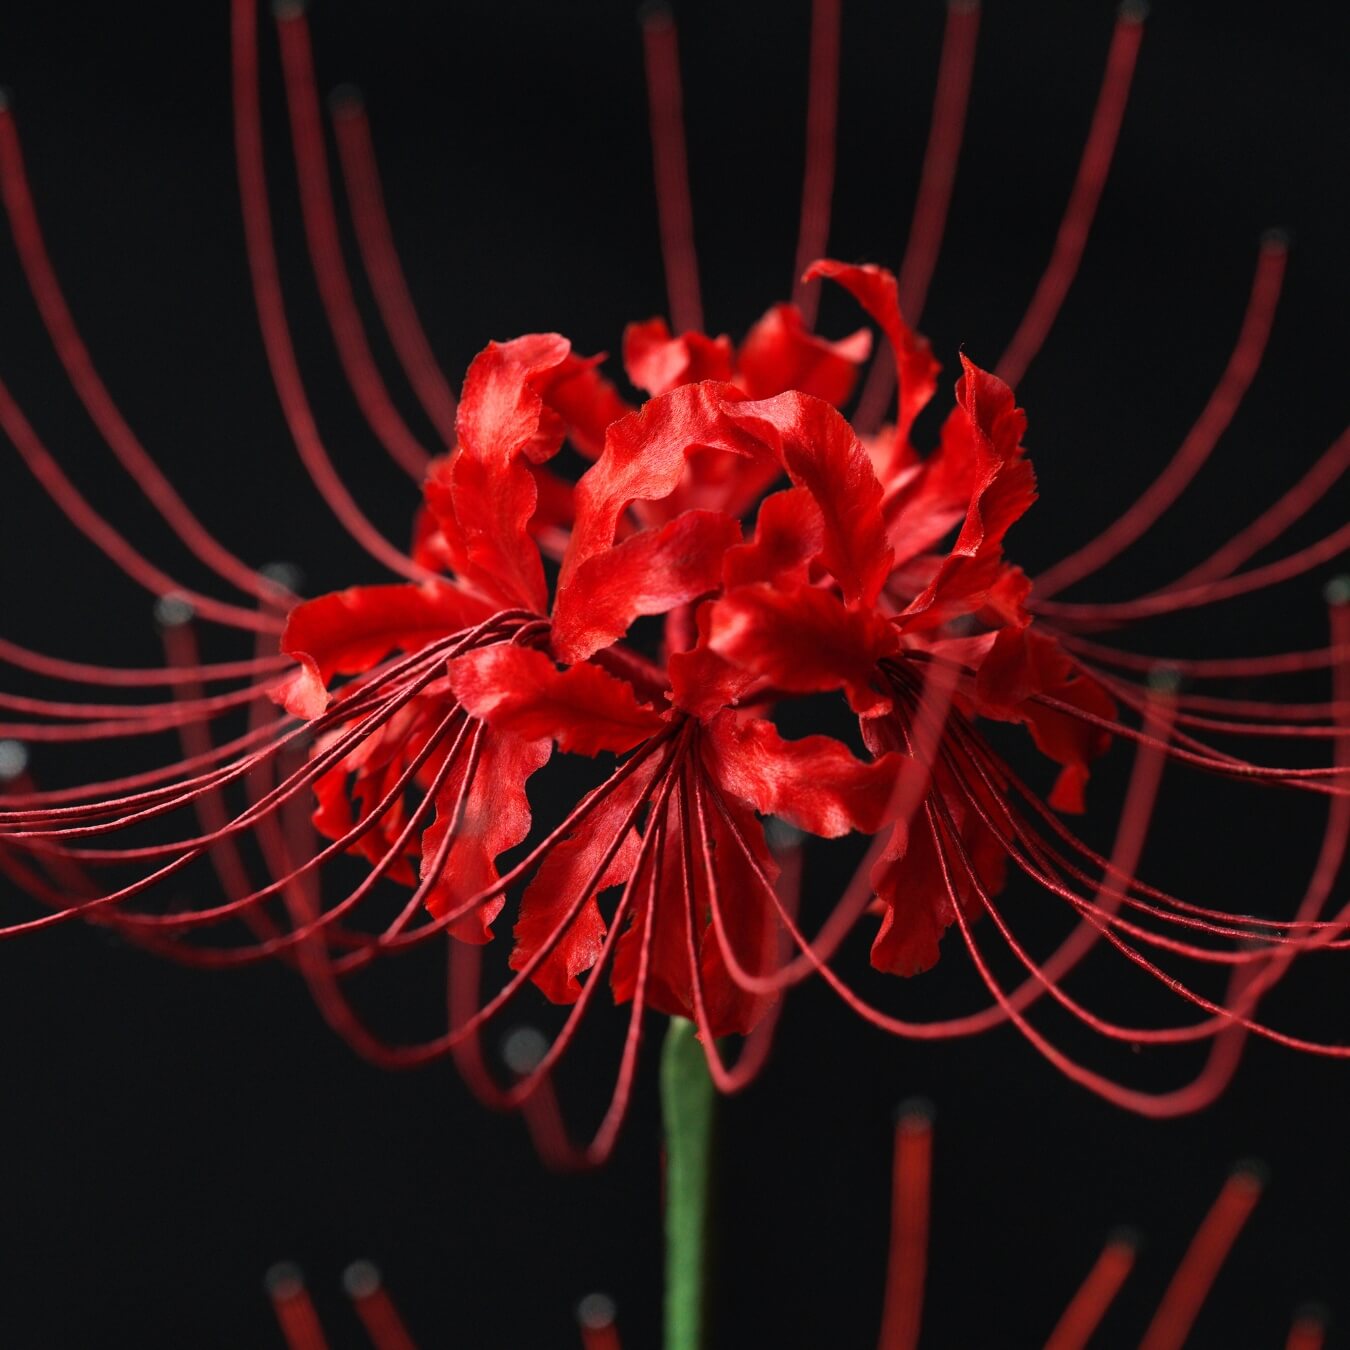
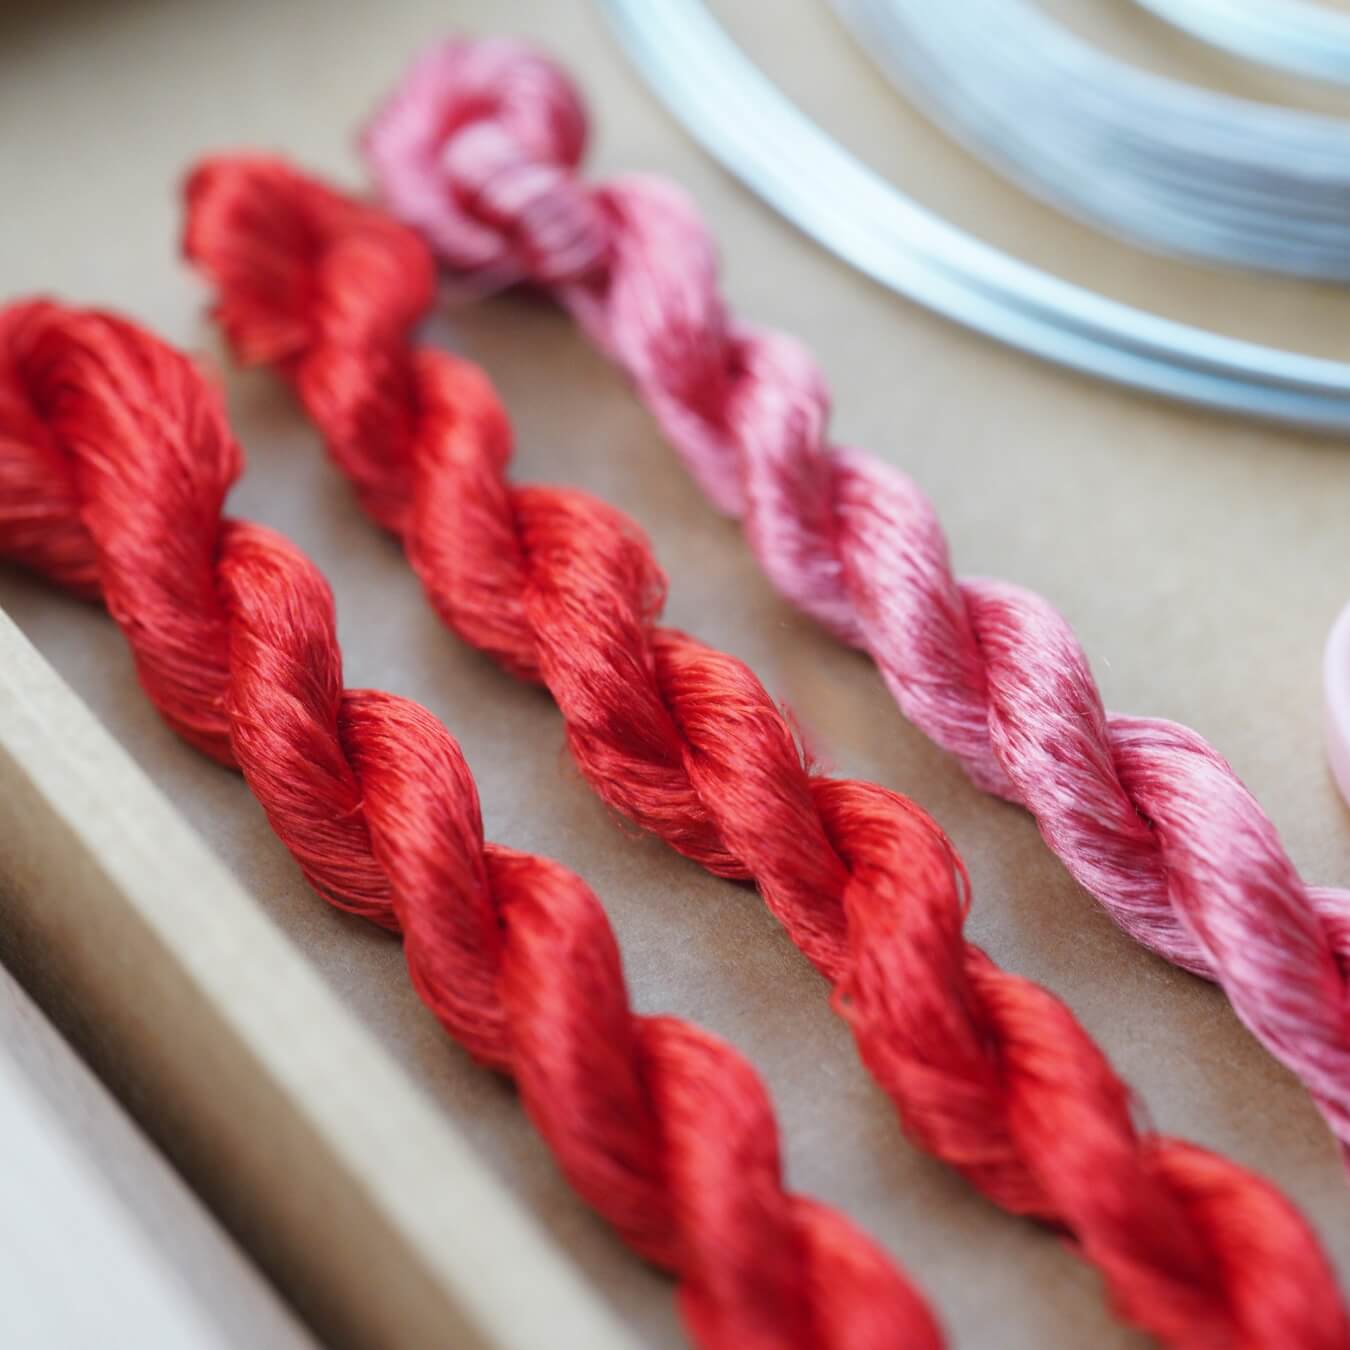
This spider lily is a flattened-style ronghua flower, and it uses two colors in total. Five threads make up one group, with a total of 32 groups.
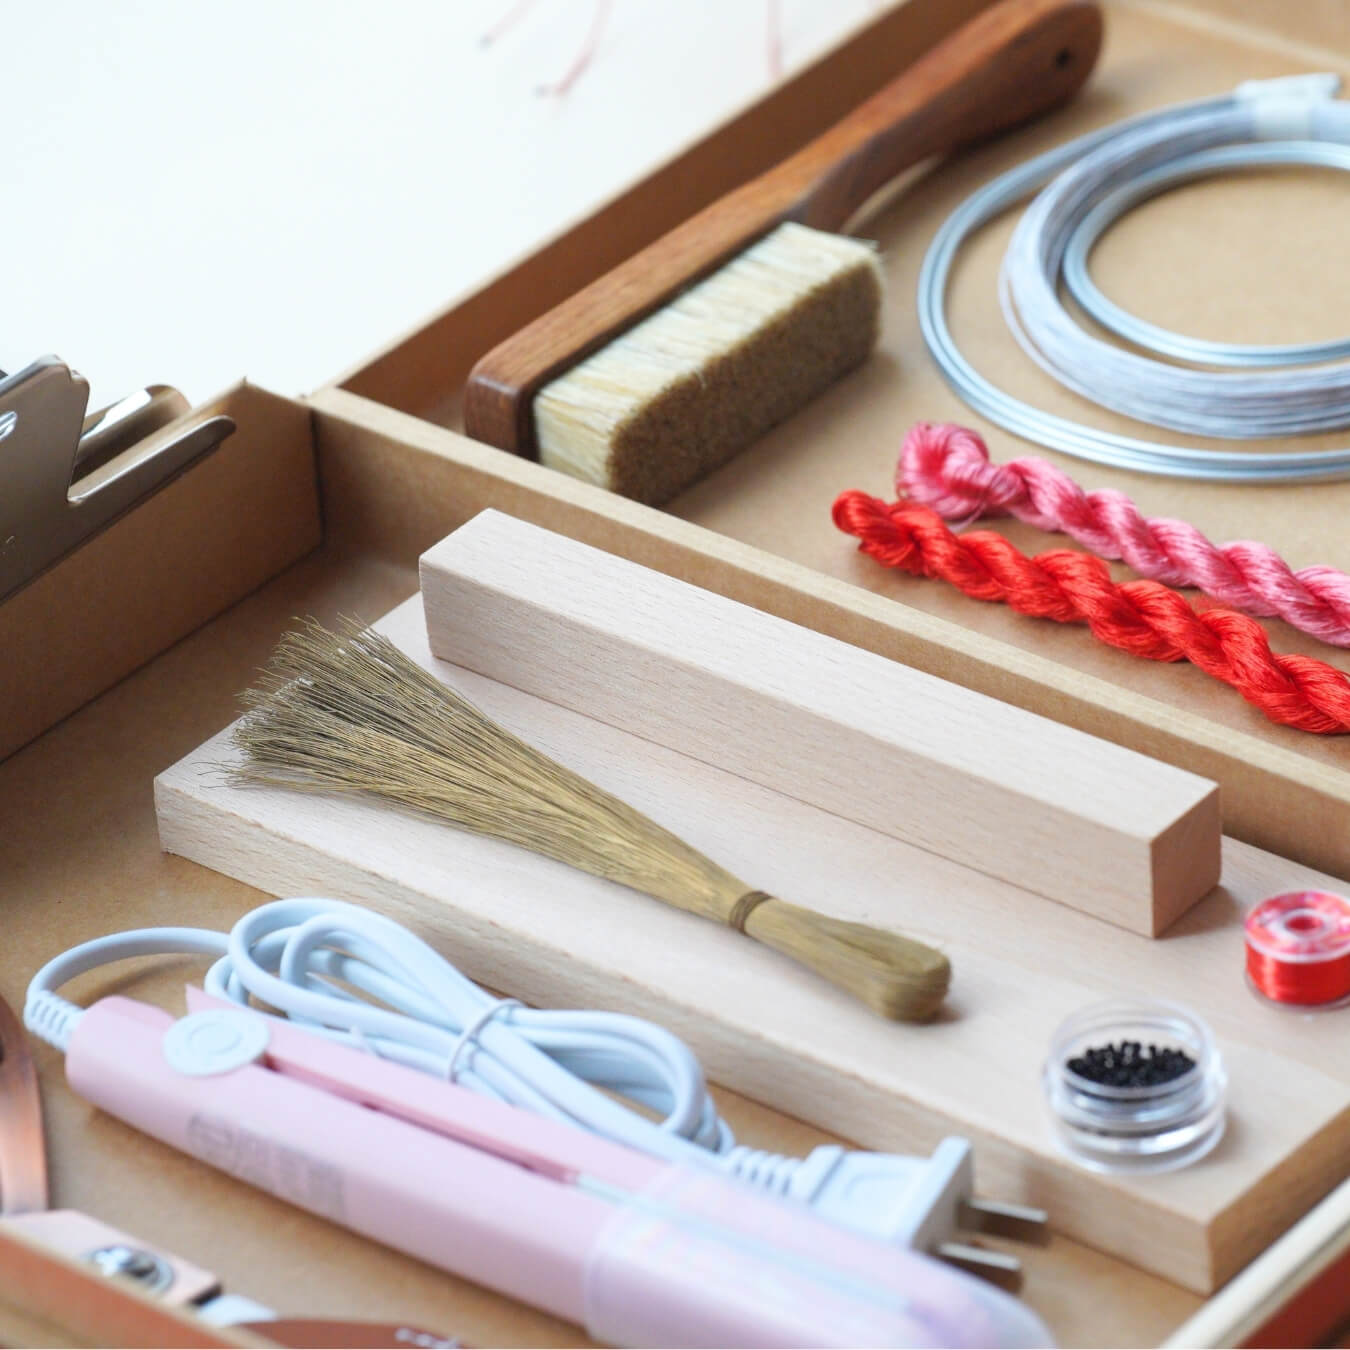
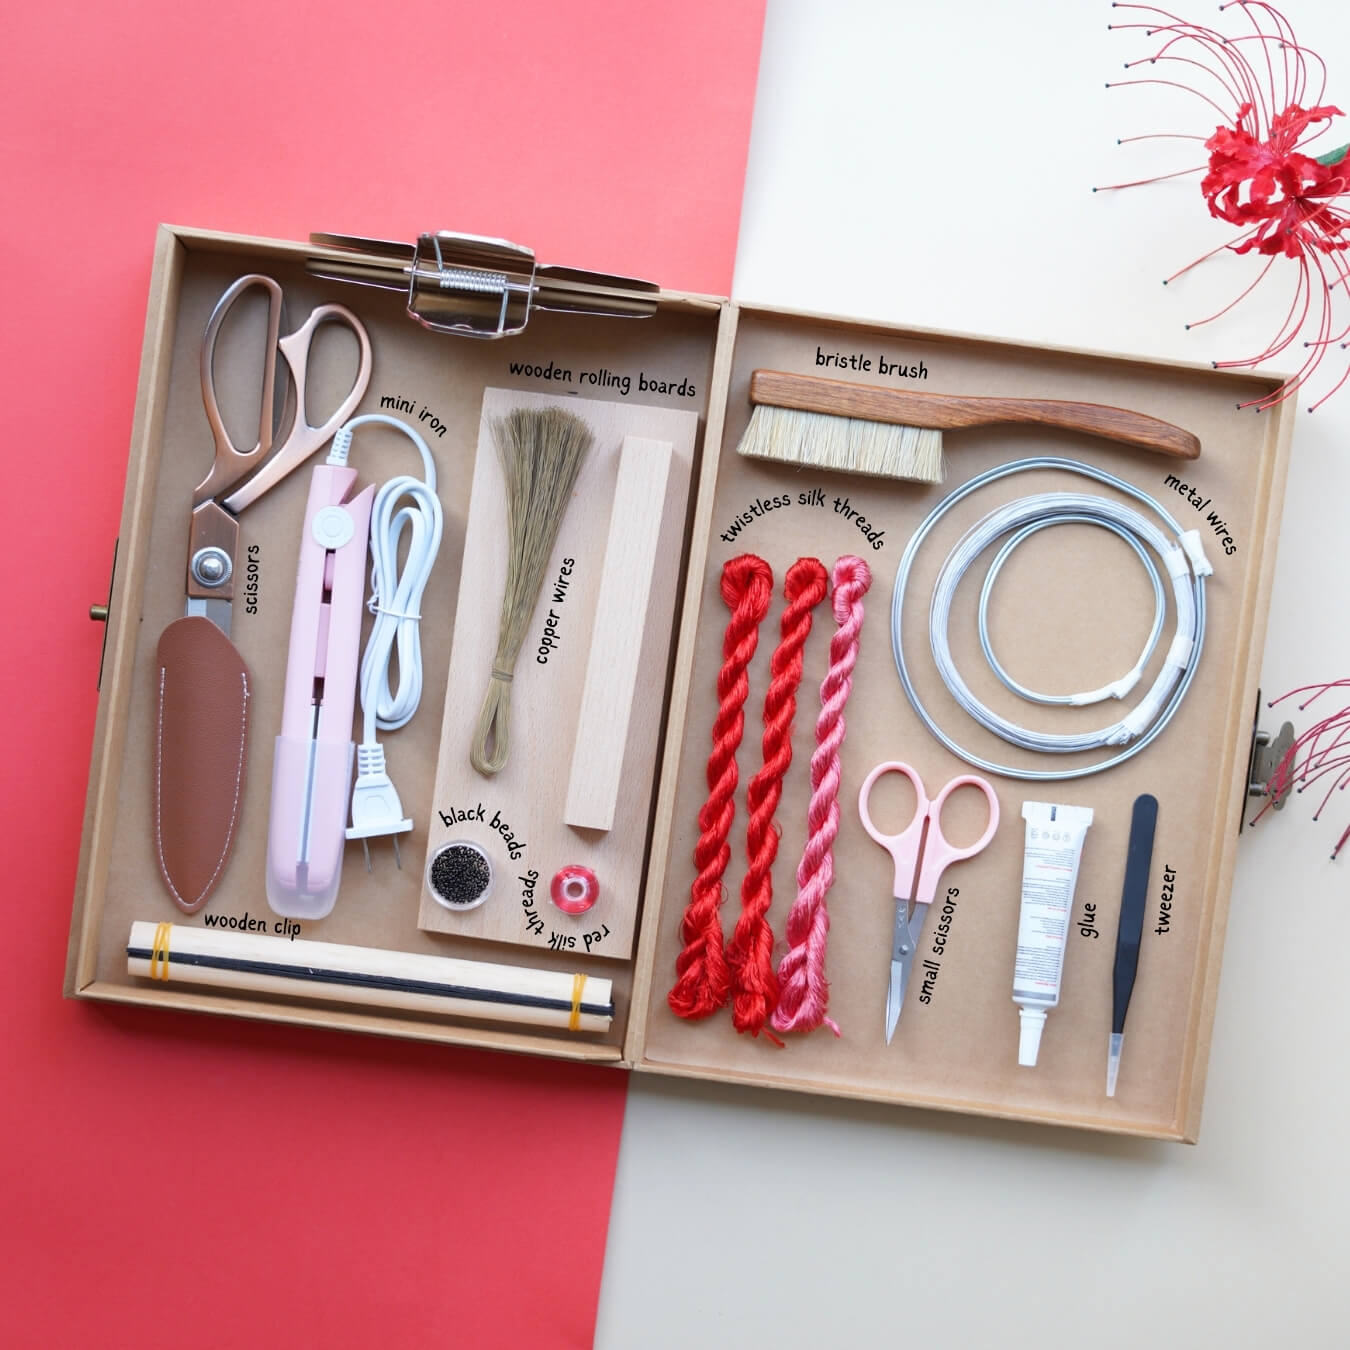
 After aligning the threads, use a mountain-shaped clip to secure them to the stand. Spraying a small amount of water can help prevent static electricity. When brushing the threads, start from the top and go all the way to the bottom. If the brush cannot go through the entire silk strip, you can divide it into two parts for easier brushing. It’s best to brush both the front and back sides. The silk threads should be smooth and fluffy after brushing. Use a wooden clip to hold the threads in place, pulling from the top to the bottom. Secure both ends of the wooden clip with rubber bands. Stretch the silk evenly so that the width from top to bottom remains consistent. You can use a heavy object to press down on the wooden clip, or use a mountain-shaped clip to hold the bottom of the threads in place.

Step 2: fix the copper wire 01:36~03:35
After folding the copper wire in half, straighten it out. Twist the folded end tightly for about 3 to 4 cm. When tying the copper wire, it’s best to apply a little magnesium powder or anti-slip powder to your fingers. After stretching the copper wire, twist the two ends together, then twist in opposite directions with both hands. While twisting the copper wire, make sure it stays taut. The distance between the copper wires should be between 1 and 1.3 cm for optimal results. Once the copper wire is tied, remove the mountain-shaped clip and wooden clip.

Step 3: Make the petals 03:35~08:08
Place the silk strip neatly in your hand, and use scissors to cut in the middle of the two copper wires. Alternatively, you can place the silk strip on a flat piece of cardboard or wood. Hold the board with one hand and the scissors with the other.
After cutting the silk strip, align the edges neatly. The copper wire must be in the center of the silk strip. Once the edges are aligned, slightly tighten the copper wire and start rolling the silk strip. While rolling, make sure the silk strip remains taut, and tighten the copper wire accordingly.

After rolling, the length of the silk strip will shorten. Cut the silk strip in half and use the clamp to flatten it. Now, we prepare to shape the silk strip. Silk flower shaping liquid can also be replaced with hair spray, fruit acid, or white glue diluted with water.
Dip the silk strip into the shaping liquid and use tweezers to remove any excess glue. The silk strip must be placed upright. Insert the silk strip into a sponge pad to dry. After drying, the silk strip will become very stiff.

Once dry, trim the shape of the silk strip. Shape it into a teardrop form, wide at the top and narrow at the bottom. Dip the silk strip back into the shaping liquid and, after removing the excess liquid with tweezers, curve the edges to create a petal shape.
Gently touch the edges of the petal with the tip of the tweezers to form a wavy pattern with peaks and valleys. The shaped petals can then be inserted into the sponge pad to dry.


Step 4: Make the flower center 08:08~10:31
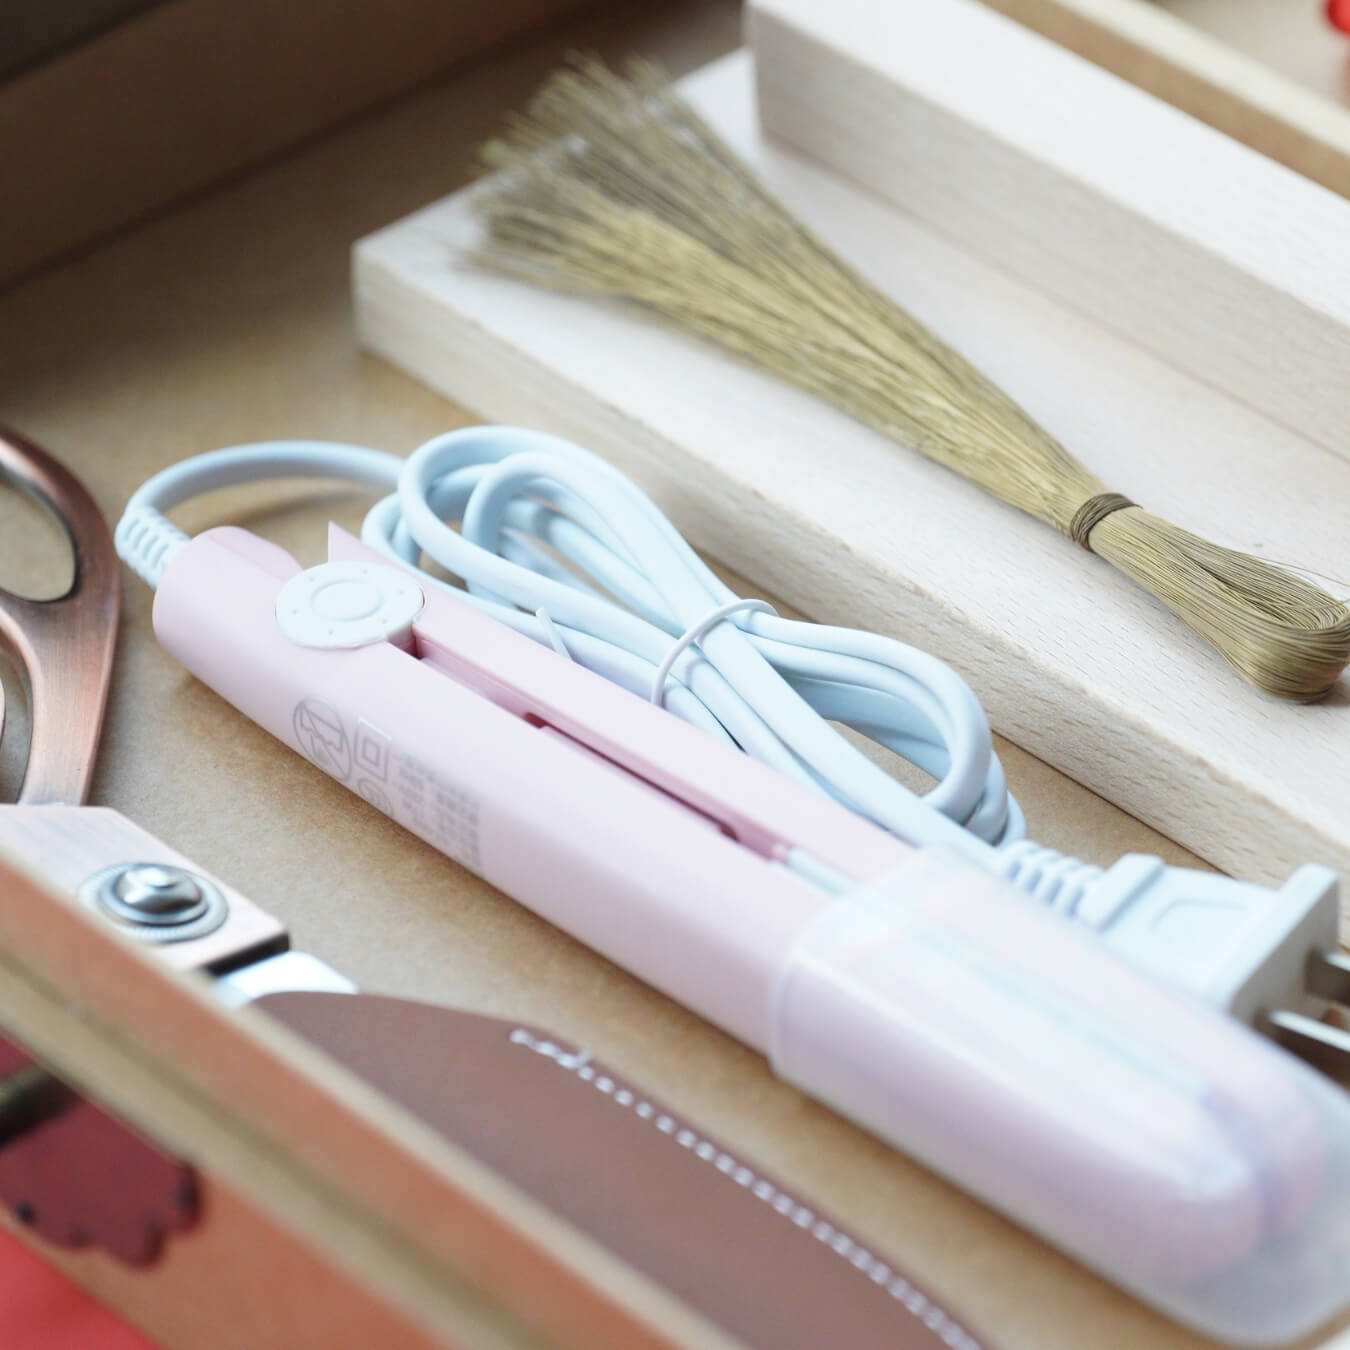
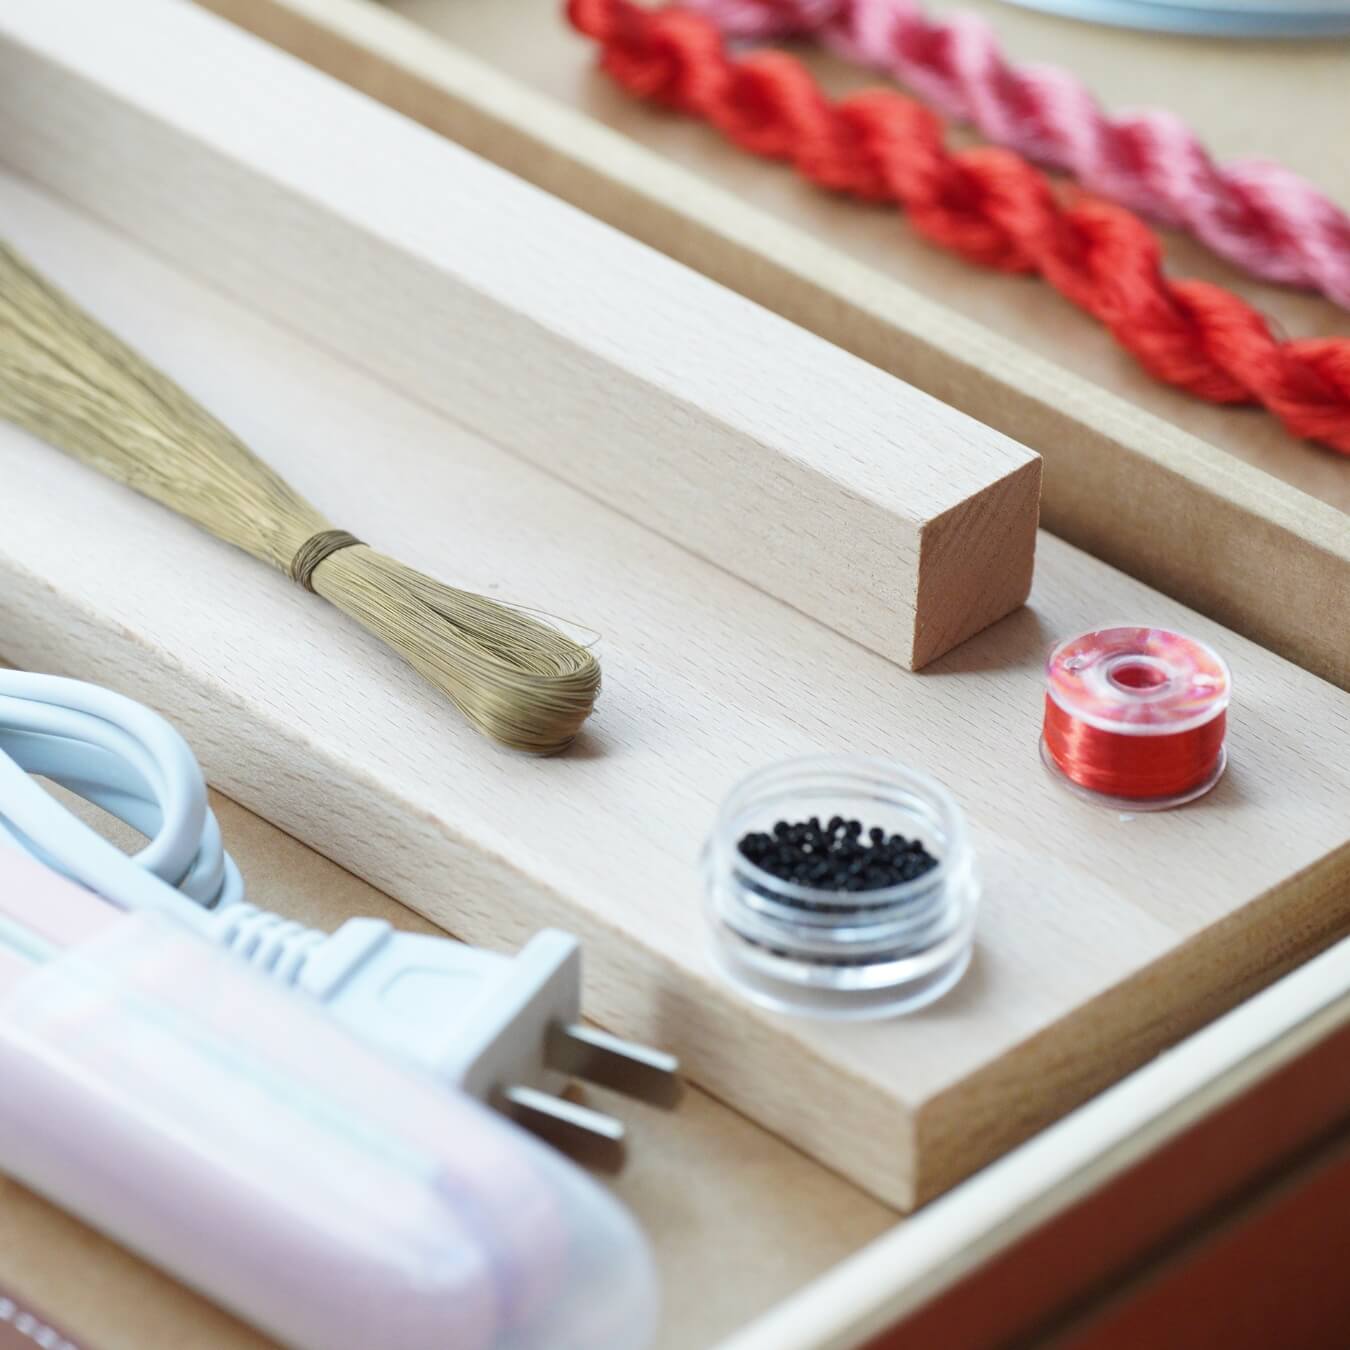
Next, we will make the flower center for the spider lily. Cut the floral wire in half. The wire is quite stiff and may damage your scissors, so it’s recommended to use a pair of old scissors that you don’t use often. A total of 70 flower centers are needed. Apply jewelry glue to the top of the wire and then attach a black seed bead. Wrap the green part completely with red silk thread. The length of the wrapped red thread should not be less than 12 cm.


Step 5: Assemble the petals and flower center 10:31~end
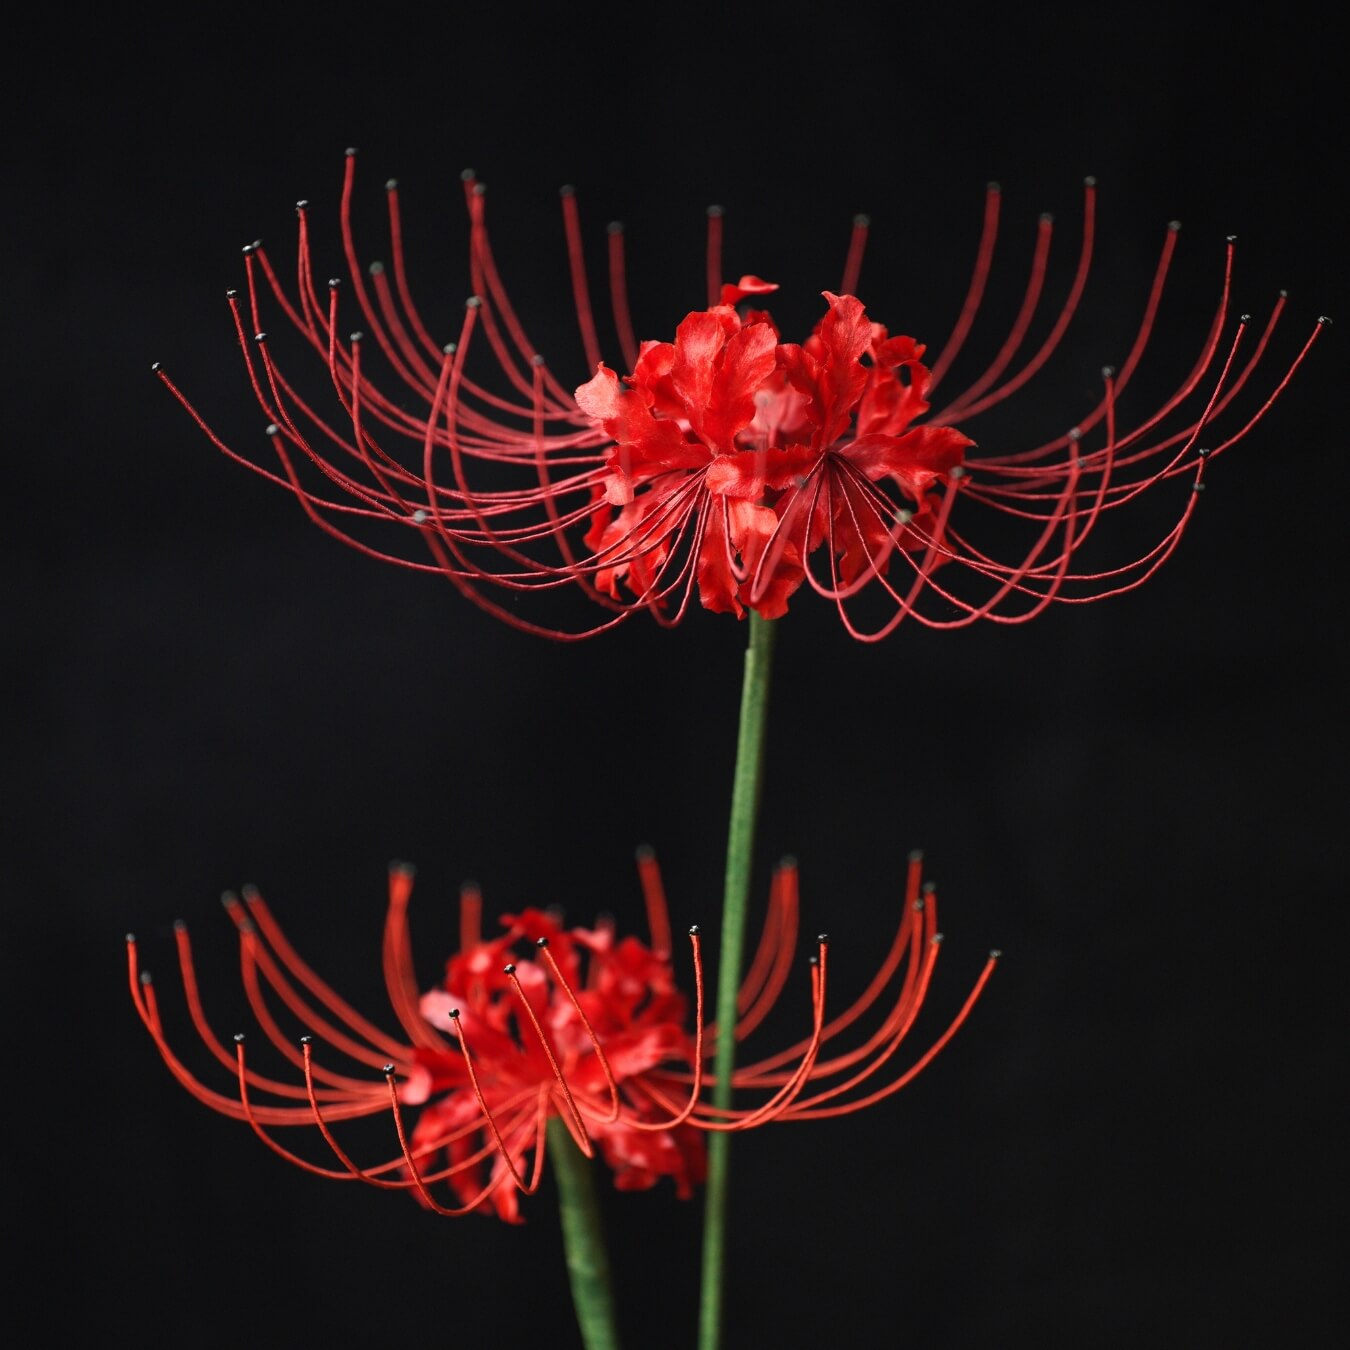
Next, we begin assembling the flowers. Seven flower centers make up one group, with the exposed length being 12 cm. Seven flower centers and six petals form one small flower. Each time a petal is added, wrap the wire once. Tie a knot about 3 to 4 cm from the flower to finish the assembly. The materials are enough to make 10 small flowers in total. In the tutorial video, two groups of flowers are assembled: one group with 6 flowers and another with 4 flowers. Trim the base of the flowers at an angle, then assemble the small flowers together. Use pliers to bend the flowers outward. After wrapping the six small flowers with wire, tie a knot to secure them. Adjust the shape of the petals to make the flower fuller. Use your hands to create a curve in the flower center.

Next, start wrapping the bottom of the flower with green floral tape. Add 2 to 3 thicker copper wires to extend the flower stem, with the copper wire being about 40 cm long. Continue wrapping the floral tape all the way to the bottom to complete the flower. Finally, adjust the overall shape, and the spider lily is finished.


If you finished your DIY product, welcome to show your awesome work to us and get coupons for the rest of our DIY kits!
INS@lanseichina
Pinterest@lanseichina


