


Ronghua, made mostly from mulberry silk and a bit of metal wire, is a traditional Chinese handicraft. The name 'Ronghua,' which sounds kinda like 'prosperity and splendor' in Chinese, gives off good vibes for a successful and smooth-sailing life, loaded with lots of traditional cultural meanings.
History of Ronghua - How It All Began
Ronghua started off in the southern parts of China, with stories saying that even back in the Tang Dynasty, the ladies in Yangzhou had a thing for wearing Ronghua flowers during festivals.
By the time of the Ming and Qing Dynasties, Ronghua production in Nanjing and Yangzhou was pretty much booming.

At one point, the Imperial Household Office even brought in skilled craftsmen from Yangzhou to the capital, Beijing, to make Ronghua just for the imperial court. So, Ronghua also got the nickname 'palace flowers.'
The Imperial Household Office churned out a whole bunch of 'Rongfu' and 'Ronghua' each year, especially cranking up the production before big festivals like the Spring Festival, Dragon Boat Festival, and Double Ninth Festival.
The love for Ronghua in the palace really boosted Ronghua craftsmanship, and the trend of women wearing flowers gradually turned into a cultural tradition.
Regional Variations of Ronghua
Cities like Beijing, Tianjin, Nanjing, and Yangzhou have all been hotspots for Ronghua creation. But just like our favorite regional food dishes, each area's Ronghua has its own unique spin, thanks to the cultural differences.
For instance, Southern Ronghua is bold and flashy in color, while Beijing Ronghua - inspired by palace styles - mostly uses bright red, with other colors more muted.
Nanjing Ronghua loves using high-quality silk for dyeing, and then they use fine copper wire to create long filament strips for the stamen, which are then twisted into various flower patterns. The silk used can be raw or cooked.

Raw silk is tough and perfect for making animal and insect-shaped products, while cooked silk is soft and great for various flower patterns. The colors mainly include bright red and pink, complimented by medium green, and adorned with yellow highlights - all creating a vibrant and grand look.
Now, let's talk about Ronghua styles.
We've got two main ones: northern-style Ronghua and southern-style Ronghua.
Northern-style Ronghua, represented by Beijing Ronghua and Tianjin Ronghua, is pretty good at creating abstract Ronghua, such as the 'Wealth and Prosperity' composition consisting of the characters '福' (fortune), '禄' (wealth), '寿' (longevity), and '禧' (happiness), along with fish-shaped flowers; 'Prosperity for Descendants' composed of gourds and bats; 'Five Blessings Bringing Longevity' composed of five bats and peaches.
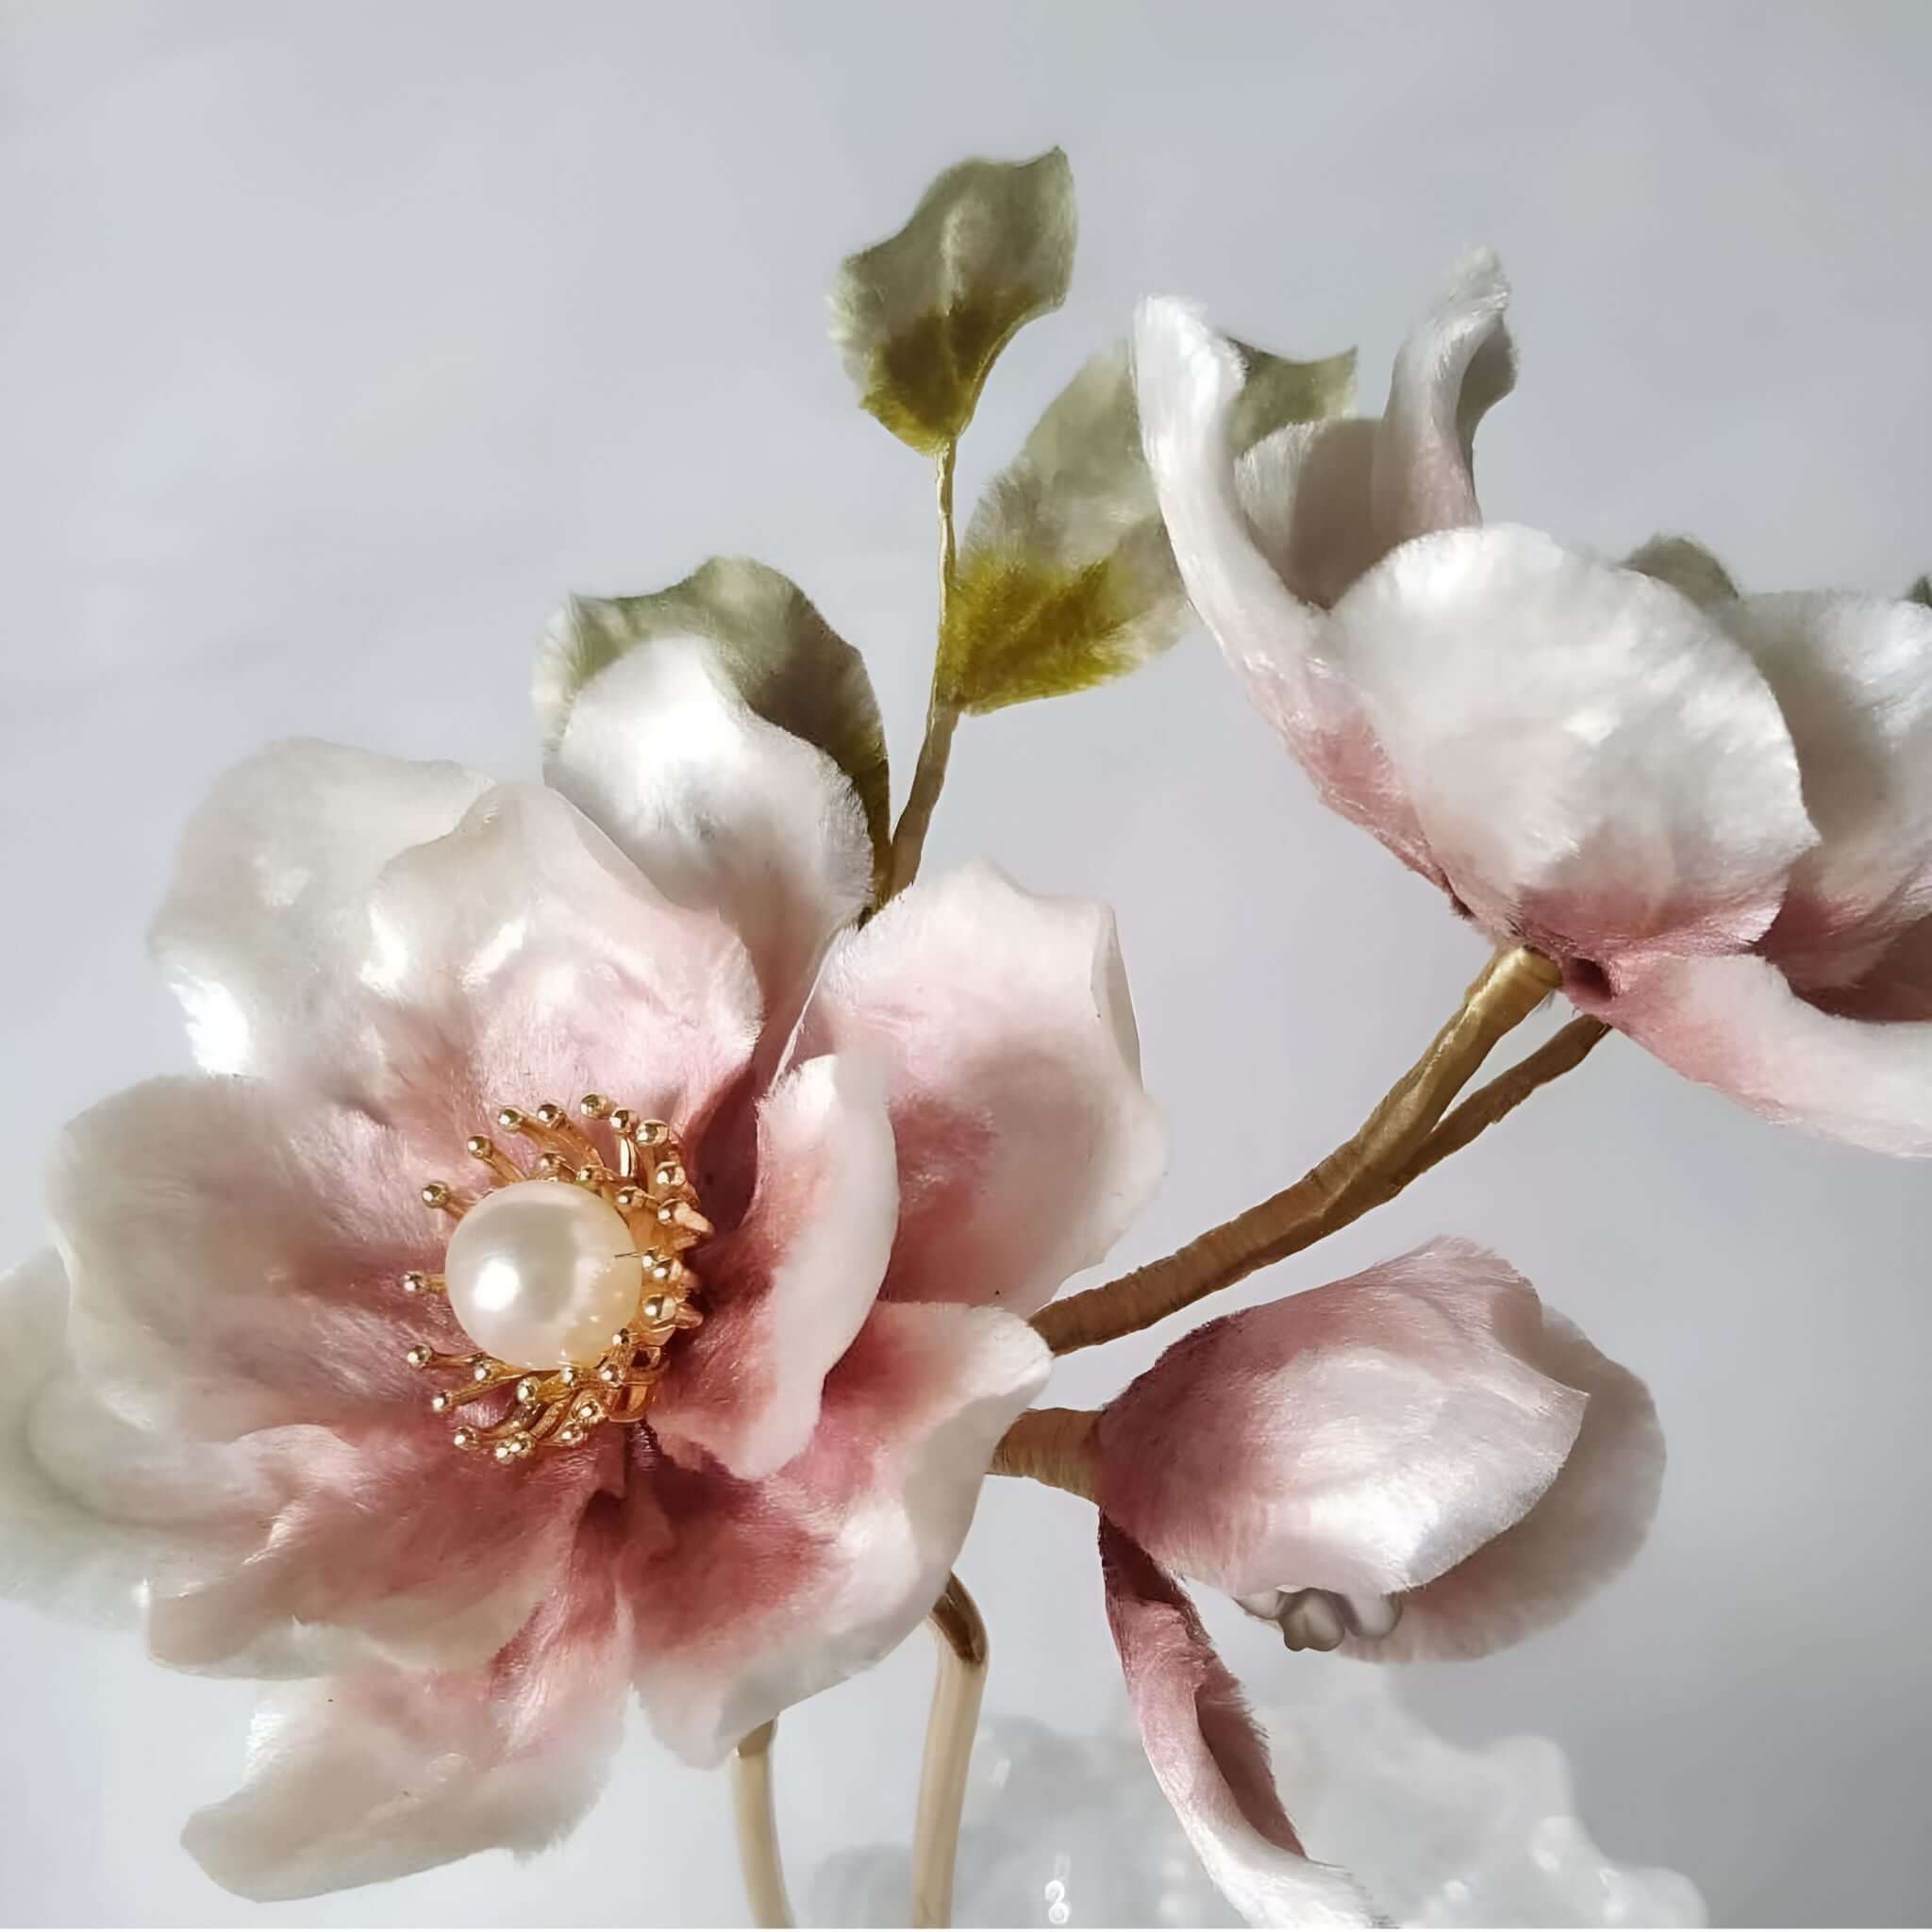
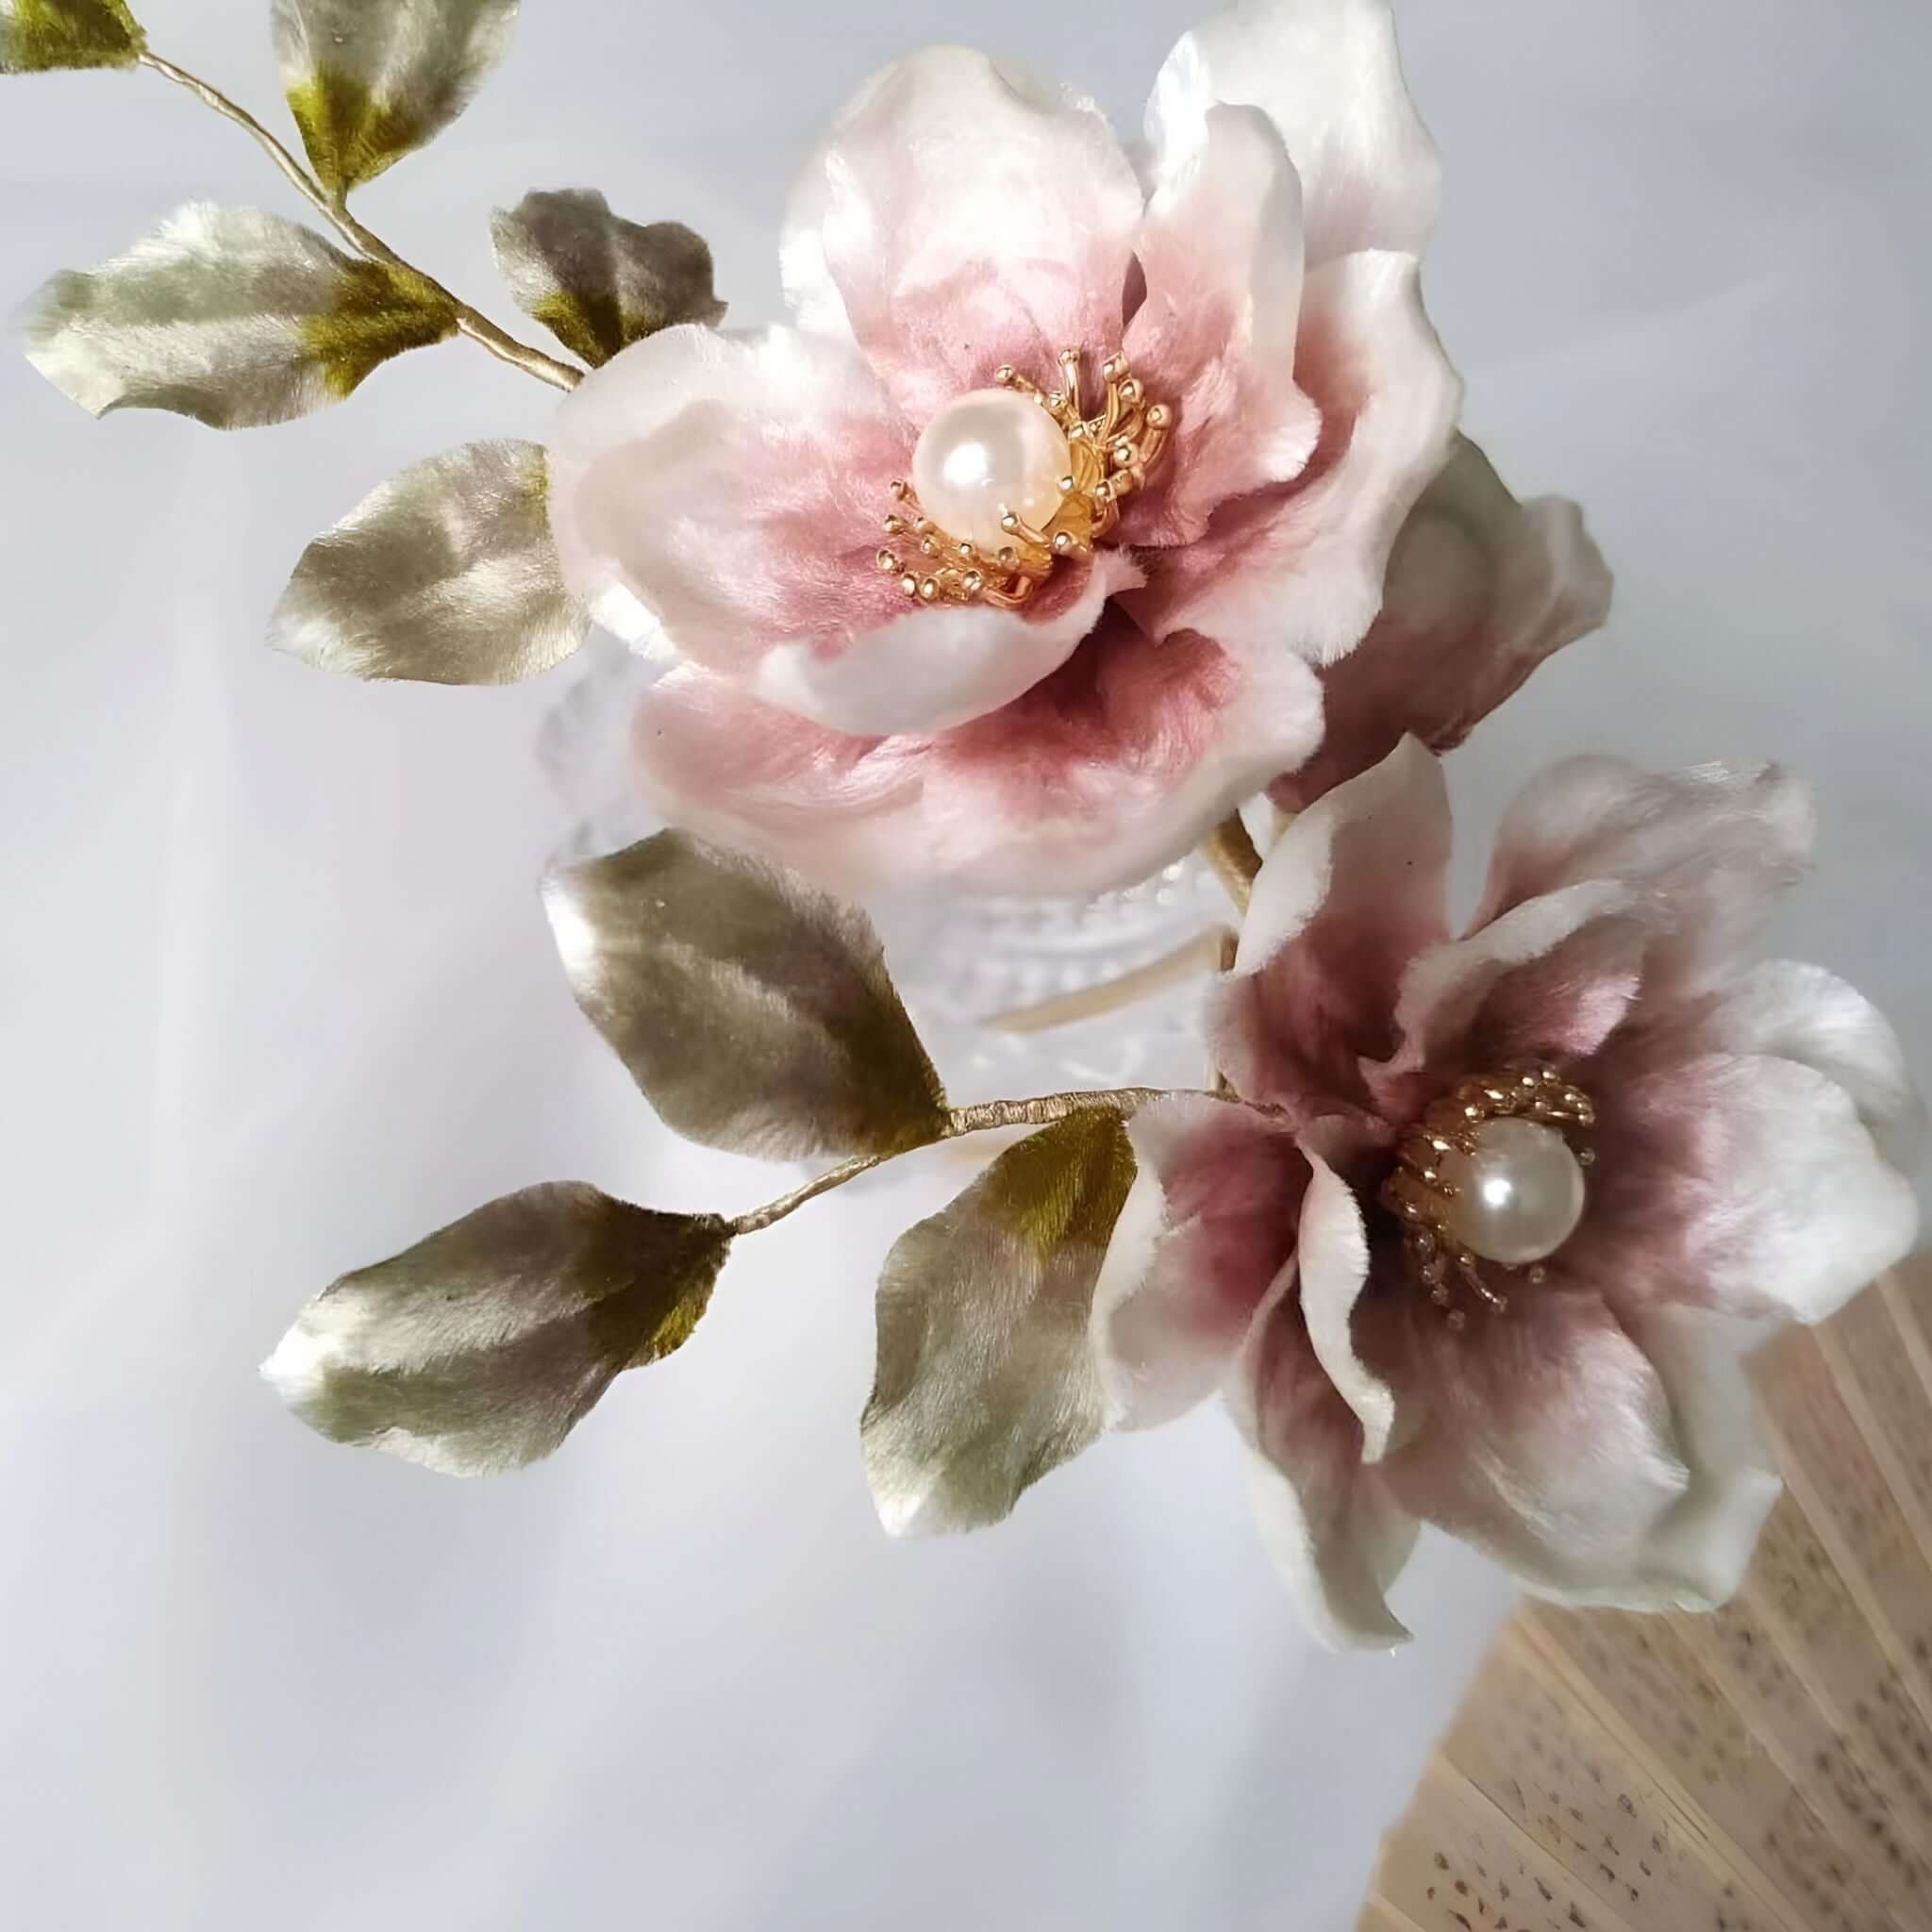
Southern-style Ronghua, represented by Nanjing Ronghua and Yangzhou Ronghua, is more about creating lifelike flowers with soft colors.

While northern-style Ronghua is more abstract, southern-style Ronghua is more ornamental. But regardless of the style, they're all still Ronghua with no significant differences.
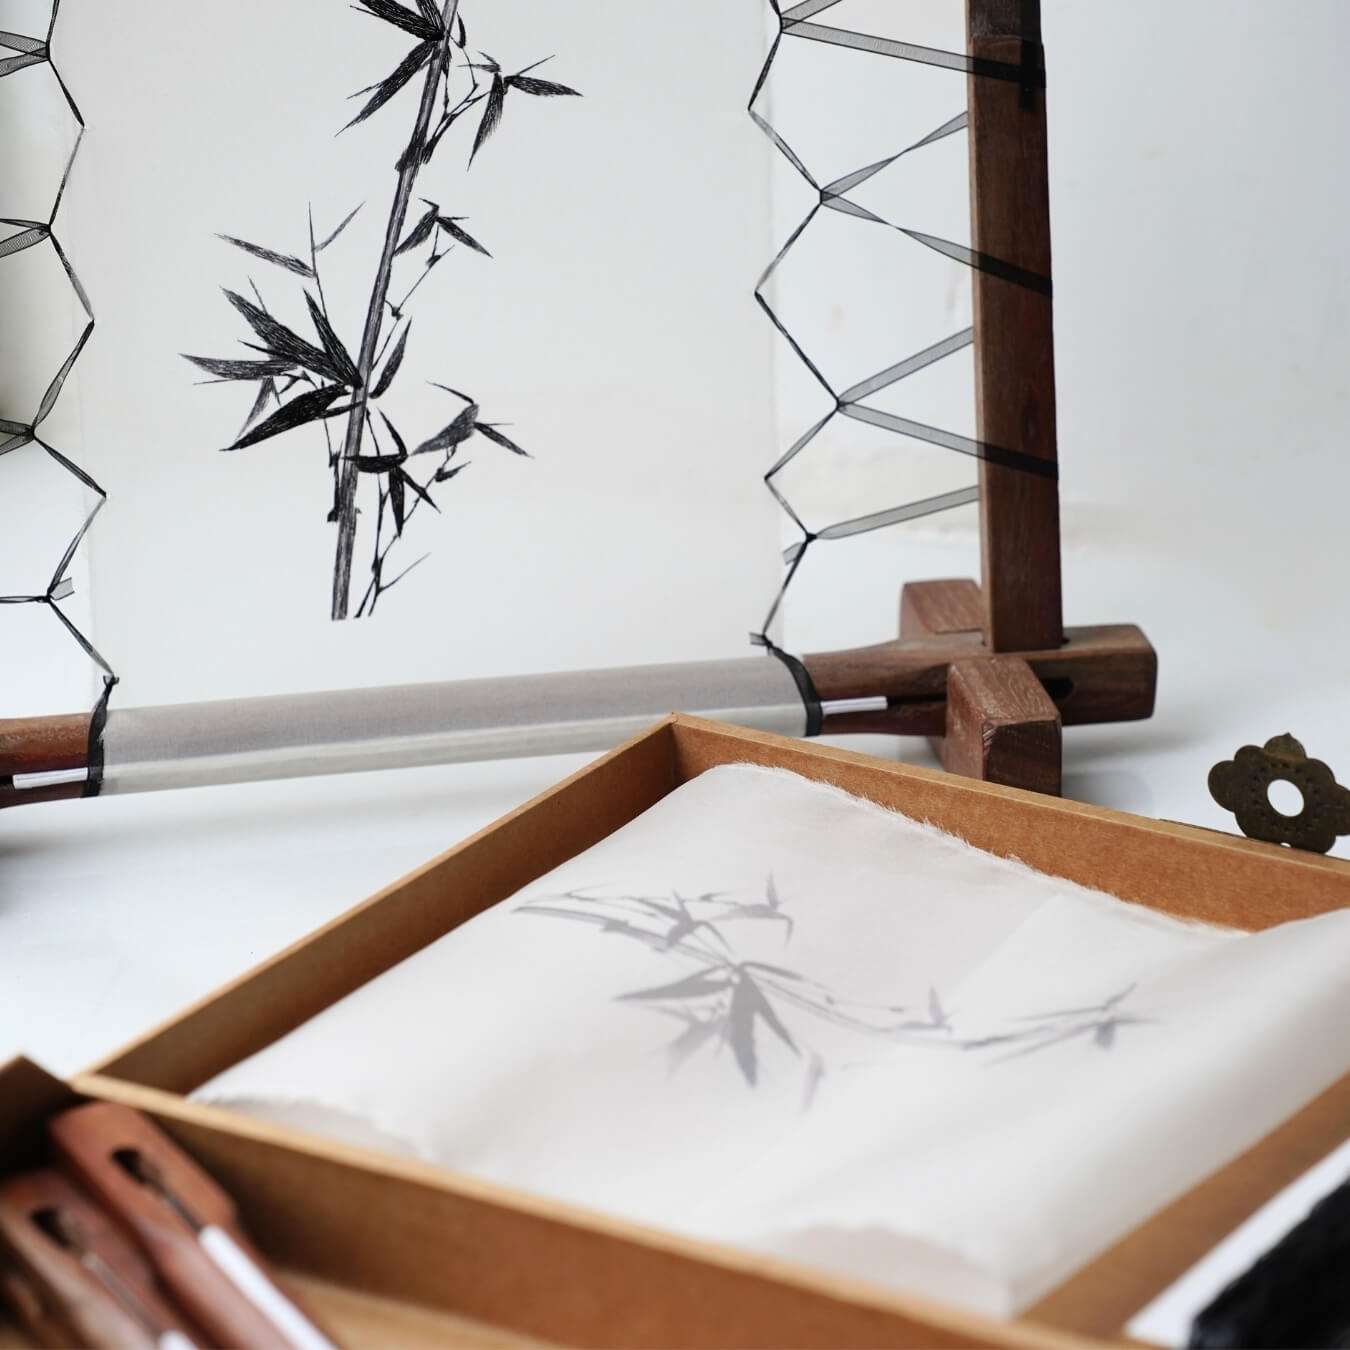
Overview of the Ronghua Production Process
Ronghua is sort of a big deal—it's got more than a dozen steps to get from silk to final product. We're talking boiling silk, dyeing, annealing copper wire, splitting threads, tying copper wires, cutting strips, aligning strips, twisting strips, shaping, assembling, and finishing.

But before we dive into the nitty-gritty of making Ronghua, there's some prep work to do. First, we boil the raw silk in alkaline water at high temps to get cooked silk. Then, we hang the dyed fluff silk to dry on bamboo poles. And let's not forget about annealing the yellow brass wire in a charcoal furnace at high temps.
Once we're prepped and ready, it's time for the main event:

- We start by splitting threads—turning big bunches of silk threads into small portions just right for 5-centimeter thread ranks.
- Then we tie copper wire, making sure the annealed copper wire is tied to the silk ranks, but not too tight or loose.
- Next, we cut strips using scissors to get the silk ranks ready according to the arrangement of copper wire.
- We make sure everything is aligned, with the copper wire right in the middle of the silk, and fix any displacement.
- Twisting time! We twist the silk strips in opposite directions with both hands.
- Shaping is next, where we trim the silk strips and bend them into different shapes with tweezers.
- Then it's assembly time, piecing all the scattered parts together with silk threads.
- Finally, we finish up by making any final tweaks to the shape of the Ronghua with tweezers.
And voila! That's how the magic happens.
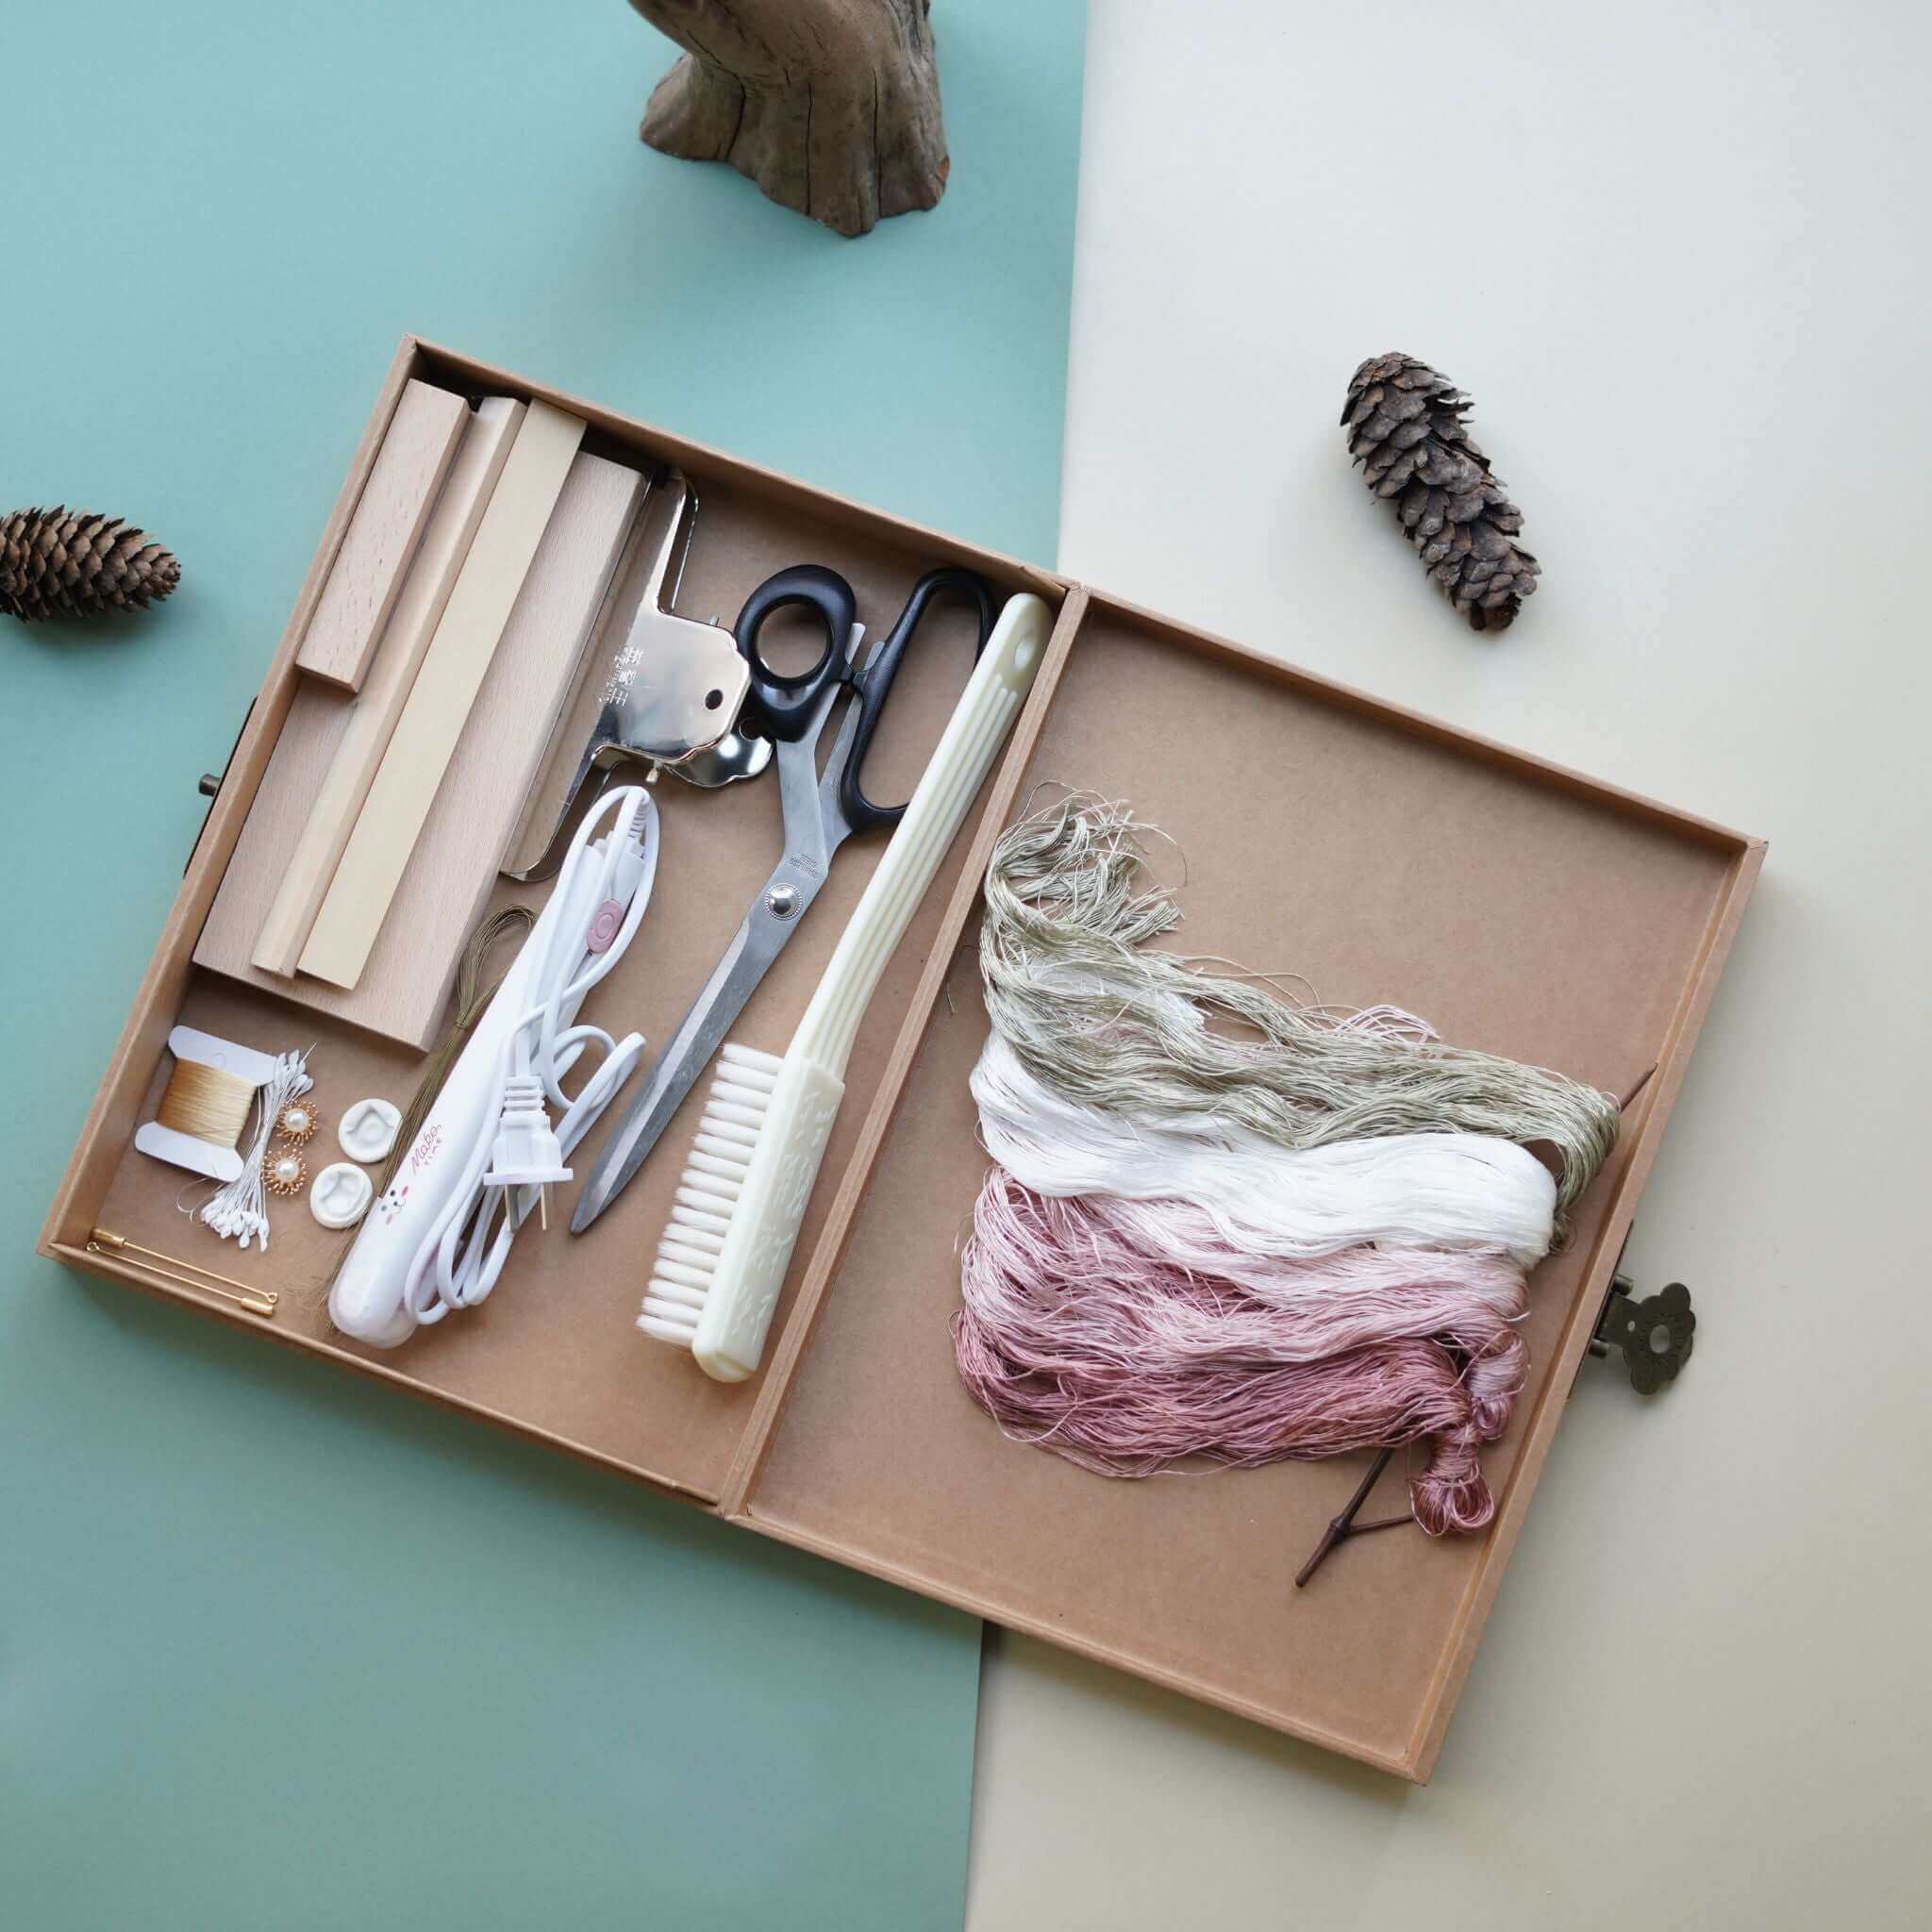
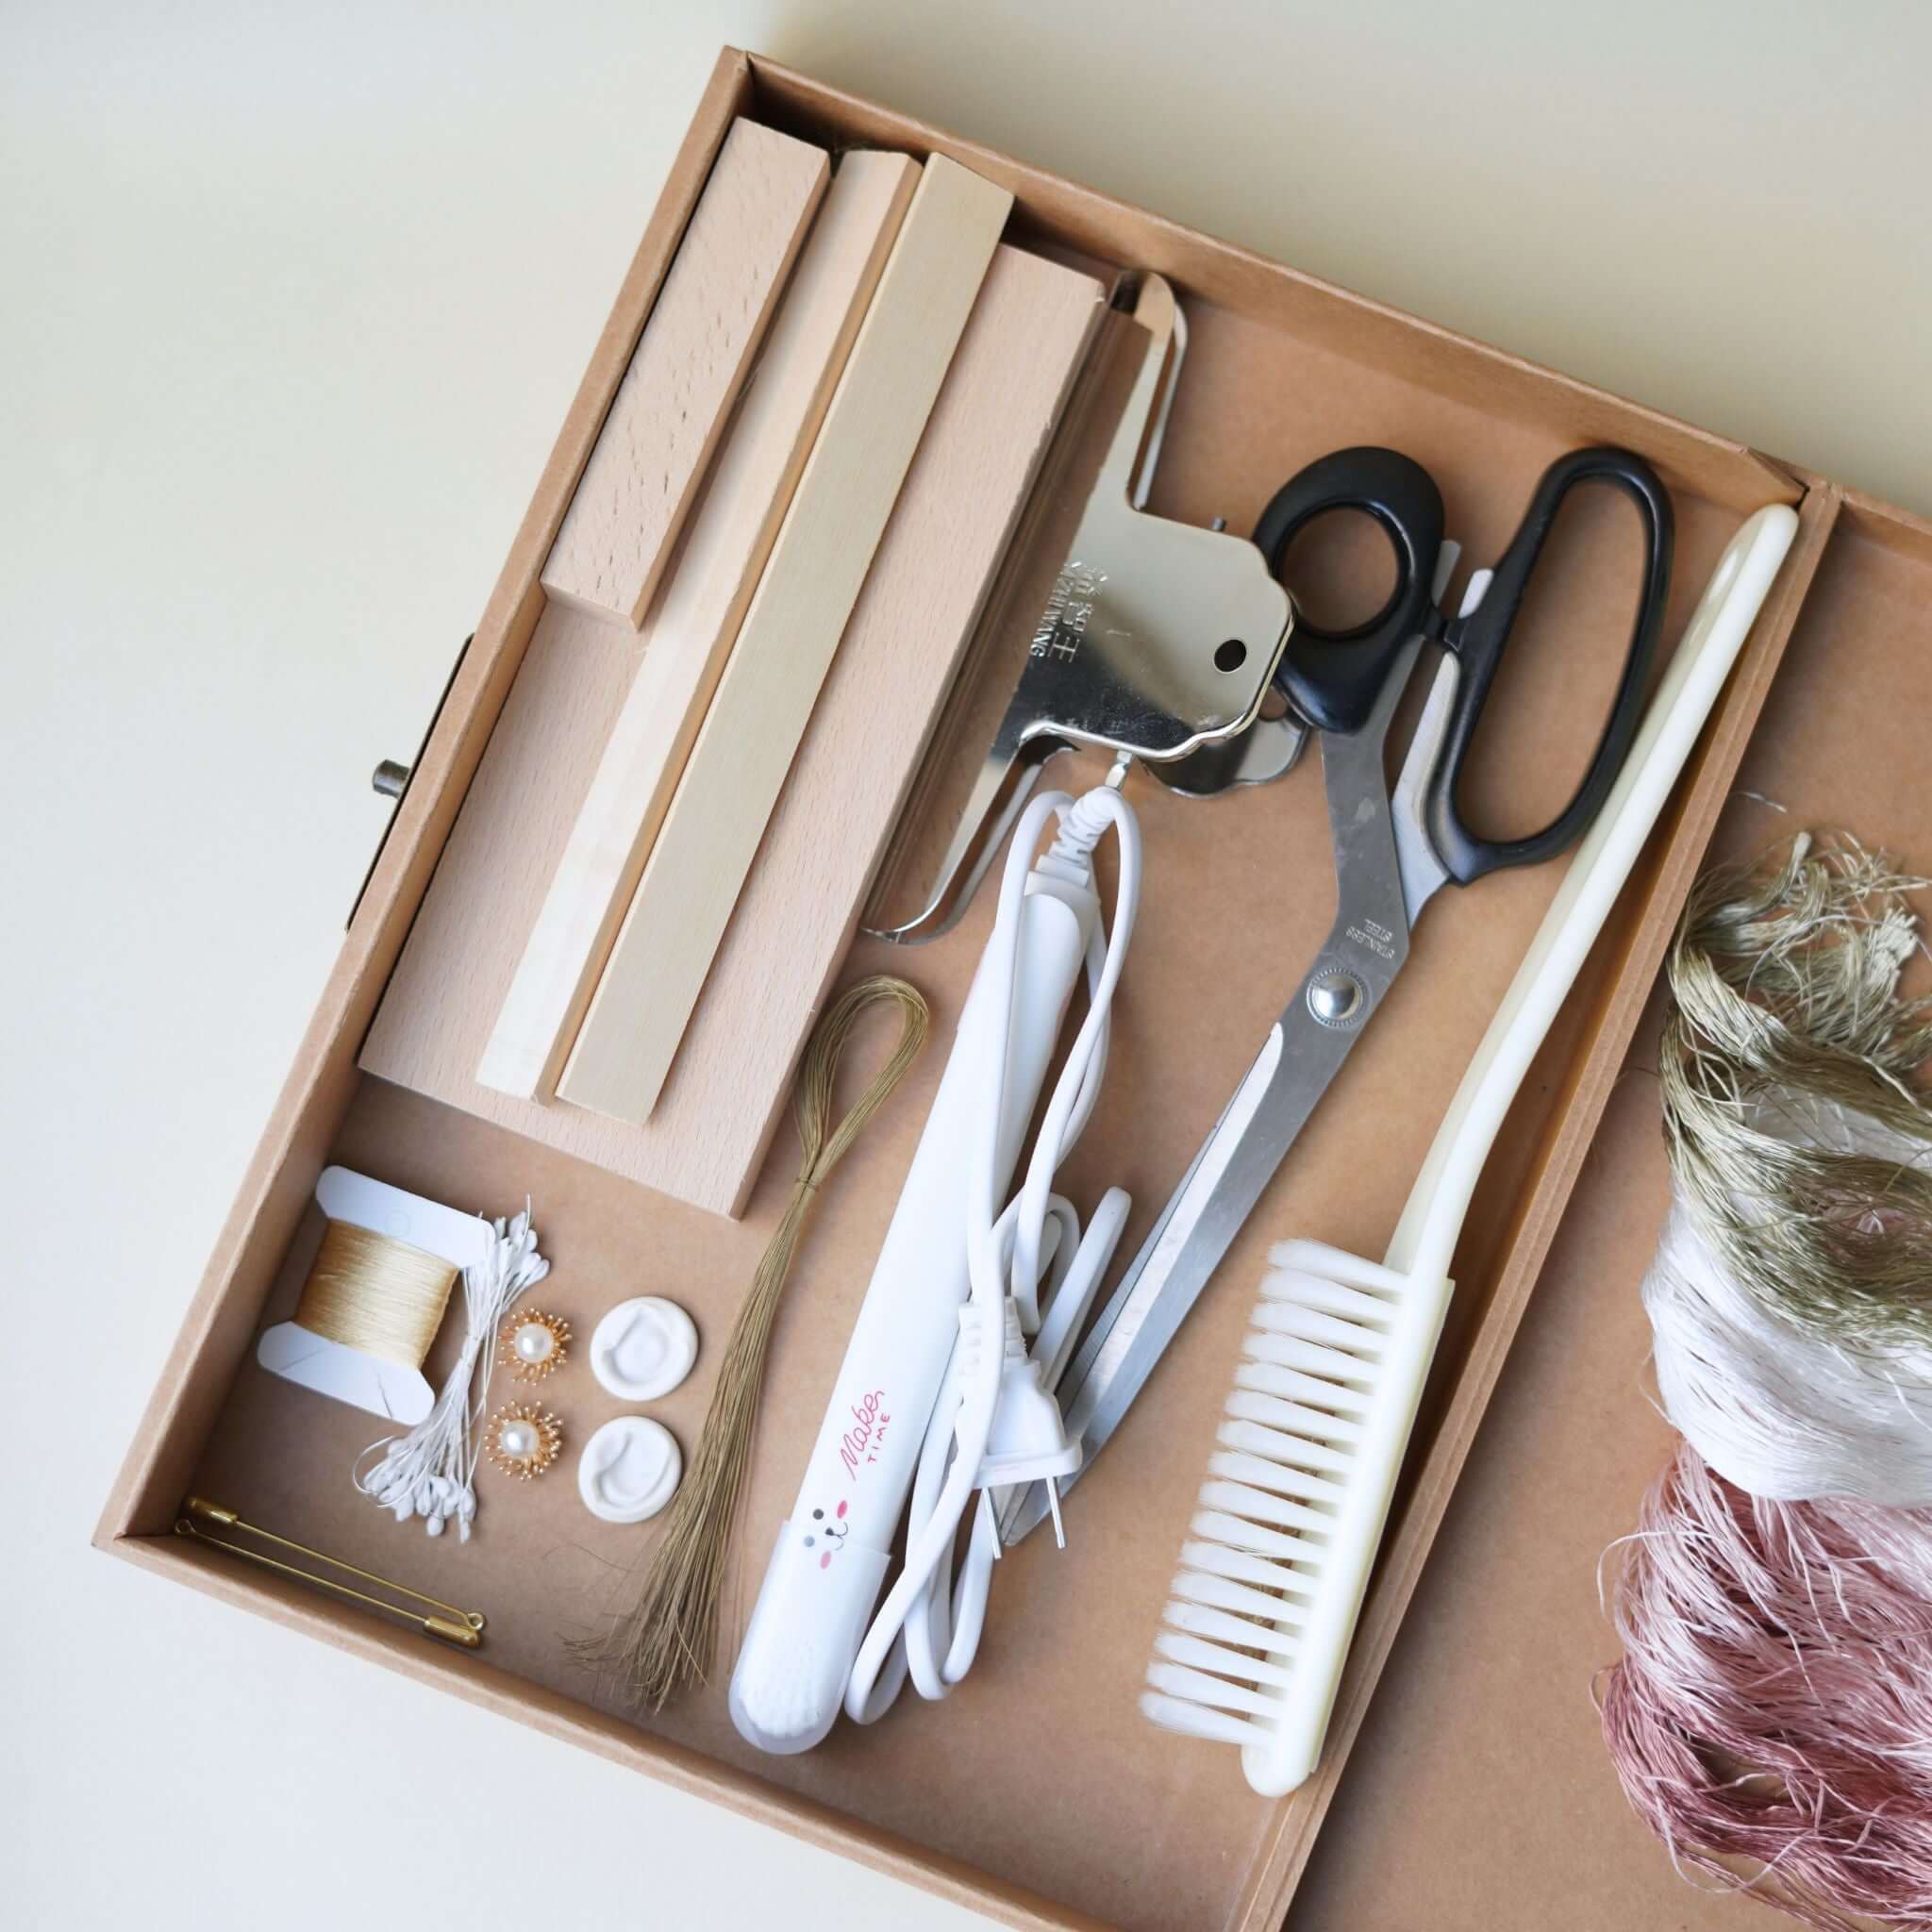
Materials and Tools for Making Ronghua
Good materials and tools can greatly improve the efficiency of making Ronghua. Below are the commonly used materials and tools in the process of making Ronghua.
Materials
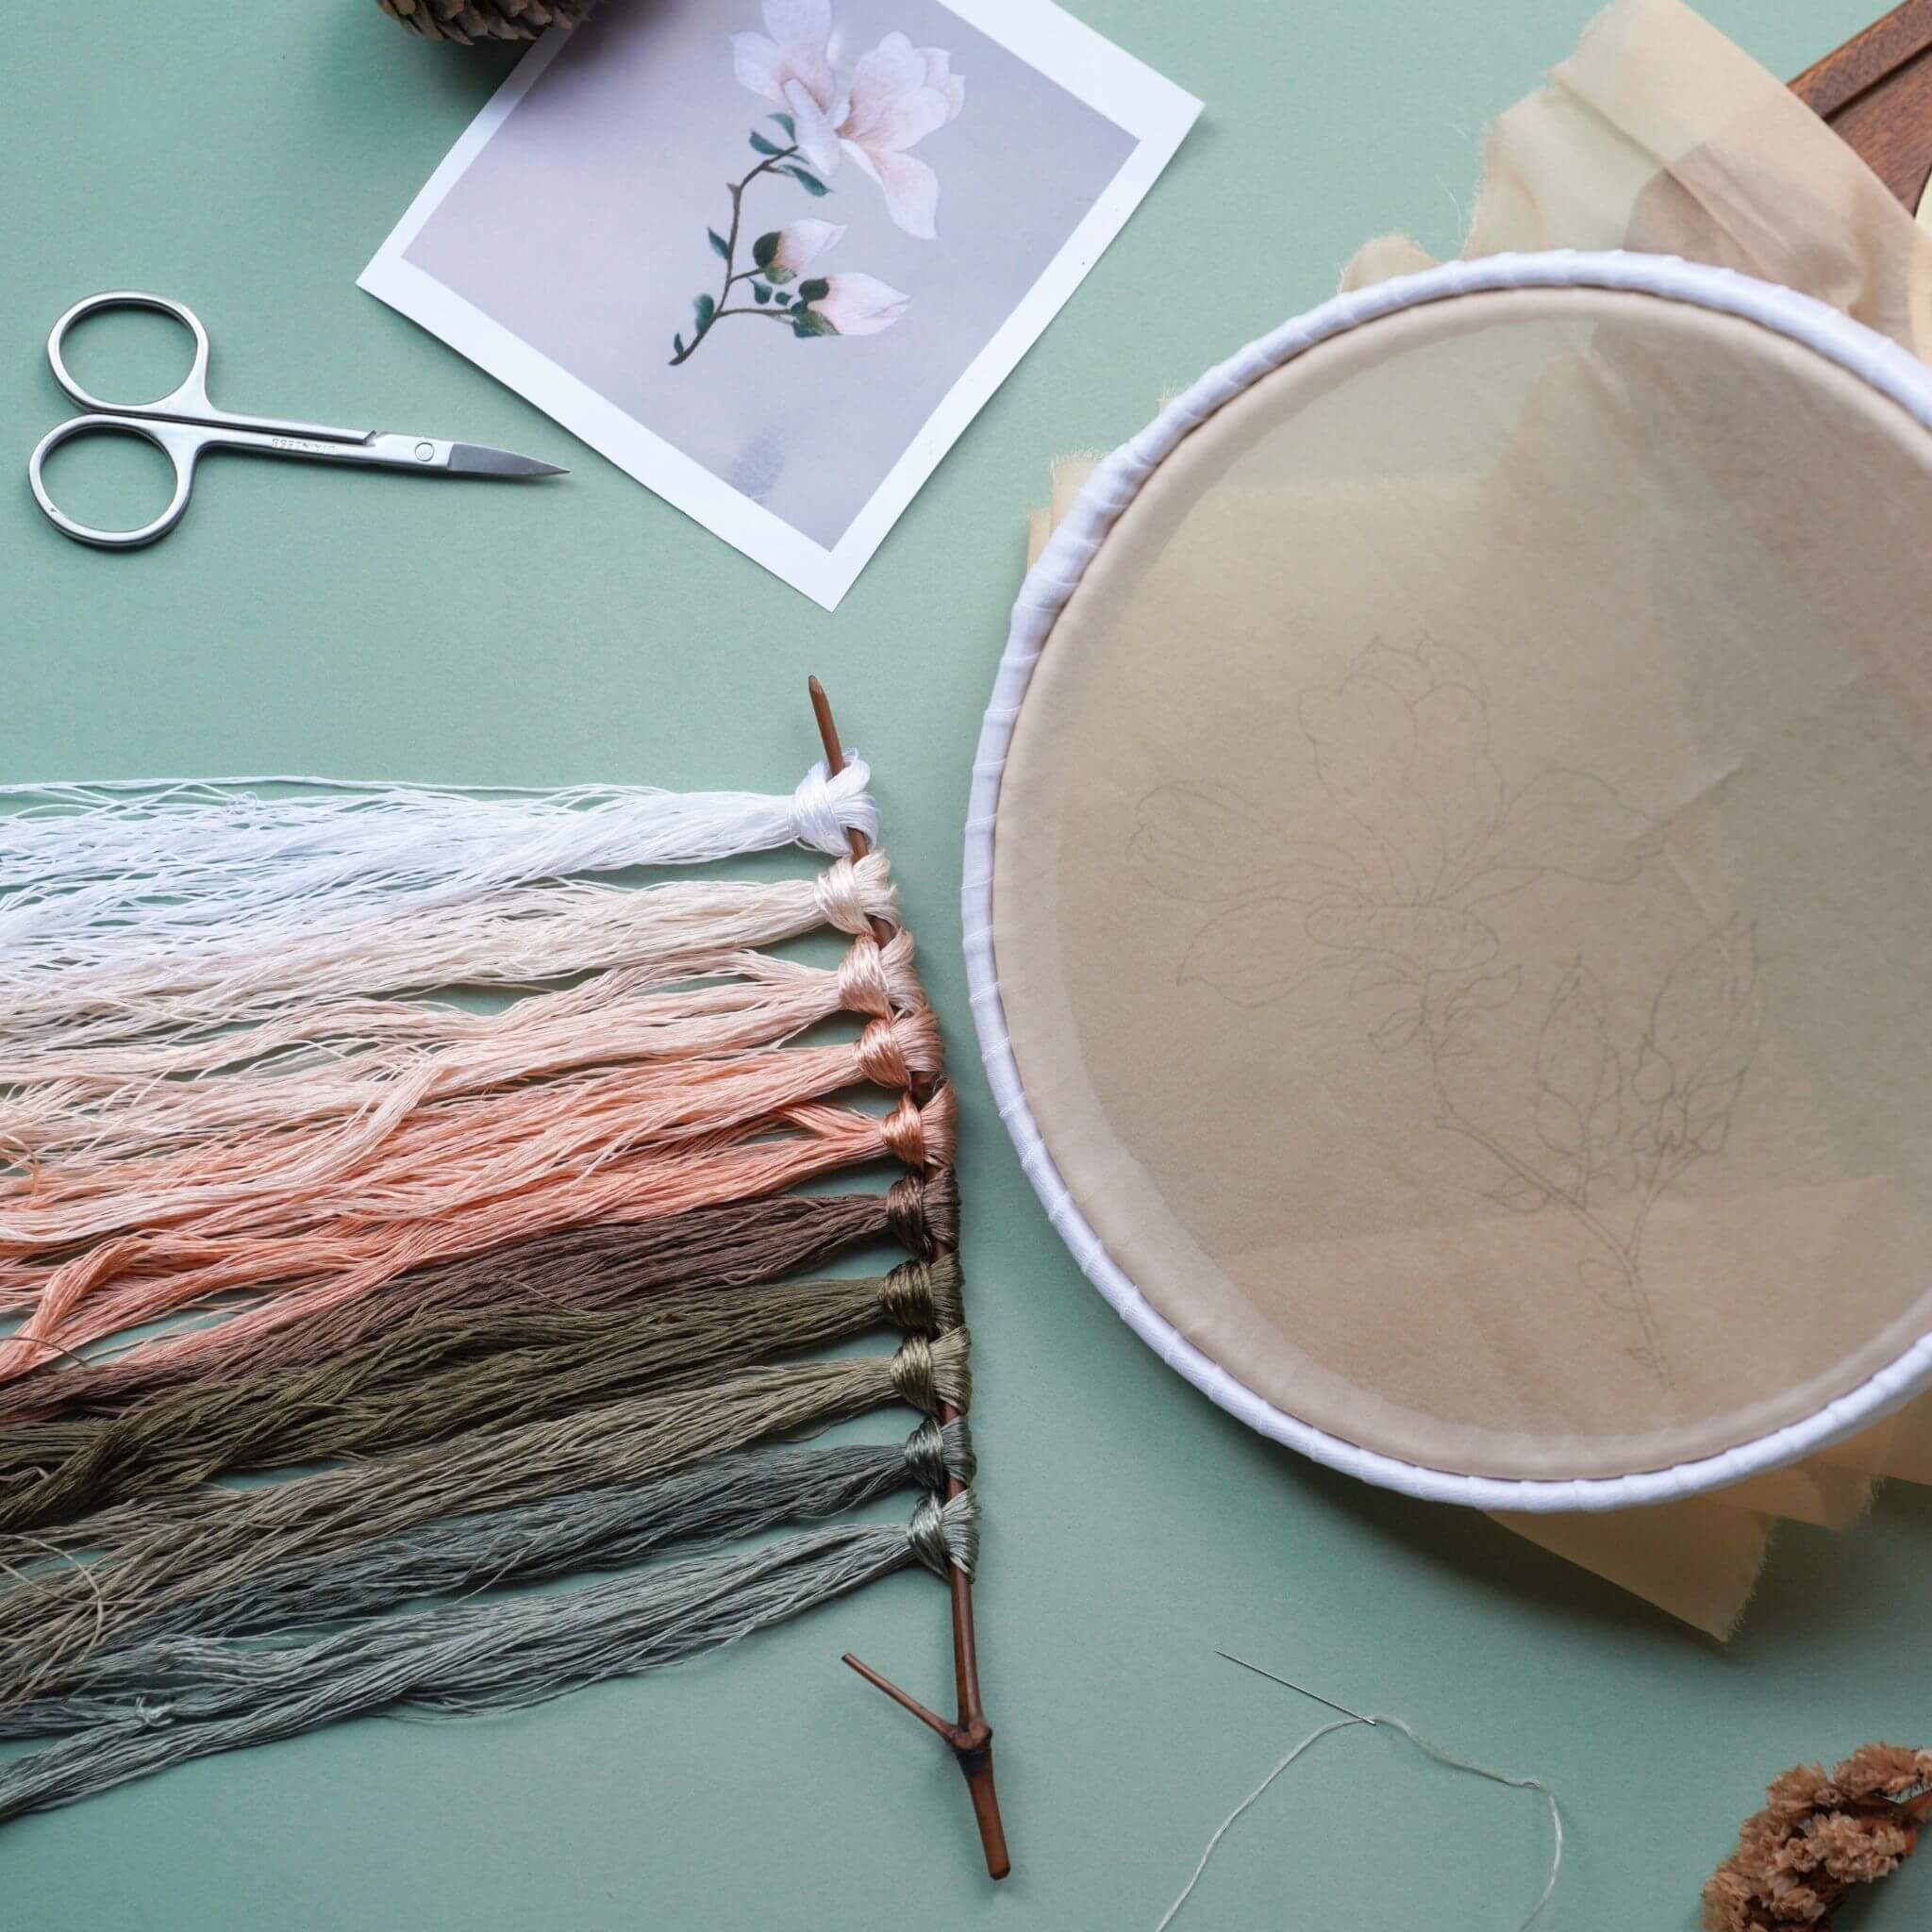
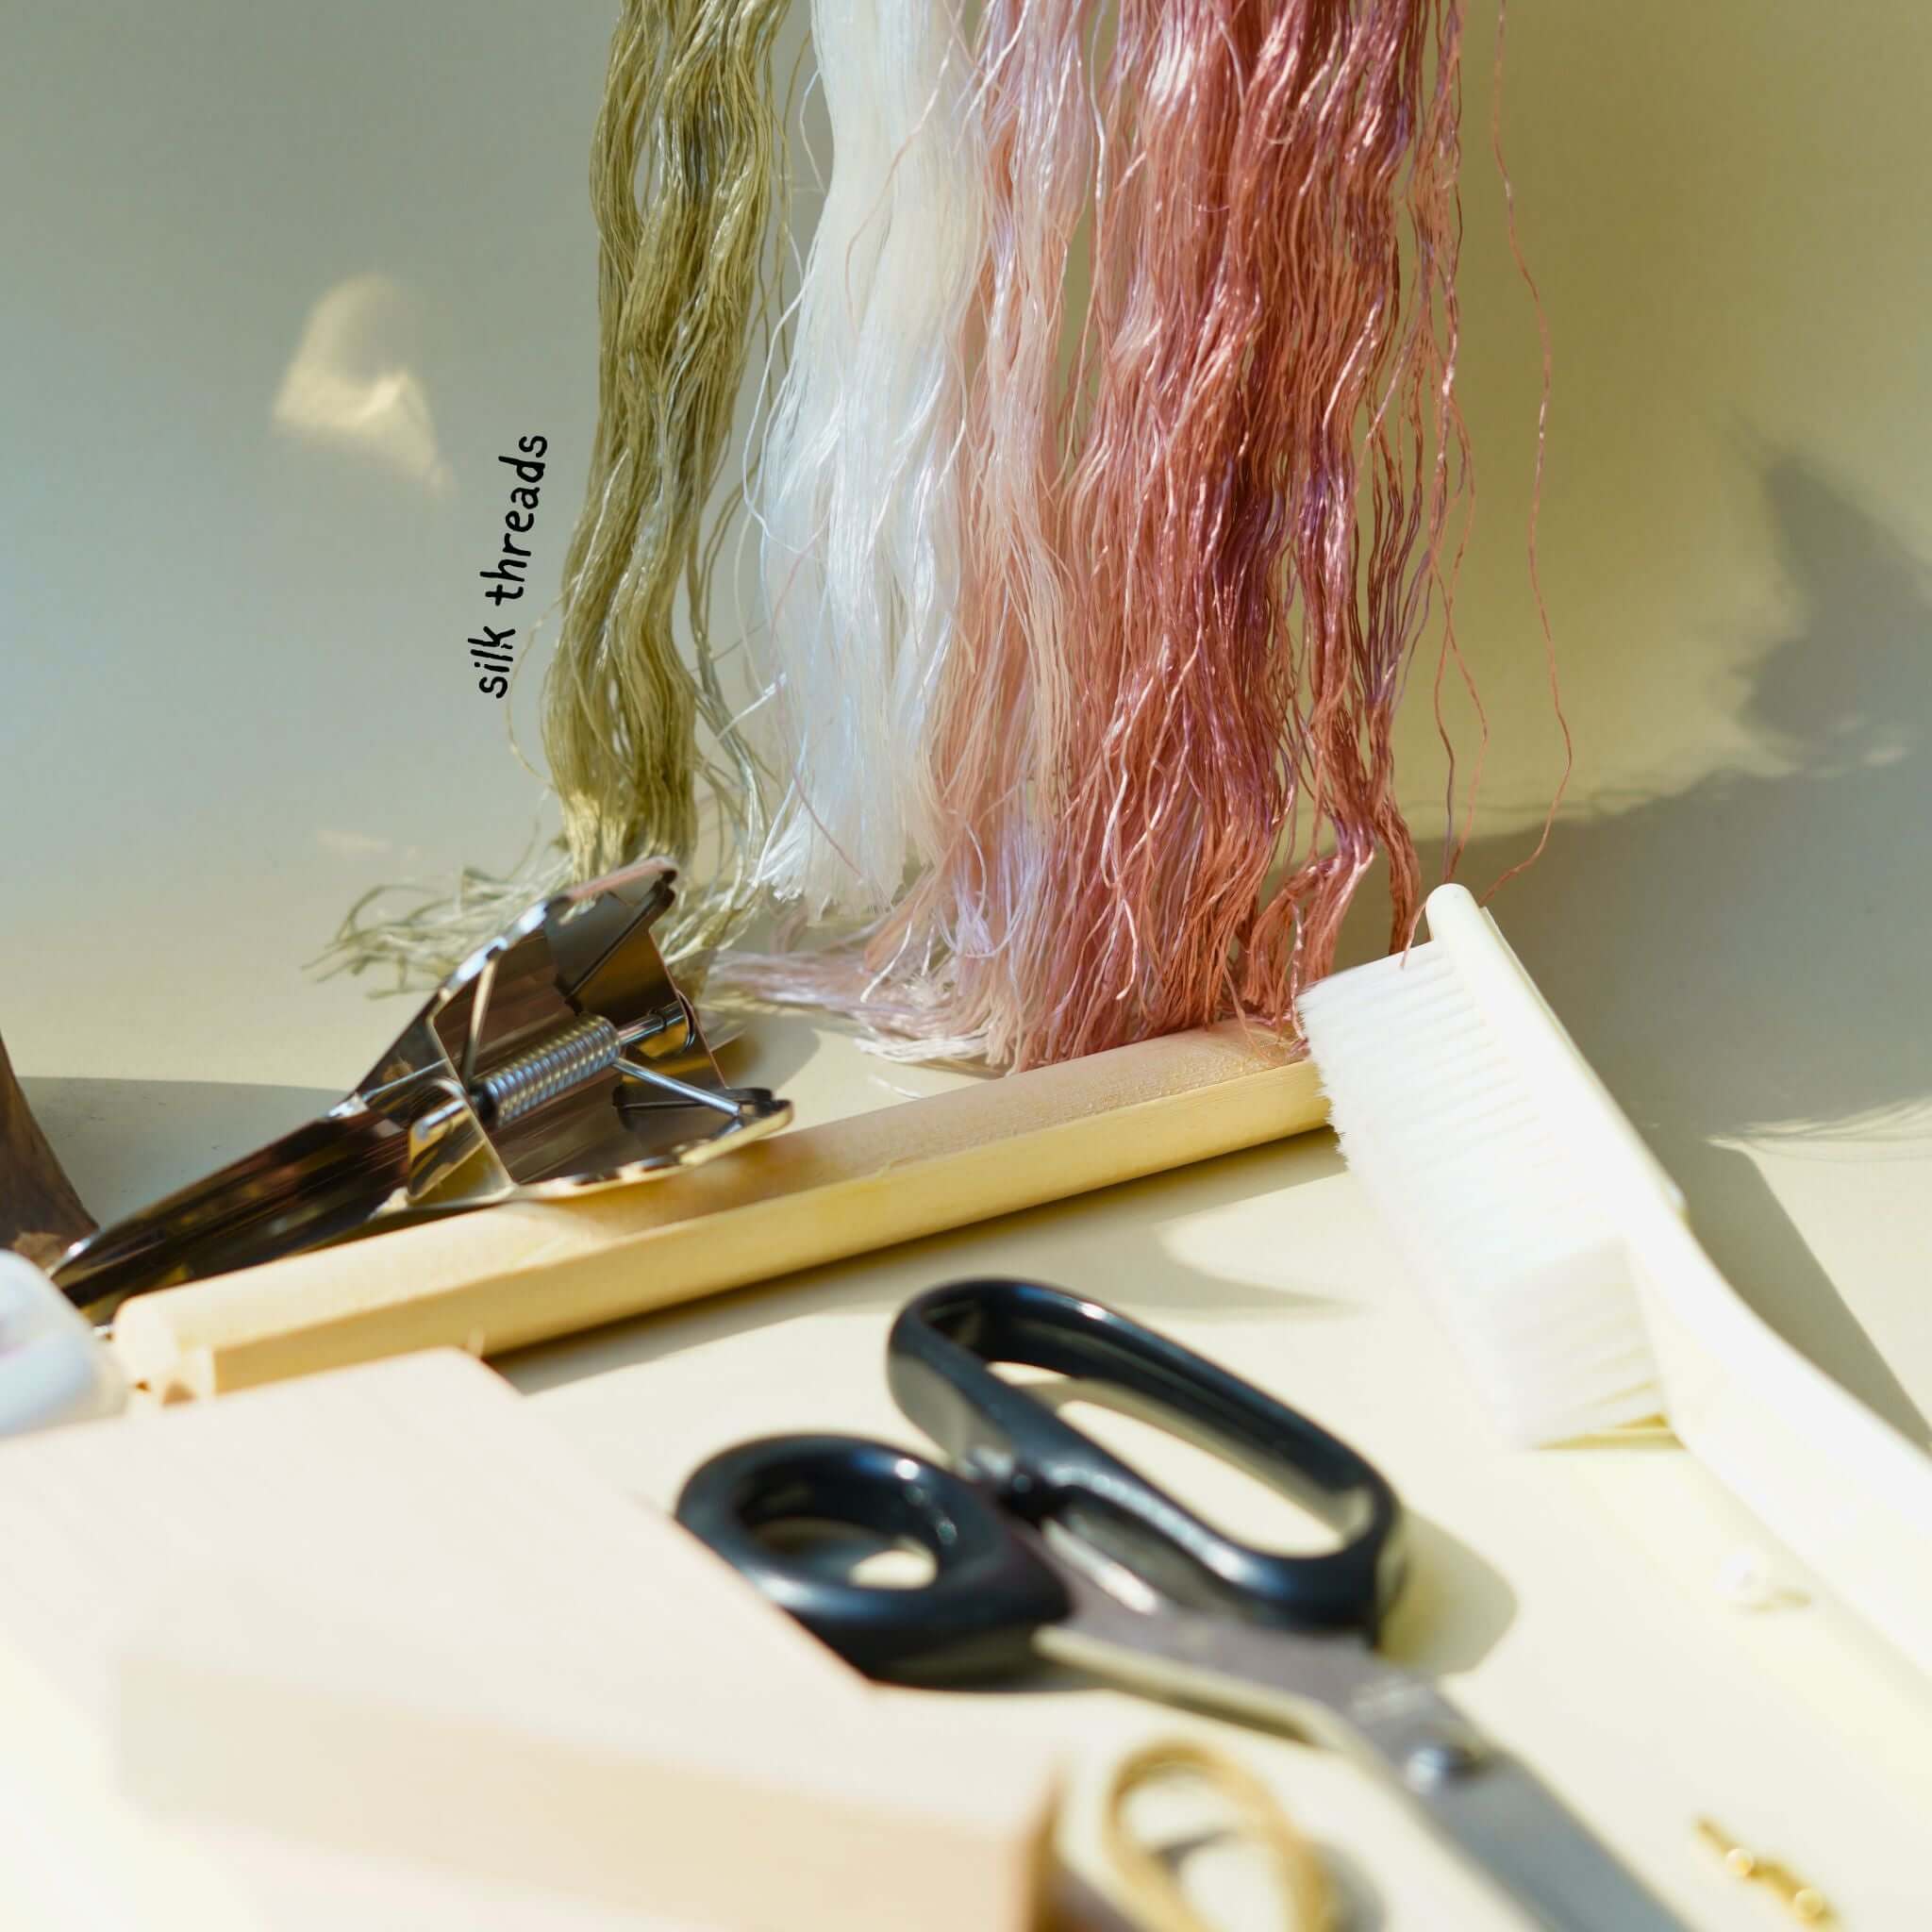
- Silk
The raw material for Ronghua, refined and degummed silk from raw silk, characterized by clear lines, smooth texture, and rich luster.
- Copper Wire
The skeleton of the entire Ronghua strip, playing an important role in the production process. To ensure the flexibility of the copper wire, it needs to be annealed at high temperature before use. It is ideal to use 0.2mm copper wire.

- Thread
Material used for assembly during flower arrangement.
- Dye
Acid dye for dyeing silk, requires high-temperature dyeing.

- Flower Stamens
Also used during flower arrangement, mostly made of plaster and cotton thread. The stamen heads come in different colors and are divided into single-headed and double-headed. Double-headed stamens need to be folded when used.
- Main Body of Hairpins and Brooch Materials
Used for making hairpins or brooches, mostly made of copper-plated metal.
Tools
- Talcum Powder
Applied to the thumb and forefinger before use to increase friction between the fingers and copper wire, reducing finger strain.
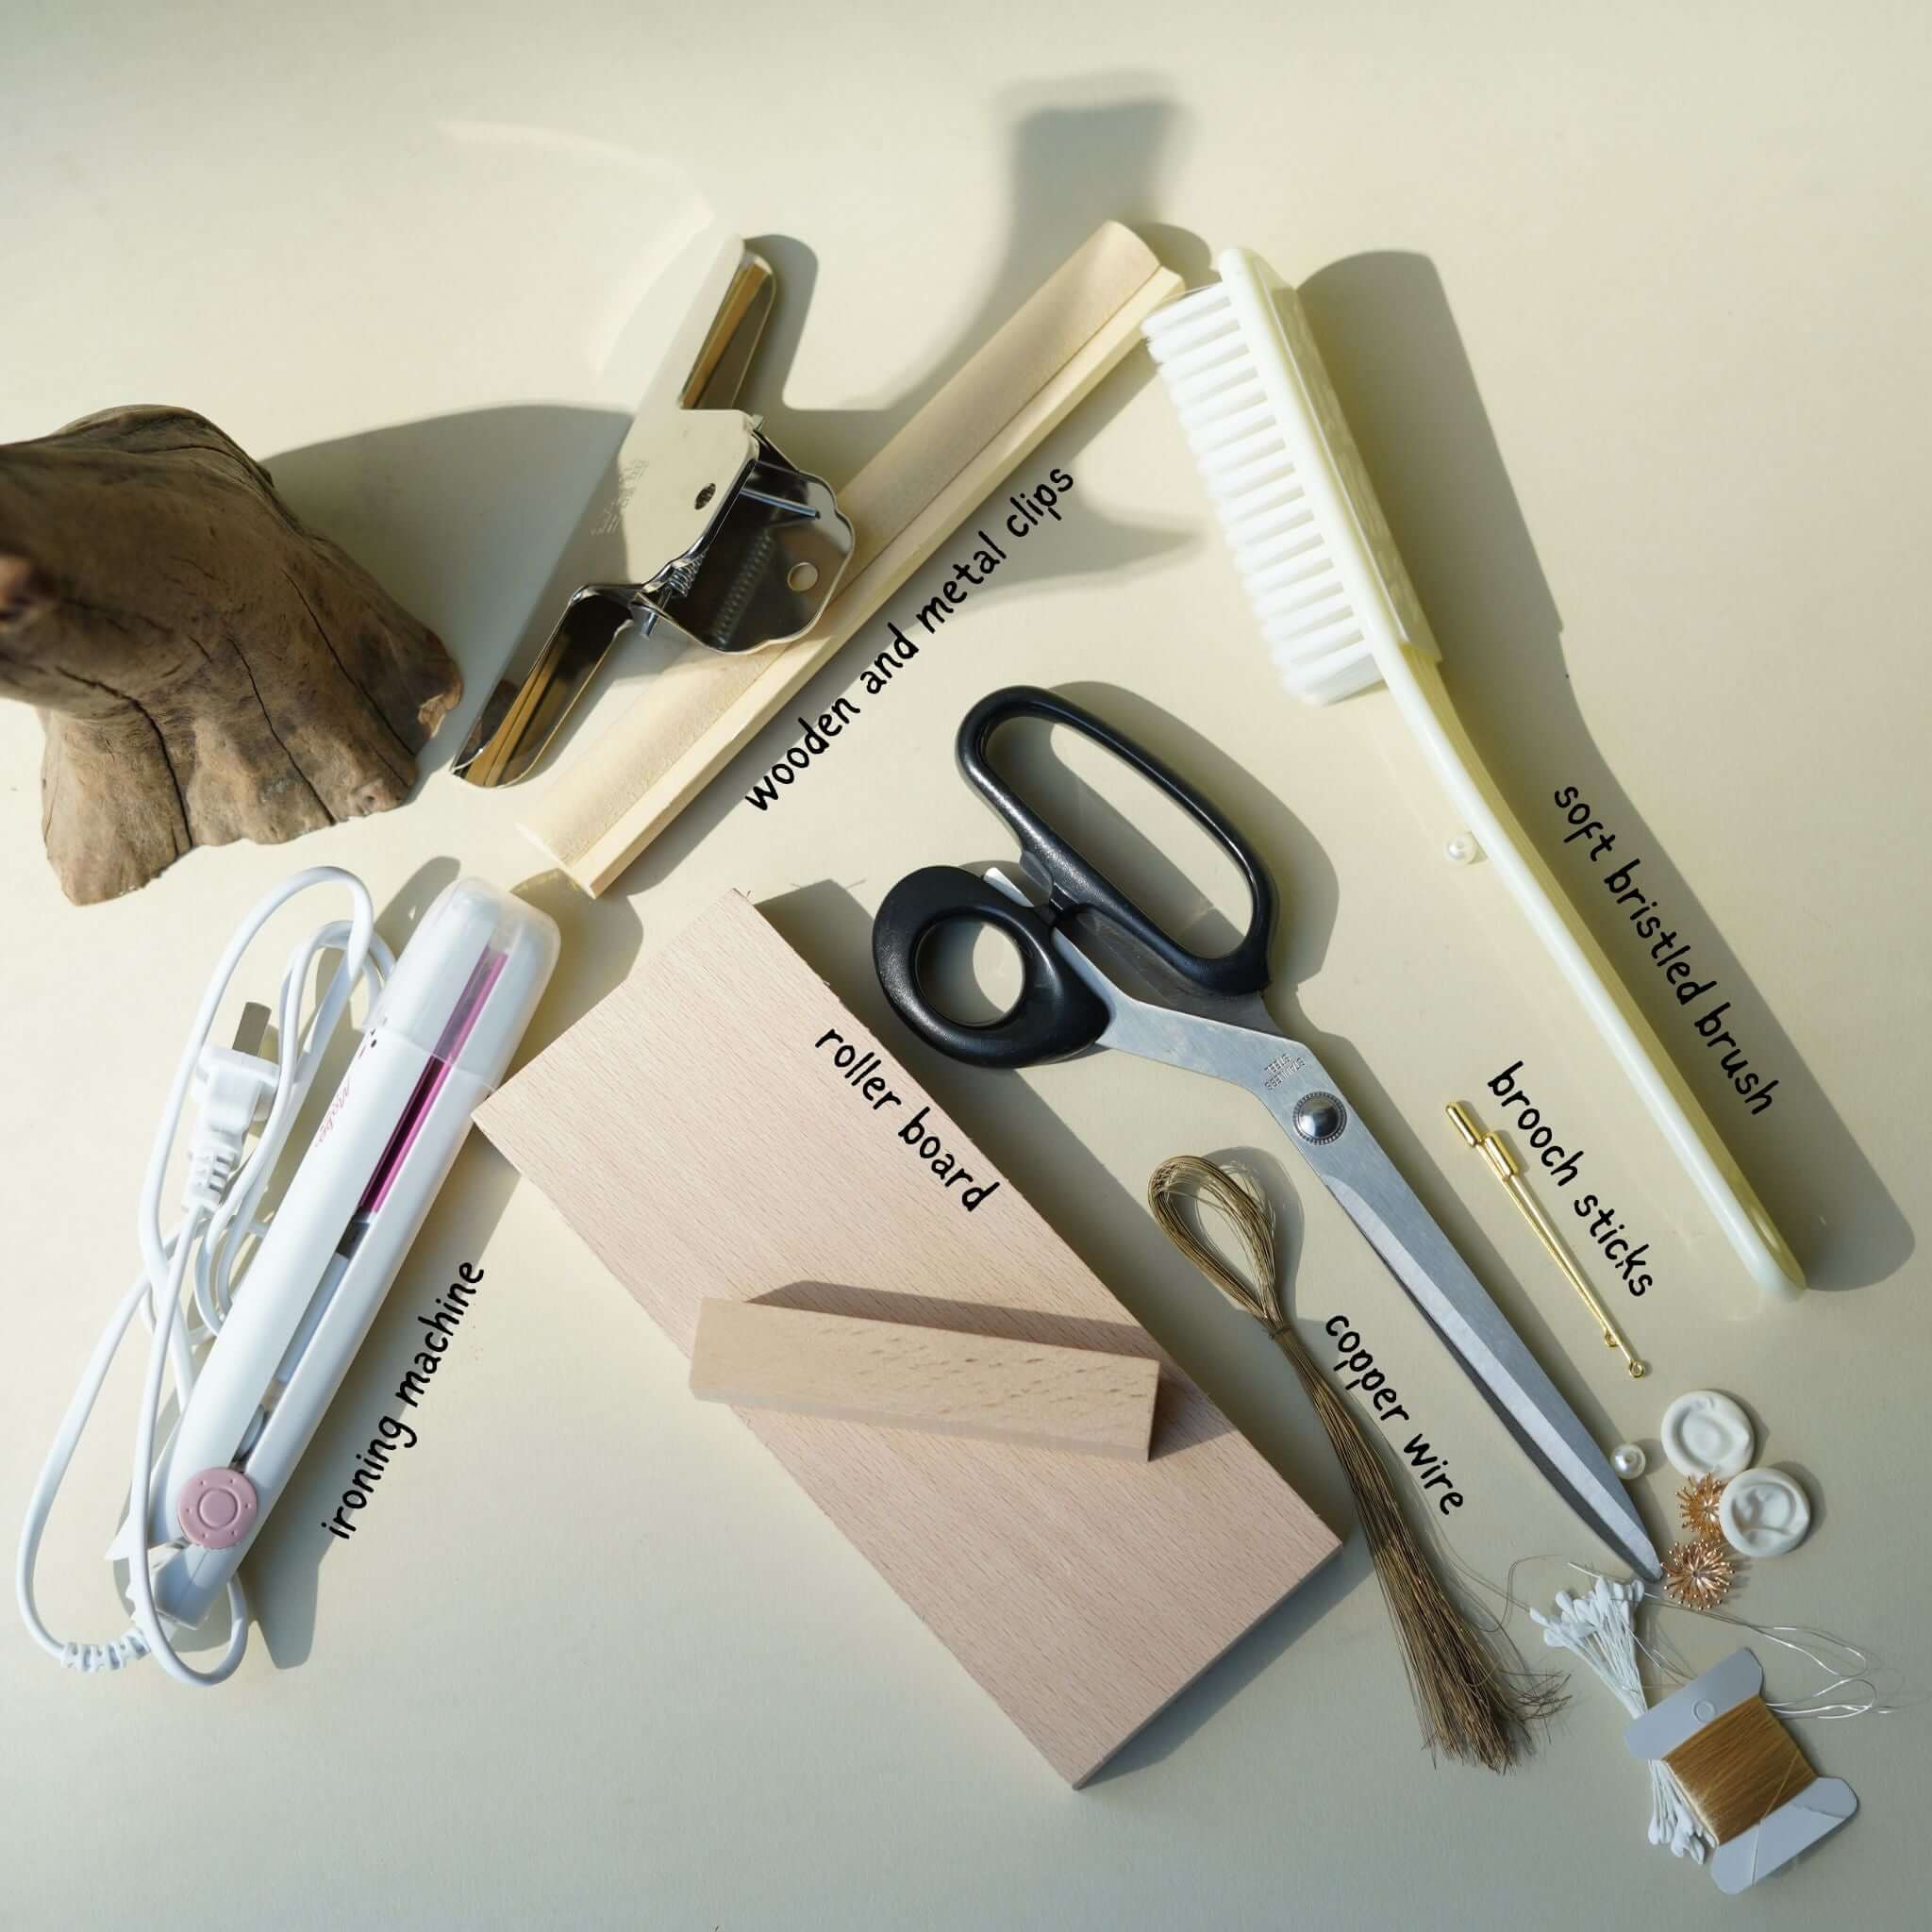
- Twisting Board
Consists of two wooden boards with slightly rough surfaces, one large and one small. Nails are hammered into the larger board to facilitate placement on the table. During use, the copper wire of the Ronghua strip is placed between the two blocks of wood, and the smaller block is twisted backward to tighten the copper wire until all the hairs on the strip are opened.

- Tweezers
An auxiliary tool used during flower arrangement. Because silk itself is delicate, adjusting the shape by hand may damage the beauty of the flower and lacks precision. Therefore, tweezers are needed for assistance during production.
- Scissors
There are two types of scissors for making Ronghua: one is large scissors for cutting Ronghua strips, about 30.5cm long, and the other is small scissors for sharpening the Ronghua strips, about 23.2cm long. Both are essential.
- Auxiliary Clips
These auxiliary clips are not traditional tools but are convenient and simple for non-professional enthusiasts to use at home. Consisting of a food sealing clip and a large stationery clip, they are used to assist in laying the silk.
- Bristle Brush
Mainly used for grooming silk, combing out the silk, and removing broken and residual silk from the Ronghua strips.
- Ruler
Convenient for measuring the length of Ronghua strips to ensure the Ronghua is finely made.

- Pressing Plate / Hair Iron
Used in making flattened Ronghua. After the Ronghua strip is pressed with the pressing plate at high temperature, it becomes a thin sheet, making the flower more three-dimensional.
- Setting Solution
Setting solution is prepared by mixing white latex and water at a ratio of 1:4 and filled into a spray bottle for easy use.
- White Latex
Used for bonding Ronghua strips and preparing the setting solution.

- Material Box
A material box can be used instead of a Ronghua wooden frame to hold the silk. The specifications of the box I use are length, width, and height, respectively, 28cm, 20cm, and 17cm.
- Ronghua Frame
Used to stretch the silk Ronghua strip, making it easy to tie the copper wire. The dimensions of the frame are length, width, and height, respectively, 40cm, 20cm, and 60cm.
- Lighter
Used for finishing. After all Ronghua works are finished and the silk thread is tied and cut, the end of the thread needs to be scorched with a lighter to finish.
How to Dye Silk for Ronghua
Materials for Silk Dyeing
- Silk
100 grams of undivided silk.
- Acid Dye
Suitable for materials such as wool, silk, and nylon. Dyeing requires high-temperature boiling.
- Fixative
Used after dyeing silk to prevent fading.
Tip: The dyeing process requires high-temperature boiling. Minors should operate under parental supervision.

Dyeing Process
- Dampen the silk with warm water.
- Use chopsticks to pick up about 1 gram of acid dye.
- Place the acid dye in the basin.
- Put the silk into the basin and boil for about 20 minutes.
- After dyeing, rinse the silk thoroughly in warm water.
- Prepare another basin of warm water and add the fixative.
- Leave the silk in the basin with fixative for 20 minutes.
- Remove the dyed silk from the basin, without wringing it dry, and hang it on a rod in a cool place to air dry naturally.
- Once the silk is dry, it is ready for use.

Dyeing Precautions
- Wear rubber gloves throughout to prevent staining of the hands.
- If the silk is too dry, add a few drops of hair conditioner during dyeing.
- Stir the silk with chopsticks midway to ensure even dyeing on both sides.

How to Anneal Copper Wire
Annealing copper wire: Annealing is a metal processing technique that involves heating the metal to a certain temperature, holding it for an appropriate amount of time, and then cooling it down. Annealing copper wire refers to heating the copper wire to a high temperature. The purpose of annealing copper wire is to reduce its hardness, making it easier to twist into fiber strips.
Winding the Copper Wire
- Find an object with a length of 14 to 15 centimeters, such as a power bank.
- Take out the large-axis copper wire.
- Wind the copper wire vertically around the object.
- Wind approximately 400 to 500 turns.
- Remove the wound copper wire from the object.
- Use the tail end of the copper wire to tie the wire loops tightly, then wrap the end around the loops.
- Winding is complete.


Annealing Process
- Place the wound copper wire in the middle of a gas stove (or any other suitable heating source).
- Turn on high heat and anneal for 6 to 7 minutes, until the copper wire turns red throughout.
- After annealing, use tweezers to remove the copper wire and let it cool on the side.
- Once cooled, cut the wire in half with scissors.
- After cutting, it should look as shown in the image.

Annealing Copper Wire Precautions
- Annealing must be done with an open flame. A gas stove or other suitable heating source can be used. Minors should perform this operation under parental supervision.
- Ensure that the copper wire is tightly wound to prevent it from breaking during annealing.
- During annealing, make sure the flame completely envelops the copper wire to ensure uniform heating.
- Do not anneal the copper wire multiple times, as this can damage its flexibility.

Step-by-step Process of Making Ronghua
The process of making ronghua flowers involves over a dozen steps from preparation to production, including splitting threads, hooking strips, tipping, grouping flowers, and more.
Step 1: Splitting Threads

To split the threads, first place the mature threads on a bamboo pole and break the tied thread ends.
Divide the threads into small sections according to the tied portions.
Then, using the method of lifting and flipping, identify the direction of the thread veins and continue to split them into relatively independent parts until the desired amount of thread is obtained, ensuring clear veins and smooth organization.
Throughout the process, the right hand mainly flips the threads on the bamboo pole, while the fingers of the left hand grip the split threads to prevent overlapping and confusion.
Step 2: Brushing Threads

Tie the previously split threads to a rope with a slipknot, leaving about 15 centimeters of thread segment after rolling.
Hold this thread segment with the index and middle fingers of the left hand, and then use the fingers of the right hand to arrange the thread to a generally smooth state.
Next, use a wrung-out damp towel to cover it for three to five minutes before starting to brush the threads.
While brushing, hold the brush handle horizontally in the right hand, insert the bristles of the pig bristle brush diagonally into the flattened thread, slide down with some force to the bottom of the thread, and rotate to brush out any tangles or knots in the middle of the thread.
Repeat this process several times on both sides, using the fingers of the right hand to comb the thread surface to ensure a clear and untangled arrangement.
During the brushing process, the thread held between the index and middle fingers of the left hand may loosen or tighten as the brush moves up and down, but it should not be left in a completely free state.
Step 3: Clamping Copper Wire

While still holding the bottom end of the thread with the left fingers, use the right index finger to align the top end of the thread, with a width slightly larger than 0.5 to 1 centimeter longer than needed.
Then, pull out a copper wire, pinch the middle, and lightly hold the ends with the thumb and index finger of the left hand.
Slightly twist and turn the wire to form a long U-shape.
Shift the thumb and index finger of the left hand to a position 2 to 3 centimeters from the bottom of the U-shape, maintaining two parallel lines formed by the two wires, and use the thumb and index finger of the right hand to pinch the bottom of the U-shape together.
Quickly twist it into a tighter spiral shape, forming a Y-shape with the wire.
Then, clamp the two ends of the wire that are separated by the split thread with the thumb and index finger of the left hand, and twist them outward, bringing the upper portion of the wire together.
Step 4: Cutting Strips

Lift the clamped thread with scissors held under the left hand and cut off the thread.
Step 5: Rolling Strips
Pick up the copper wire with the right hand and rotate both hands in opposite directions to create a thick spiral shape with the thread strip.

Place the thread strip on a wooden board and use a rolling board with the right hand to roll and compress the thread strip until it becomes tight and dense, forming a single thread strip.

A qualified thread strip should be consistent in length, thickness, weight (uniform thickness during splitting), color matching, and should stand upright on the copper wire, full of vitality.
Step 6: Trimming Strips

When tipping, pay attention to correcting the posture. Keep both arms moderately apart and hollow under the armpits.
Slowly twist the thumb and index finger of the left hand holding one end of the thread strip, while holding the tipping scissors with the right hand.
Trim the thread strip by pressing the cutting edge against the copper wire.
When the cutting edge reaches the copper wire, it is called a "full tip"; if the cutting edge does not reach the copper wire, it is called a "half tip".
Step 7: Assembling Ronghua Flowers

When grouping flowers, keep both arms moderately apart, with hollow armpits.
Hold one end of the iron wire with the thumb and index finger of the left hand, while the middle finger and ring finger stabilize the wire, ensuring it remains stable.
Hold the paper with the right hand, and while the thumb and index finger of the left hand continue to twist the wire, the middle finger and ring finger also push the wire upwards, stabilizing it.
The right hand holding the paper simultaneously pushes it forward, ensuring the paper wraps evenly around the wire.
A key indicator of mastering this basic skill is that the twisting motion of the left hand's fingers can transform a bent wire into a straight one as it continually moves upward.
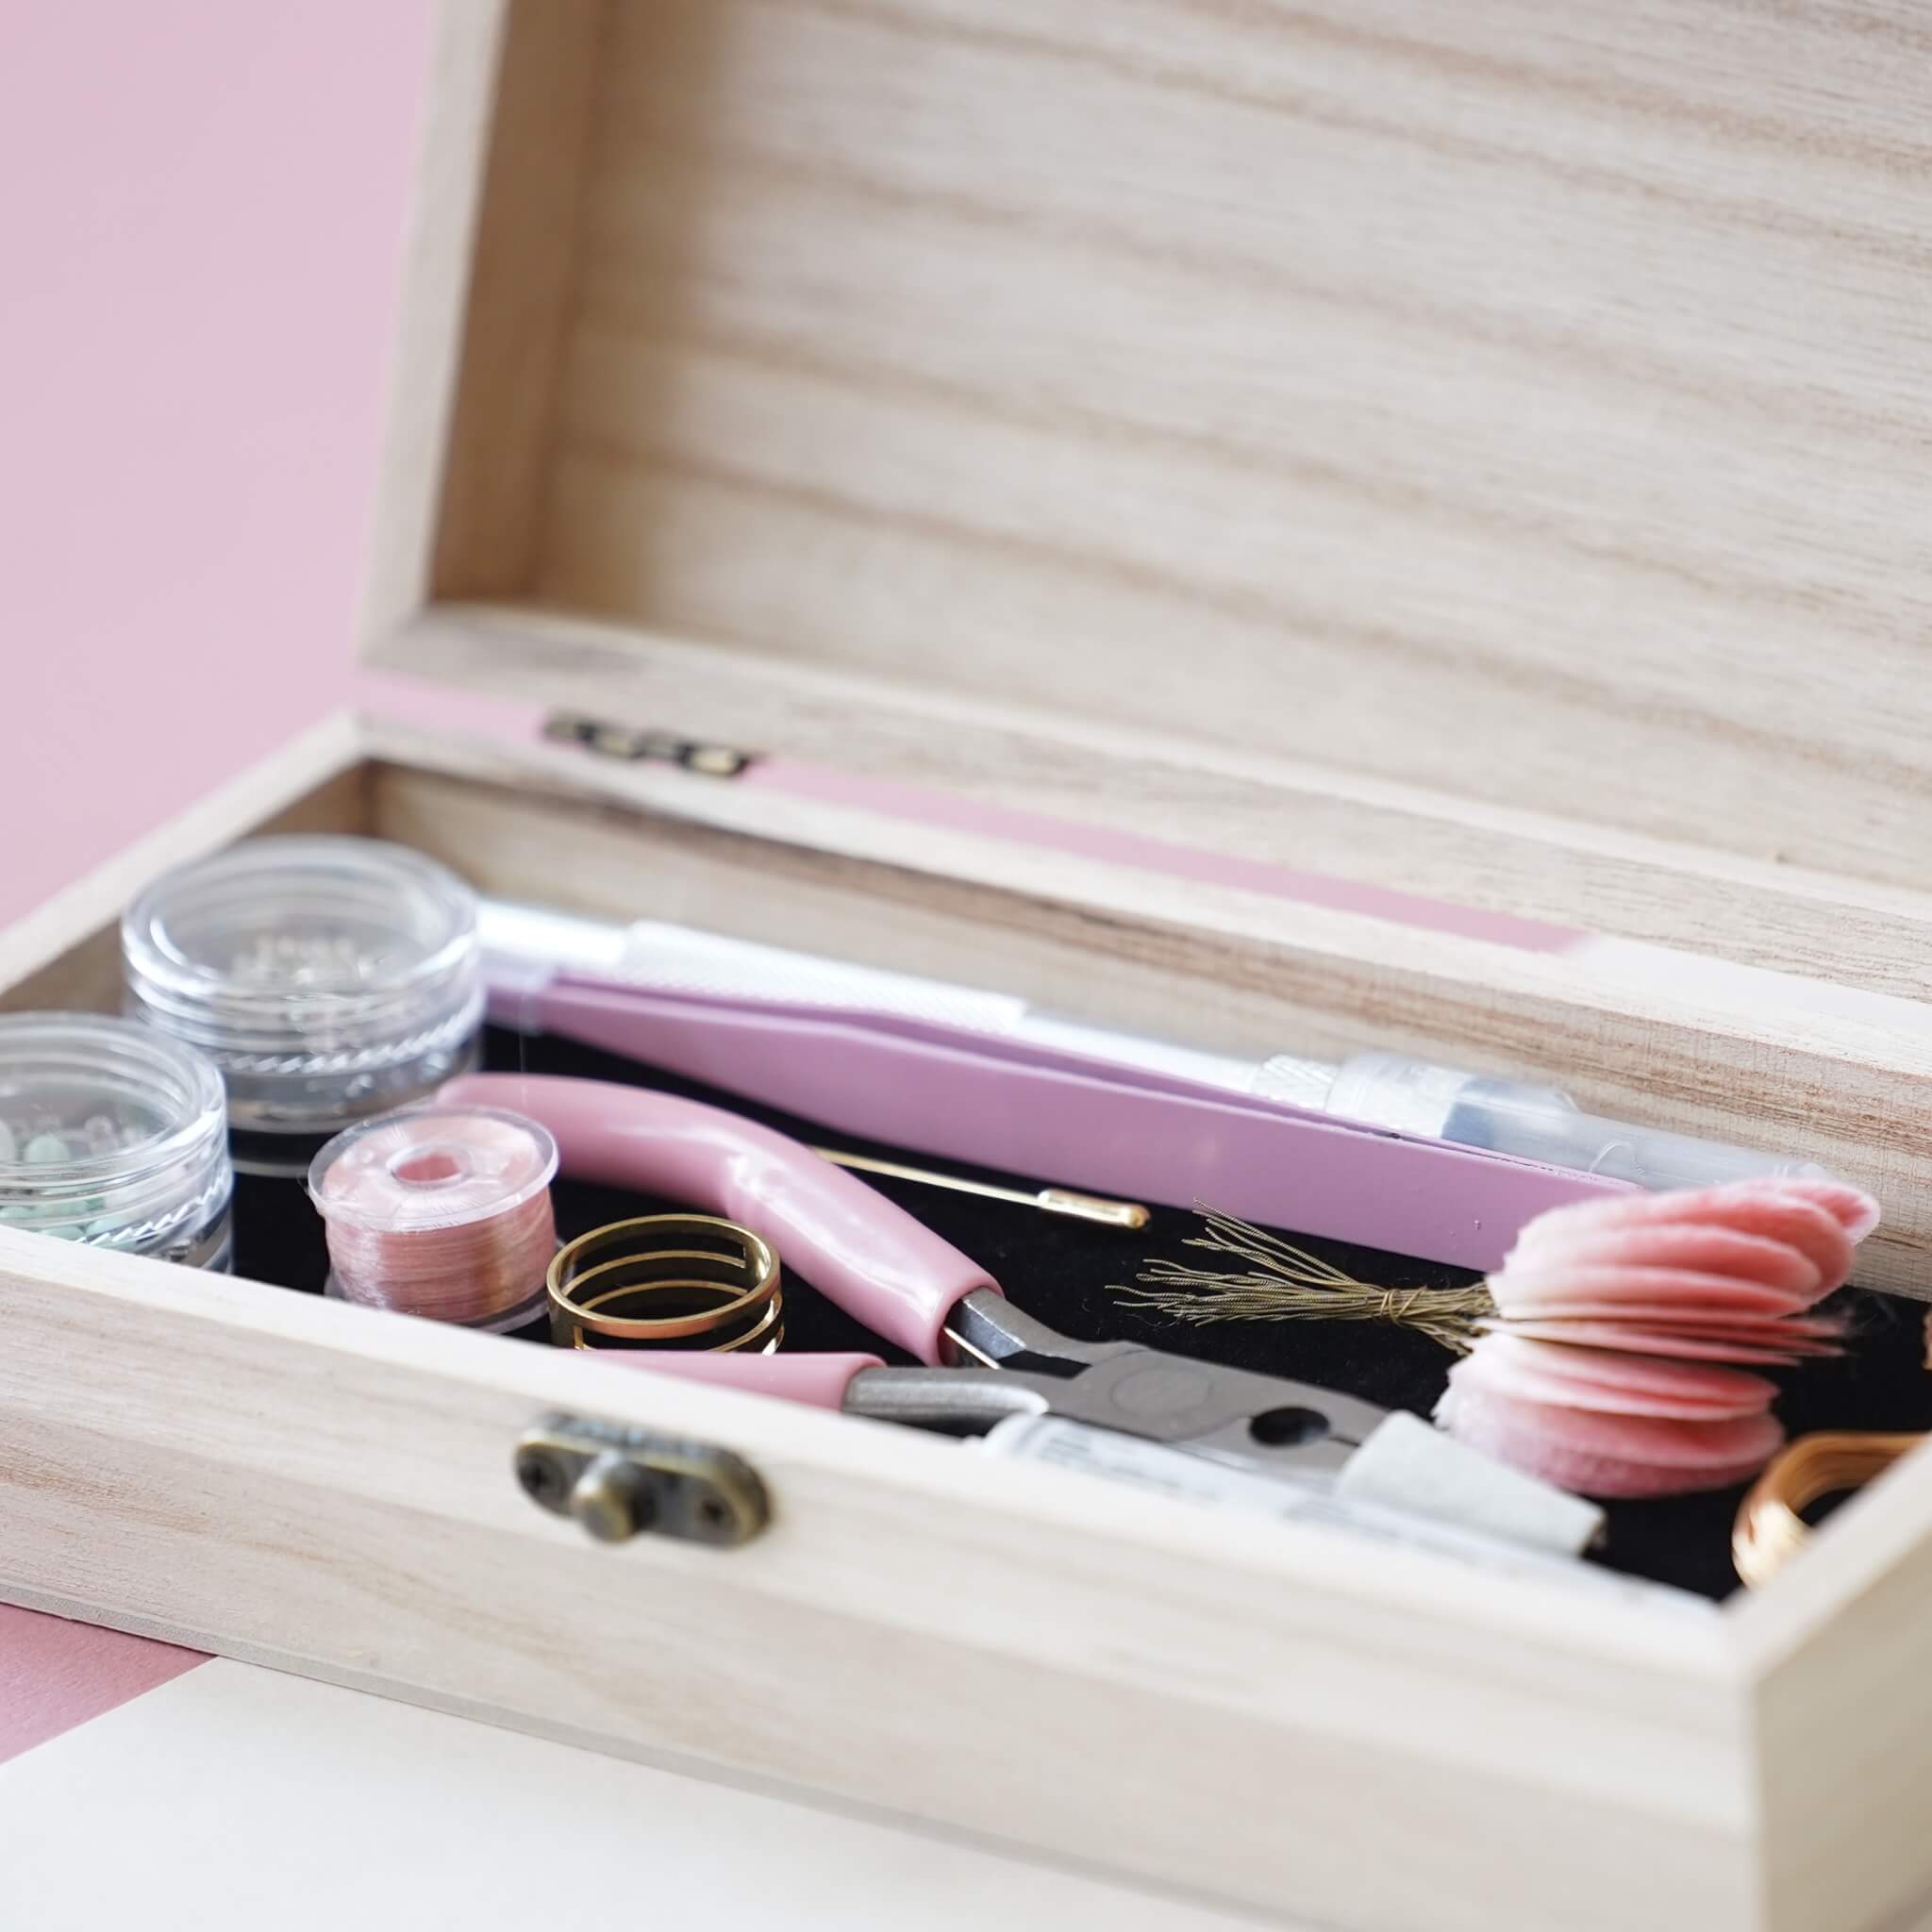
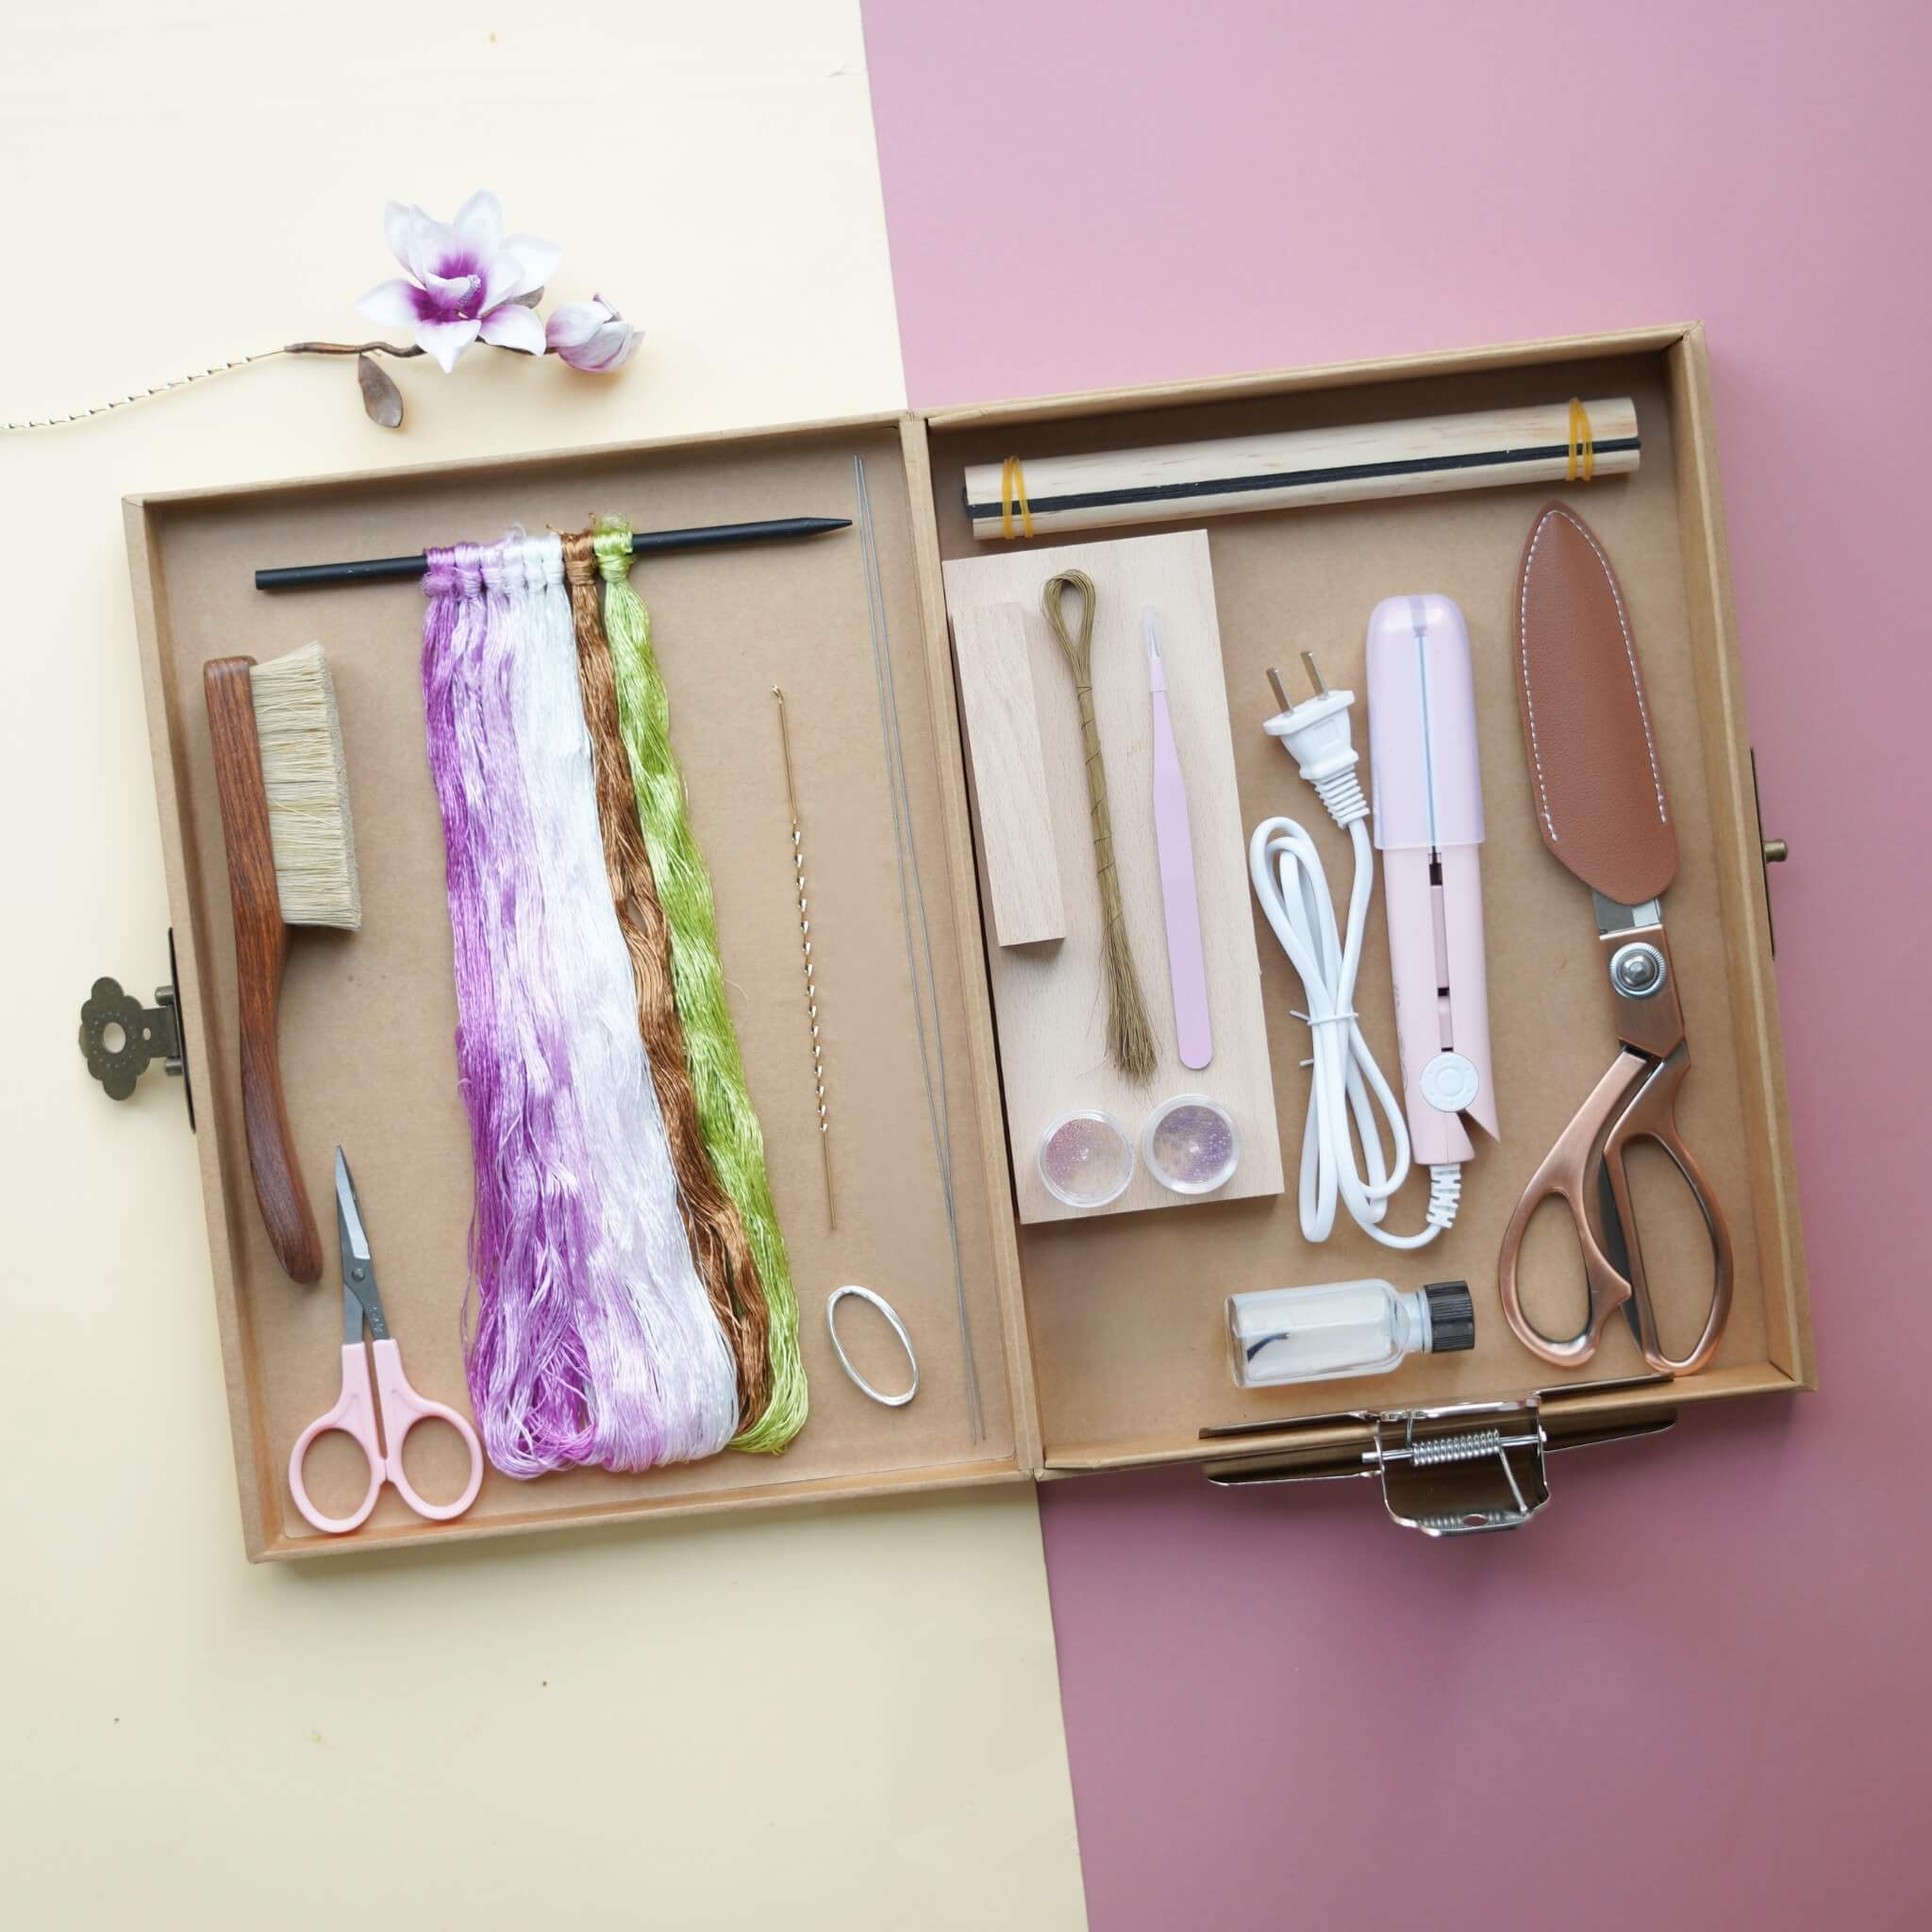
DIY Kits for Two Kinds of Ronghua
Fluffy Ronghua - Traditional Style
So, you know the classic ronghua look, right? Fluffy, not pressed down, kinda like velvet flowers. And everyone's seen the plum flower design - it's super beginner-friendly too.
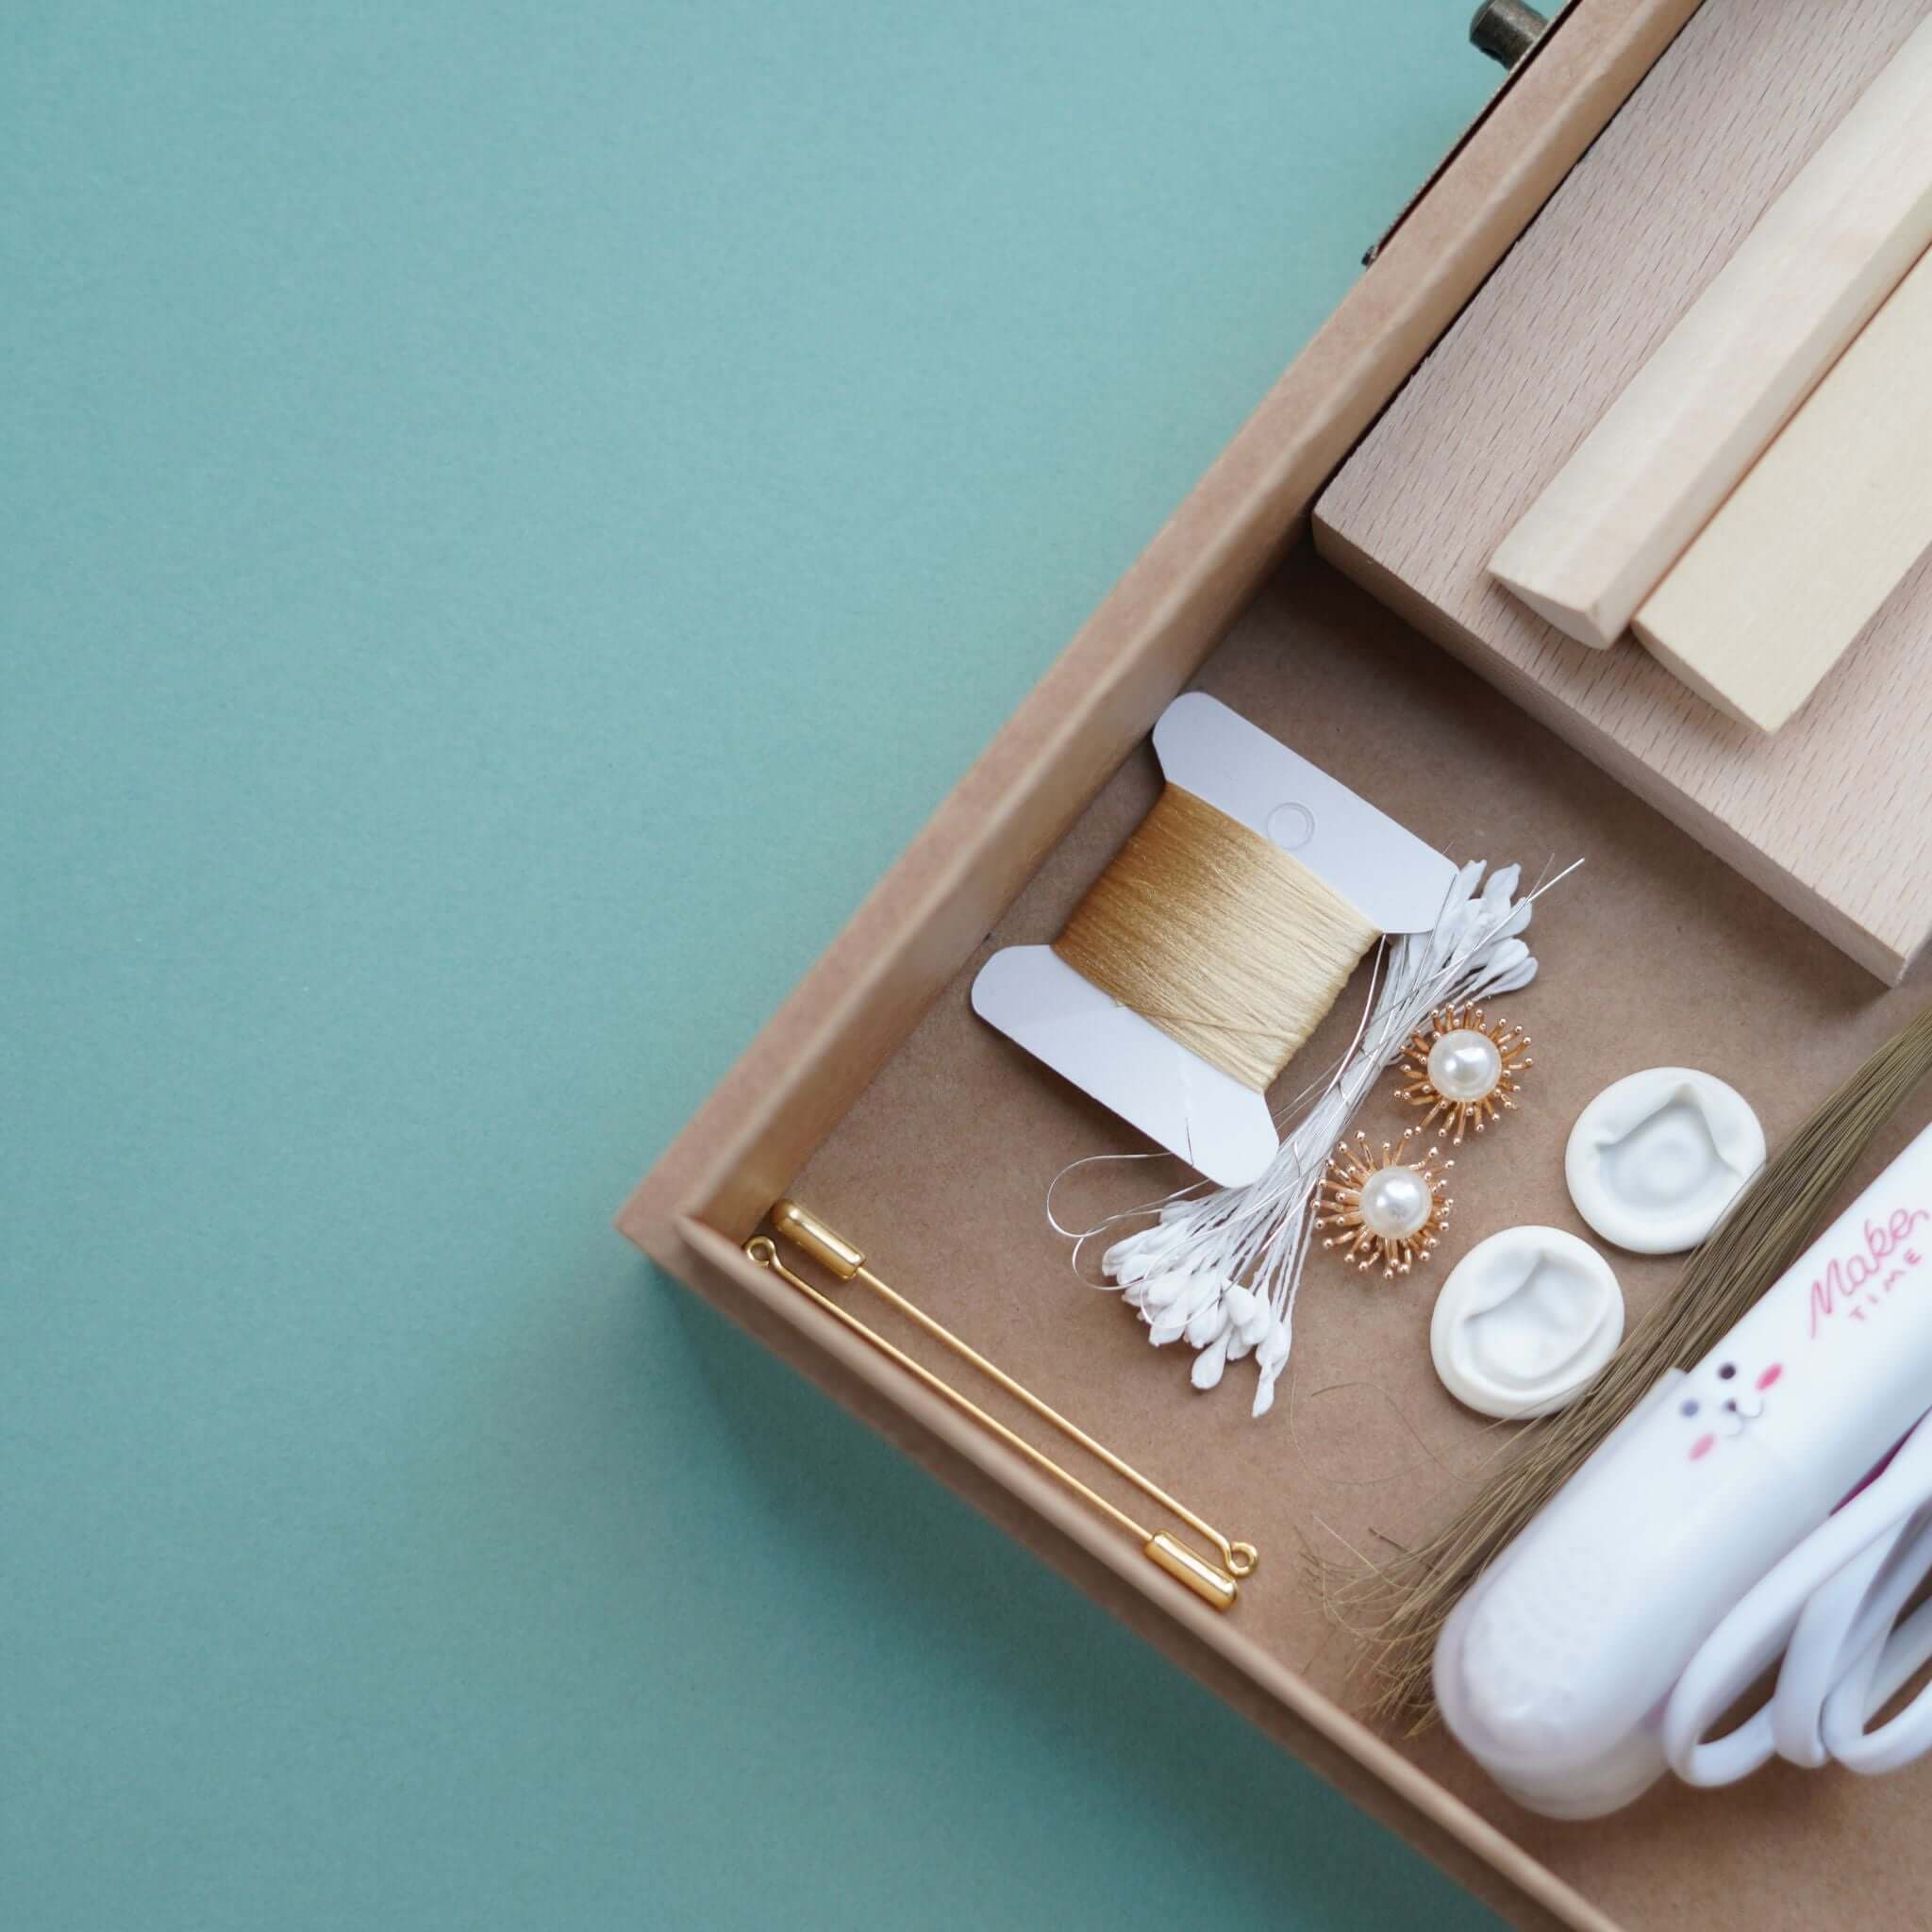
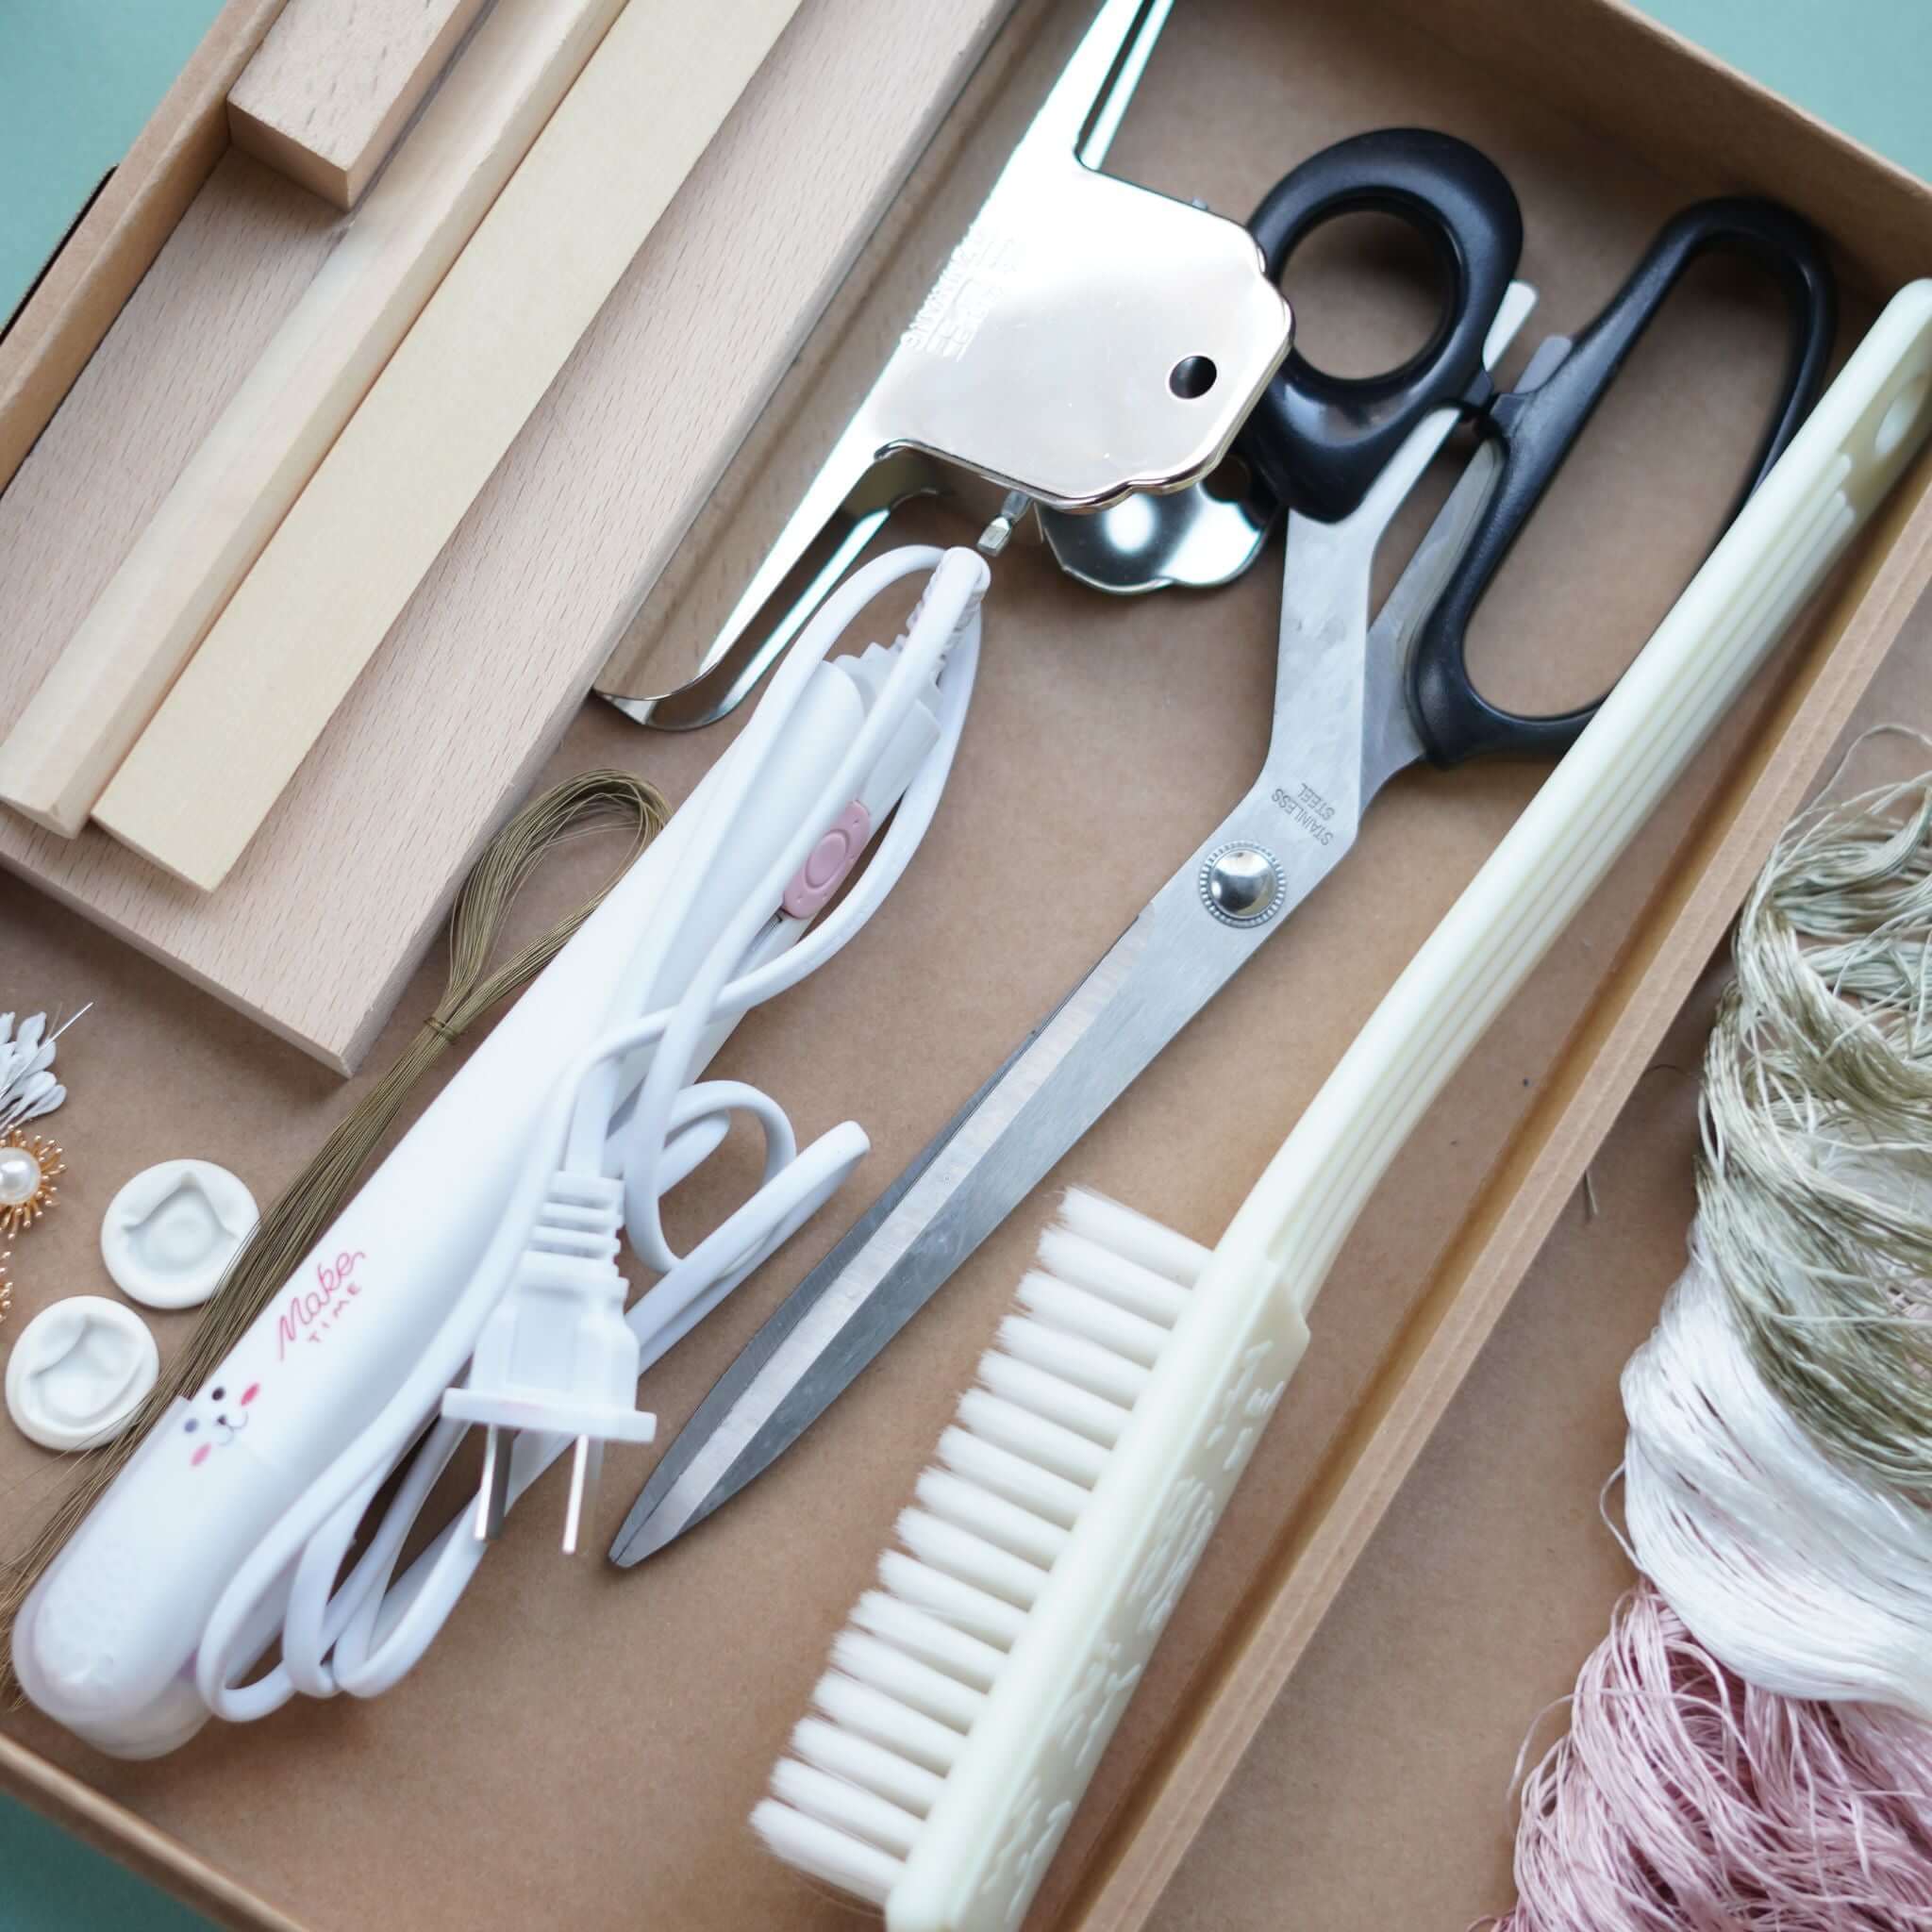
We've got this DIY kit ready for you to get crafty with a traditional-style plum flower ronghua. In the kit, you'll find all the stuff you need: dyed silk threads (split already, don't worry), annealed copper wire, paper buds, and all the tools you'll need (like a twisting board, tweezer, brush, clips, and scissors).

Flat Ronghua - Pressed style
Well, we've got an even cooler version of Ronghua - the pressed one. They're perfect for making flowers that look super real, like chrysanthemum. This type needs an extra step though - you've gotta use an ironer or hair straightener to squash the ronghua sticks into shape.
We've got a DIY kit for these fancy pressed-style Pink Bloom ronghua flowers. Inside this kit, you'll find everything you need: dyed silk threads (already split for you), annealed copper wire, metalware, and all the tools (like a twisting board, tweezer, brush, hair straightener, clips and scissors).


