


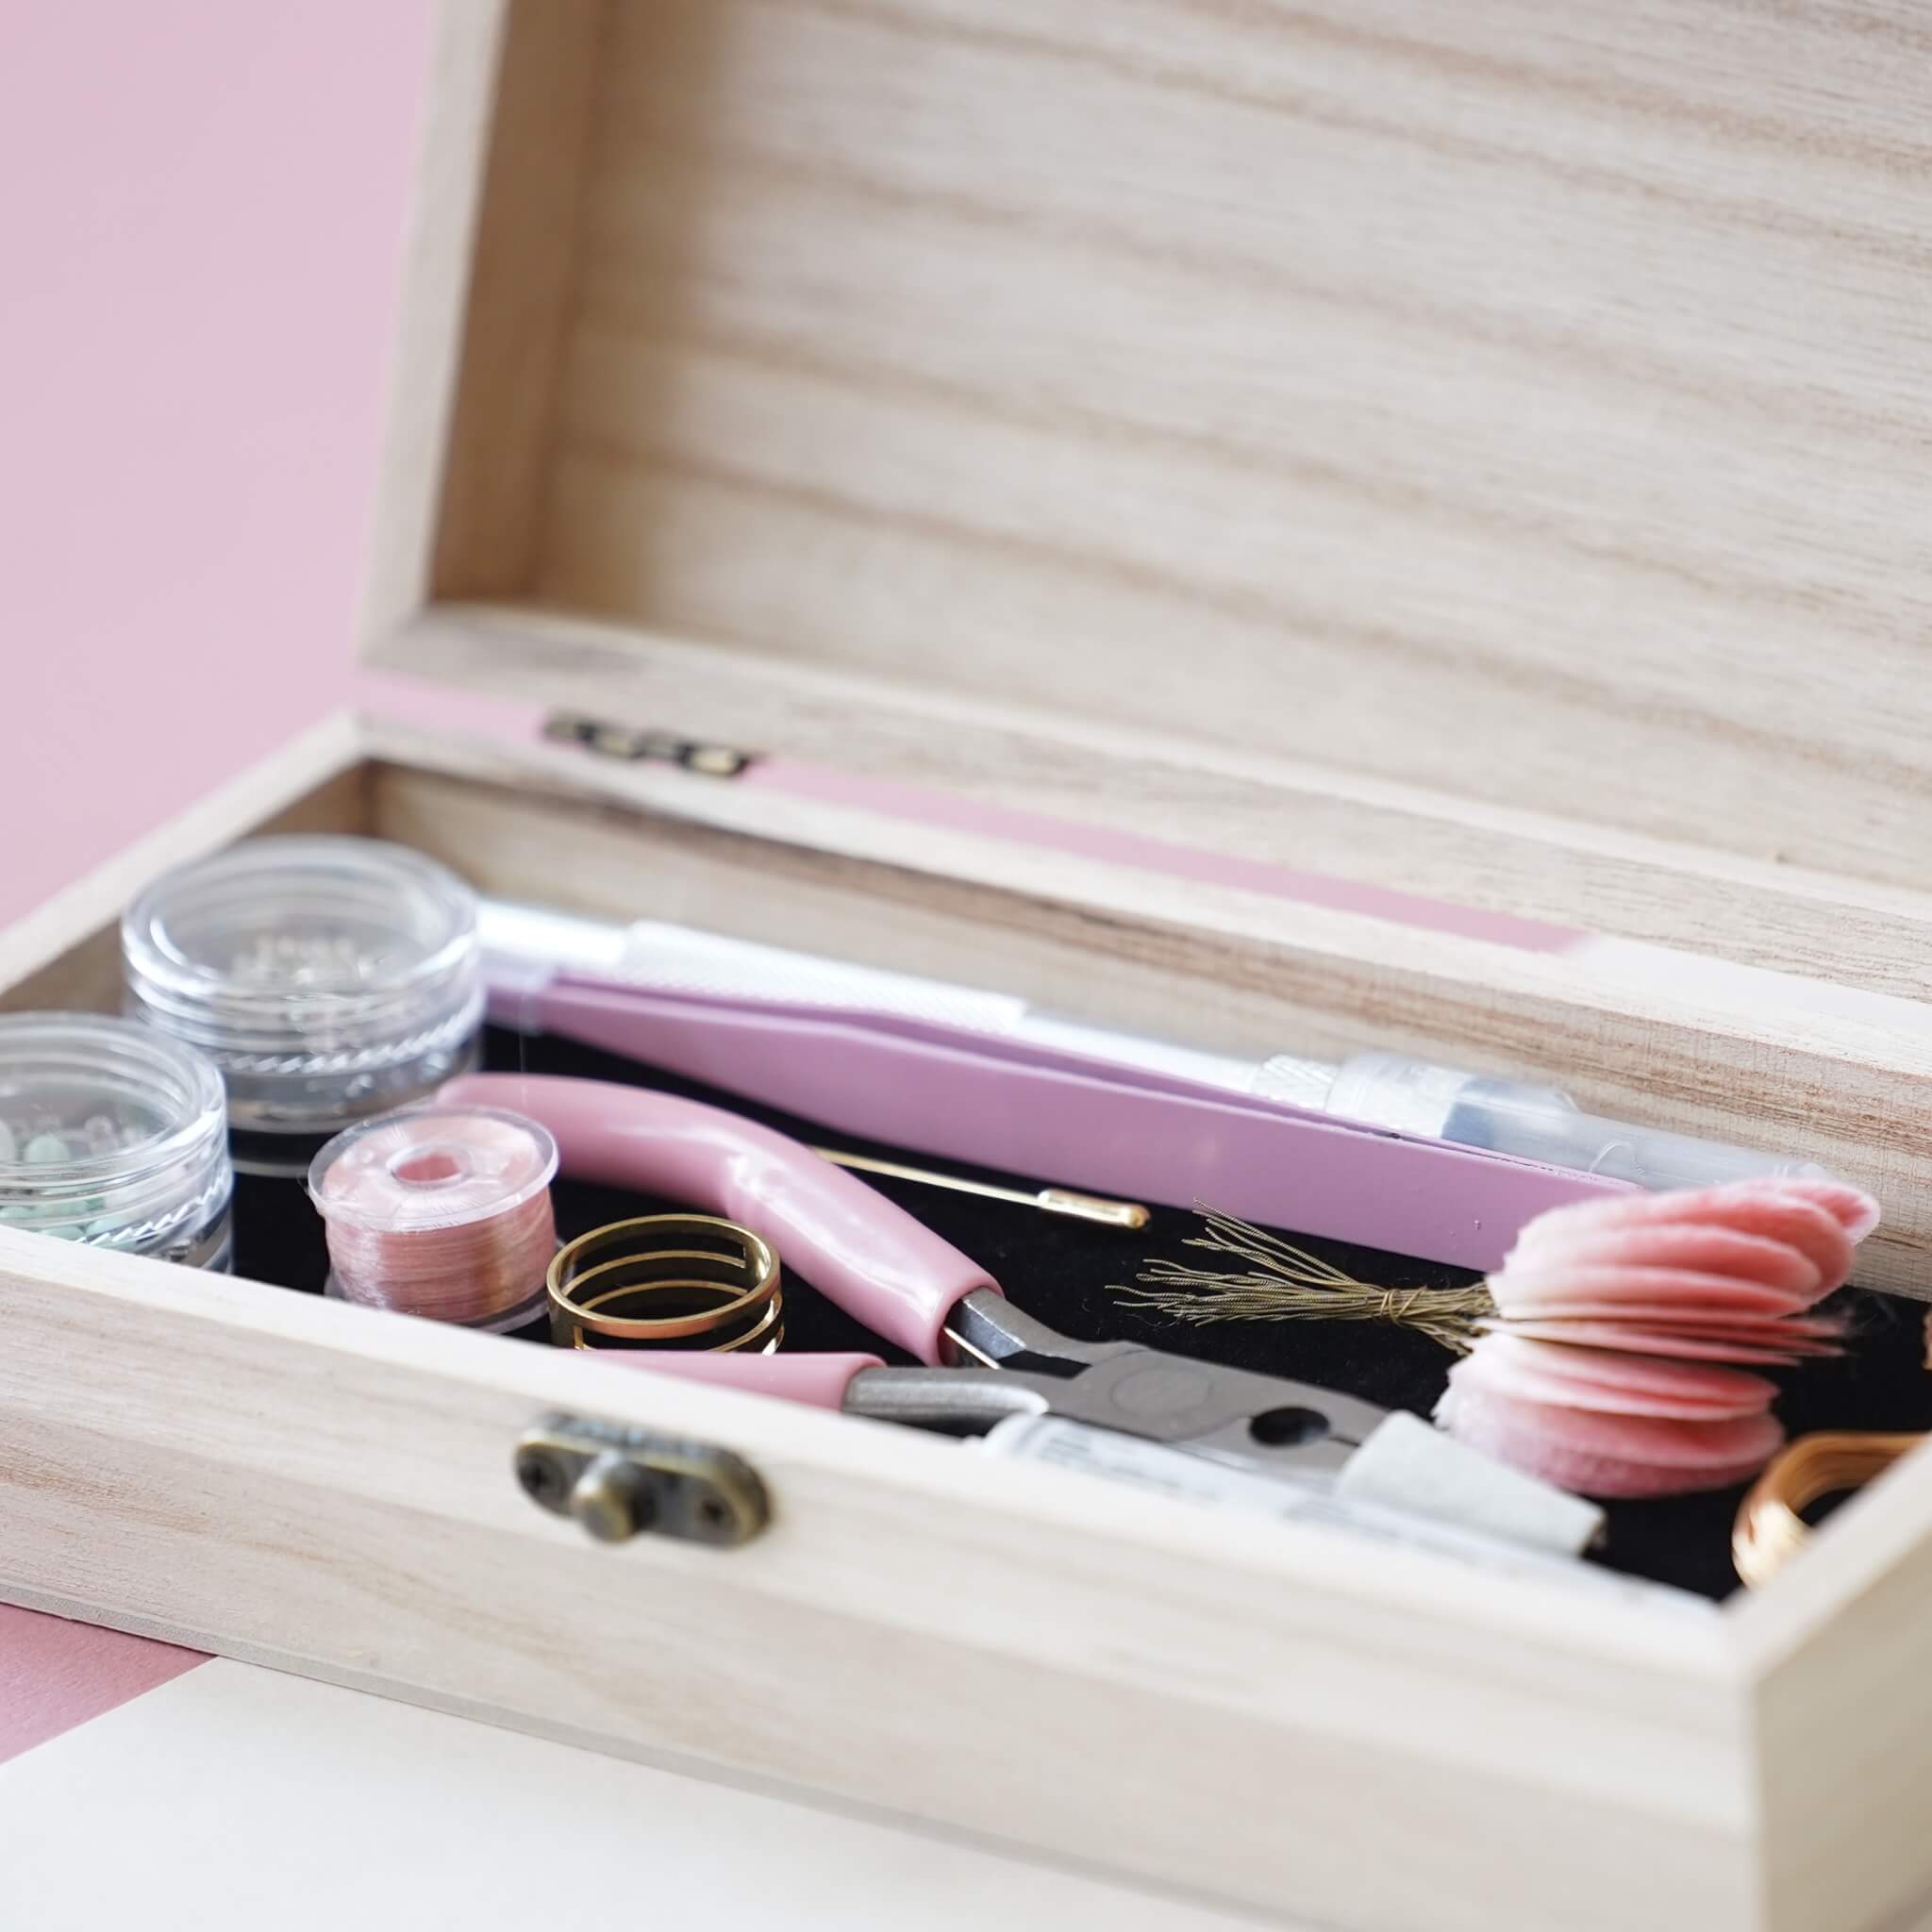
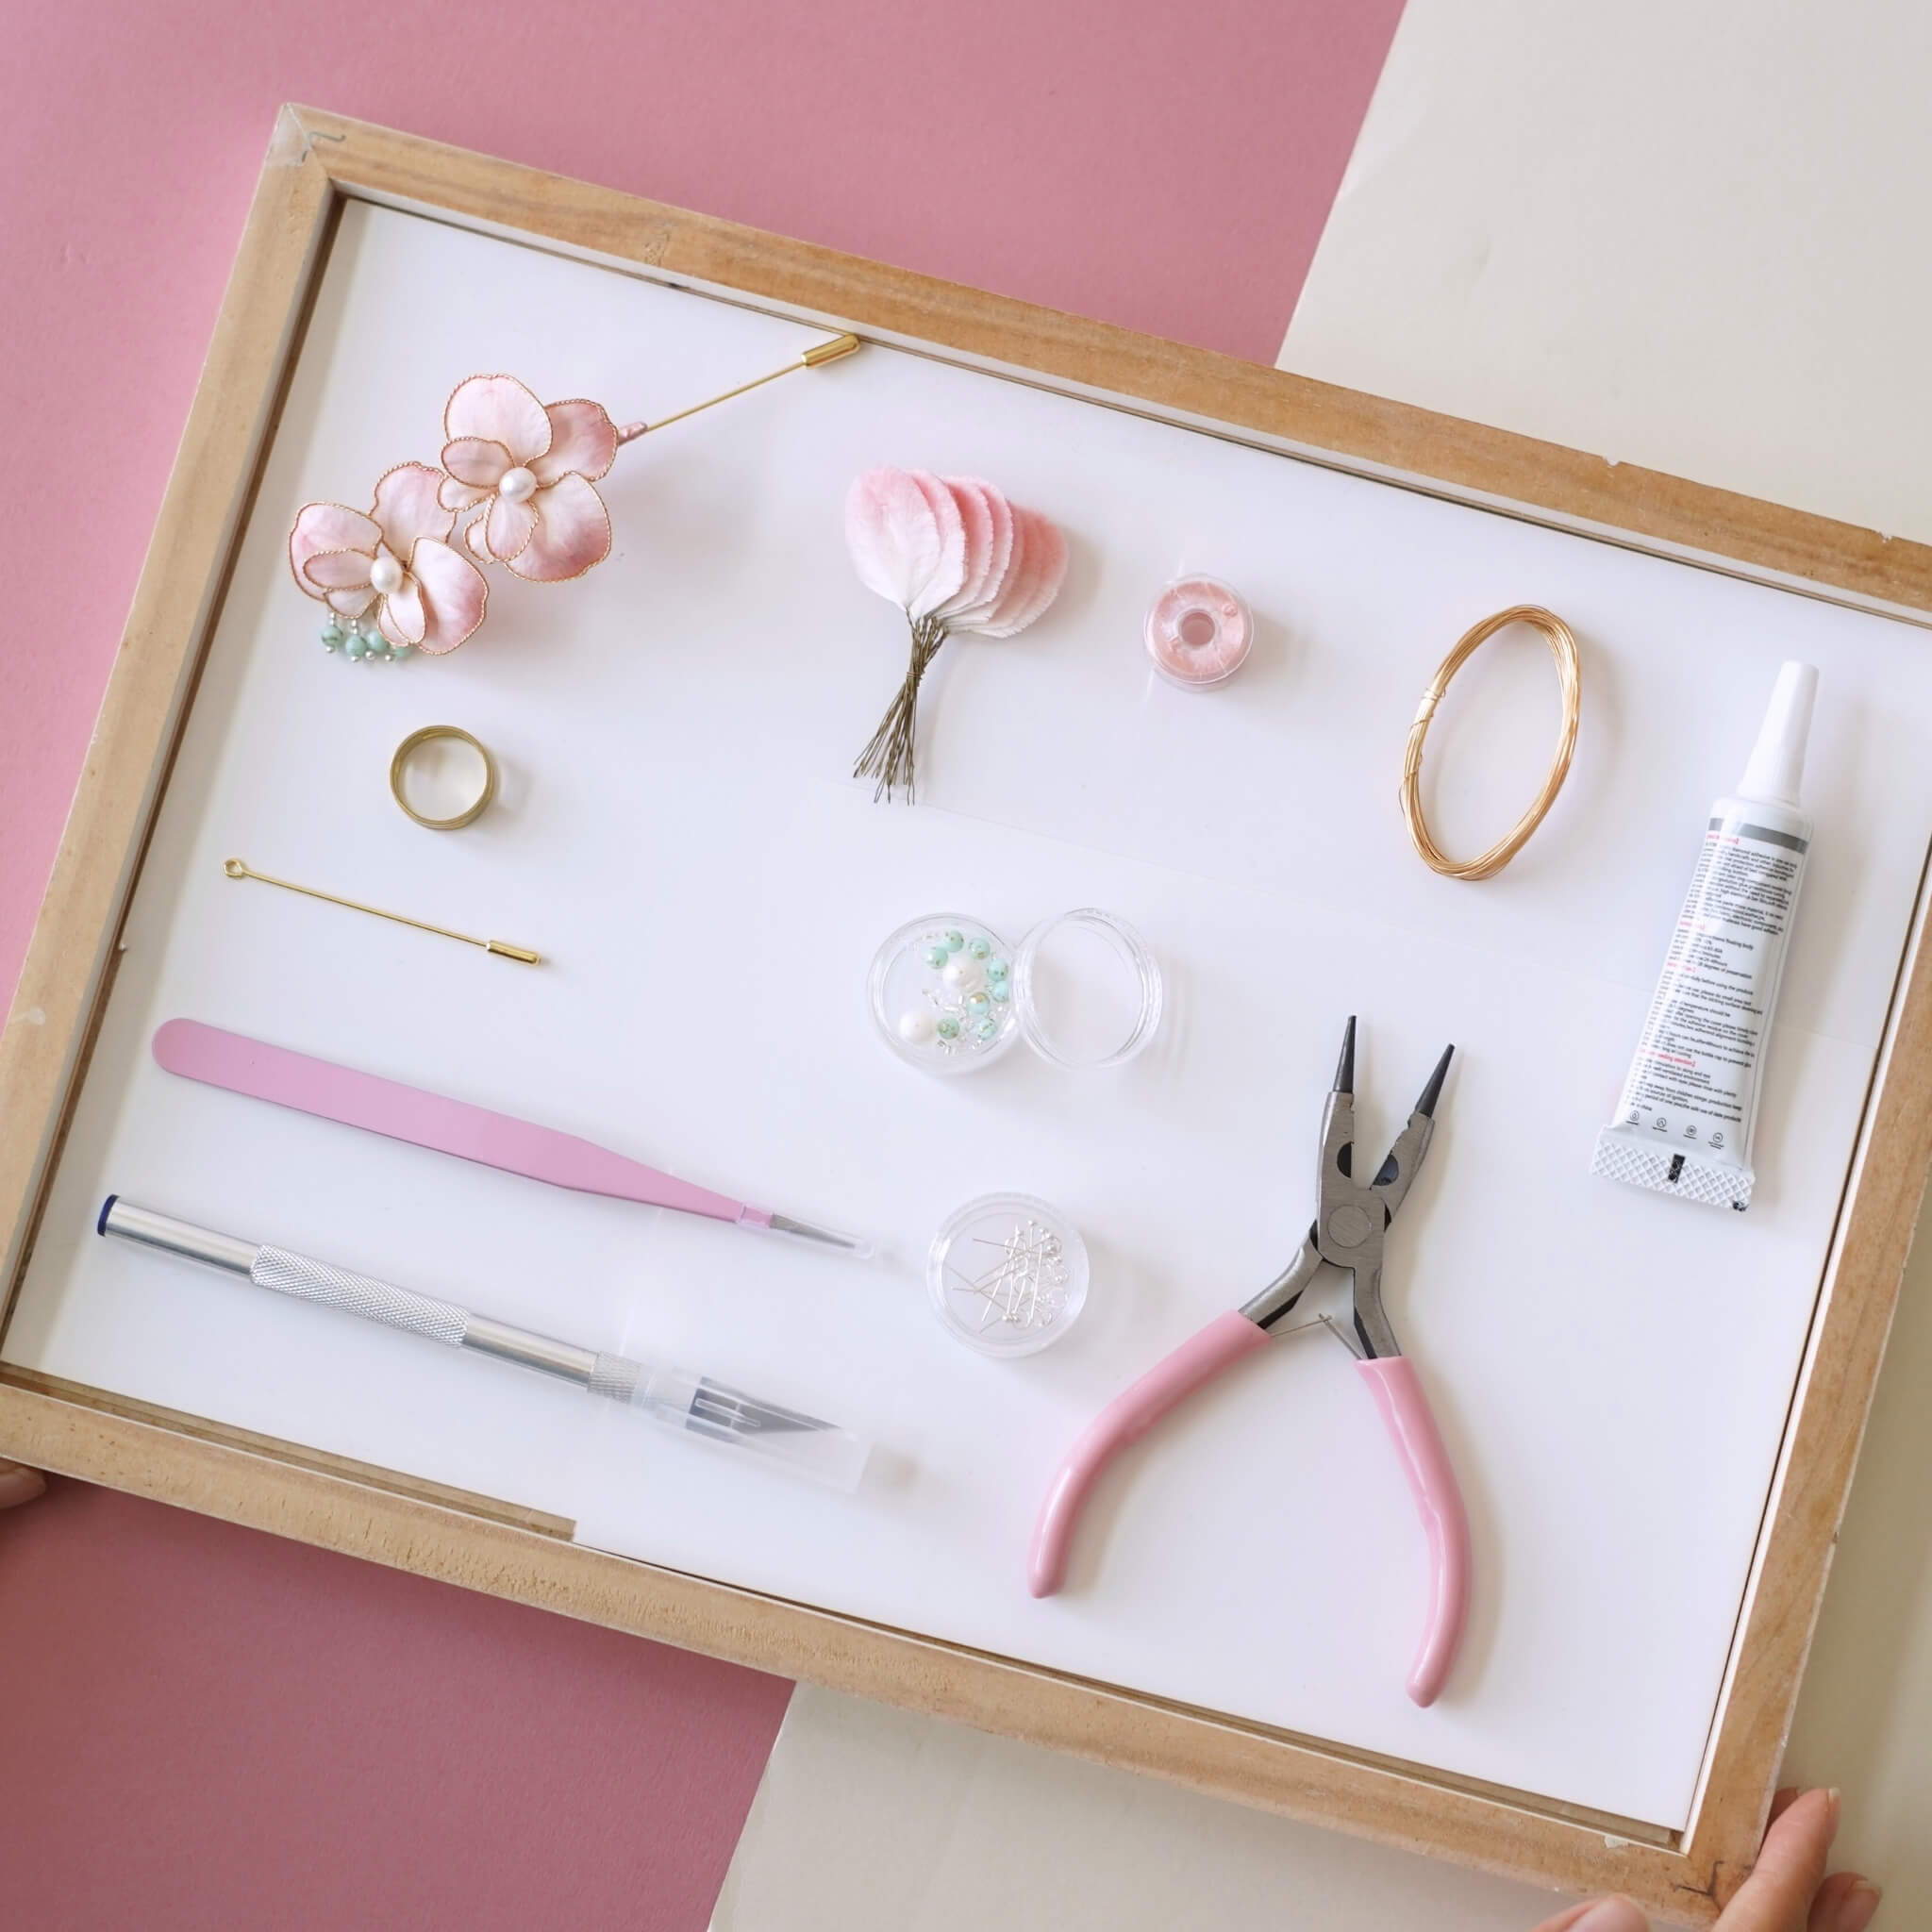
In this easy DIY tutorial post, we’ll show you how to use pre-shaped silk strips to create delicate flower petals, shape a realistic flower bud, and assemble everything into a stunning handmade bloom.
Step 1: Making the Silk-Wrapped Petals 00:00~09:03
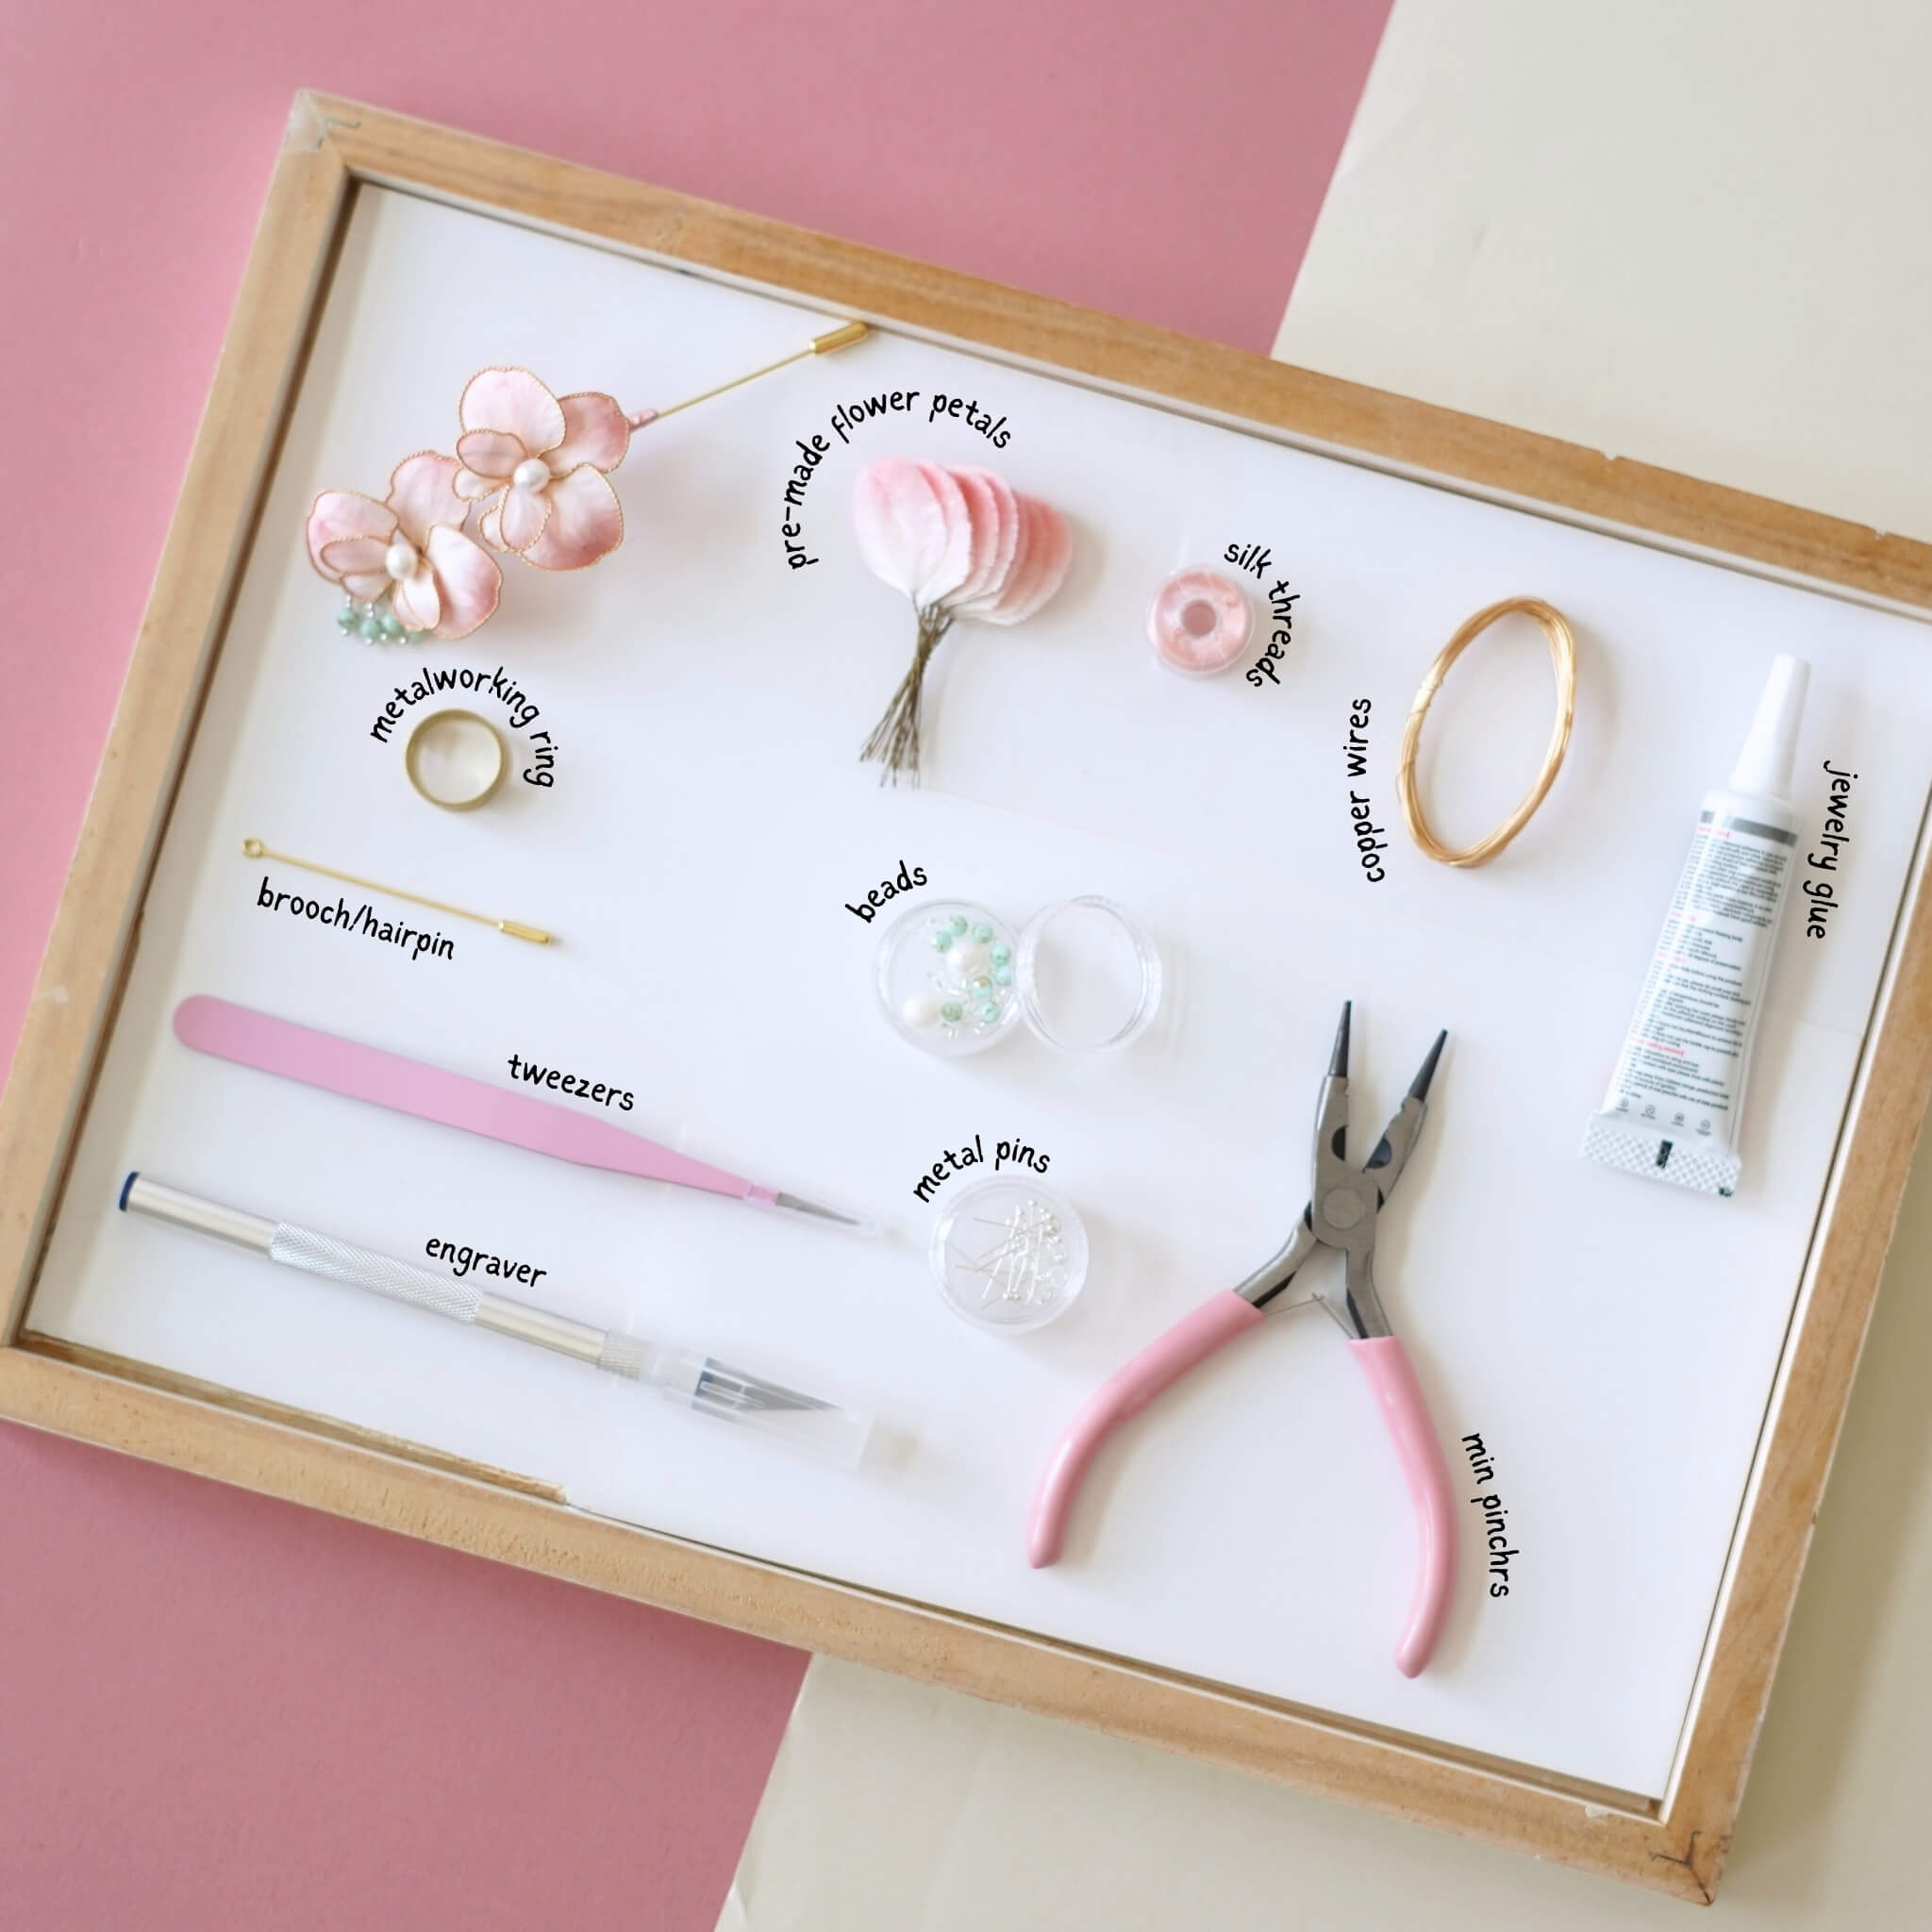
Use a flat iron to press the pre-made silk strips until smooth. Cut a piece of copper wire, about ten to fifteen centimeters long, fold it in half, and twist the ends tightly together. Use a wire twisting board to twist the wire as tightly as possible. Then press the wire into shape using a mold. Adjust the wire with tweezers to ensure there are no gaps between the wire and the mold. Once it's shaped, remove it from the mold. Repeat this process for the rest of the petal shapes. We need to make a total of two flowers, which means 14 petals.

Apply jewelry glue to the wire, making sure the glue does not go beyond the edge of the wire. Press the wire onto the silk strip and use the flat iron to clamp them together, ensuring there are no gaps between the wire and the silk. For smaller petal shapes, you can glue two pieces onto one strip. Trim off the excess silk strip beyond the wire. For areas the scissors can’t reach, use a craft knife. If the edges are fuzzy, you can use a lighter to lightly burn them. However, the flame may leave some black marks — avoid this method if that’s a concern. You'll need 14 petals in total to make the two flowers. Each silk strip needs to be pressed with a flat iron to create a slight curve.


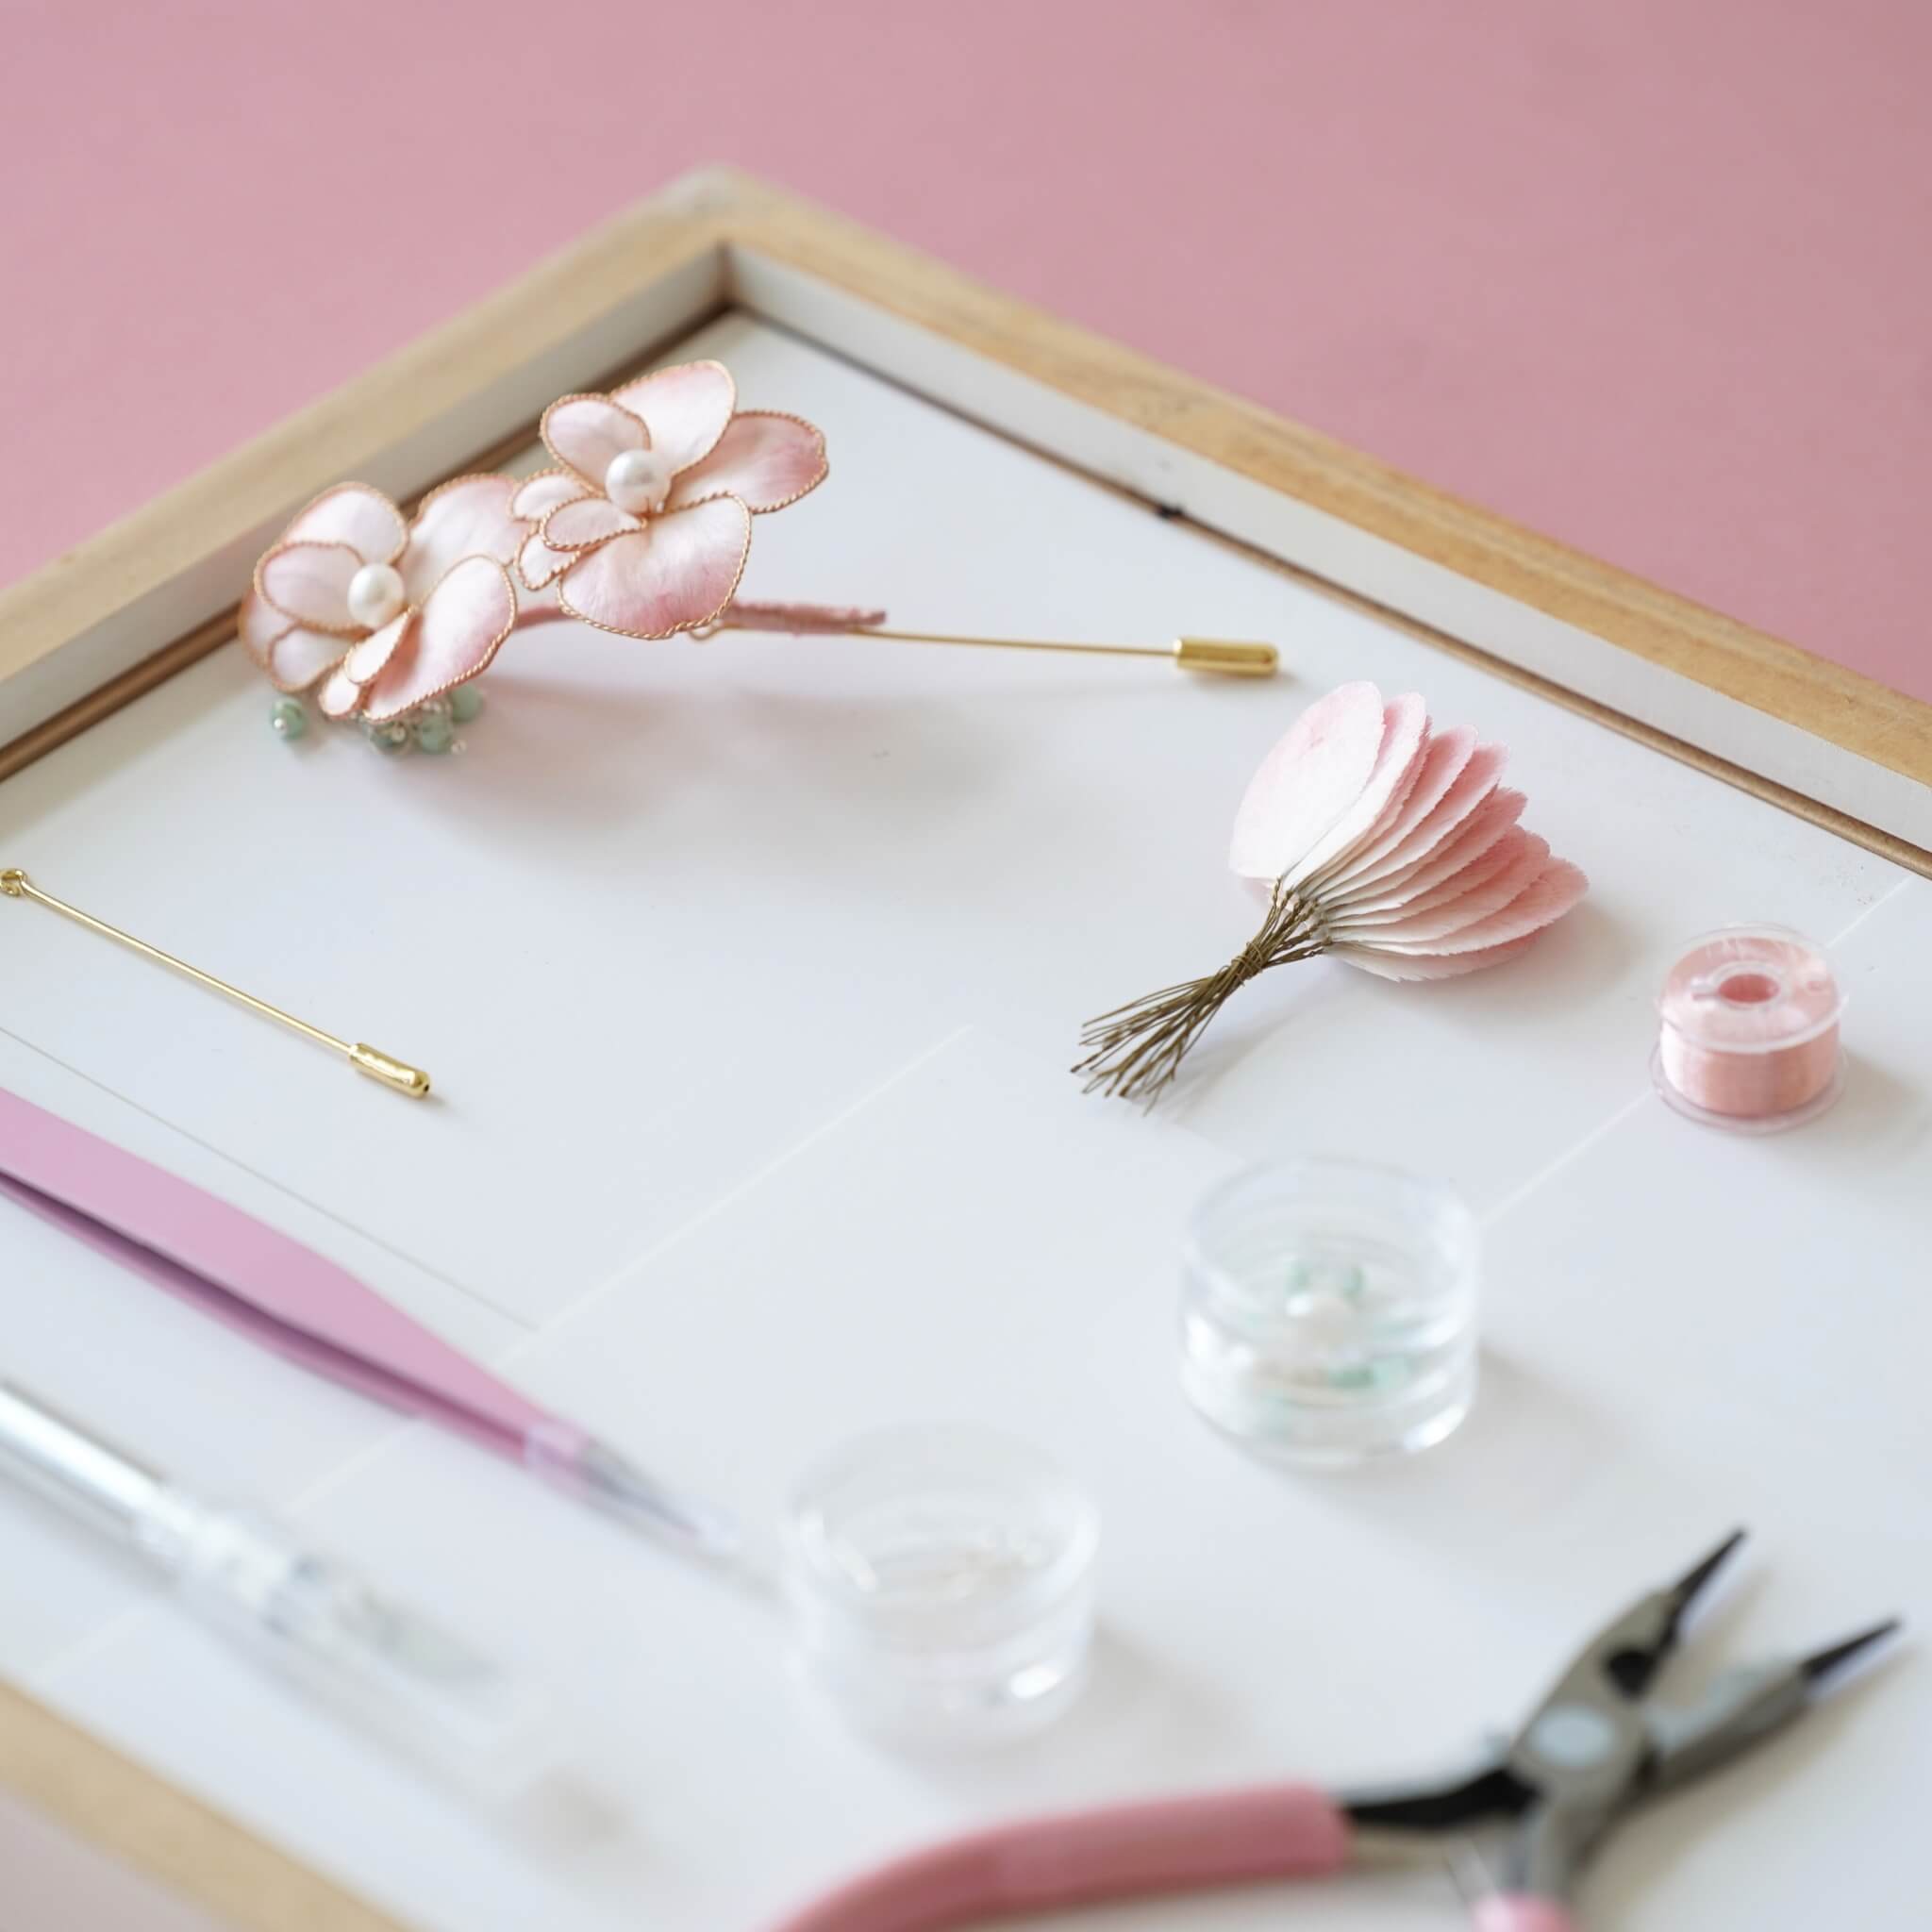
Step 2: Making the Tassels and Assembling the Petals 09:04~end
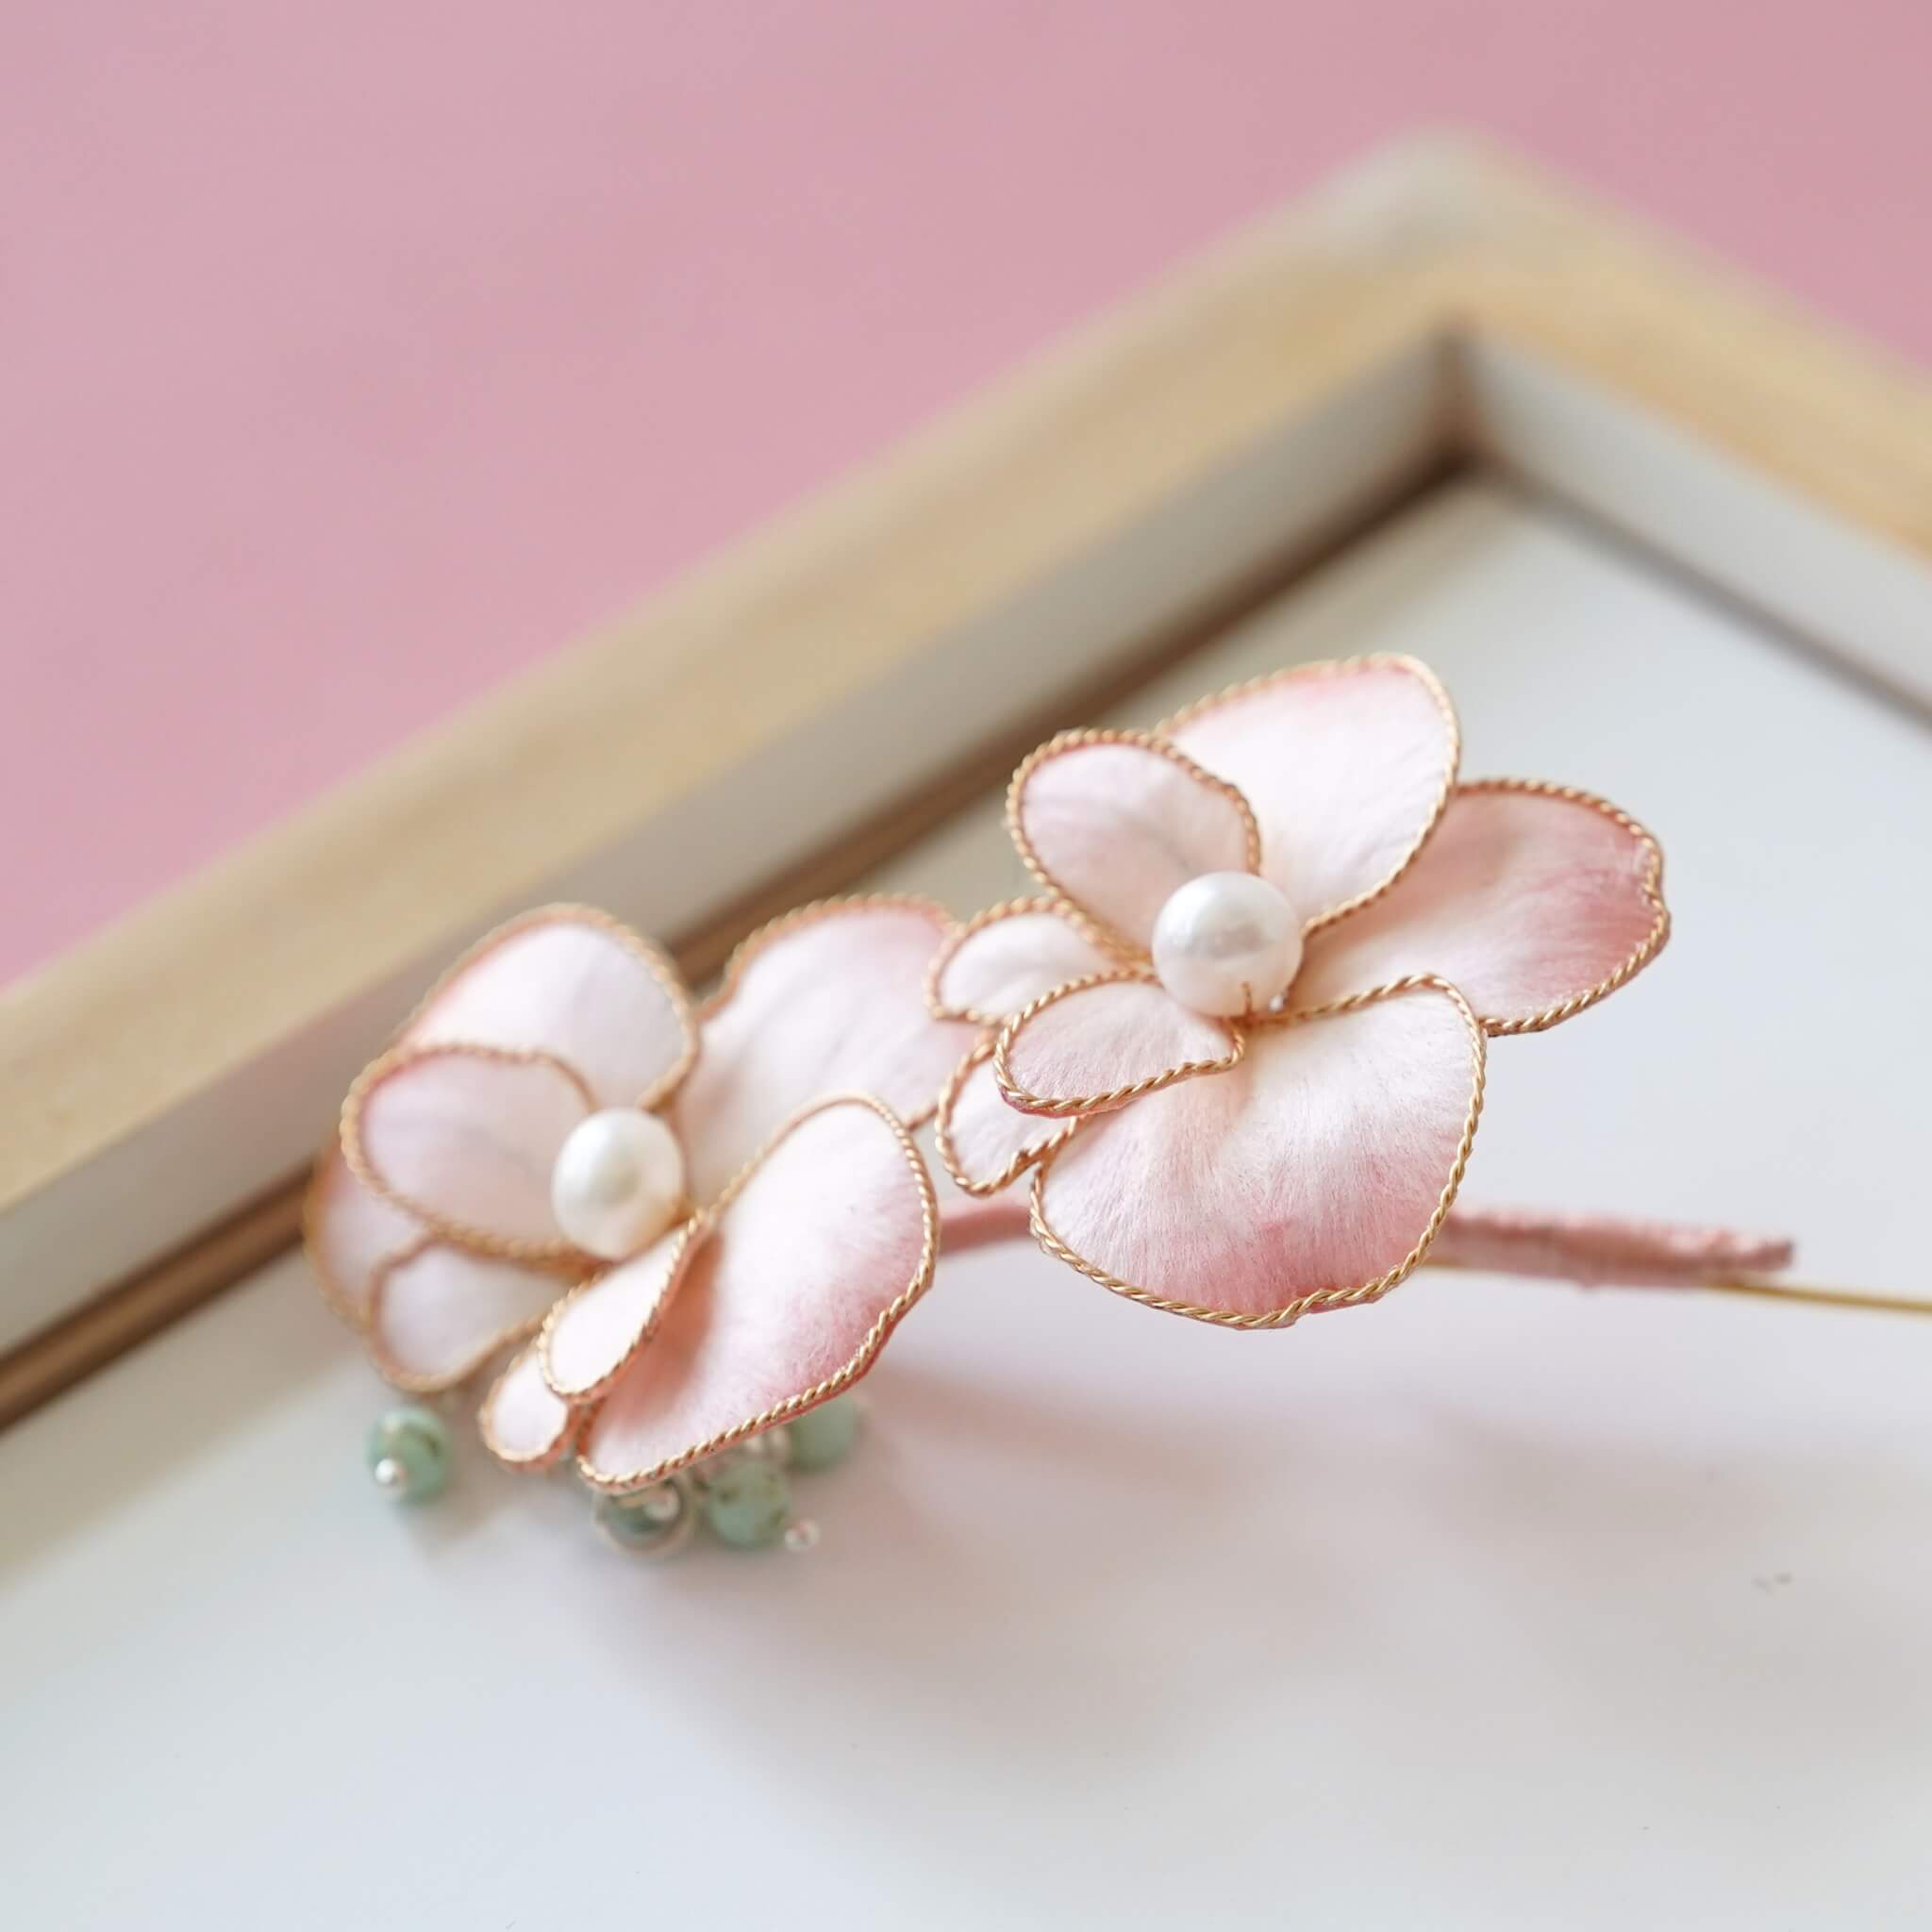
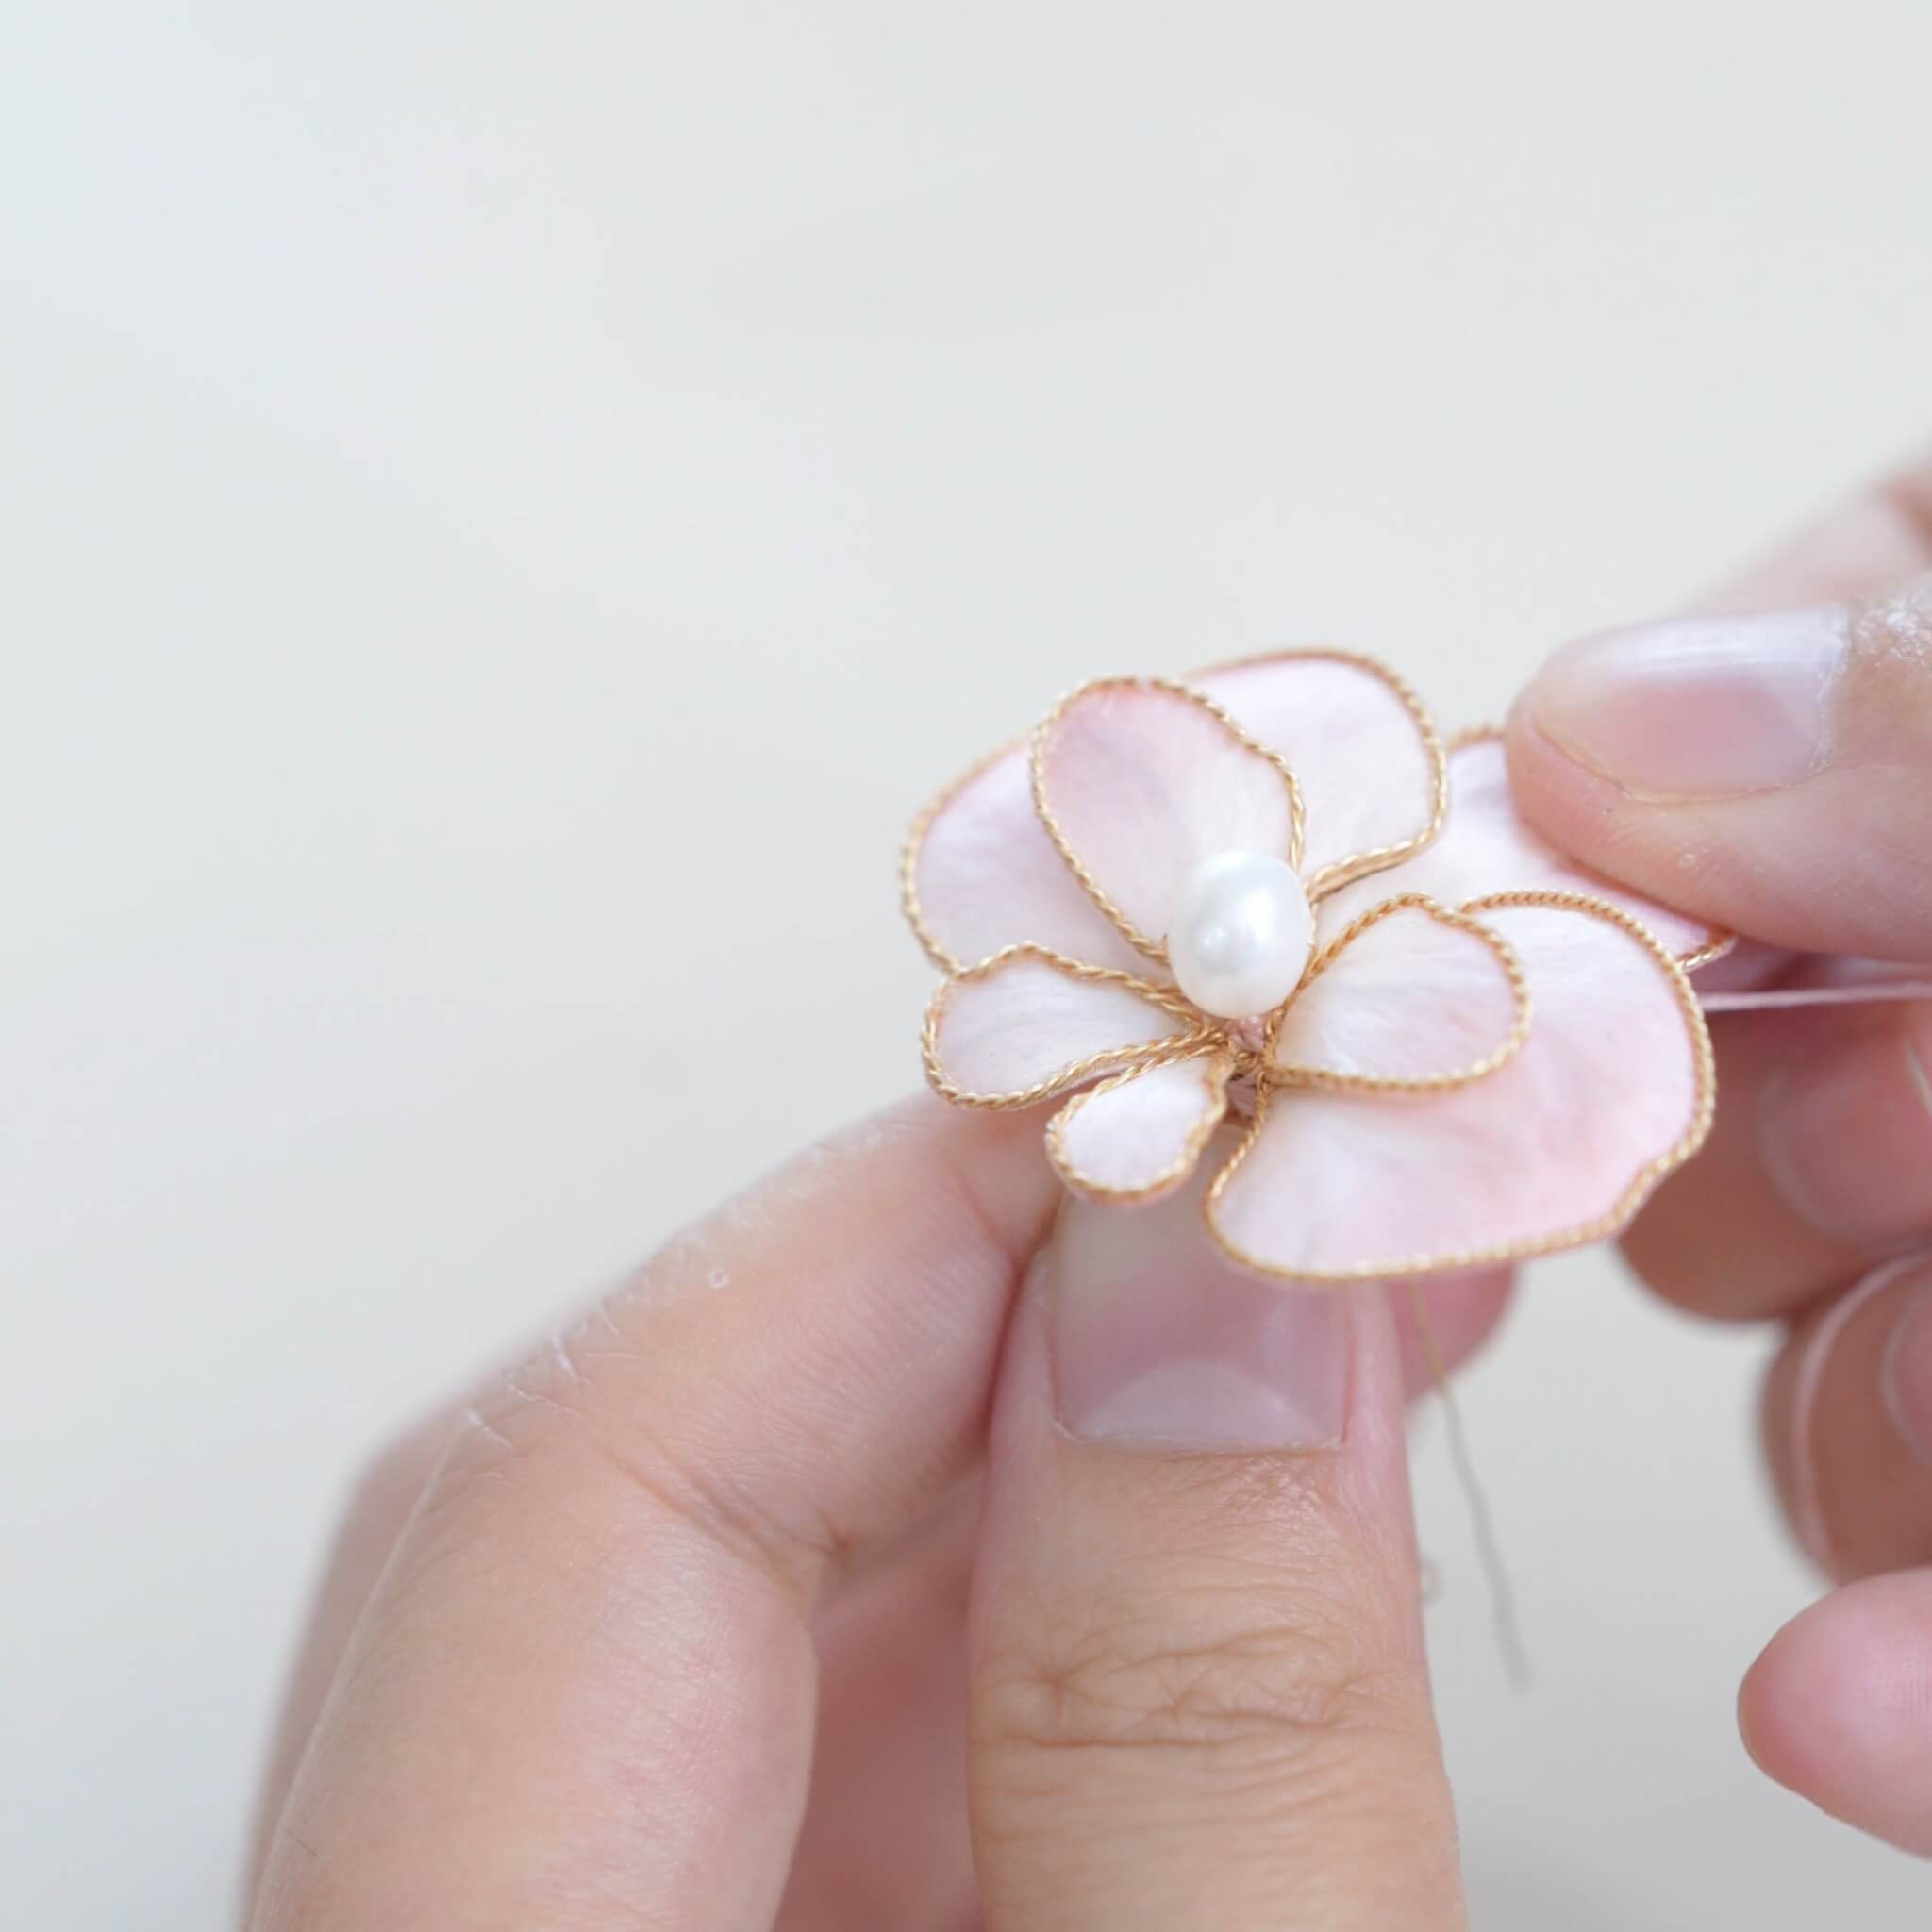
Take a pearl and thread it onto a piece of copper wire, then twist the wire tightly to secure the pearl. Next, begin assembling the first flower. Start by securing the silk thread and copper wire together. For the first layer, attach two medium-sized petals. For the second layer, attach two of the largest petals. Behind the large petals, add one No. 2 petal. The smallest petal should go at the very bottom. The petals on the left and right should be symmetrical—adjust their positions as you go. Wrap the entire copper wire with silk thread, making sure there are no gaps while wrapping. Once you’ve wrapped down to the base, tie a knot to finish and cut off the excess thread.


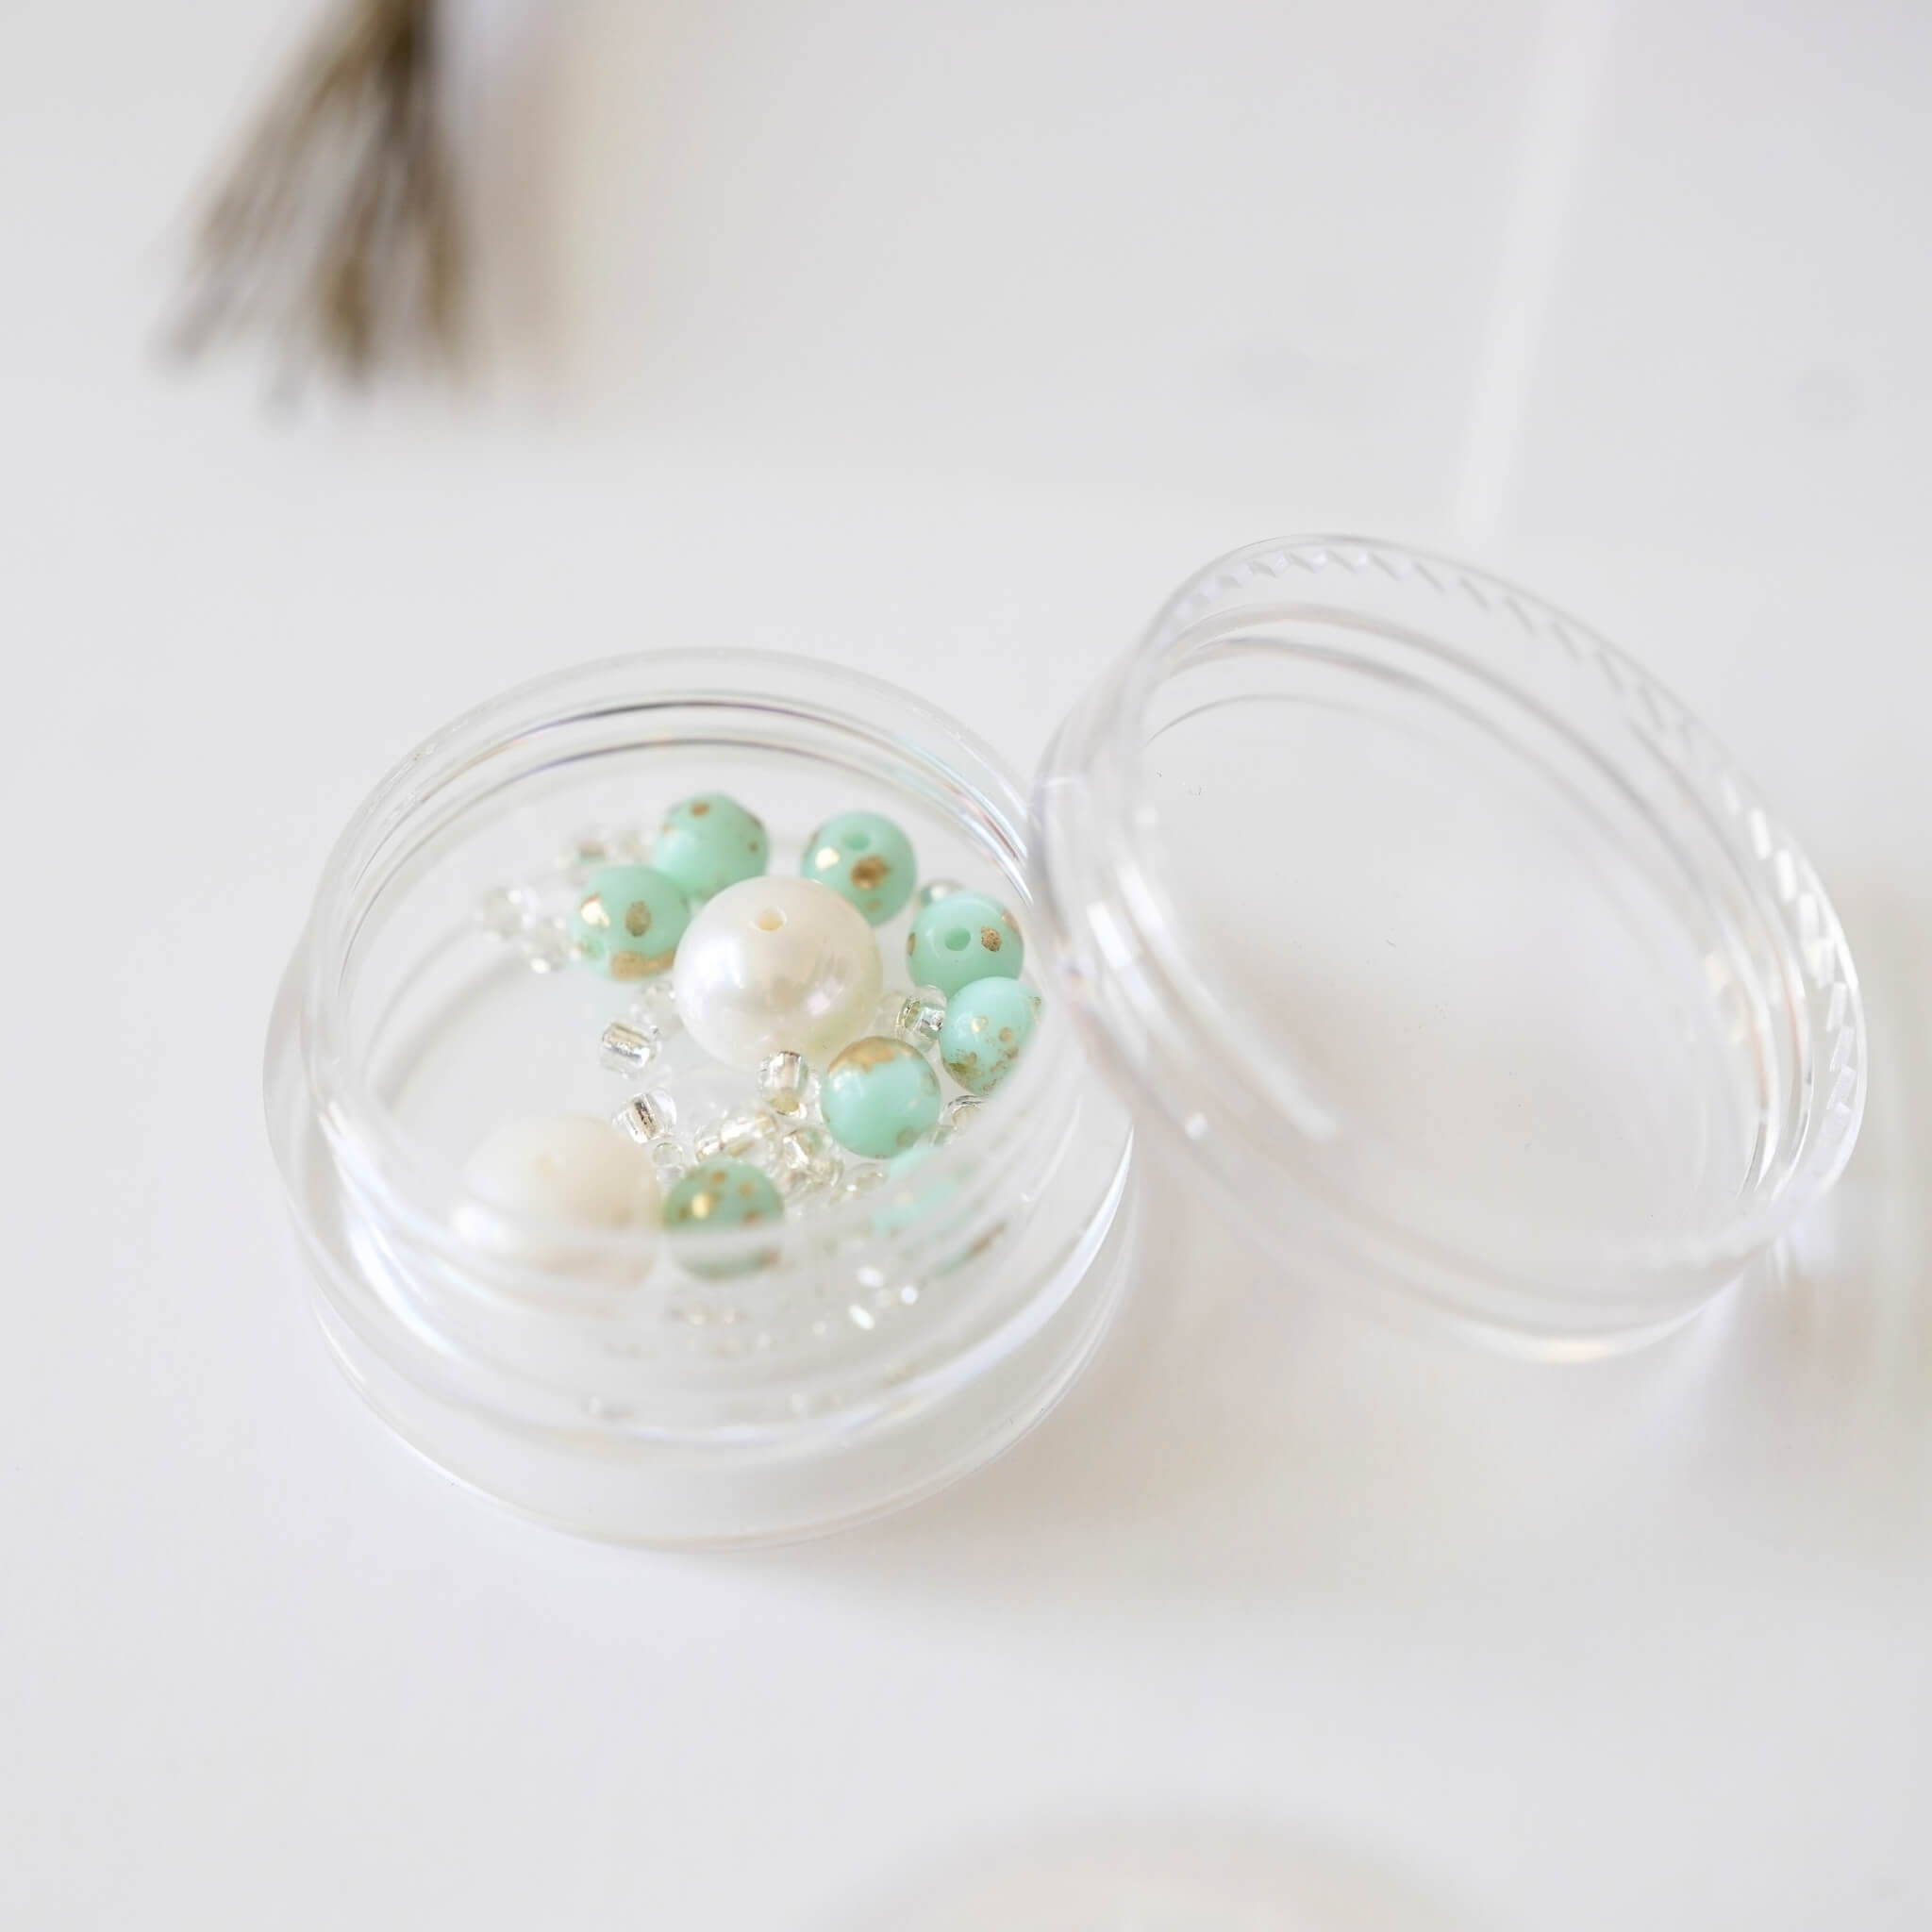
Prepare four light green beads. Thread each one onto a headpin, followed by three small transparent beads. Use pliers to form a loop with the remaining headpin wire to prevent the beads from falling off. You’ll need a total of four tassel pendants. Prepare four pieces of copper wire, each about 8–10 cm long. Fold each one in half and twist tightly, leaving a small loop at the top. You’ll need four of these.

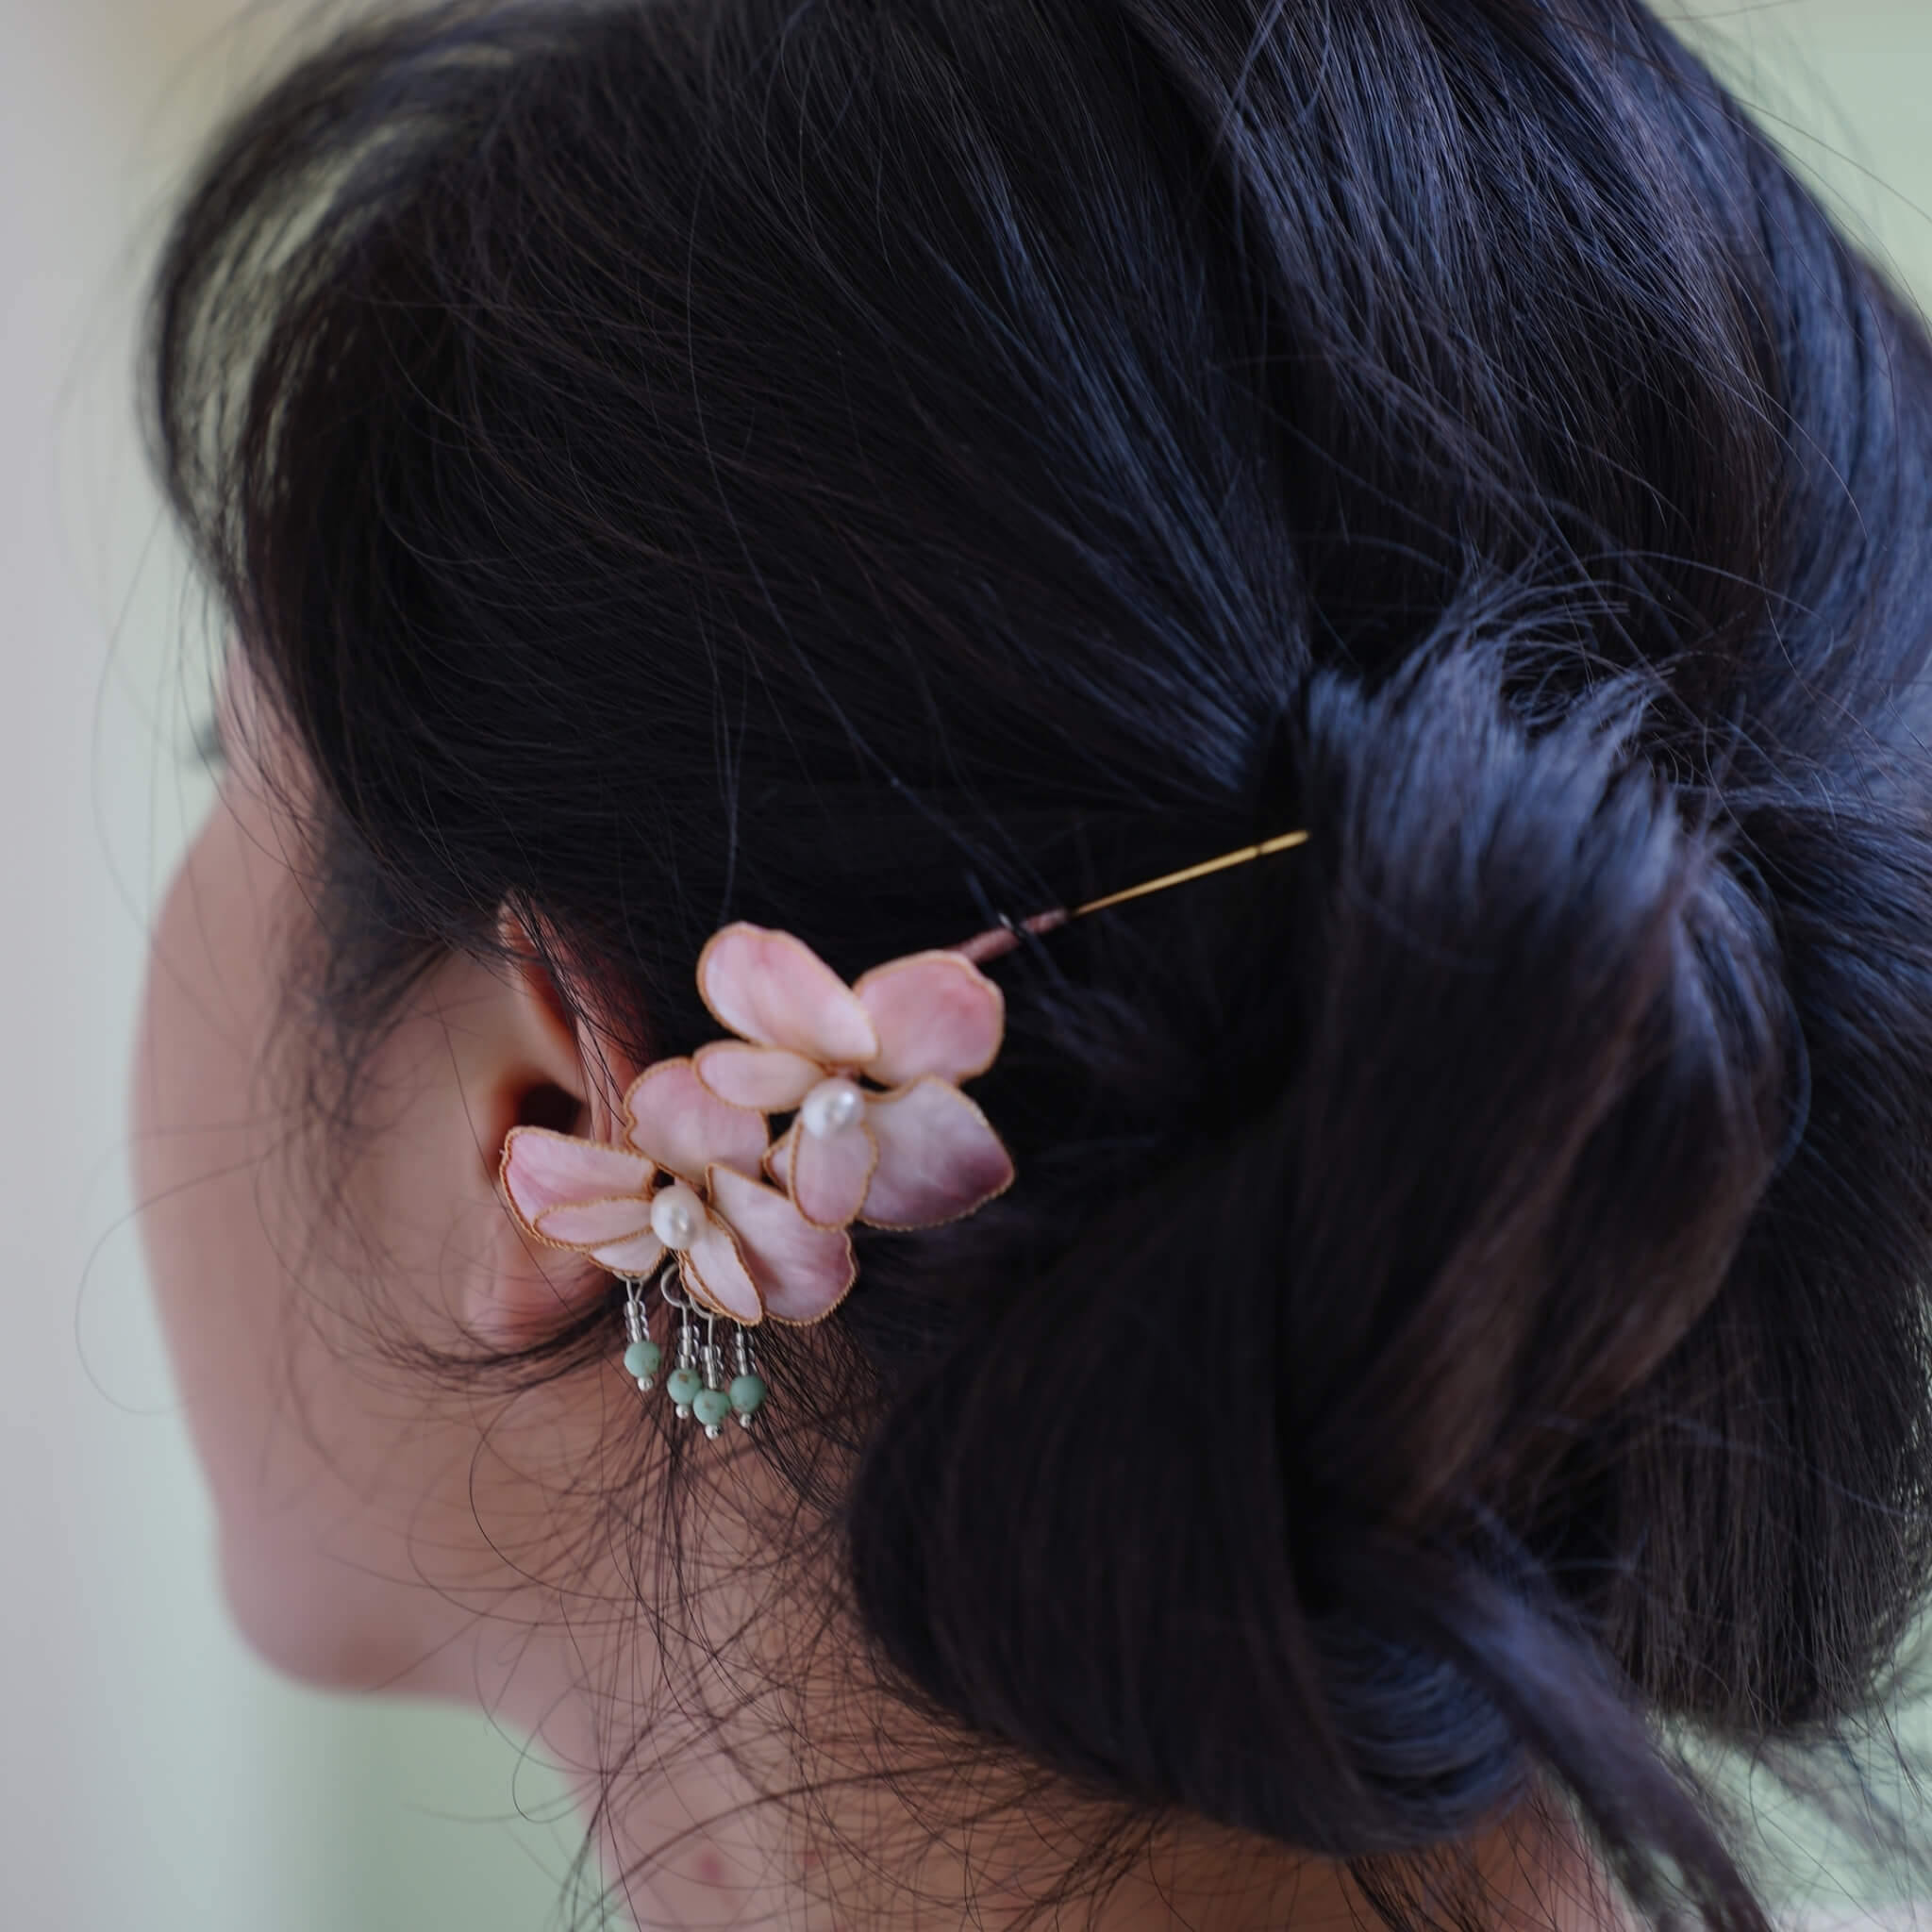
Now assemble the flower and the copper wire pieces. Hide the wire behind the flower—don’t let too much show. Wrap all the copper wire with silk thread. Insert the pendant through the small loop, then fix a ring tool to the copper wire on the back of the flower. Use the gap in the ring tool to twist the jump ring tightly closed. Make sure the jump ring is closed without any gaps, or the pendant may fall off.

You’ll be making two flowers in total. The second flower doesn’t need a pendant. Bend the copper wire on the back of the silk flower to a 90-degree angle. Now assemble the two silk flowers together. Trim any excess wire and fold the wire at the end. Continue wrapping silk thread over the folded wire until it is completely covered.

Take a folded piece of silk thread and continue wrapping around it. Thread the end of the silk through the loop, then pull it out to secure. Cut off any extra thread. Set the flame on a lighter to the lowest setting and gently burn the edges to clean them up. Finally, attach the finished flower to your preferred base. Once everything is secured, your silk butterfly orchid brooch is complete!
If you finished your DIY product, welcome to show your awesome work to us and get coupons for the rest of our DIY kits!
INS@lanseichina
Pinterest@lanseichina


