Wir verwenden Cookies und ähnliche Technologien, um Ihnen die beste Erfahrung auf unserer Website zu bieten. Weitere Informationen finden Sie in unserer Datenschutzerklärung.
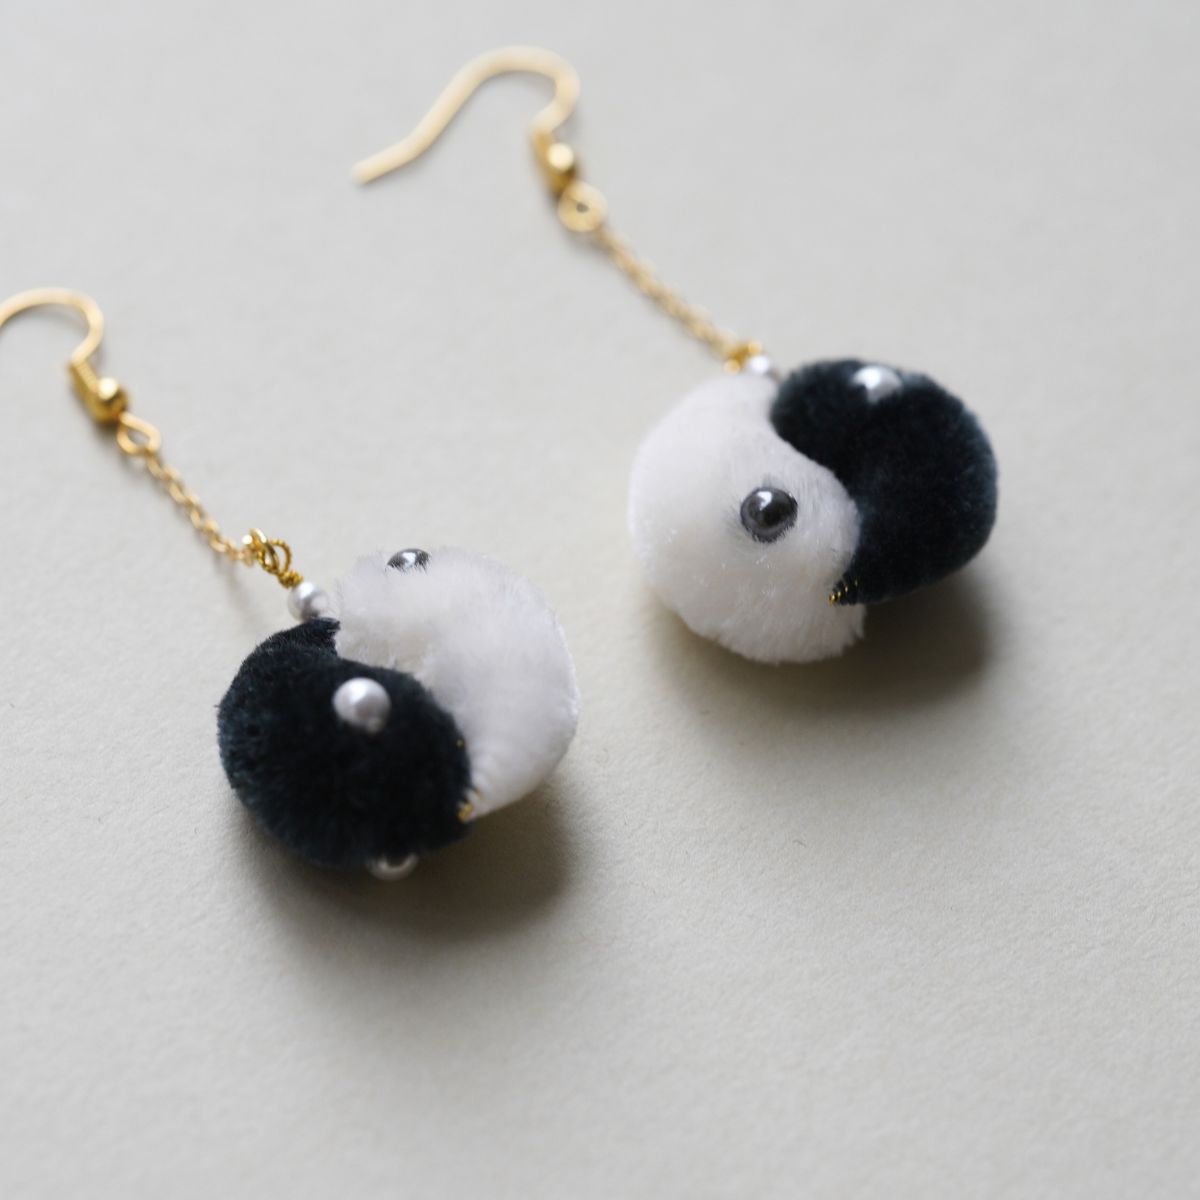
Inspiriert von der ruhigen Schönheit der Herbstchrysanthemen erweckt das Fall For You-Set diese klassische Blume in Seide zum Leben. In diesem Tutorial lernen Sie, wie Sie Ihre eigenen zarten Chrysanthemen-Ohrringe herstellen — eine sanfte und meditative Art, die Jahreszeit willkommen zu heißen.
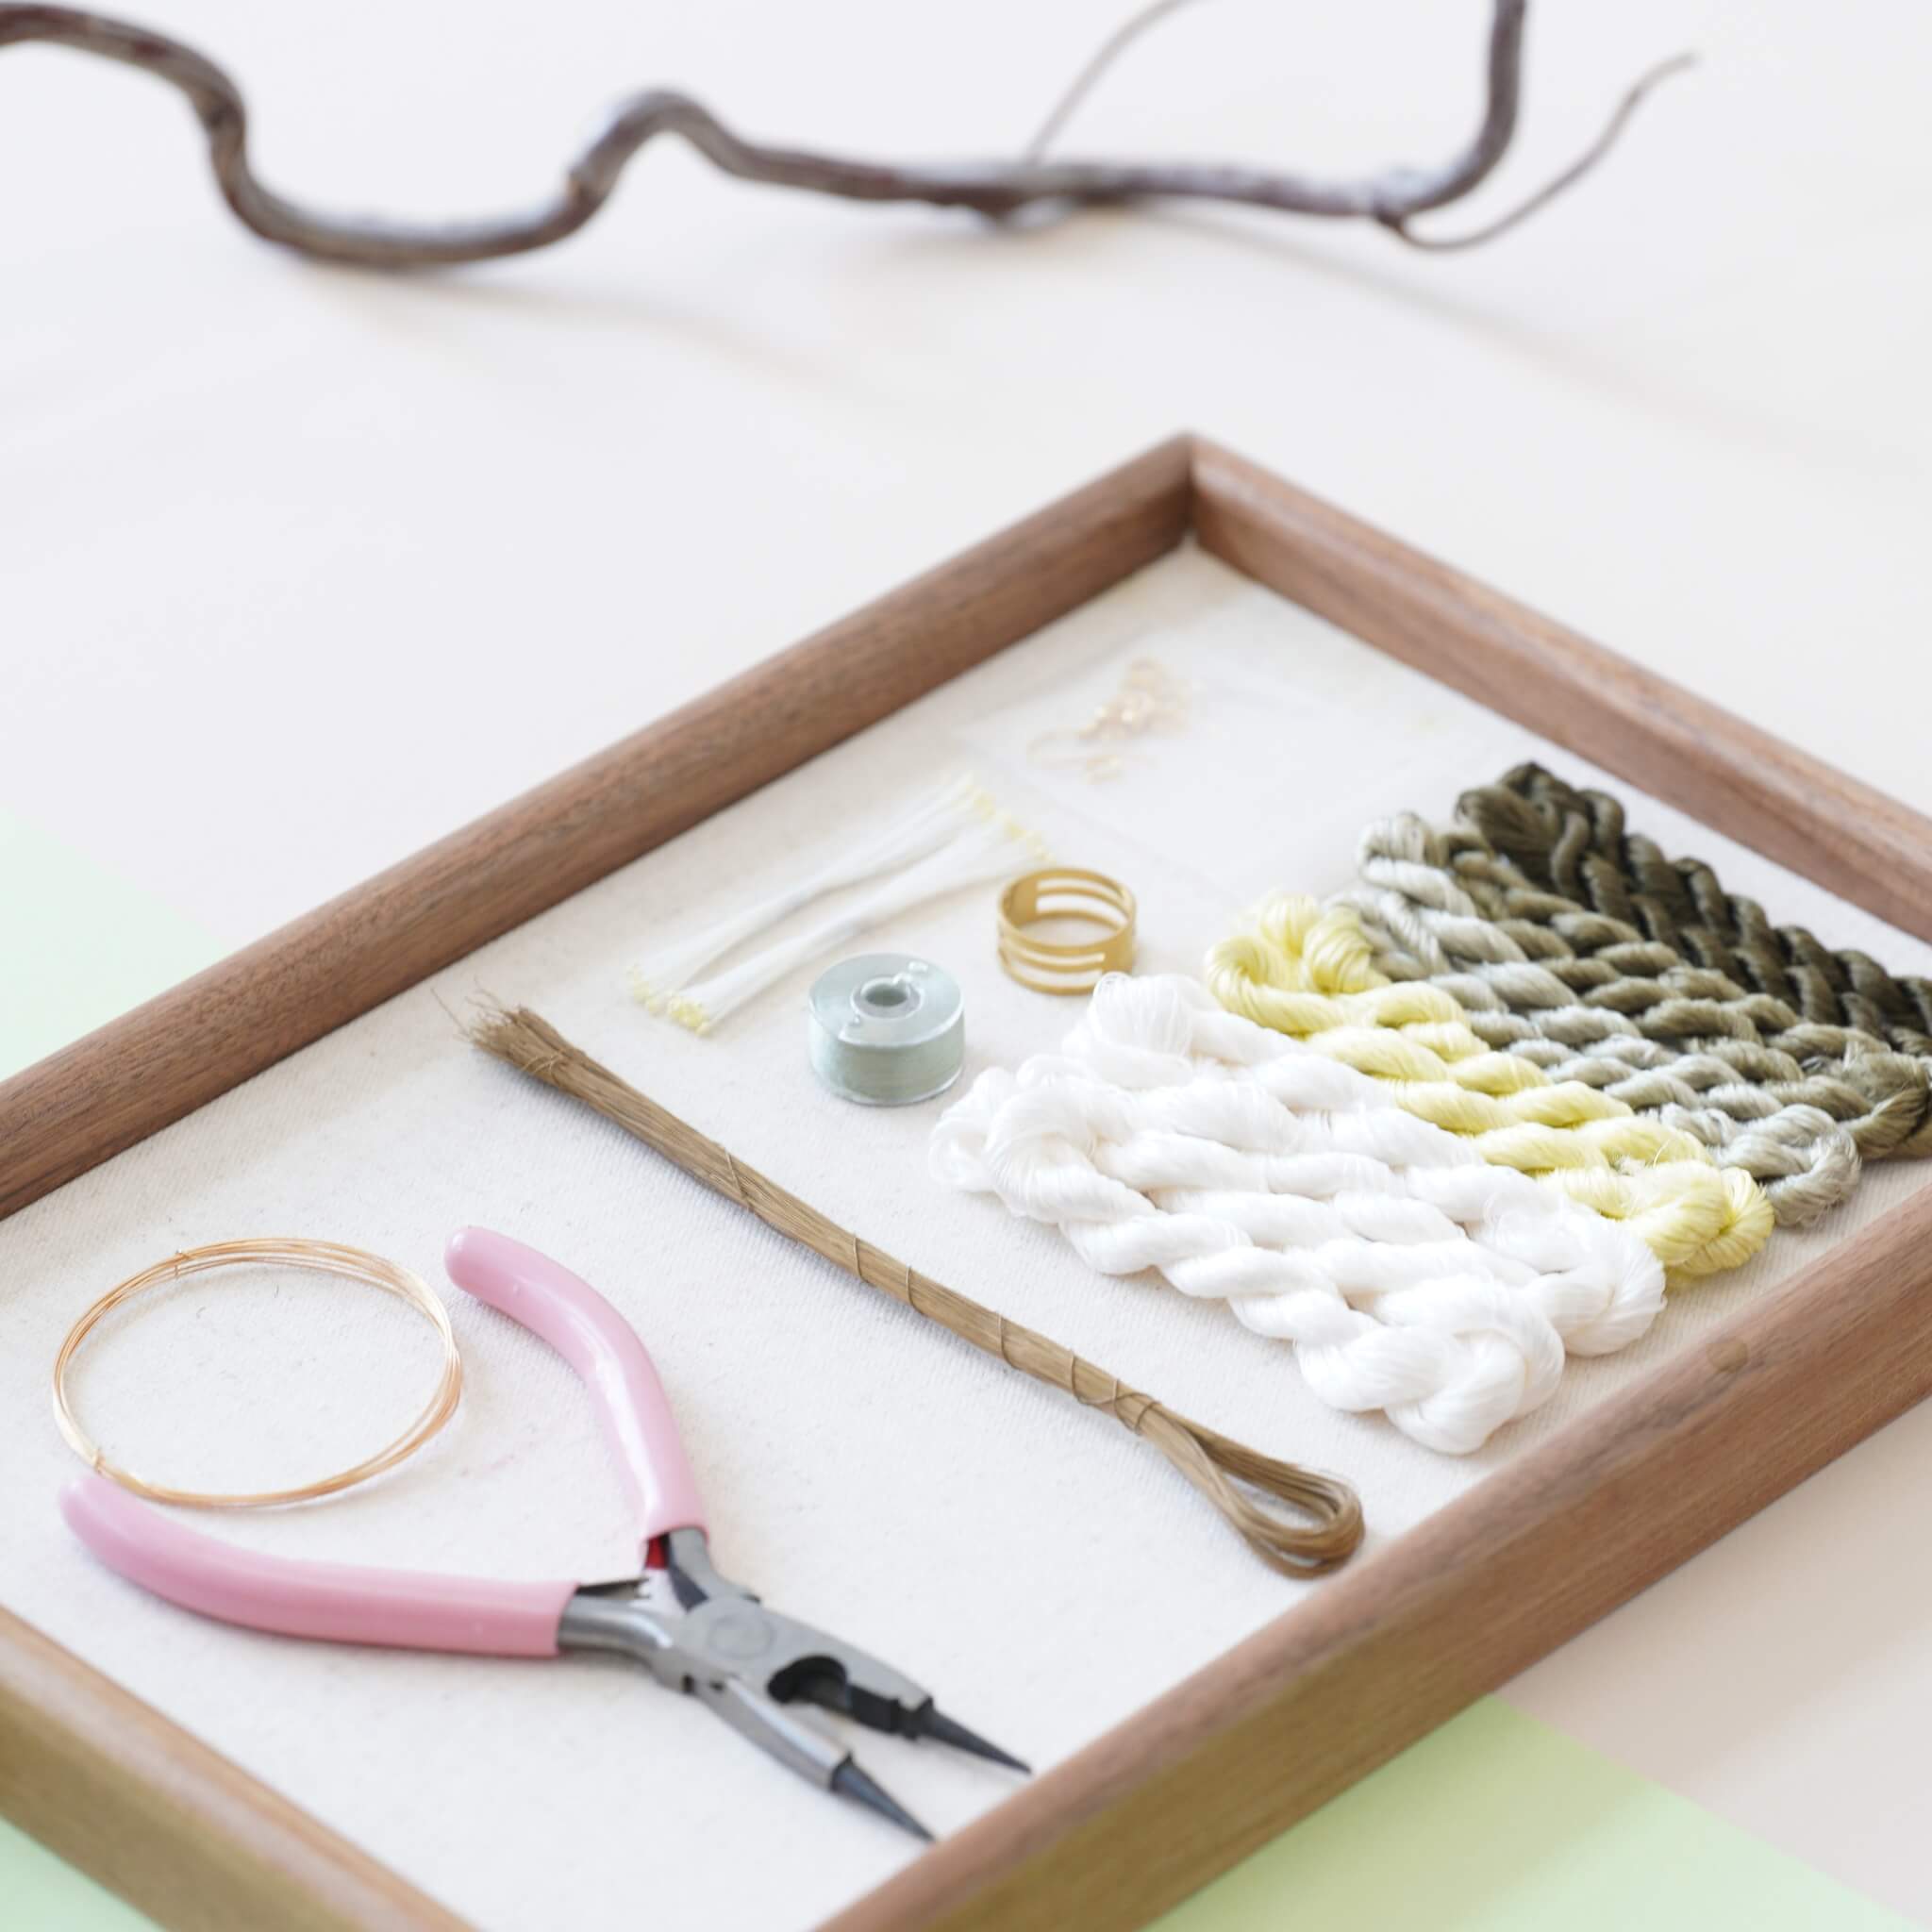
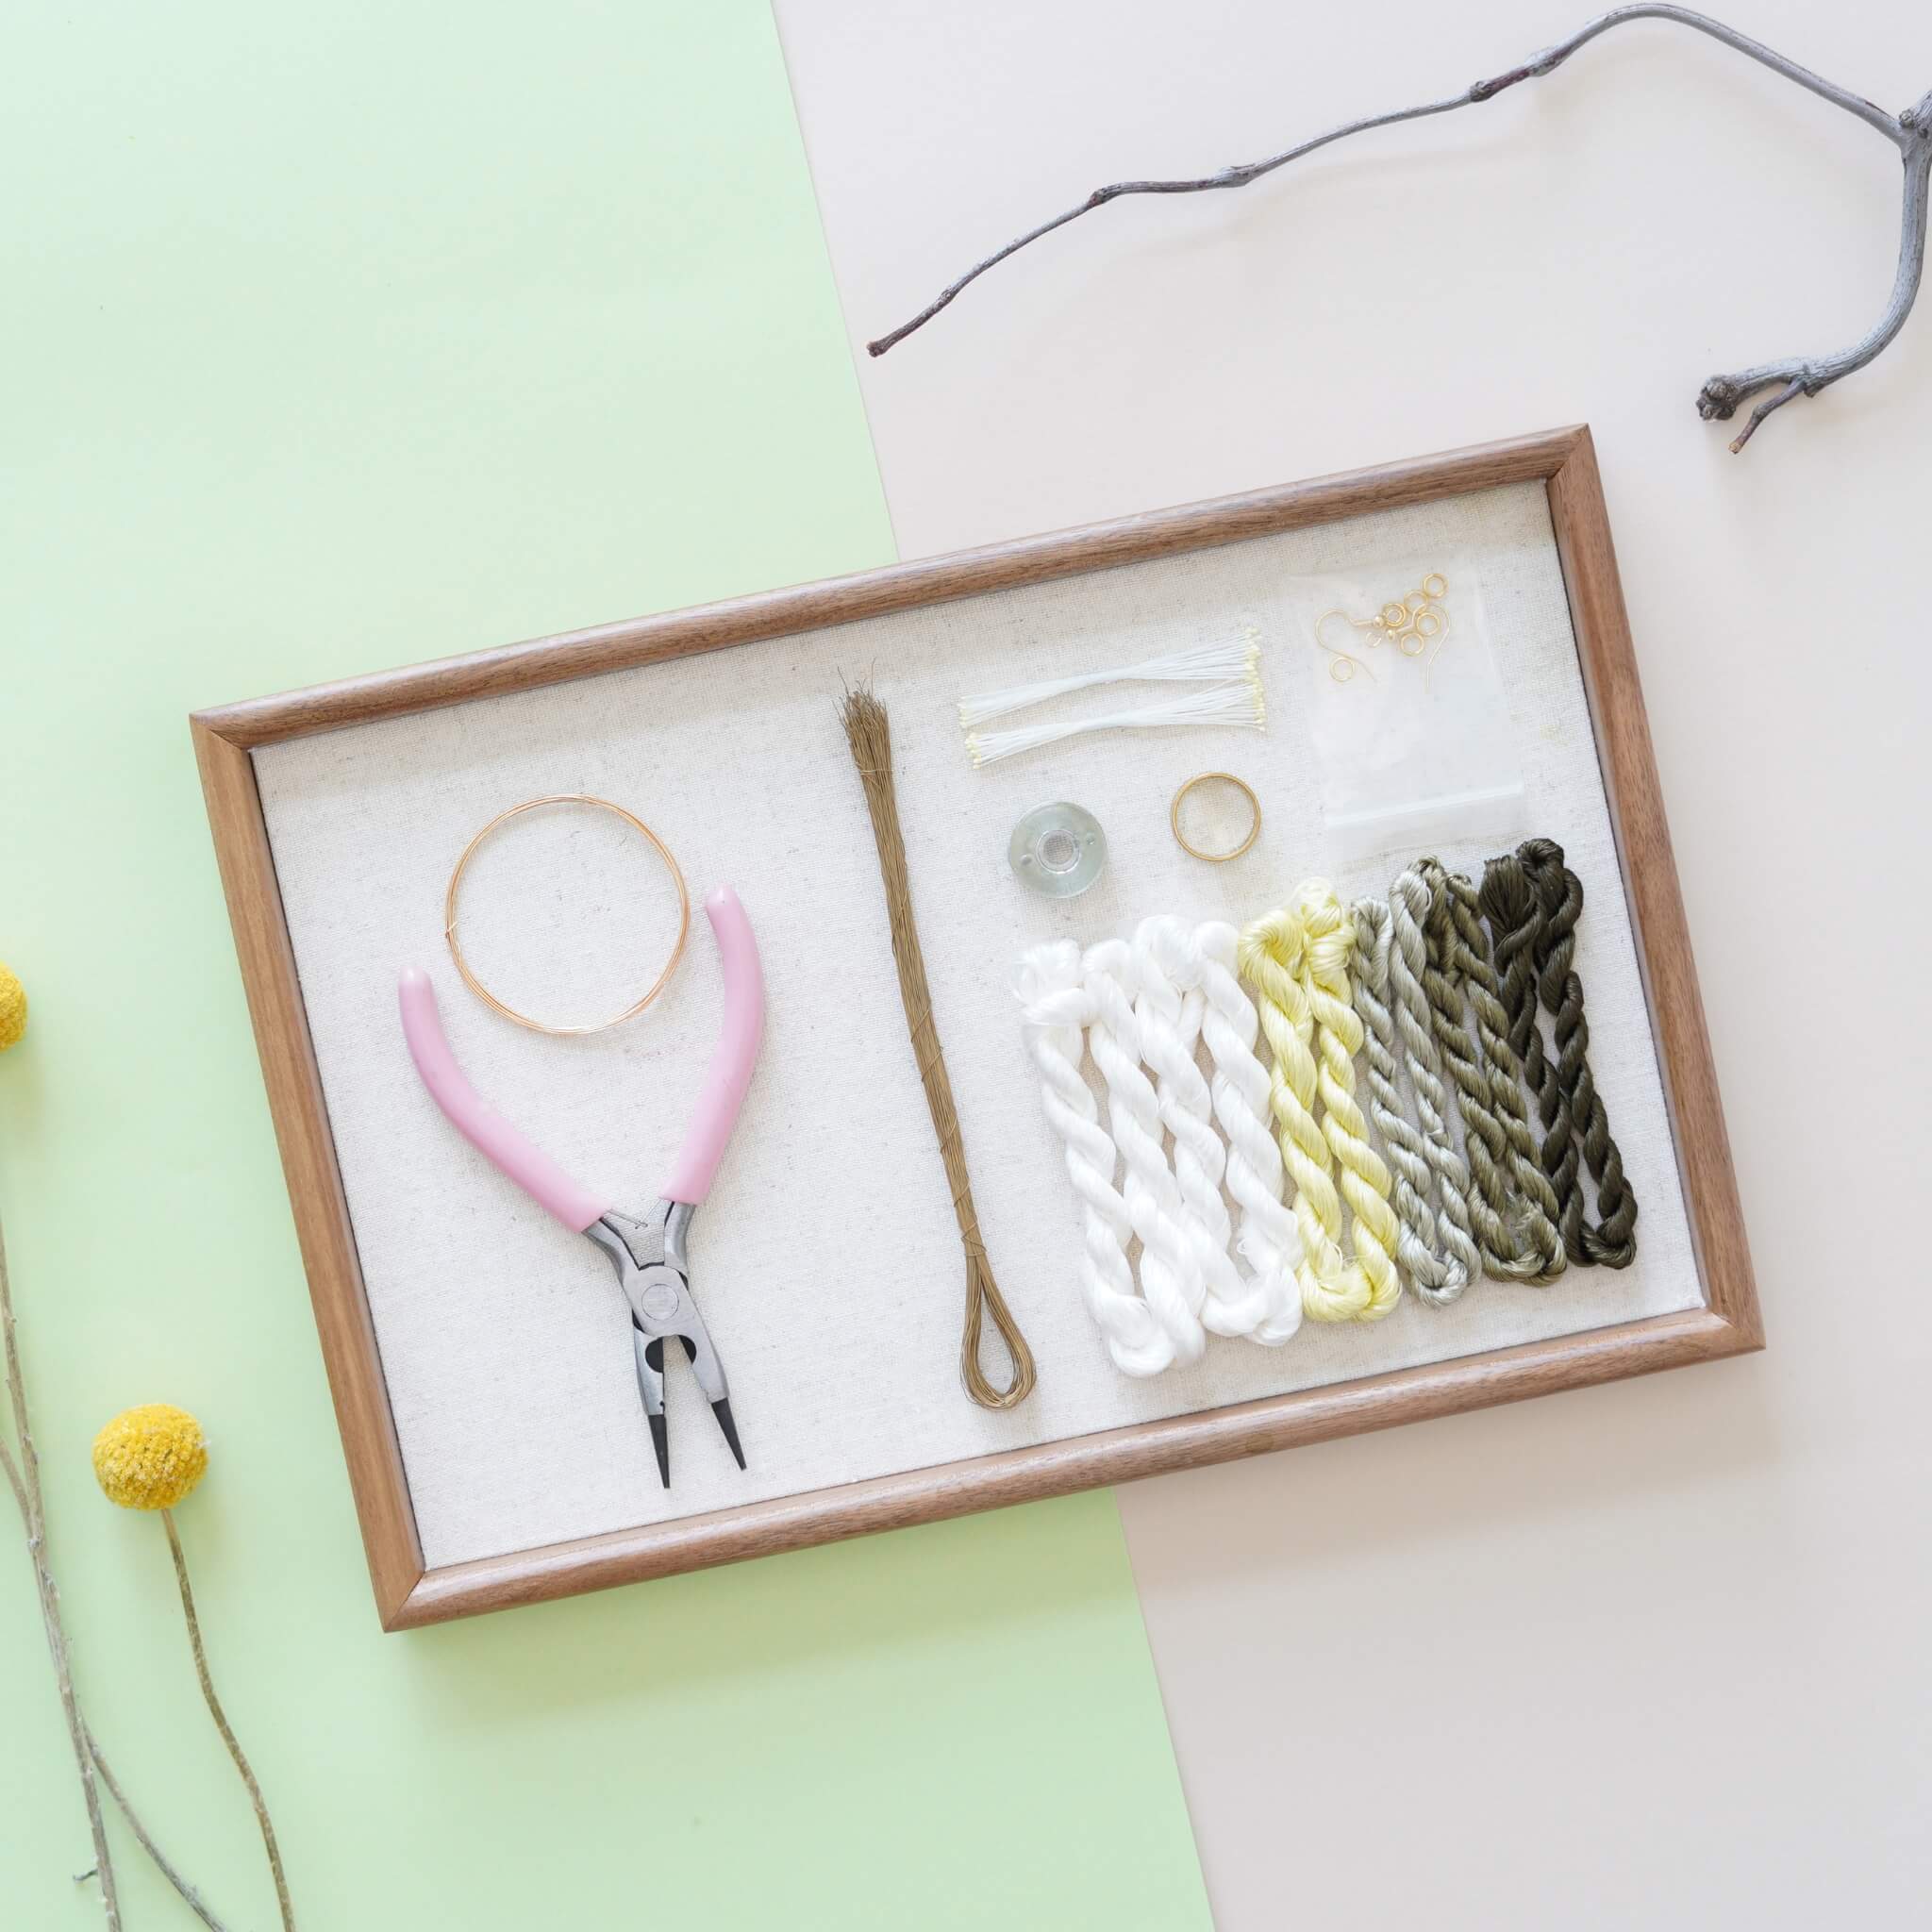
Vorbereitung: Was Sie benötigen
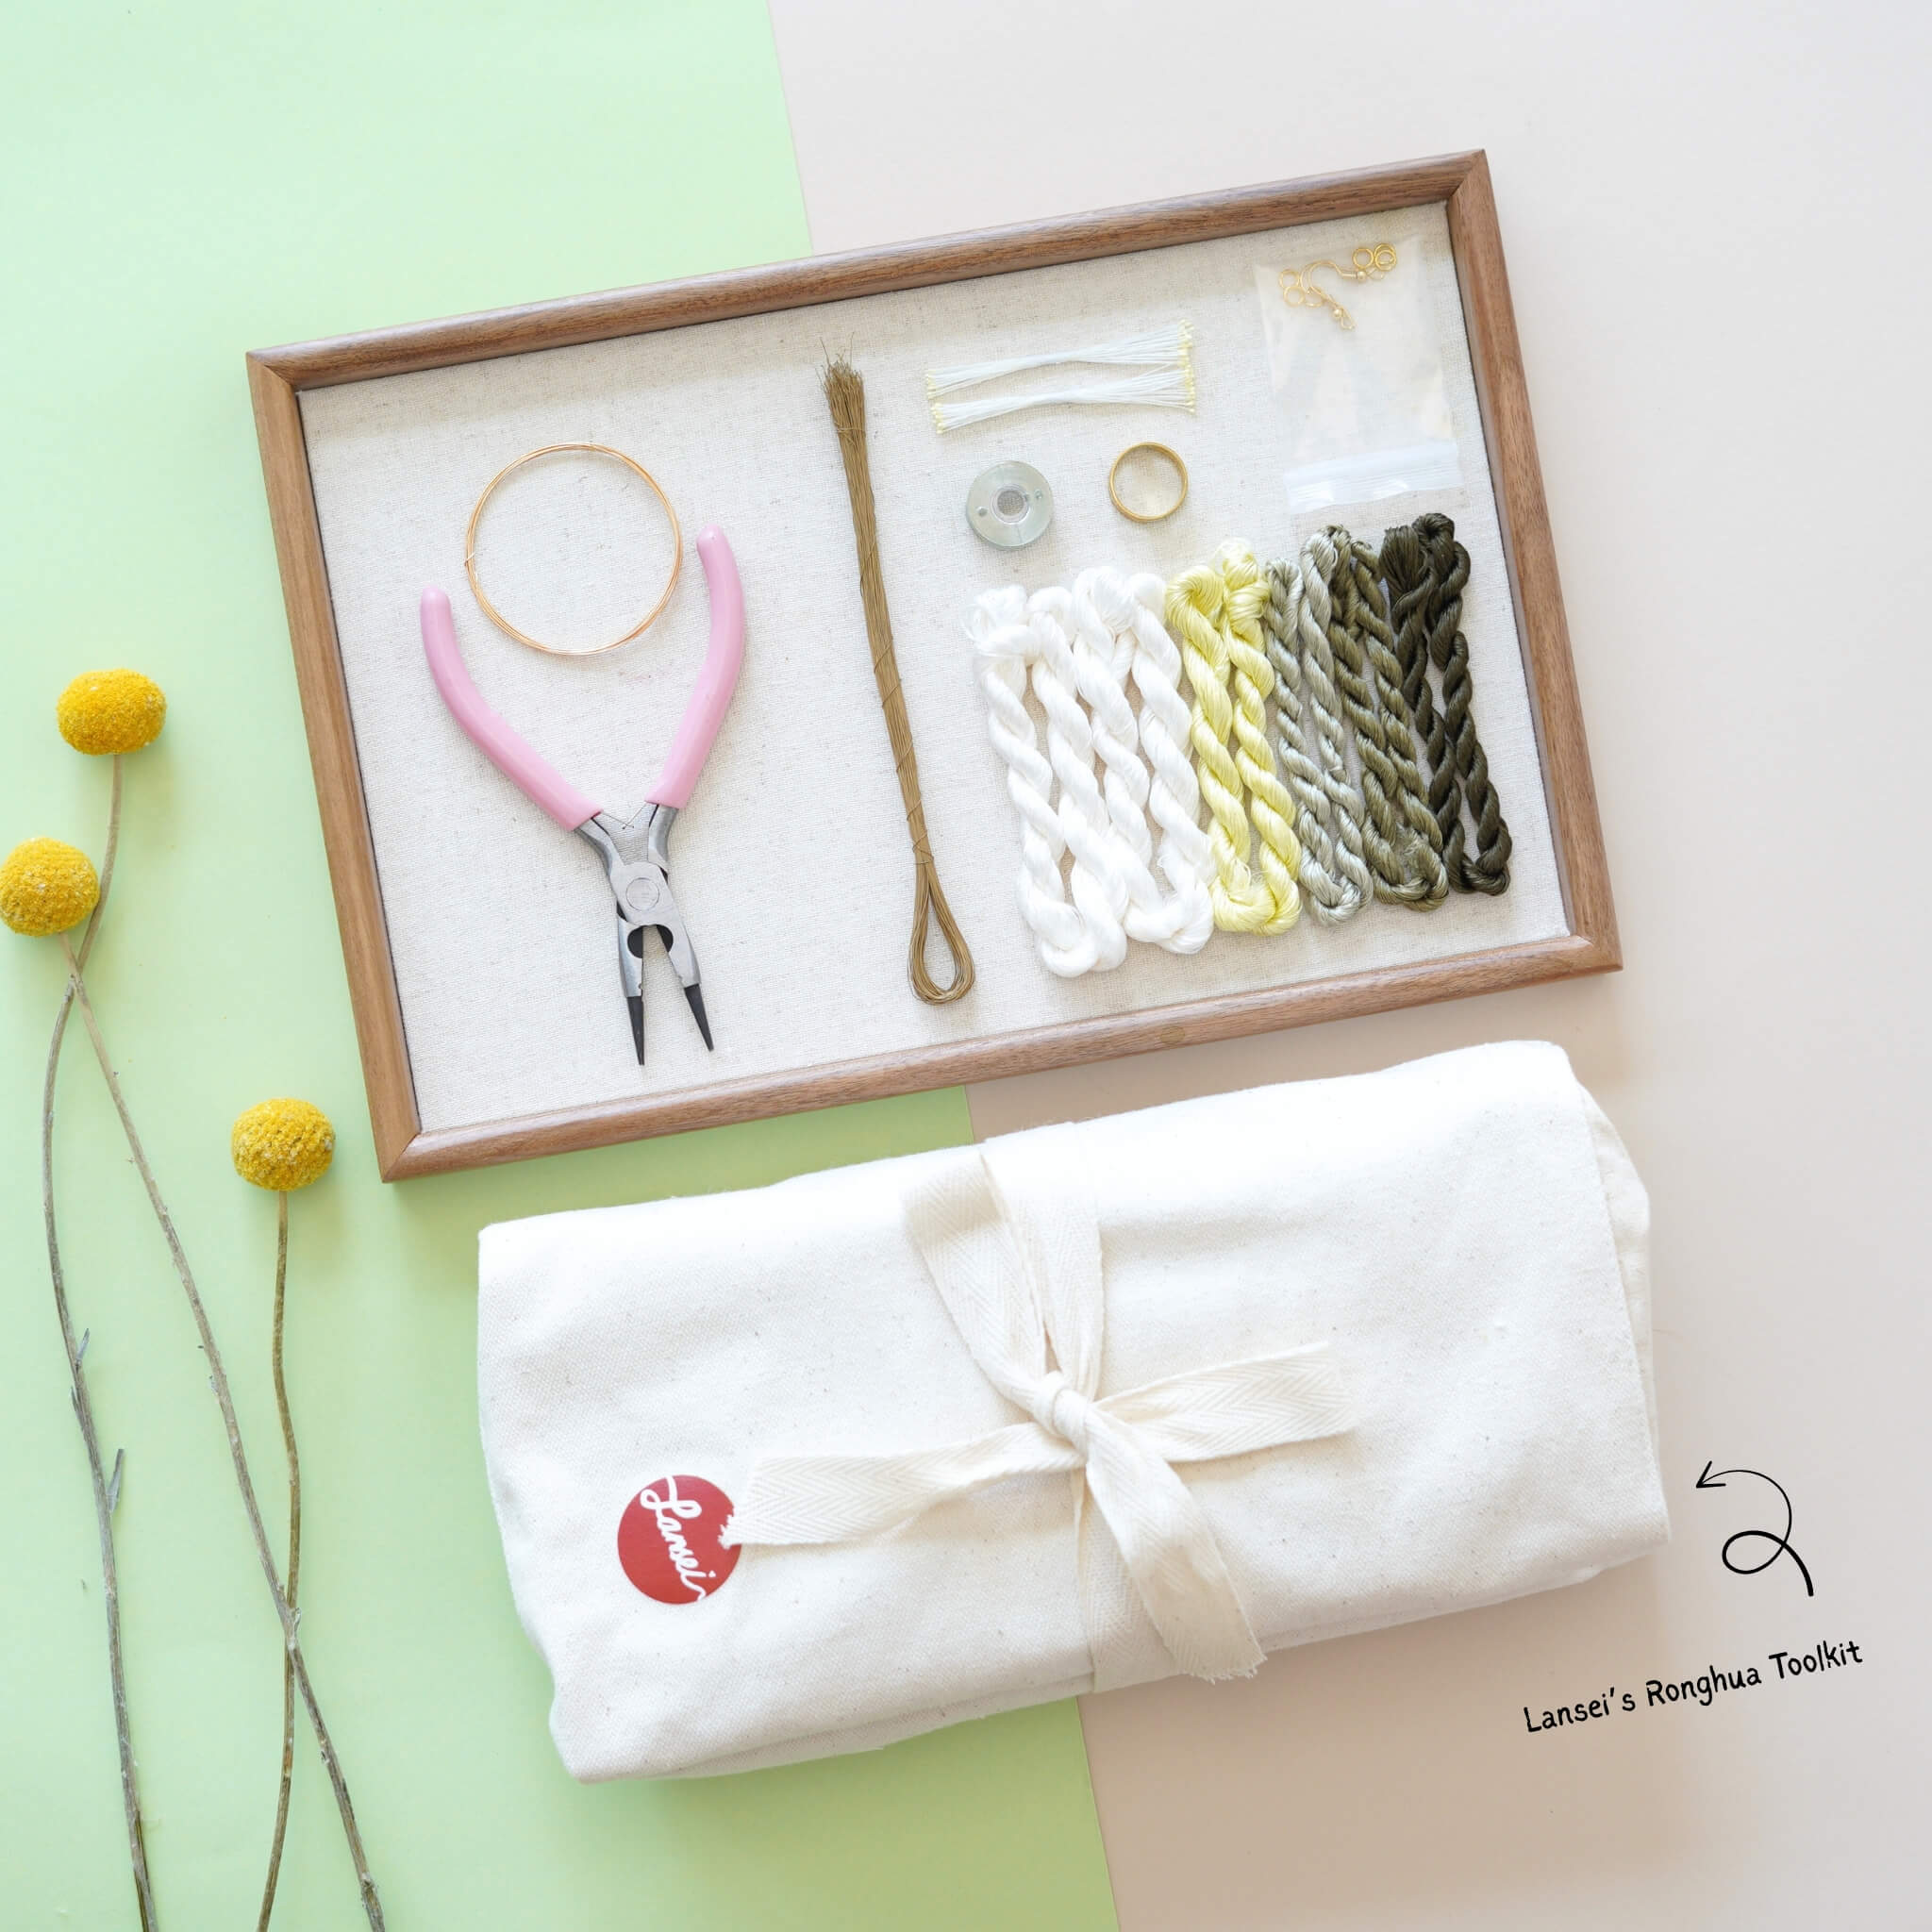
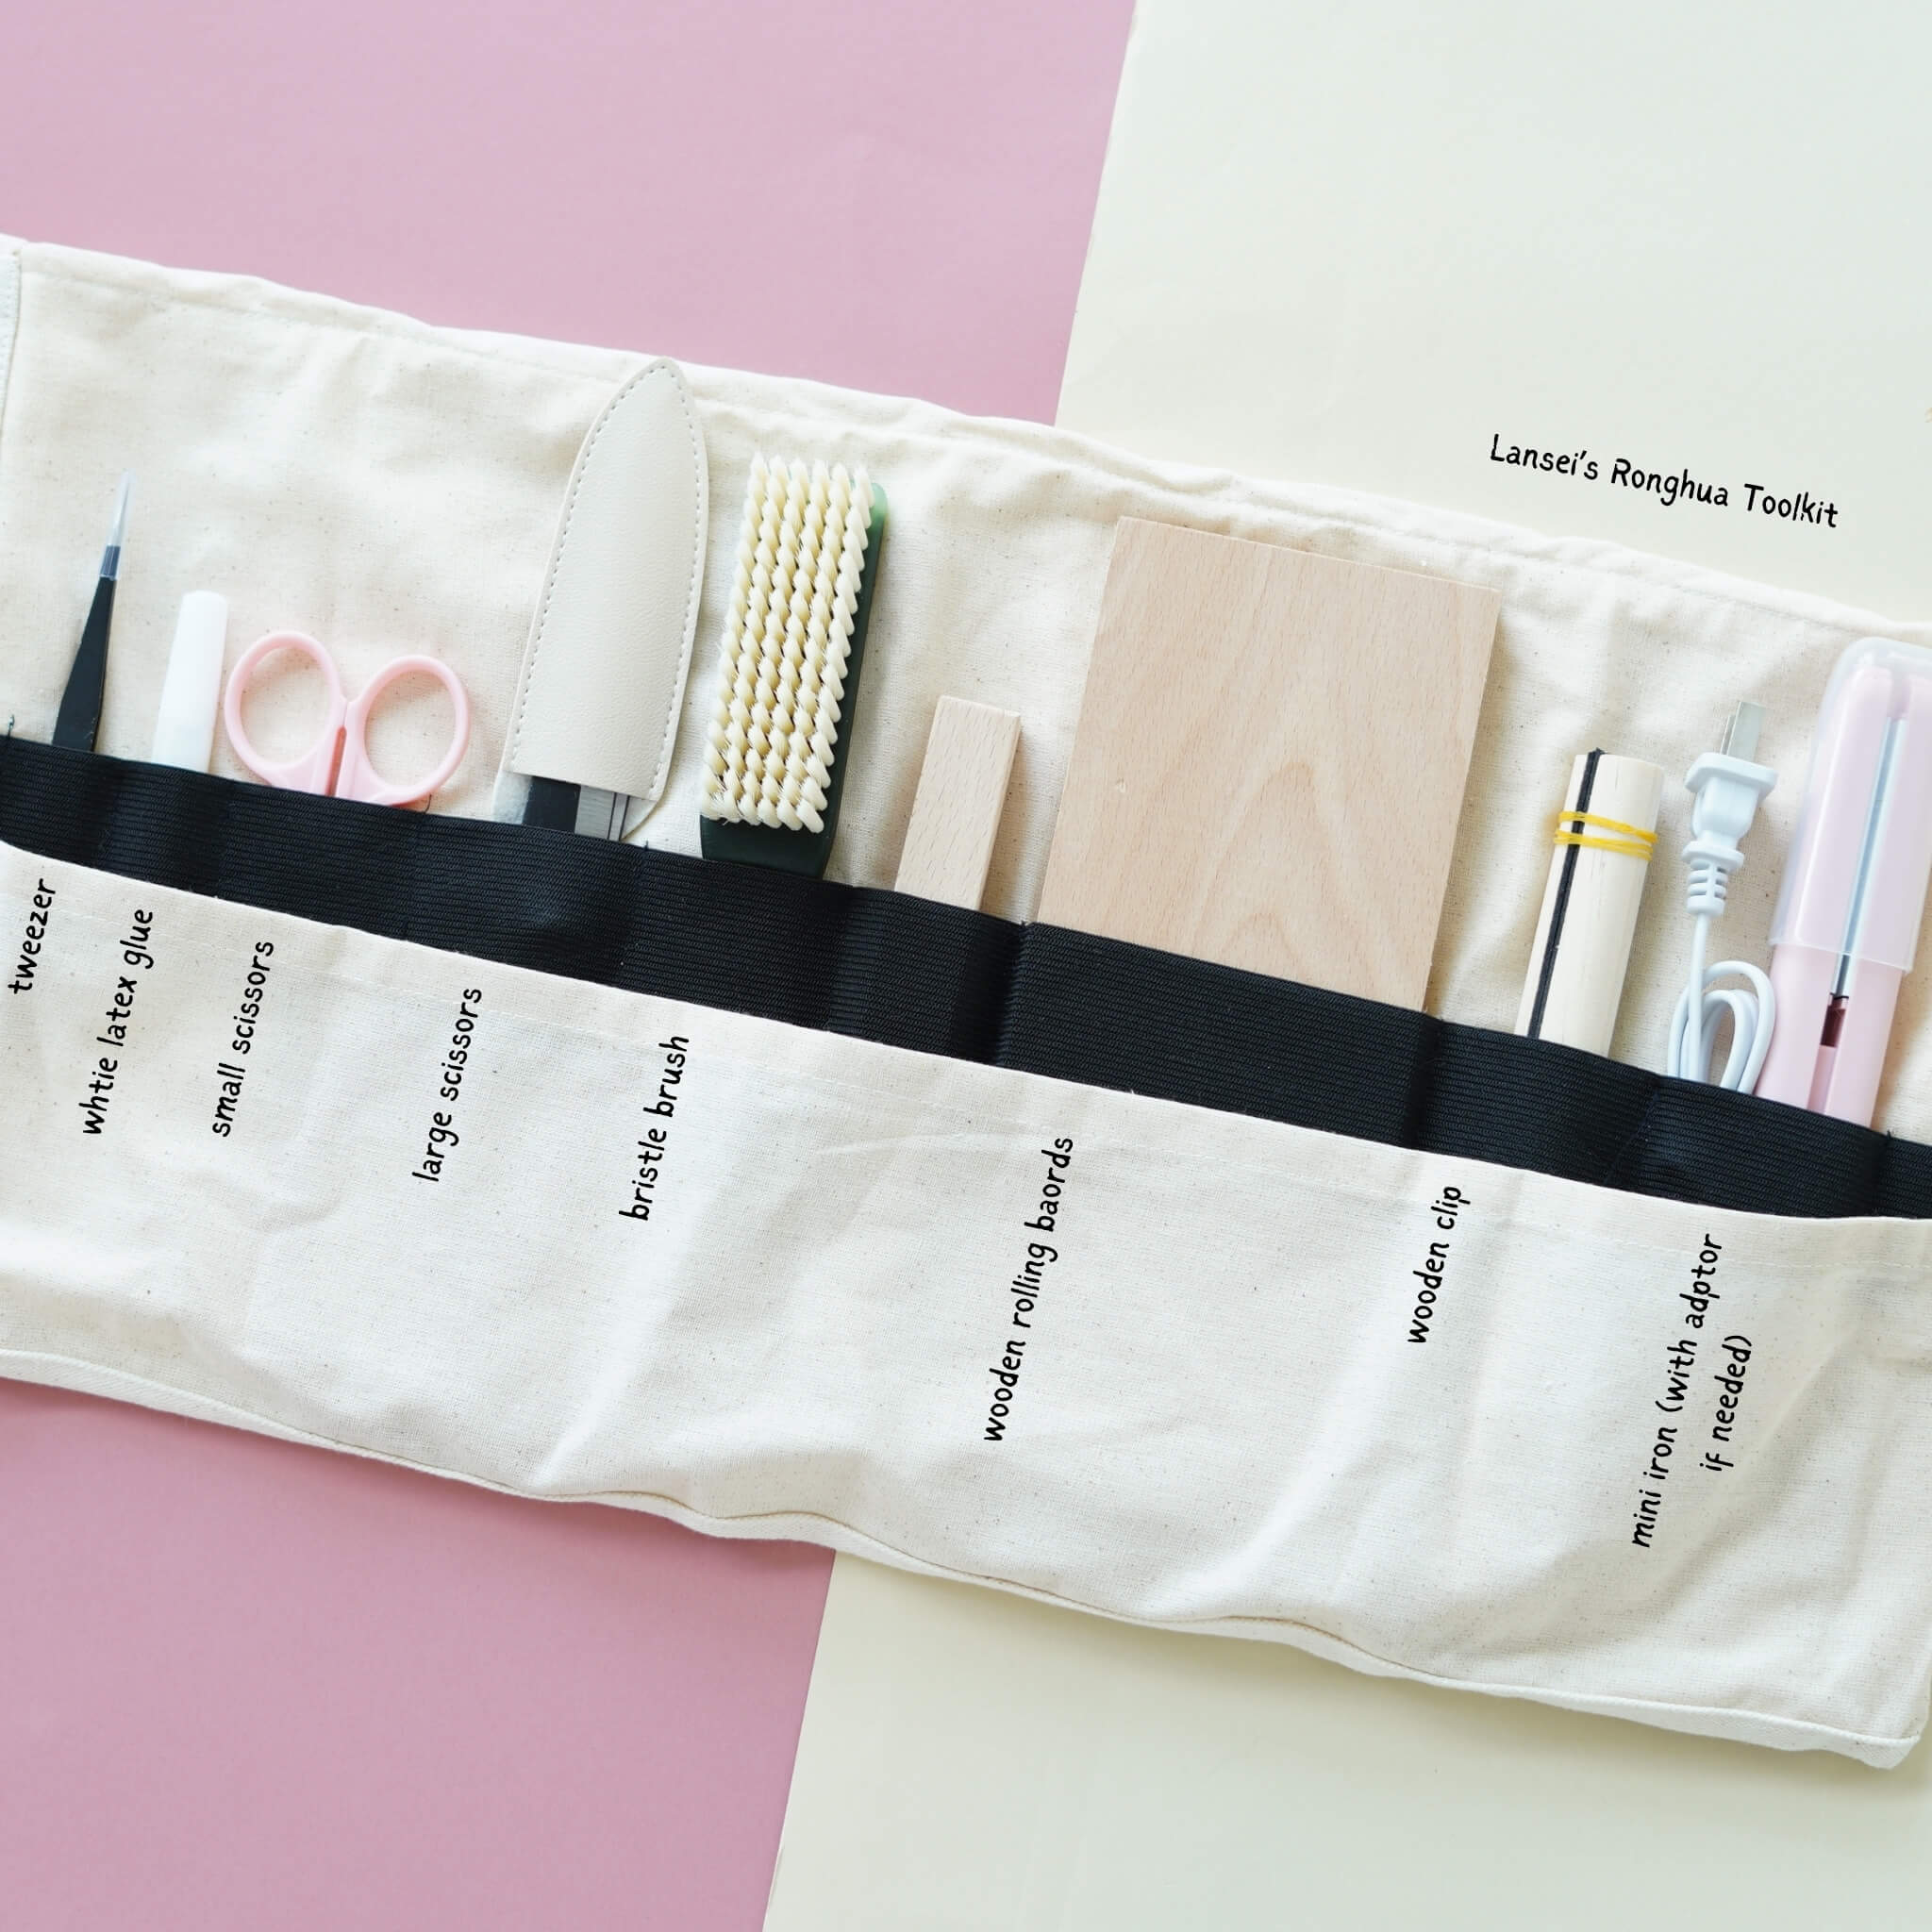
Wenn Sie unser Ronghua Toolkit gekauft haben, besitzen Sie bereits alles, was benötigt wird! Falls nicht, bereiten Sie die folgenden Werkzeuge vor:
Borstenbürste (mittel bis weich)
Glätteisen (das, mit dem Sie Ihre Haare glätten)
Pinzetten
Mindestens 2 Paar Scheren
Holzstäbchen / Bleistifte / Essstäbchen
Haarspray oder verdünnter Weißleim (Verhältnis 1:1,15–1:1,2)
Große Klammern (ca. 15 cm)
Drehbretter und Holzklötze (für gleichmäßige Spannung)
Anti-Rutsch-Pulver (optional, aber hilfreich)
Vollständiges Tutorial-Video
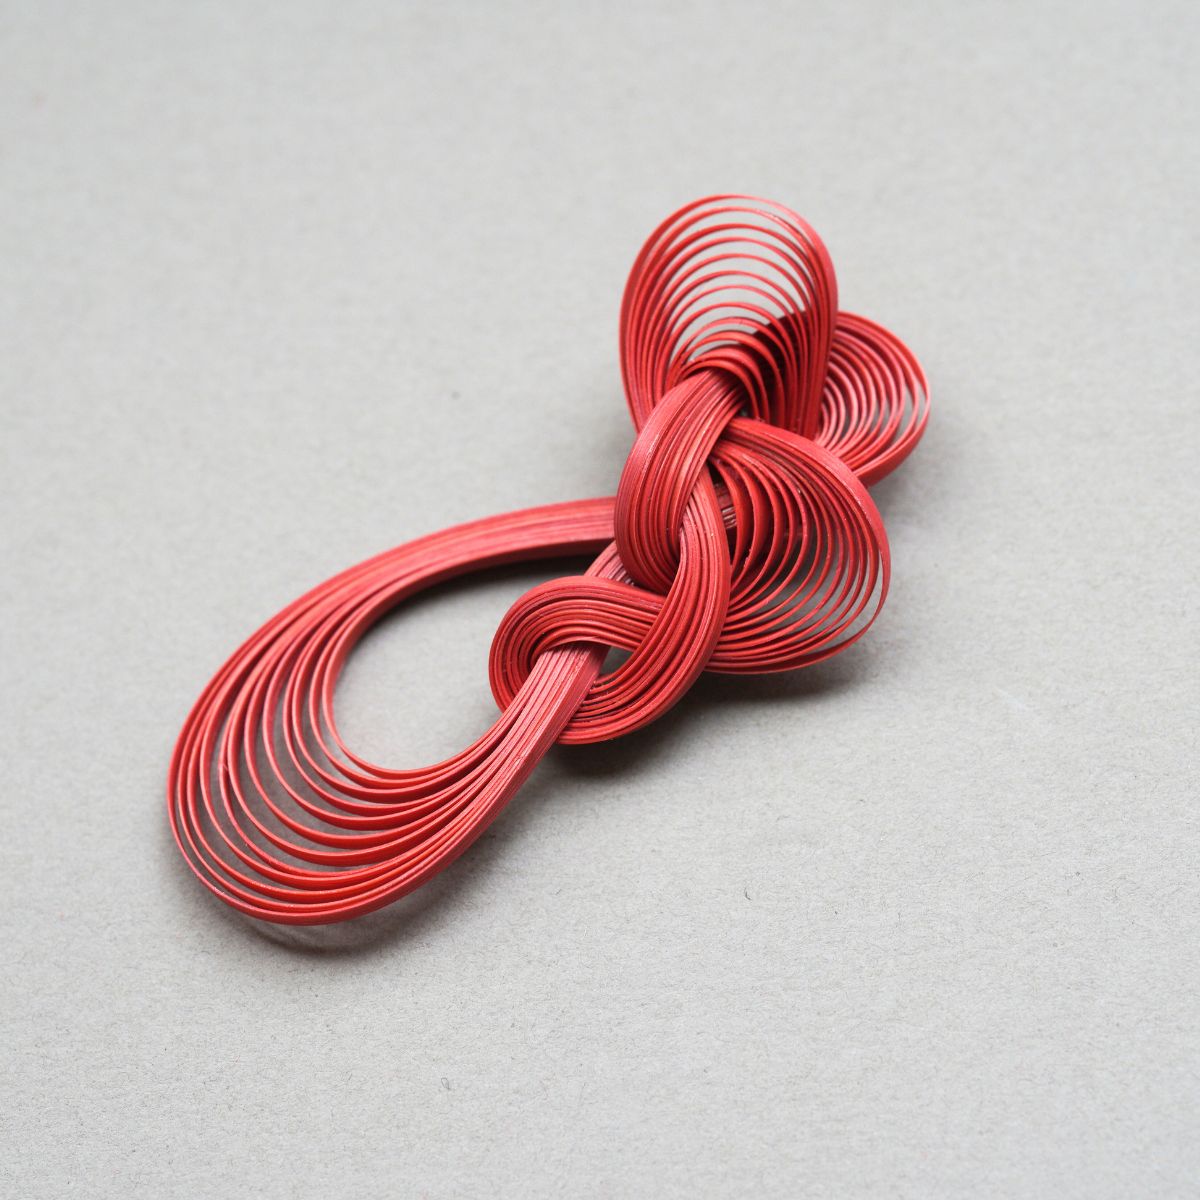
Schritt 1. Ausrichten und Anordnen der Seidenfäden
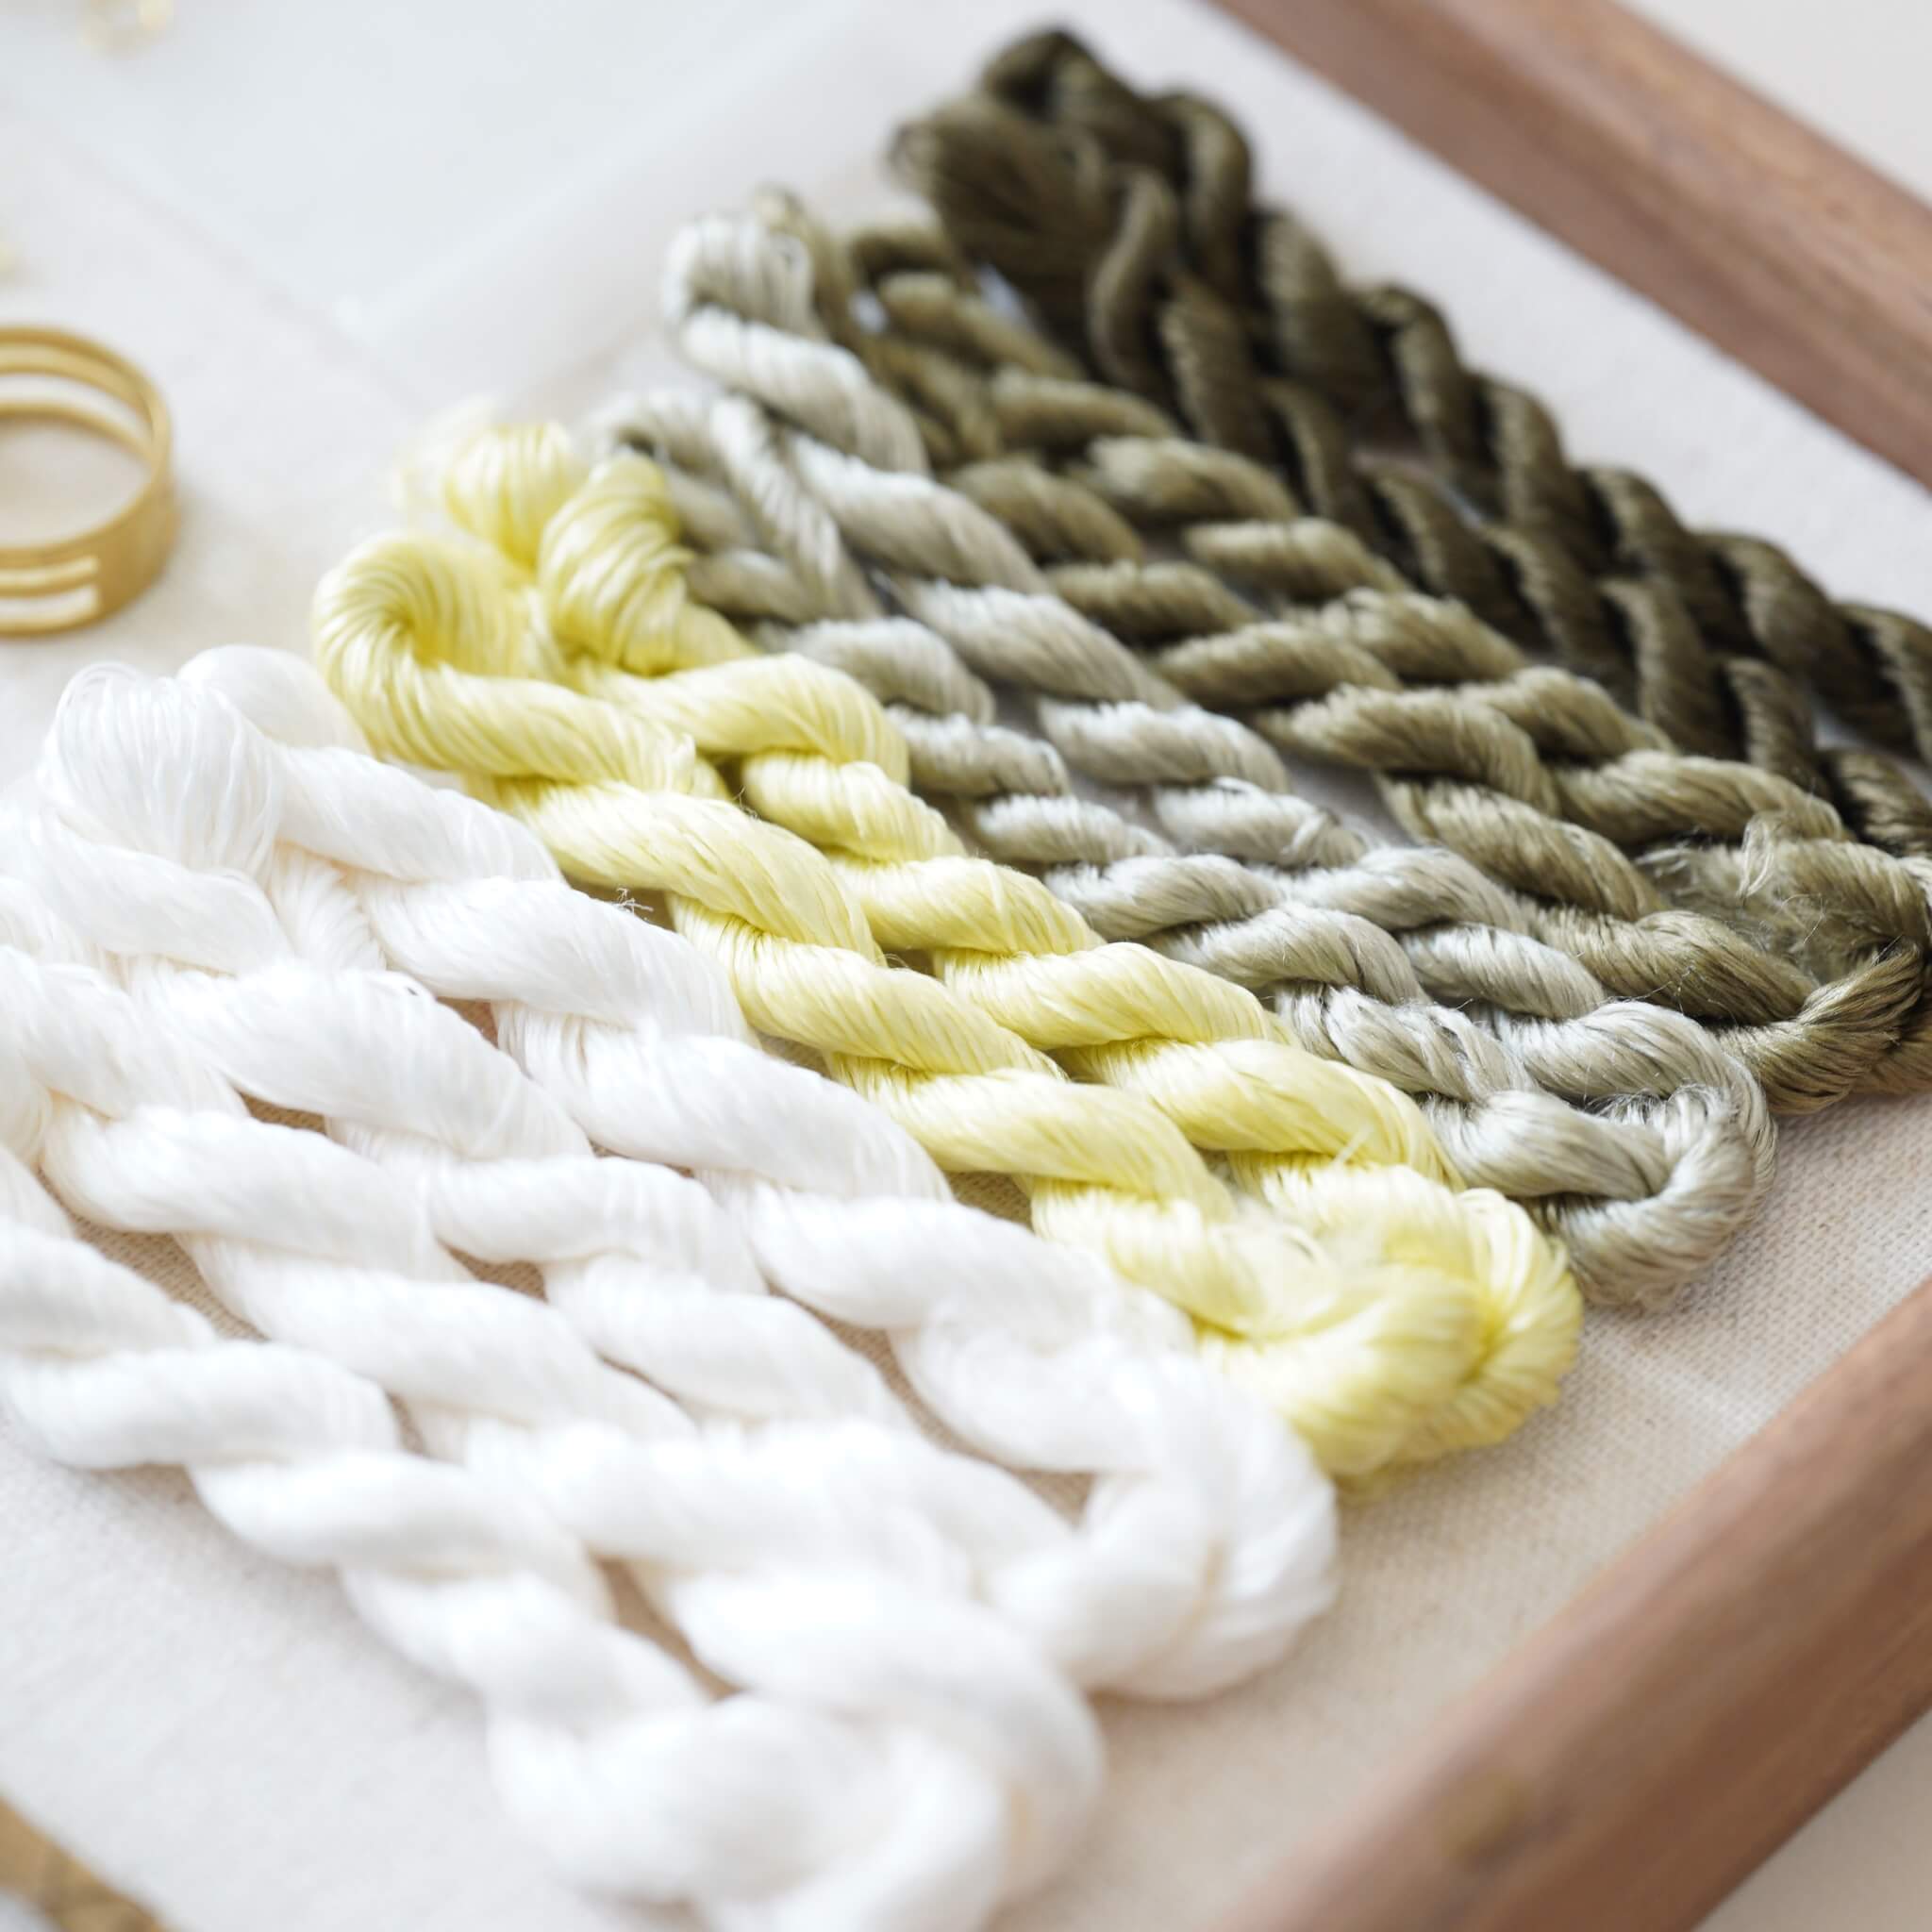
Beginnen Sie damit, Ihre Seidenfäden zu entknoten. Finden Sie den Knoten an einem Ende jedes Bündels und schneiden Sie ihn vorsichtig auf. Dieses Projekt verwendetSevenSeidenfarben, um vier Seidenreihen zu erstellen. Siehe das Farbschema unten für Details zur Fadenkombination.
Schritt 2. Gruppieren und Vorbereiten der Fäden
Jedes Seidenbündel besteht aus winzigen, fadenähnlichen Strukturen – das sind Ihre einzelnen Fäden.
Richten Sie alle Stränge ordentlich aus und binden Sie sie um einen dünnen Stab, wobei die Enden gleichmäßig bleiben. Vermeiden Sie ungleichmäßige Längen – das sorgt später für eine gleichmäßige Textur.
Schritt 3. Seidenreihen herstellen
Wiederholen Sie den oben beschriebenen Vorgang, um insgesamt vier Seidenreihen zu erstellen. Denken Sie daran, sich für die folgenden Reihen auf die im Diagramm angegebenen Daten zu beziehen, da jede leicht unterschiedlich ist. Unten sehen Sie die fertigen Seidenreihen, die wir hergestellt haben.
Schritt 4. Bürsten der Seidenreihen
Befestigen Sie eine Seidenreihe mit großen Metallklammern an Ihrem Ständer – wenn Sie keinen hölzernen Ronghua-Ständer haben, ist das völlig in Ordnung! Sie können sich unser Video zu alternativen Lösungen zum Ständer ansehen.
Halten Sie die Enden der Fäden mit einer Hand und bürsten Sie sanft, aber fest von oben nach unten. Heben Sie die Bürste nicht zwischendurch an. Ein leichter Wassernebel verhindert statische Aufladung. Sie können etwas Druck ausüben — Seidenfäden sind stärker, als sie aussehen! Bürsten Sie sowohl die Vorder- als auch die Rückseite, bis die Reihe glatt und flauschig aussieht.
Jeder benutzt einen anderen Pinsel und eine andere Handgeschwindigkeit, daher variiert auch die Zeit, die für diesen Schritt benötigt wird. An meinem Beispiel dauerte es etwa 10 Minuten, um diese Seidenreihe zu bürsten. Wenn sich das Haar weich und flauschig anfühlt, können Sie aufhören und nachsehen. Wenn es keine vollständige lineare Unterscheidung zwischen den Fäden mehr gibt und sie anfangen, aneinander zu kleben, ist es fertig :)
So fühlt sich der gebürstete Seidenfaden an:
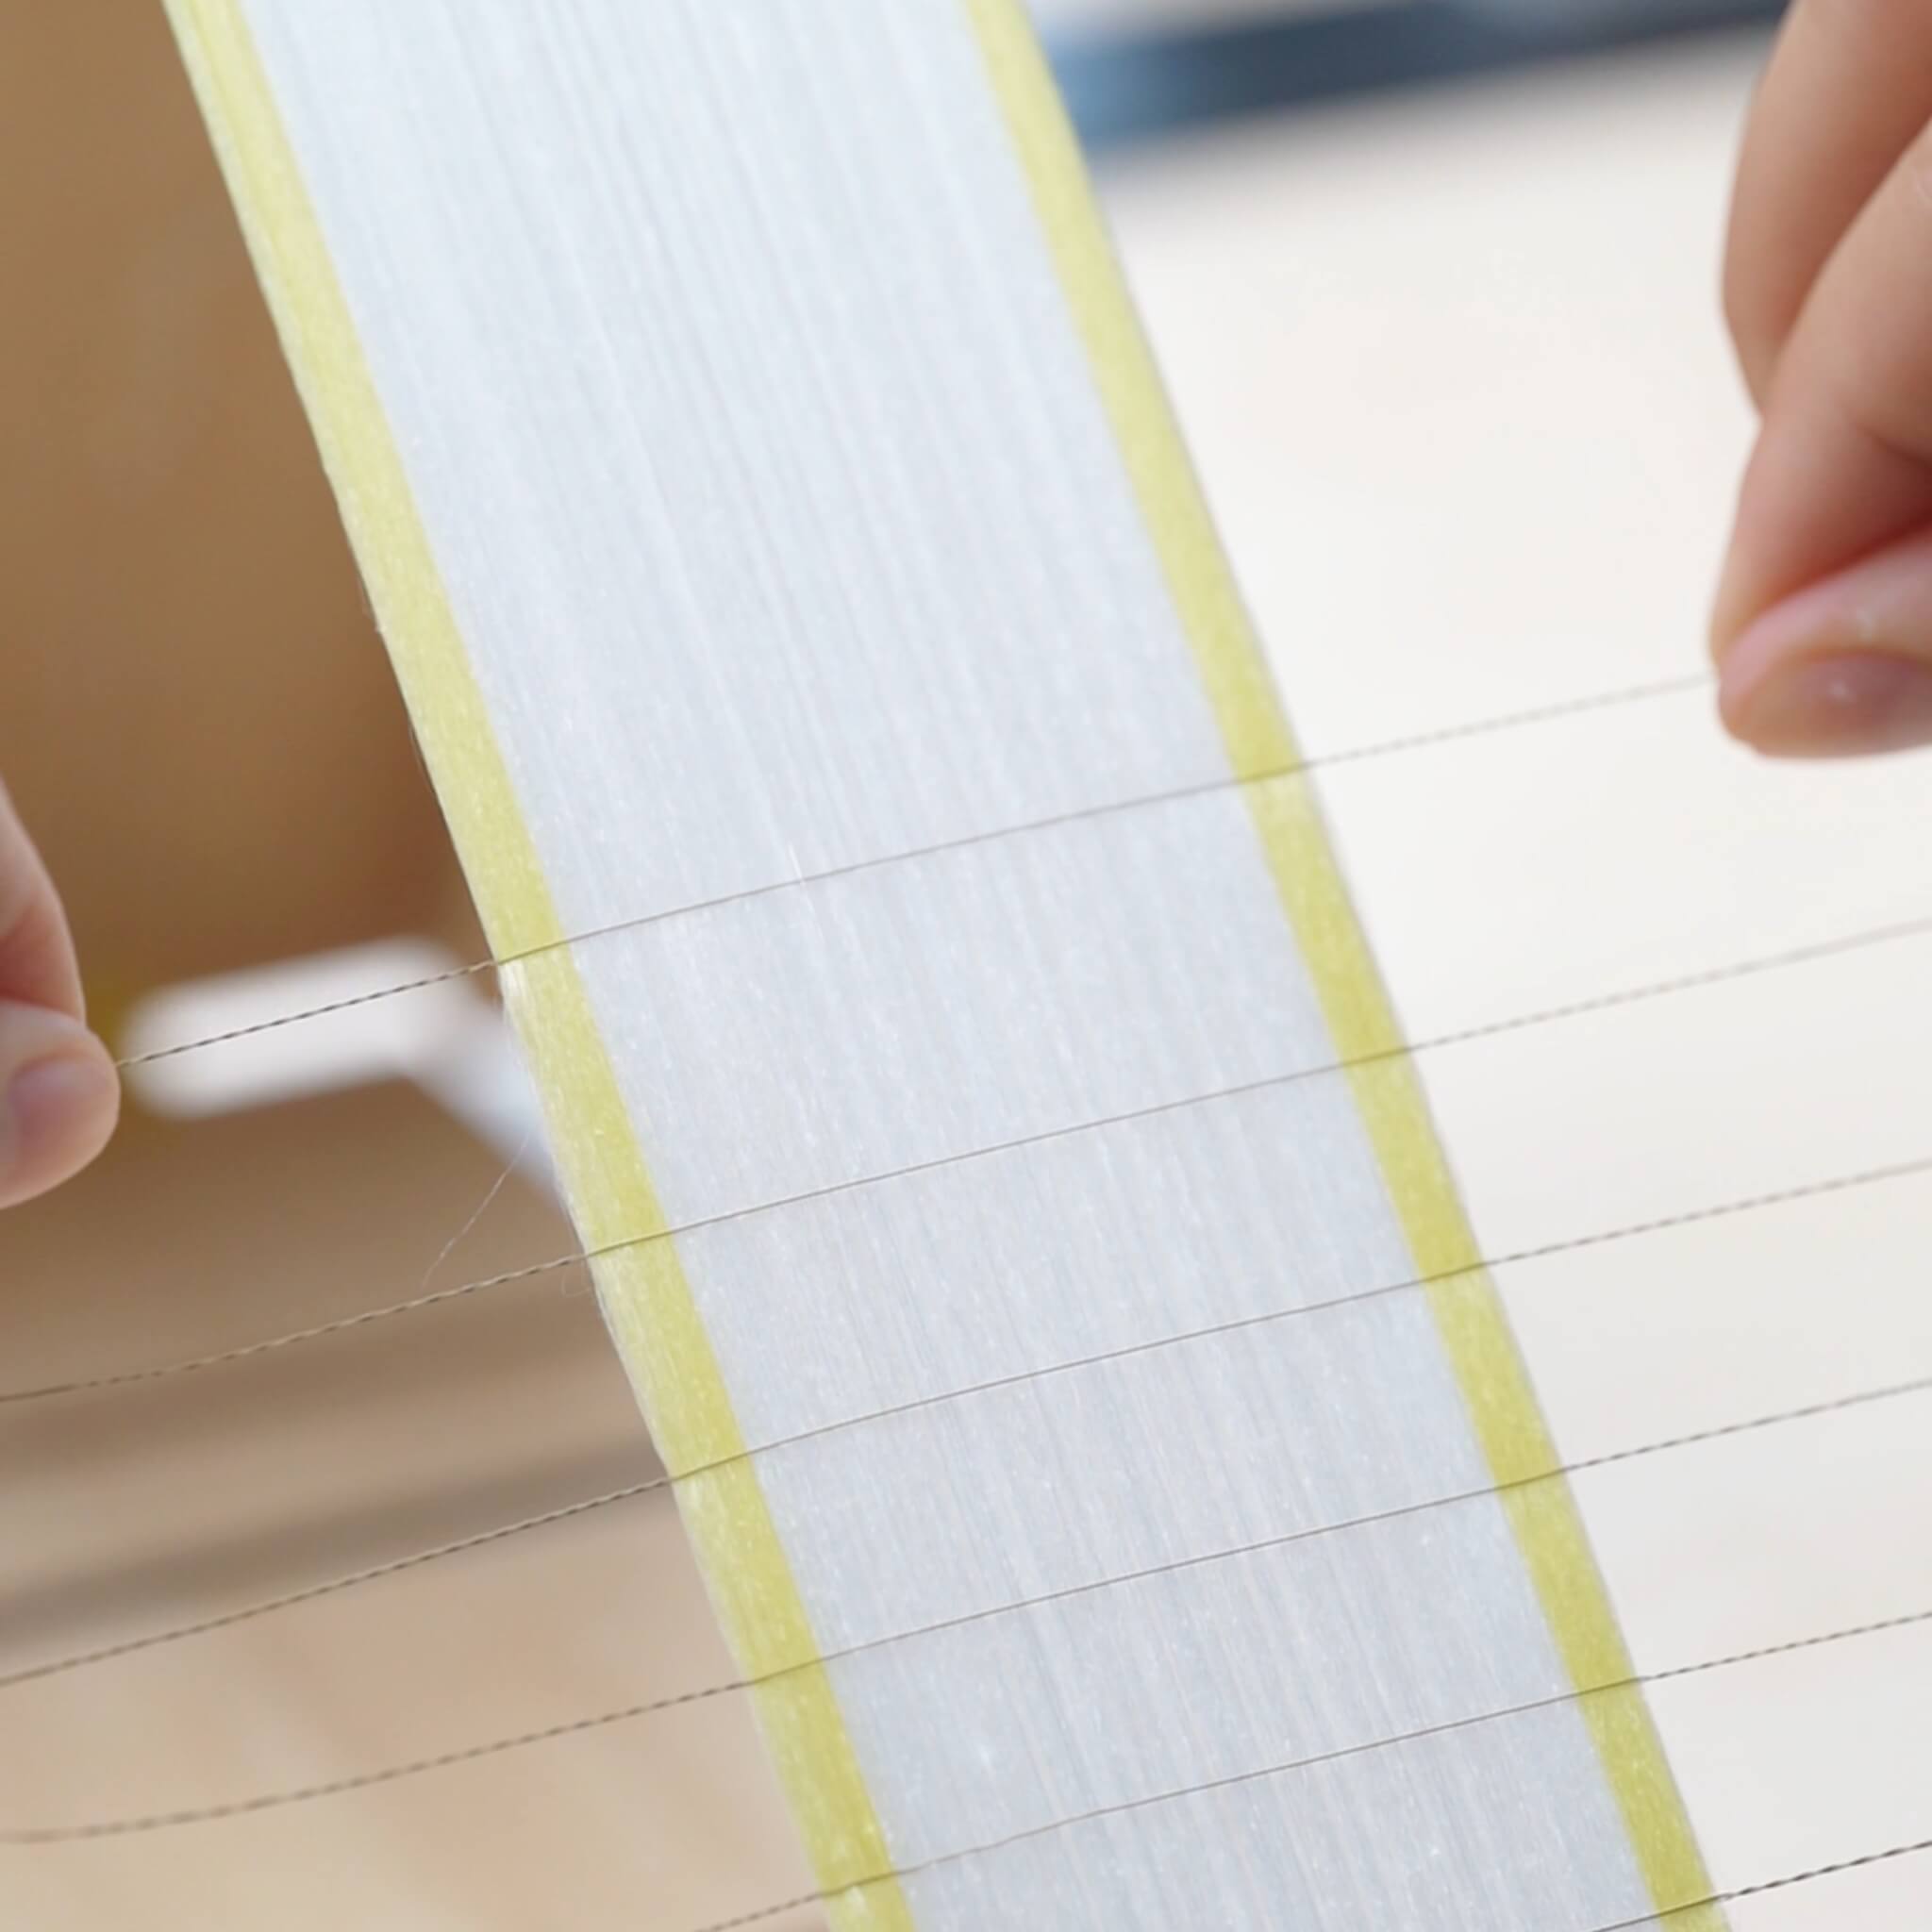
Schritt 5. Kupferdrähte anbringen
Wenn Sie das Gefühl haben, dass die Seide genug gebürstet ist, sichern Sie das Ende mit einer weiteren großen Klammer an Ihrem Tisch oder an etwas, das hilft, sie straff zu ziehen. Ziehen Sie einen weichgeglühten Kupferdraht aus dem gefalteten Ende der Reihe heraus und richten Sie ihn gerade. Drehen Sie den gefalteten Teil zu einer Spirale von etwa 3 cm. Klemmen Sie die Seidenfäden zwischen zwei Kupferdrähten ein und drehen Sie die gegenüberliegende Seite fest. Ziehen Sie beide Drähte straff und drehen Sie weiter, bis sie zu einem verschmolzen sind. Denken Sie daran, dass die Drehrichtung für das linke und rechte Ende entgegengesetzt ist.
Für die erste Reihe sollte der Abstand zwischen den Kupferdrähten 7-8 mm betragen. Für die zweite Reihe 6 mm. Für die restlichen Reihen sollte der Abstand 5 mm sein.
Wenn Sie Anti-Rutsch-Pulver haben, wird es viel einfacher sein, Ihre Finger darin zu tauchen und zu drehen. (Wir empfehlen dir dringend, das Video-Tutorial für diesen Schritt anzusehen:)
Nach dem Schneiden nehmen Sie die Seidenreihe vom Ständer und legen sie flach hin.
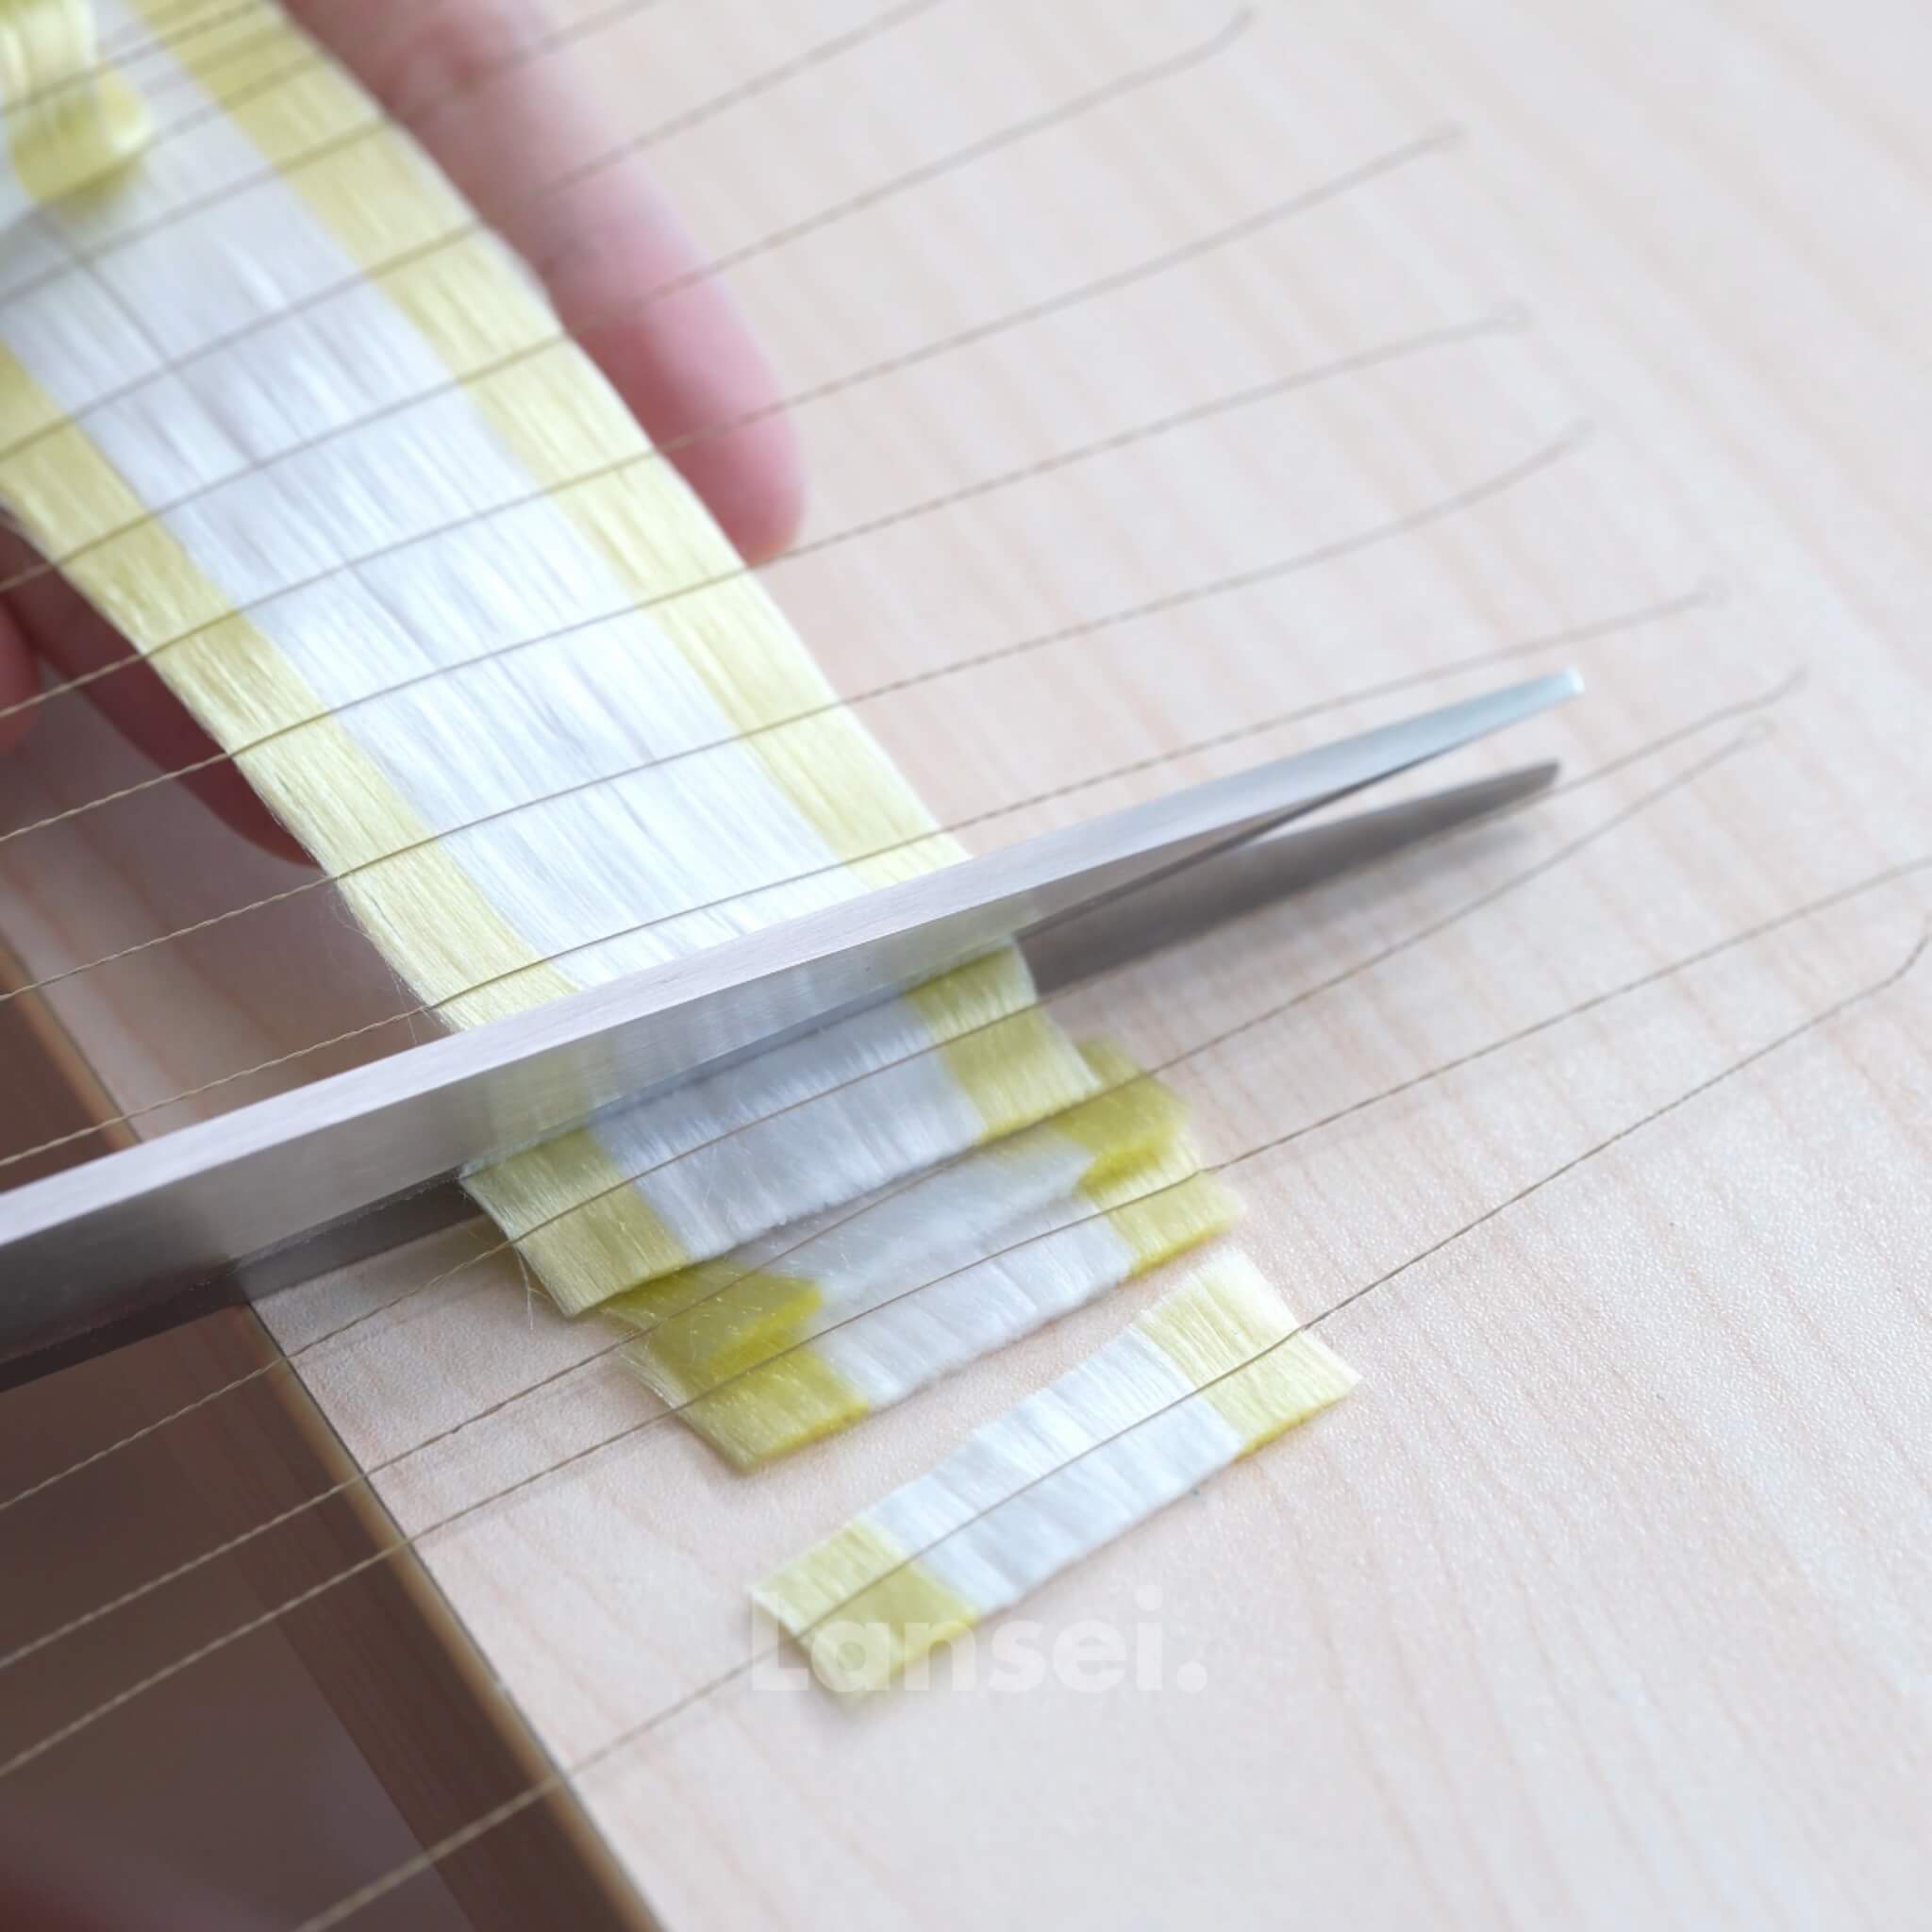
Schritt 6. Schneiden der Seidenstreifen
Schneiden Sie das Ende der Reihe ordentlich zu, dann schneiden Sie zwischen jedem Kupferdrahtpaar, um gleichmäßige Seidenstreifen zu erhalten. Beim Schneiden müssen die Scheren genau in der Mitte zwischen zwei Kupferdrähten angesetzt werden, sonst wird die Breite der Seidenstreifen ungleichmäßig. Wenn Fäden an der Schere kleben bleiben, reinigen Sie sie — das wird meist durch statische Aufladung oder Rückstände verursacht. Schneiden Sie schnell und sauber für glatte Kanten. Berühren Sie den Draht nicht, da er sonst verrutschen kann.
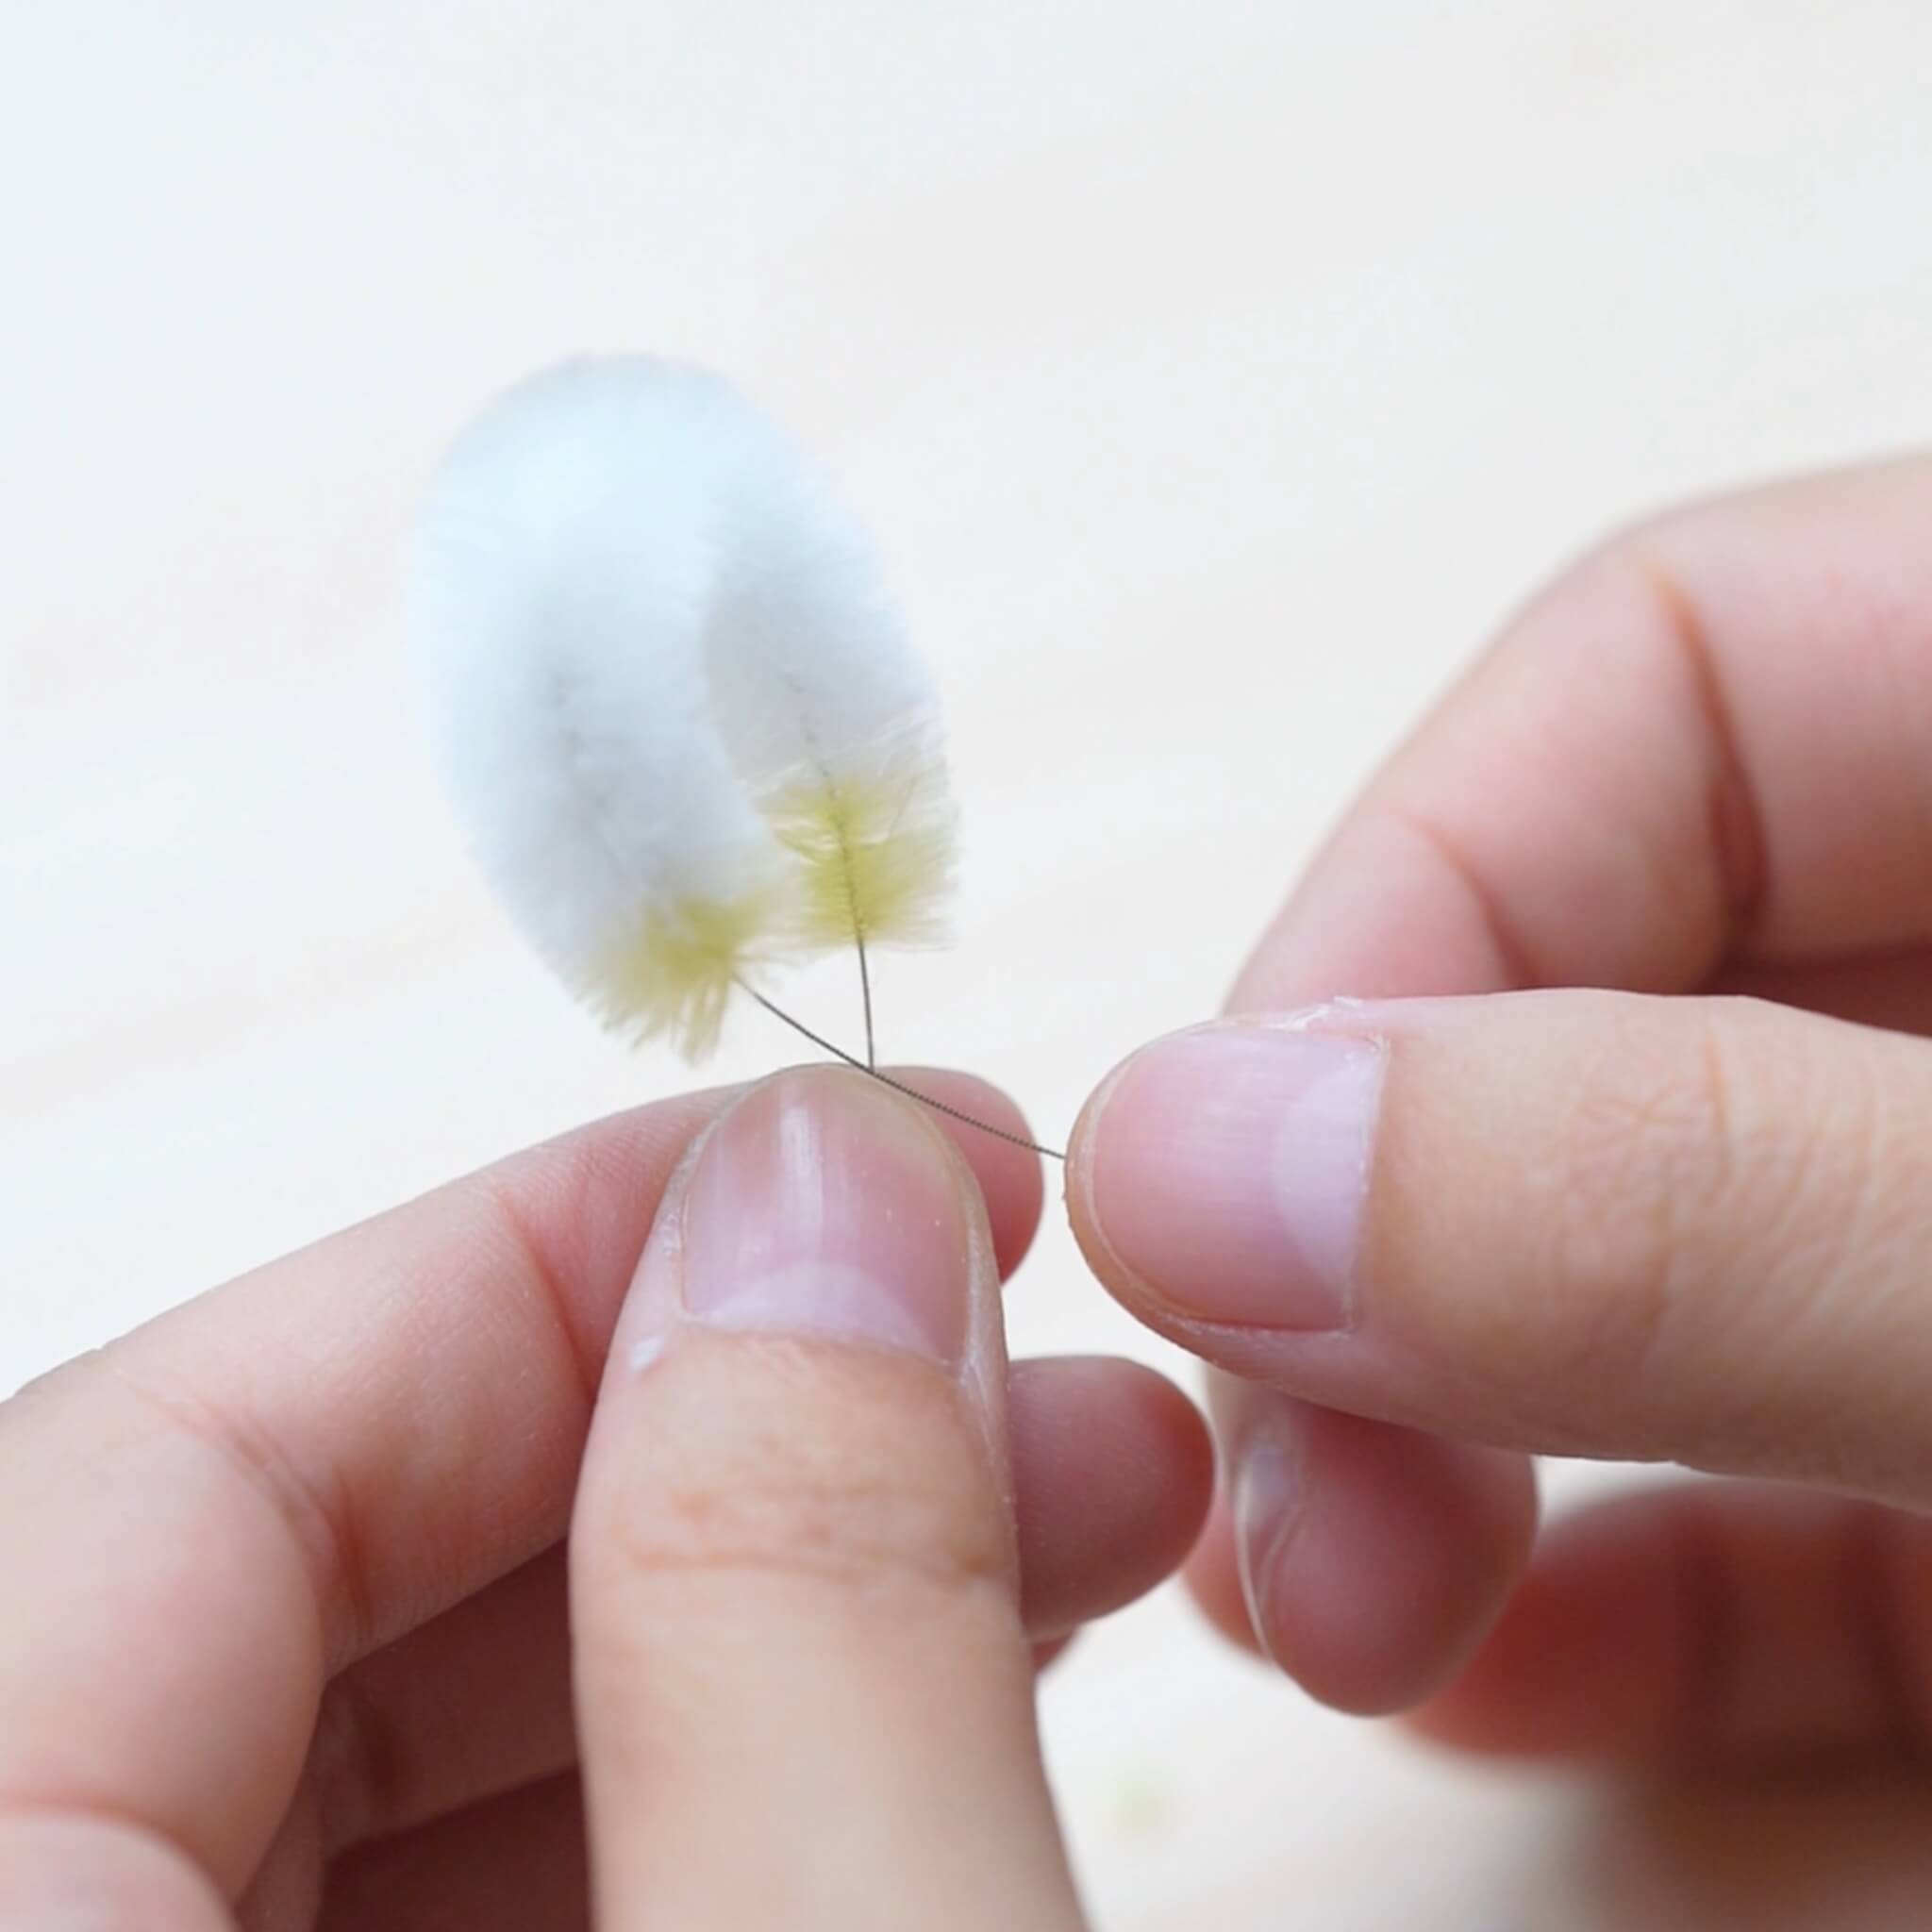
Schritt 7. Zentrieren und Verdrehen der Streifen
Richten Sie den Kupferdraht mit einer ebenen Fläche oder einem Holzblock in der Mitte jedes Streifens aus. Sobald zentriert, drehen Sie beide Hände in entgegengesetzte Richtungen, um zu spannen.
Als Nächstes legen Sie den Kupferteil zwischen die Drehbretter und drehen weiter in dieselbe Richtung. Stoppen Sie, wenn sich der Draht fest anfühlt – zu starkes Drehen kann ihn brechen. Woran erkennen Sie, ob er fest genug ist? Wenn der Kupferdraht richtig festgezogen ist, sollte er nur schwach sichtbar sein. Wenn der Kupferdraht sehr sichtbar ist, ist er nicht fest genug.
Schritt 8. Die Streifen zuschneiden
Sobald alle Streifen aufgeplustert sind, legen Sie die längsten Streifen beiseite — verwenden Sie sie noch nicht.
Für den Rest schneiden Sie den Kupferdraht am helleren Ende ab. Denken Sie daran — schneiden Sie immer das hellfarbige Ende.
Bei anderen Streifen können Sie entweder die eine oder andere Seite schneiden. Nehmen Sie 5–7 der längsten Streifen. Richten Sie die Enden des Kupferdrahts ordentlich aus. Schneiden Sie den Kupferdraht am ersten Streifen ab. Schneiden Sie dann jeden folgenden Streifen 3–5 mm kürzer als den vorherigen. Dies dient dazu, die Streifen allmählich in der Länge zu verkürzen.
Das reicht für eine Blume — für zwei Blumen benötigen Sie zwei Sets.
Schritt 9. Die Streifen flachdrücken
Alle Seidenstreifen müssen geglättet werden. Schneiden Sie ein Ende des Kupferdrahts ab. Erhitzen Sie Ihr Glätteisen und drücken Sie den Streifen sanft von unten nach oben. Bewegen Sie sich langsam und gleichmäßig.
Dann müssen wir die flachgedrückten Streifen verstärken.
Bereiten Sie Ihre Fixierlösung vor:
Verwenden Sie entweder Haarspray oder
Verdünnter Weißleim mit Wasser oder Alkohol (Verhältnis 1:1,15 oder 1:1,2)
Weichen Sie die flachgedrückten Seidenstreifen ein, lassen Sie sie die Lösung aufnehmen und kratzen Sie dann den Überschuss ab.
Schritt 10. Formen Sie die Blütenblätter
Solange sie noch feucht sind, formen Sie die Streifen mit der „nassen konkaven“ Methode:
Drücke überschüssige Lösung mit der Pinzette aus.
Formen Sie natürliche Kurven entlang der Blütenblattkanten, während sie noch nass sind. Lassen Sie sie aufrecht trocknen.
Wie können Sie die Kurven formen? Verwenden Sie zuerst ein Rundstab-Werkzeug, um die Streifen zu pressen.
Das verleiht ihnen eine natürliche gebogene Form. Nach dem Pressen kann die Rückseite kraus werden — benutze die Pinzette, um sie zu glätten.
Wenn du keine runde Stange hast, kannst du direkt eine Pinzette verwenden. Biege die Streifen vorsichtig mit der Pinzette zu einer leichten Kurve. Ziehe beide Enden leicht nach innen. Je dunkler die Farbe, desto stärker sollte der Streifen gebogen sein. Nach dem Formen klebe den Streifen zum Trocknen fest.
(Wir empfehlen dir dringend, das Video-Tutorial für diesen Schritt anzusehen:)
Wiederhole den gleichen Vorgang für alle übrigen Streifen. Beachte — je länger der Streifen, desto sanfter die Kurve. Wenn du fertig bist, überprüfe, ob die äußeren Streifen die kleineren umschließen können.
Nachdem die Streifen getrocknet sind, schneide sie in Blütenblattformen. Wir werden insgesamt vier Arten von Blütenblättern haben.
Schritt 11. Die Blumen machen
Sobald alle Blütenblätter geformt und trocken sind, ist es Zeit zum Zusammenbauen!
Beginne mit den dunkelsten Streifen für die innerste Schicht und befestige zuerst den Seidenfaden und das Blütenblatt zusammen. Staple die Blütenblätter einzeln, um eine kleine Knospe zu formen, und füge weitere hinzu, bis keine Lücken mehr sichtbar sind. Für die innerste Schicht verwende etwa 10 Blütenblätter.
Achte darauf, dass die Unterseiten aller Blütenblätter auf derselben Höhe sind. Jede Blütenblattschicht wird auf die gleiche Weise zusammengesetzt — es entsteht ein voller Kreis. Die inneren Blütenblätter sollten enger gesetzt werden, während die äußeren Blütenblätter lockerer und offener sein sollten. Die genaue Anzahl der Blütenblätter kann je nach Dicke variieren. Setze das Zusammenfügen fort, bis die Blume die gewünschte Form erreicht hat.
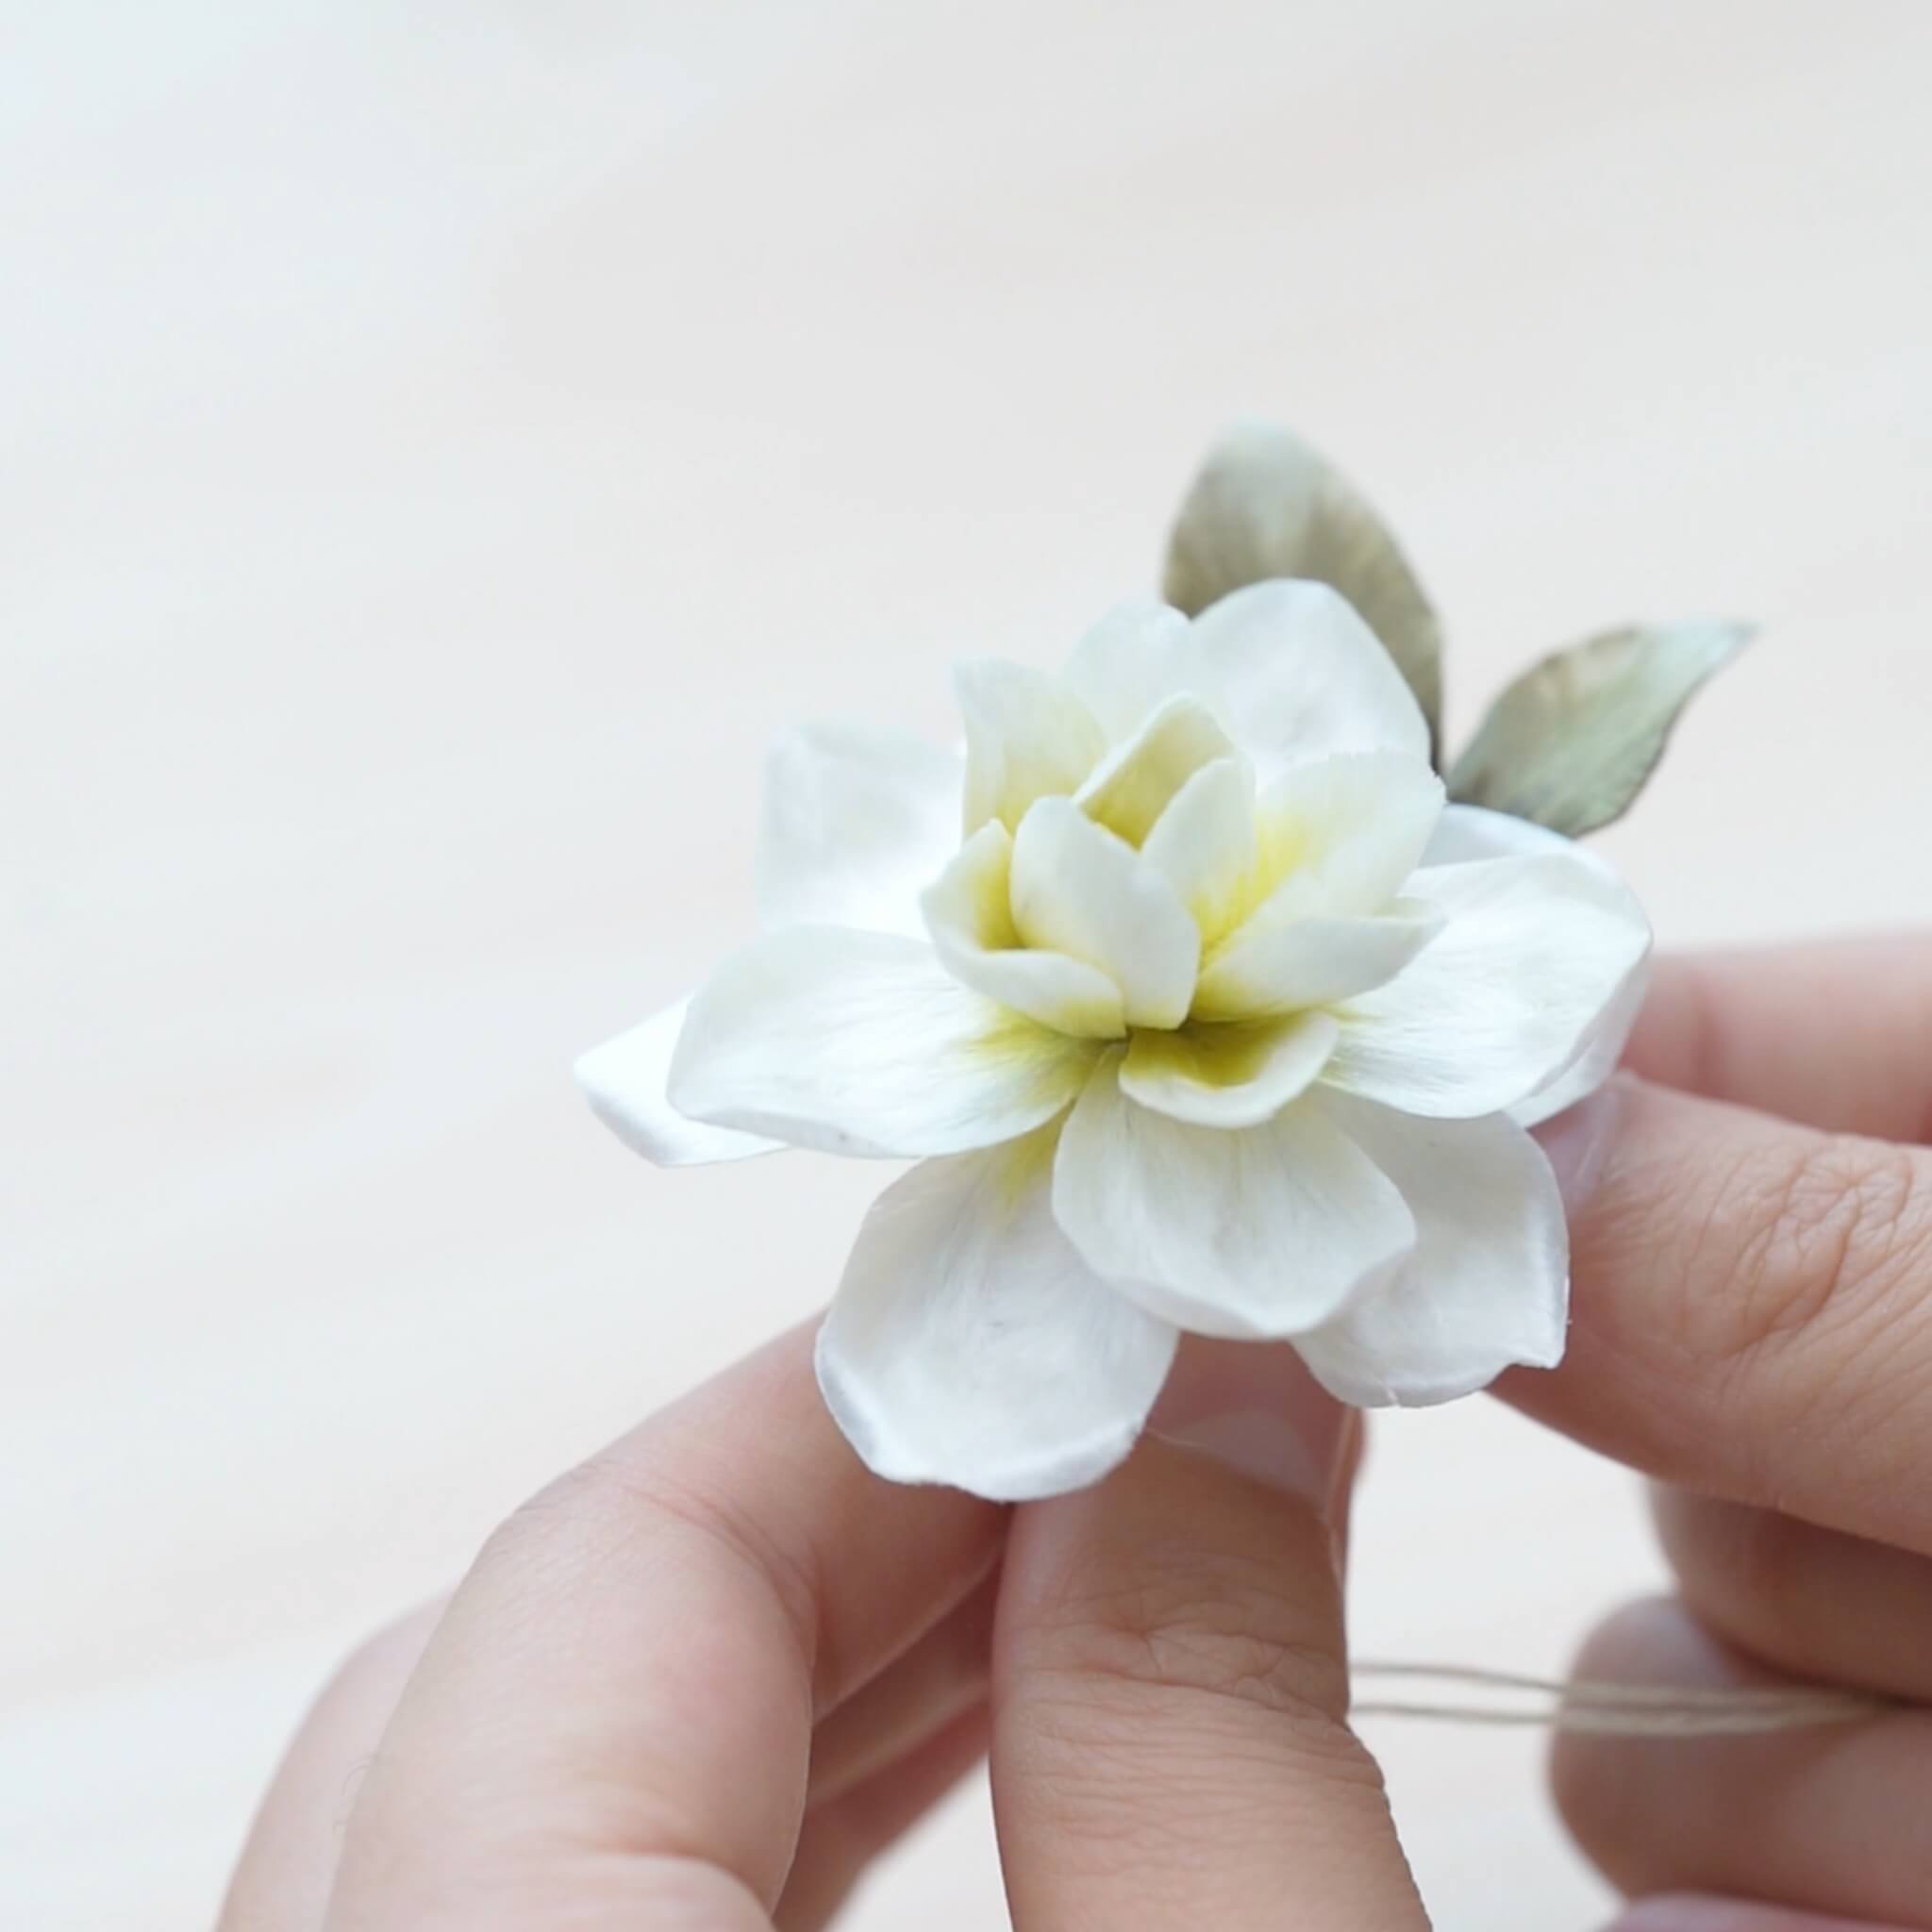
Für die äußerste Schicht verwende die zugeschnittenen Streifen in verschiedenen Längen. Beginne zuerst mit den kürzeren Blütenblättern und arbeite dich dann zu den längeren vor. Nach dem Zusammenfügen passe die Position der Blütenblätter an und lasse sie natürlich nach außen ausbreiten – vermeide es, sie zu eng zu machen. Drehe schließlich einige Blütenblätter leicht nach links oder rechts, um einen natürlichen Look zu erzeugen. Jetzt ist die Chrysanthemenform fertig.
Du musst insgesamt zwei Blumen herstellen. Bevor du weitermachst, stelle sicher, dass du die Blumen in die gewünschte Form und Richtung bringst, denn später kannst du sie nicht mehr anpassen. So sollte die Rückseite der Blume aussehen.
Schritt 12. Befestige die Blumen an der Basis
Sobald die Blütenblätter angepasst sind, nimm den Kleber heraus und trage ihn auf die Basis des Kupferdrahts auf, achte darauf, dass der Kleber nicht in die Blütenblätter eindringt. Nach dem Auftragen des Klebers kannst du die Blütenblätter nicht mehr anpassen, also stelle sicher, dass sie zuerst in der richtigen Position sind. Sobald der Kleber getrocknet ist, schneide überschüssigen Kupferdraht ab.
Trage dann großzügig Schmuckkleber auf die Blumenbasis auf und puste sanft, um das Trocknen zu beschleunigen. Füge auch etwas Kleber um den Bereich des Kupferdrahts hinzu. Wenn der Kleber halb getrocknet ist, befestige die Basis am unteren Teil der Blume und drücke sie fest zusammen. Sobald sie sicher sitzt, kannst du die Hand loslassen.
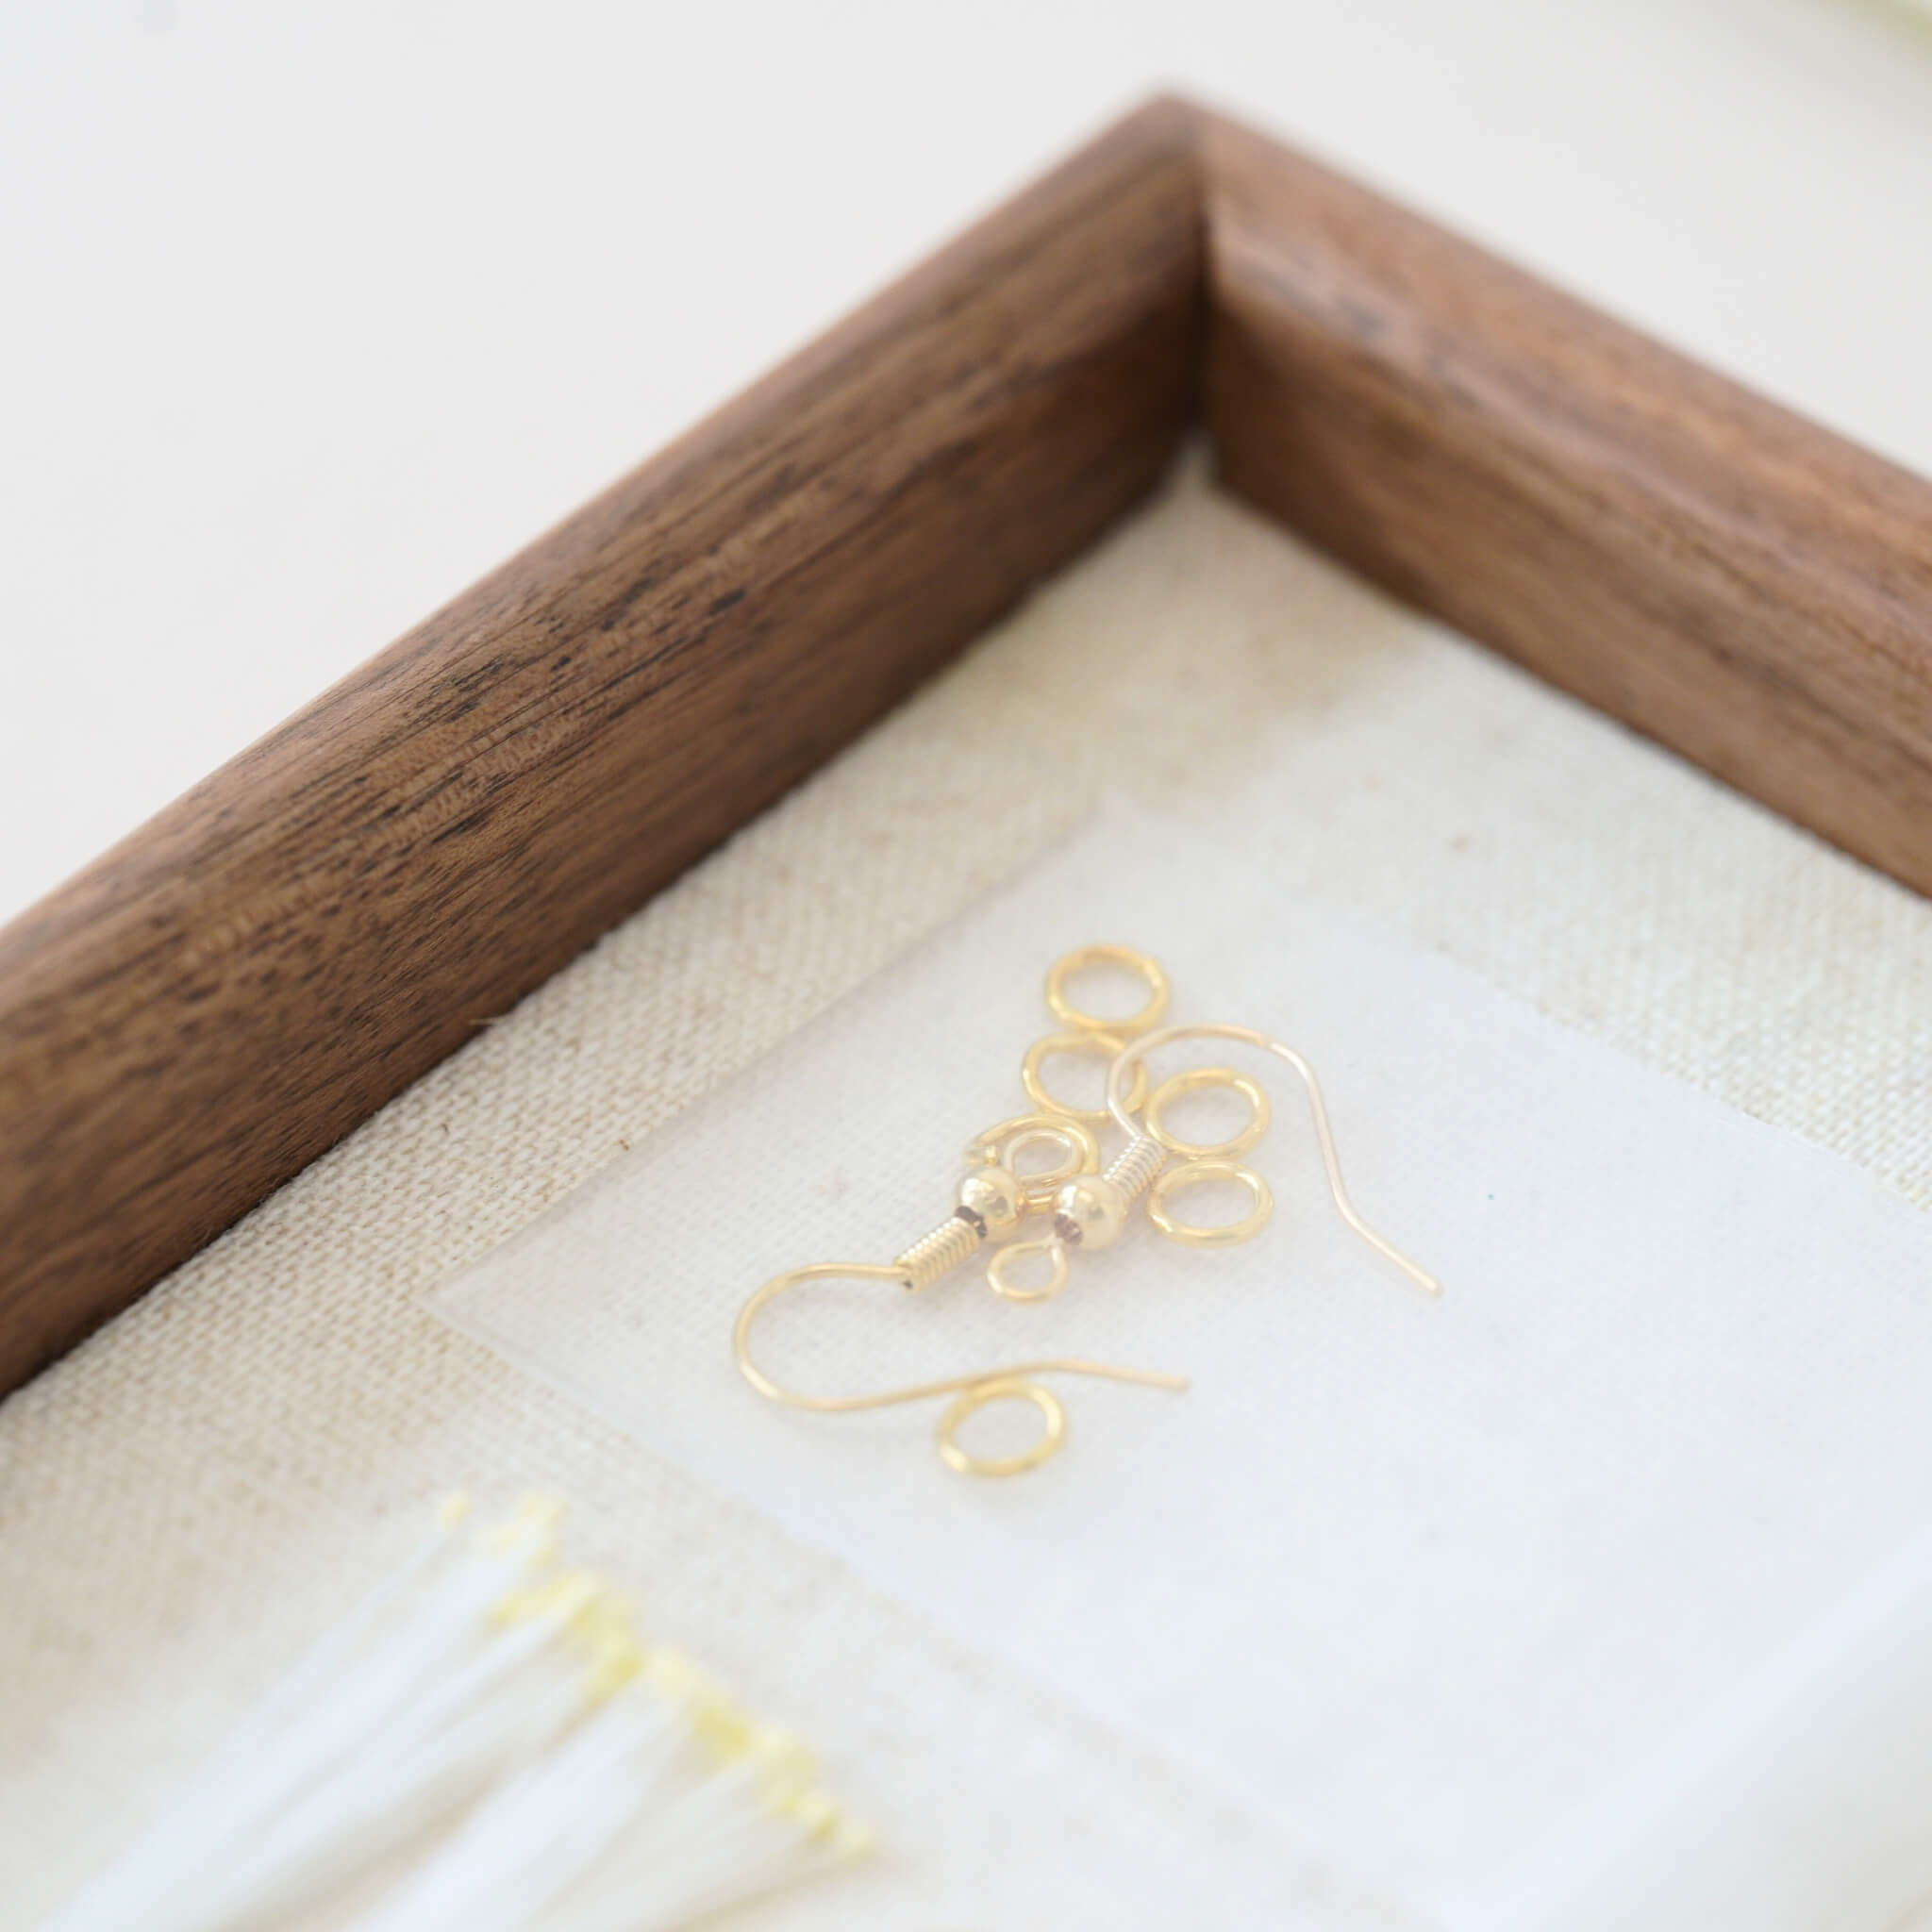
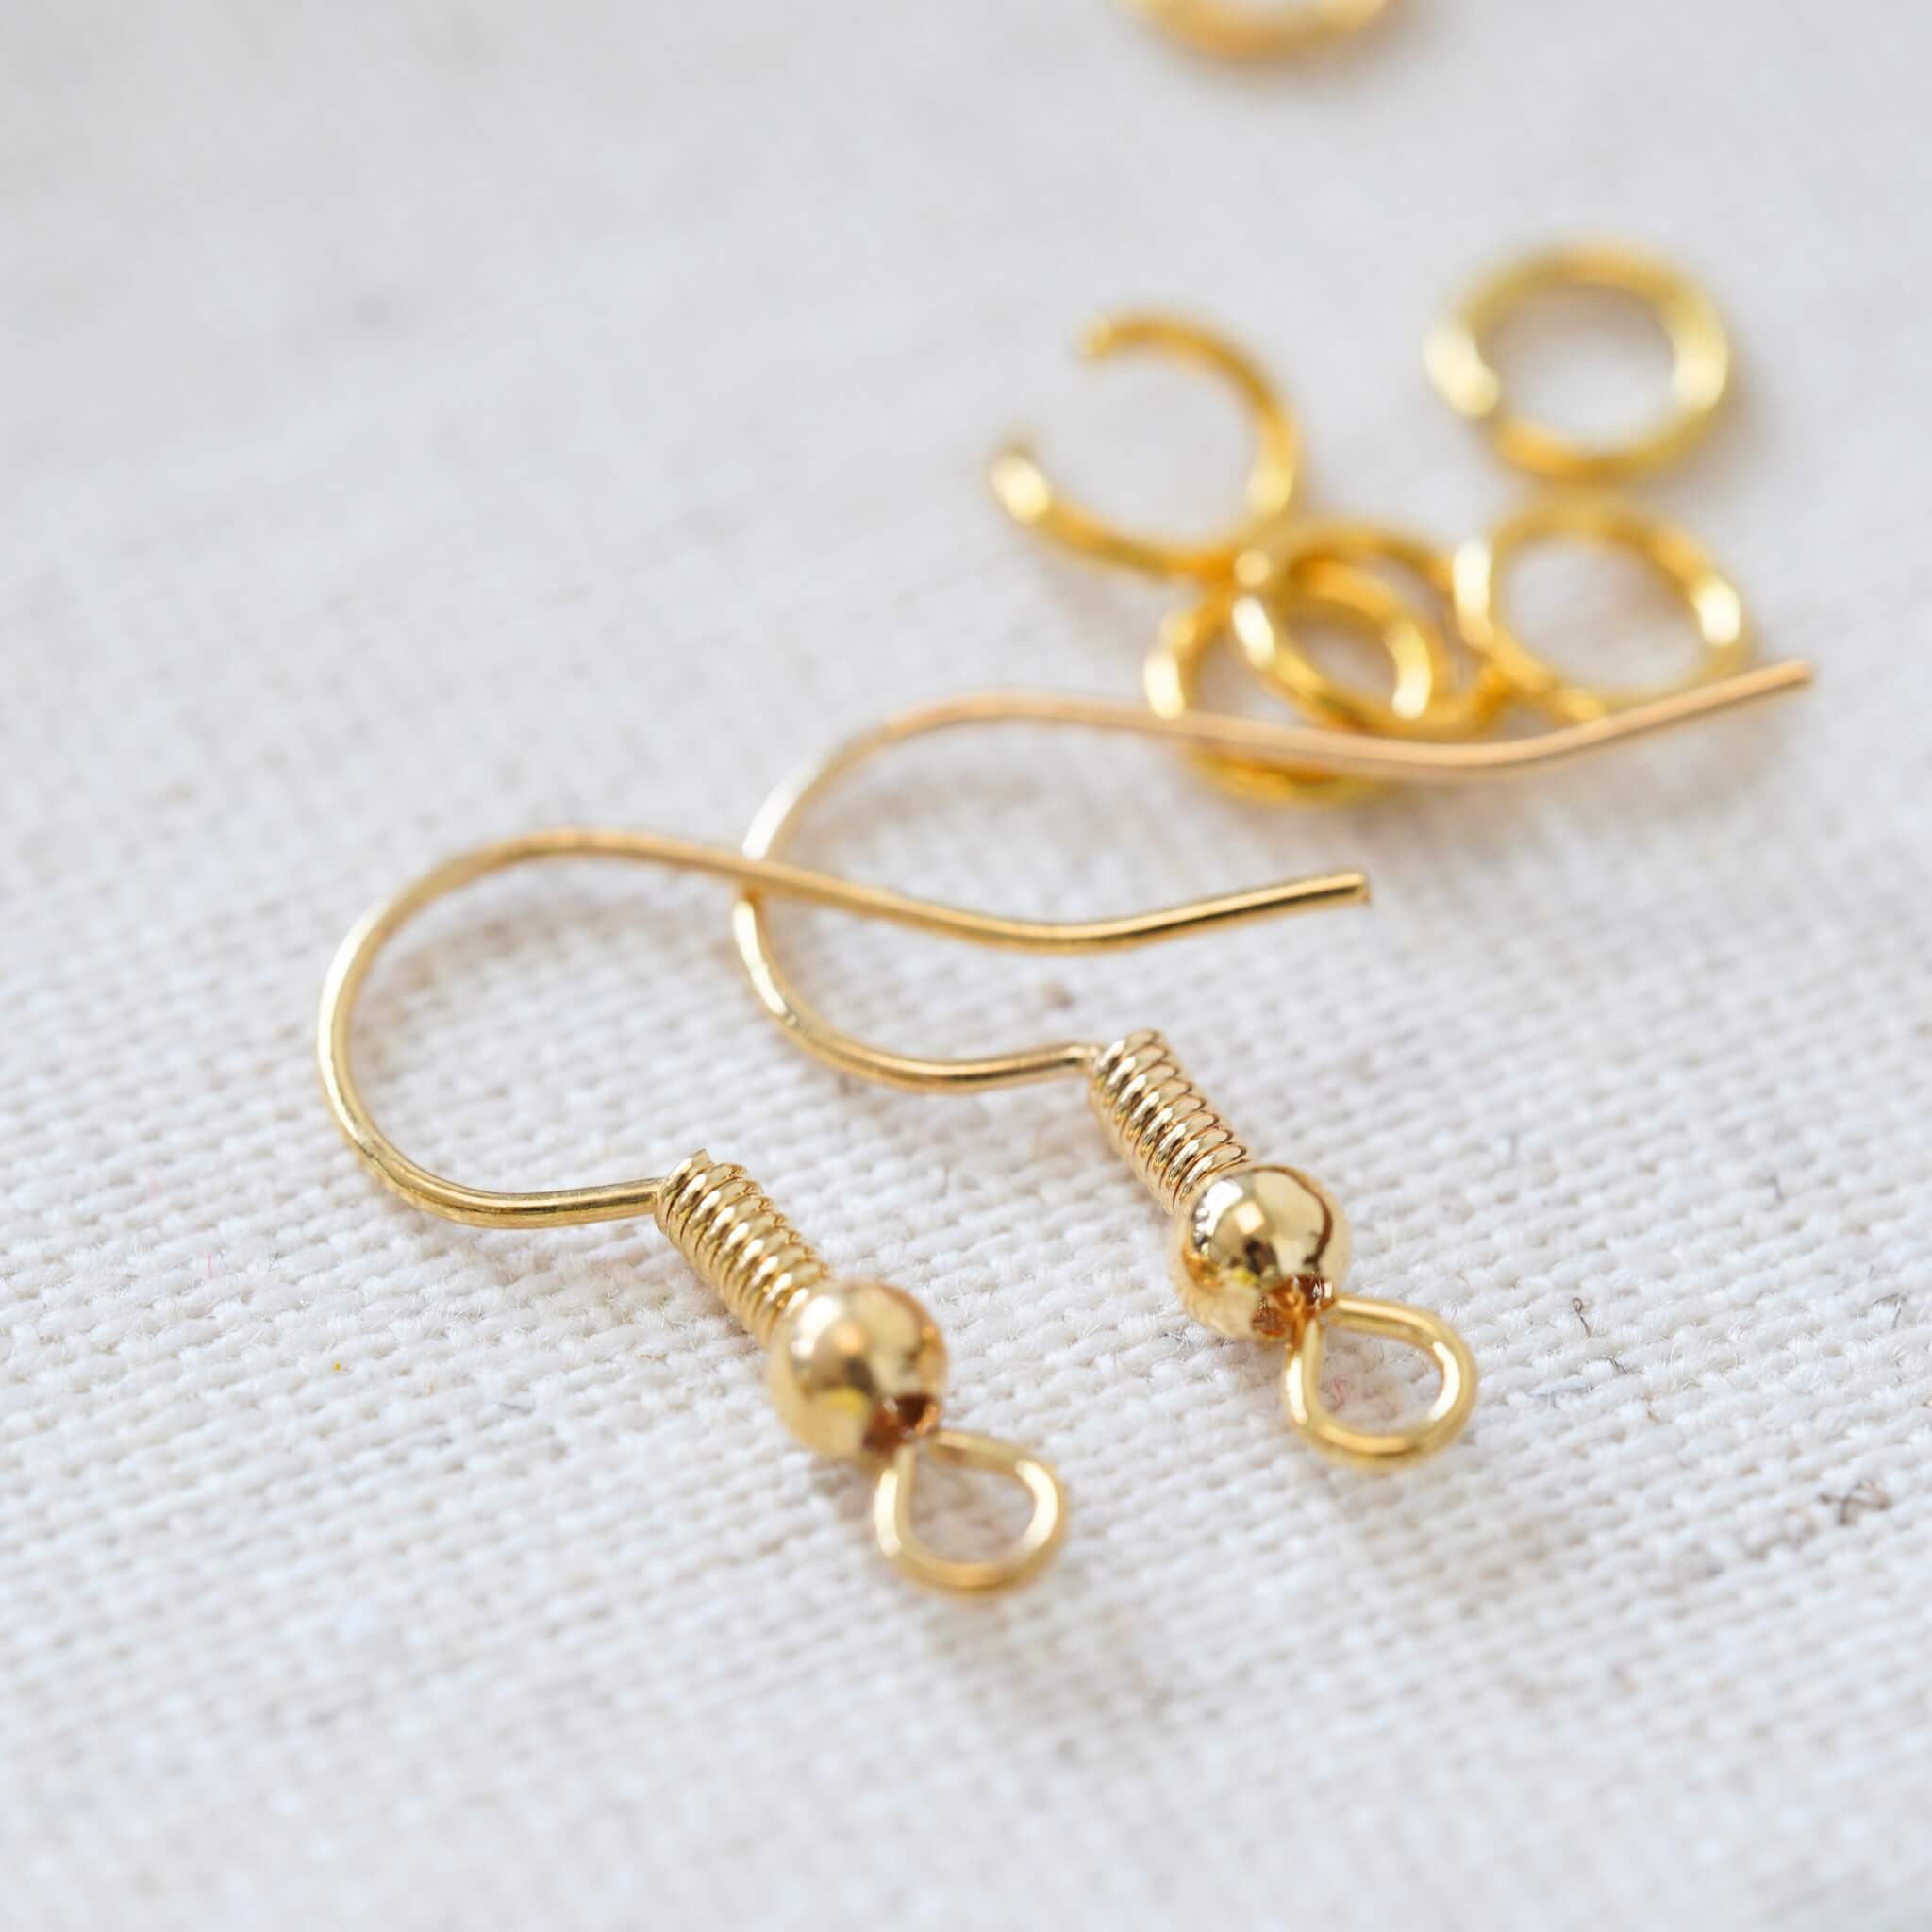
Nimm als Nächstes die Ohrstecker-Basis heraus und trage eine kleine Menge Schmuckkleber darauf auf. Wenn der Kleber halb getrocknet und klebrig ist, befestige die Ohrstecker-Basis und die Blumenbasis zusammen. Wenn der Schmuckkleber nicht gut hält, kannst du auch UV-Harz verwenden, das mit einer UV-Lampe ausgehärtet werden muss.
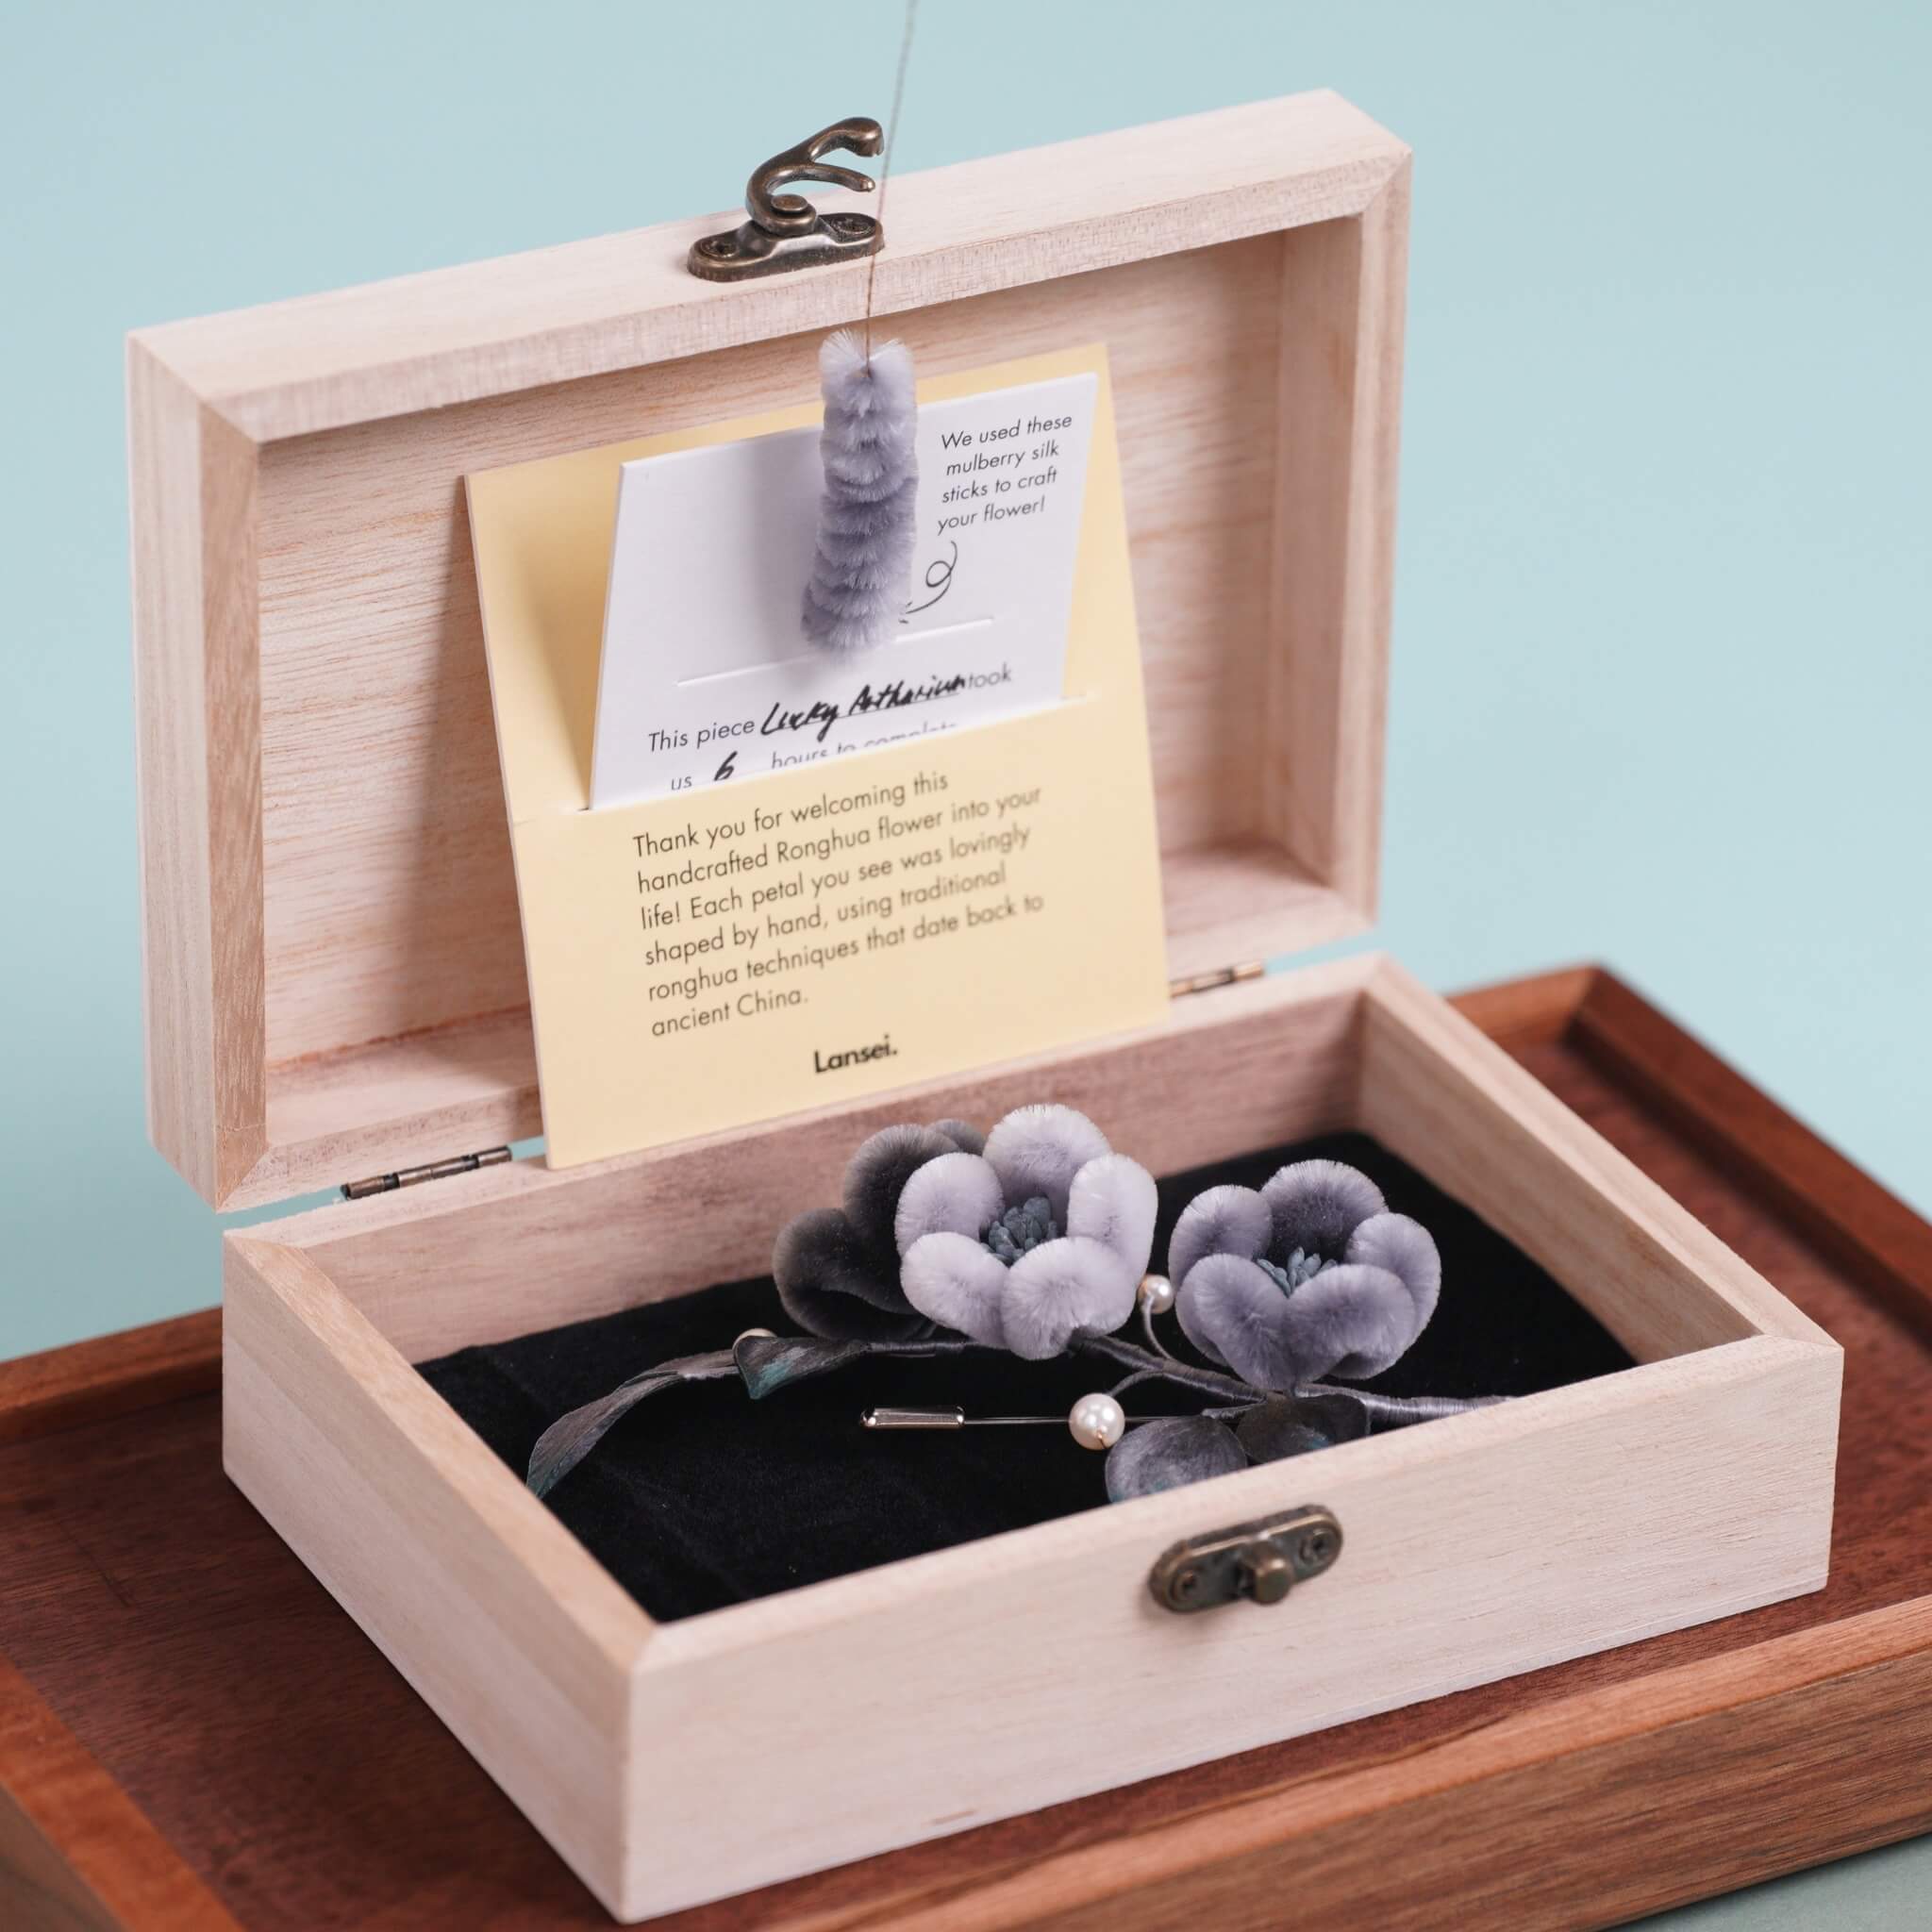
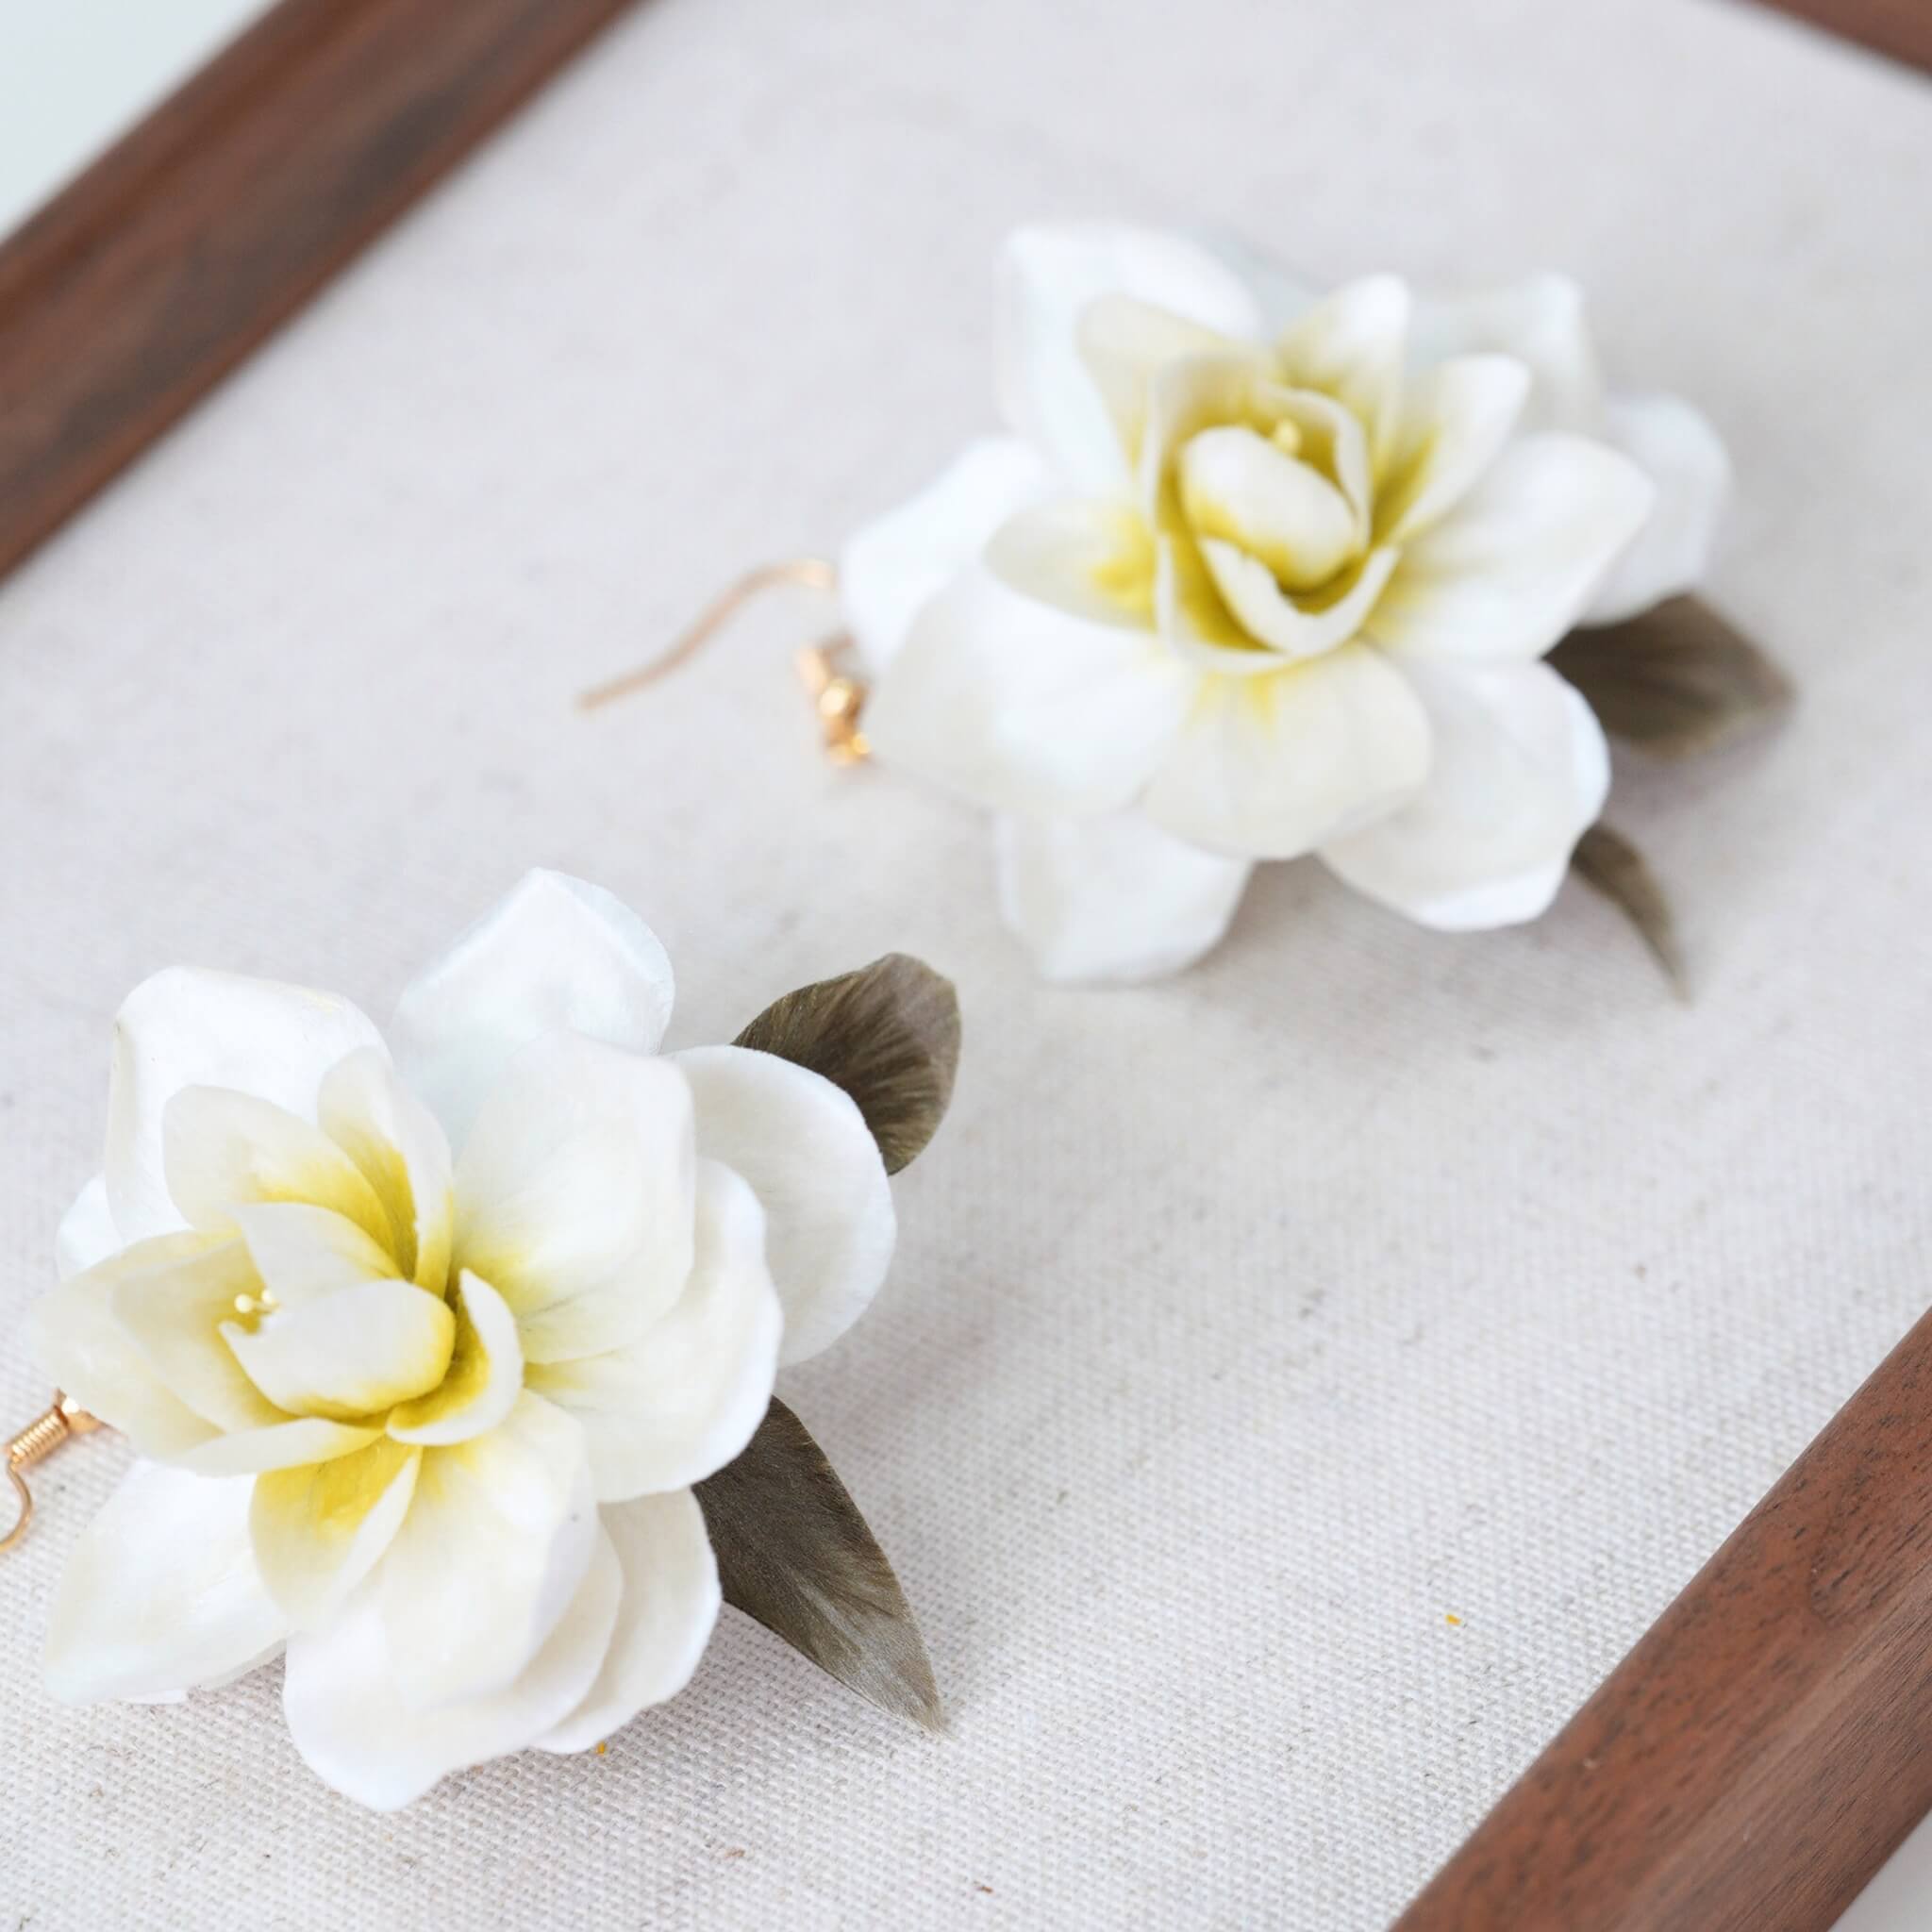
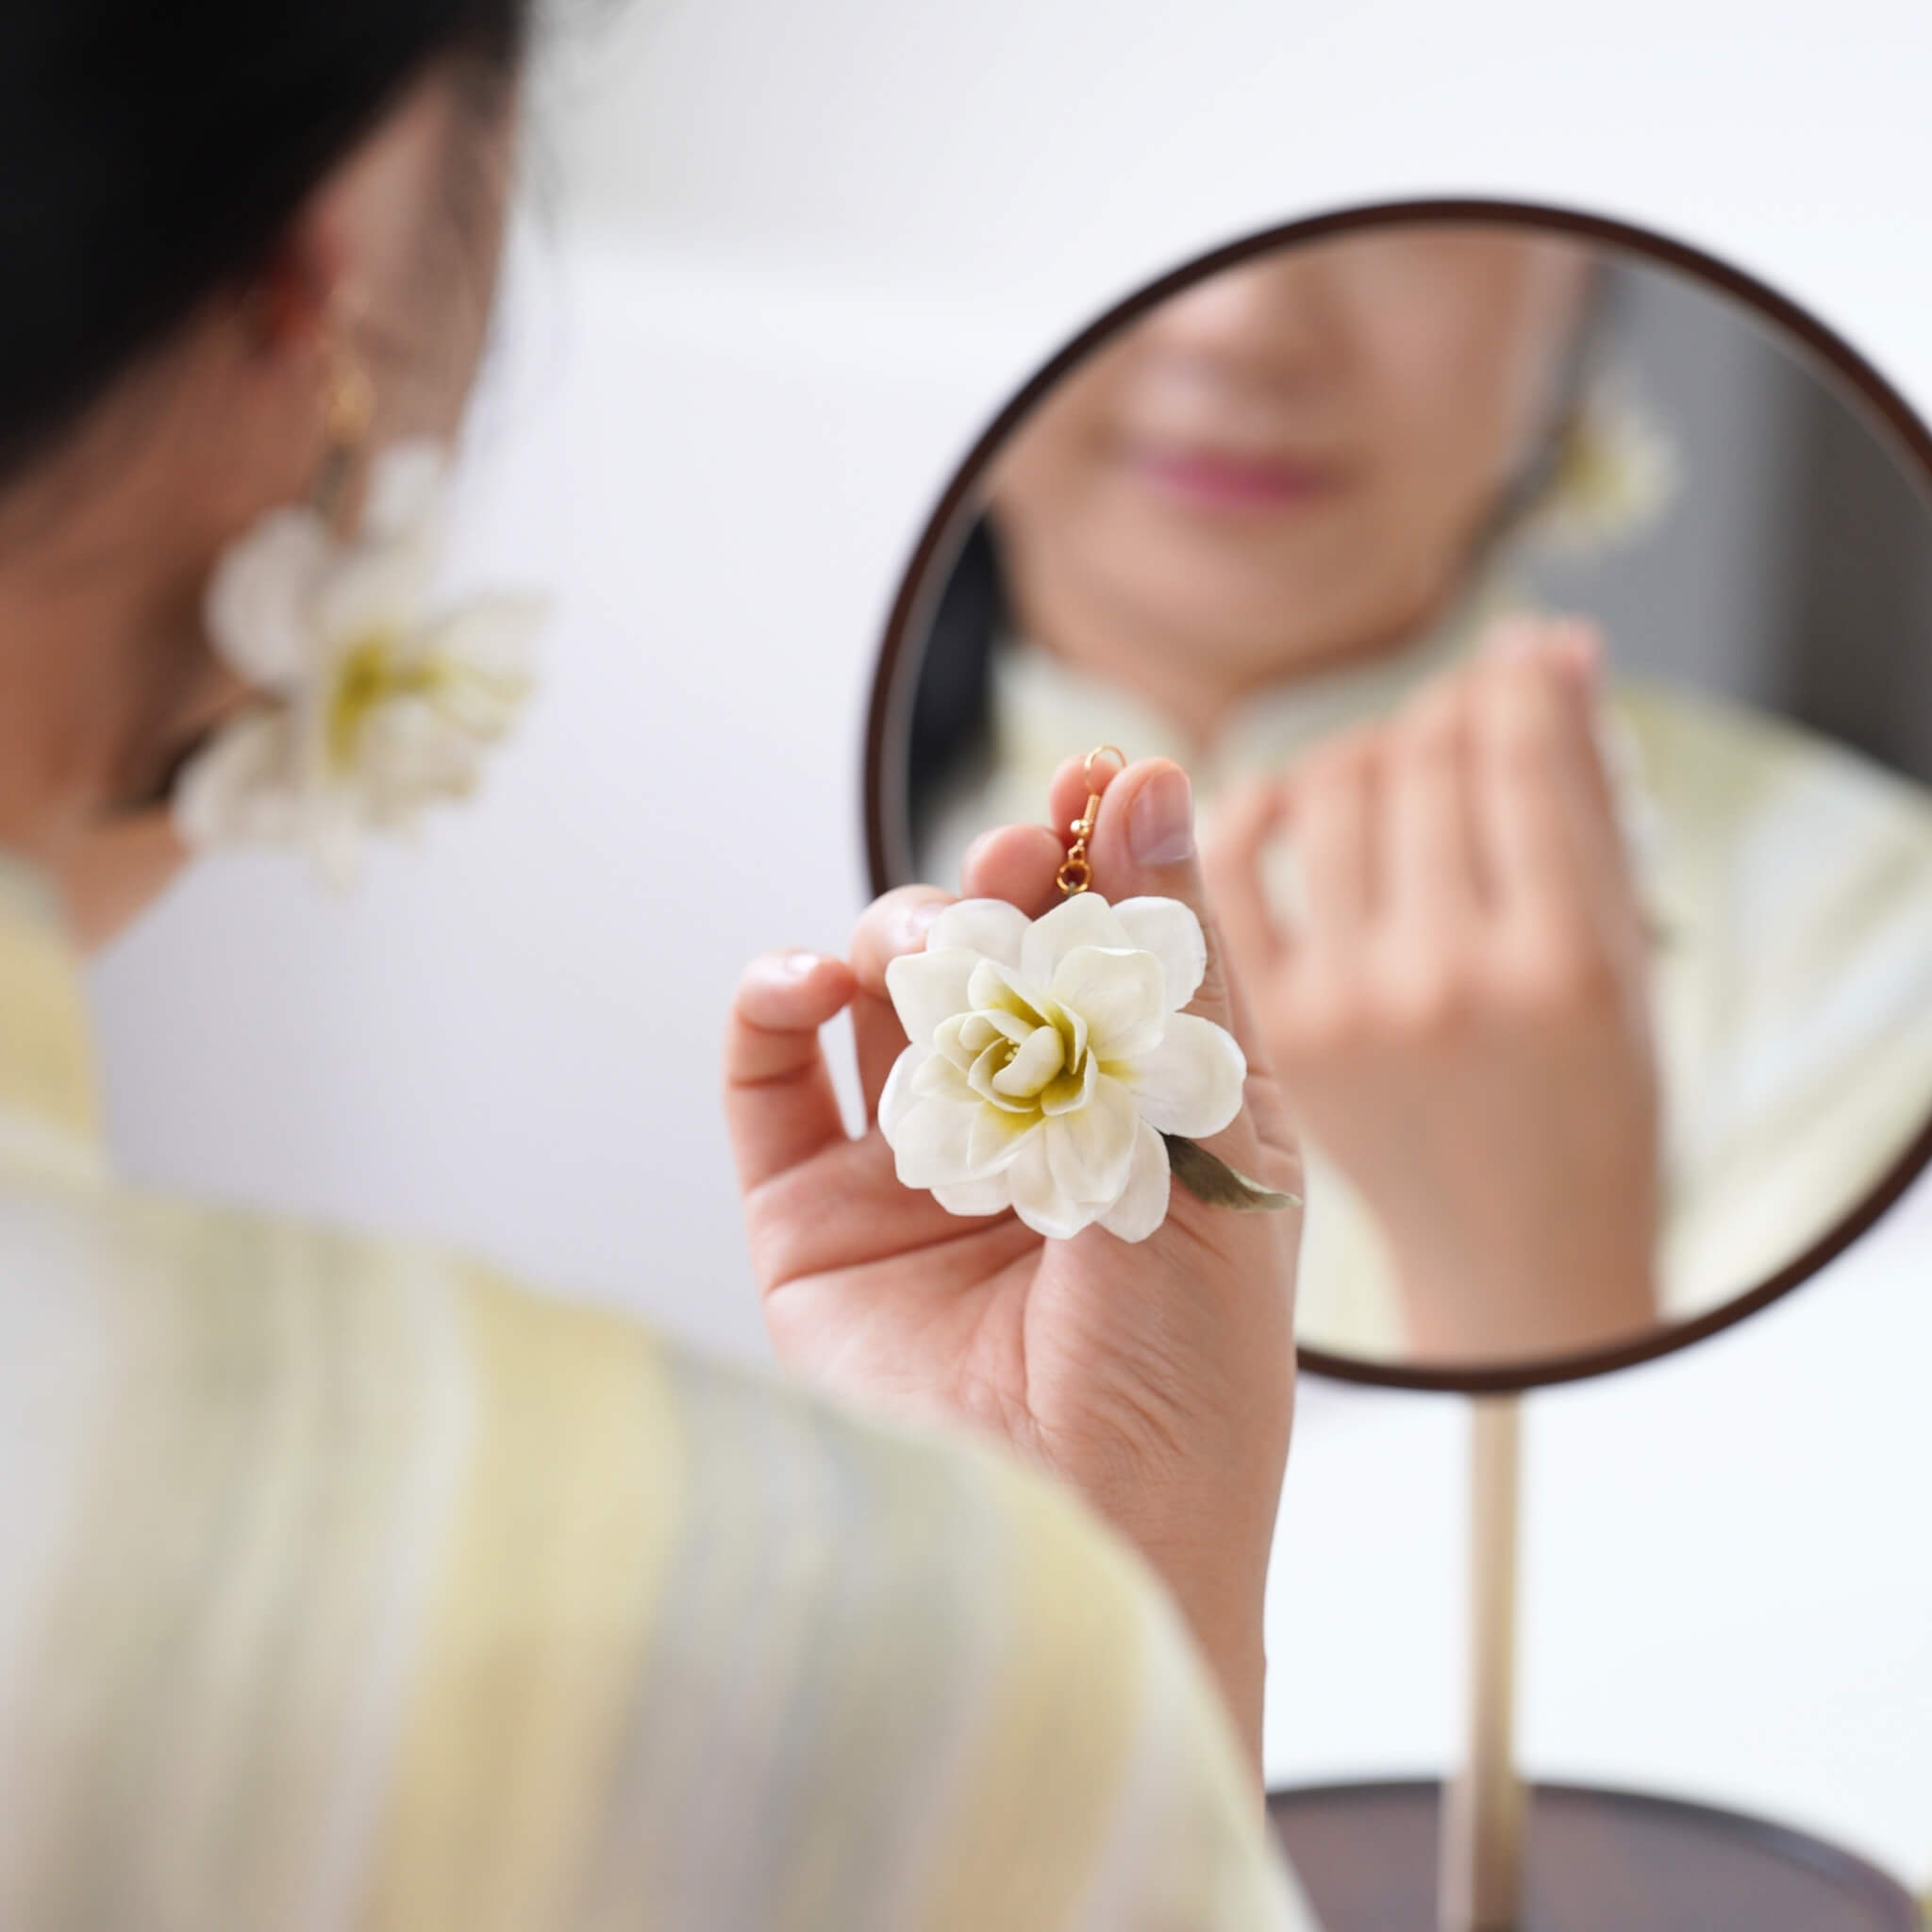
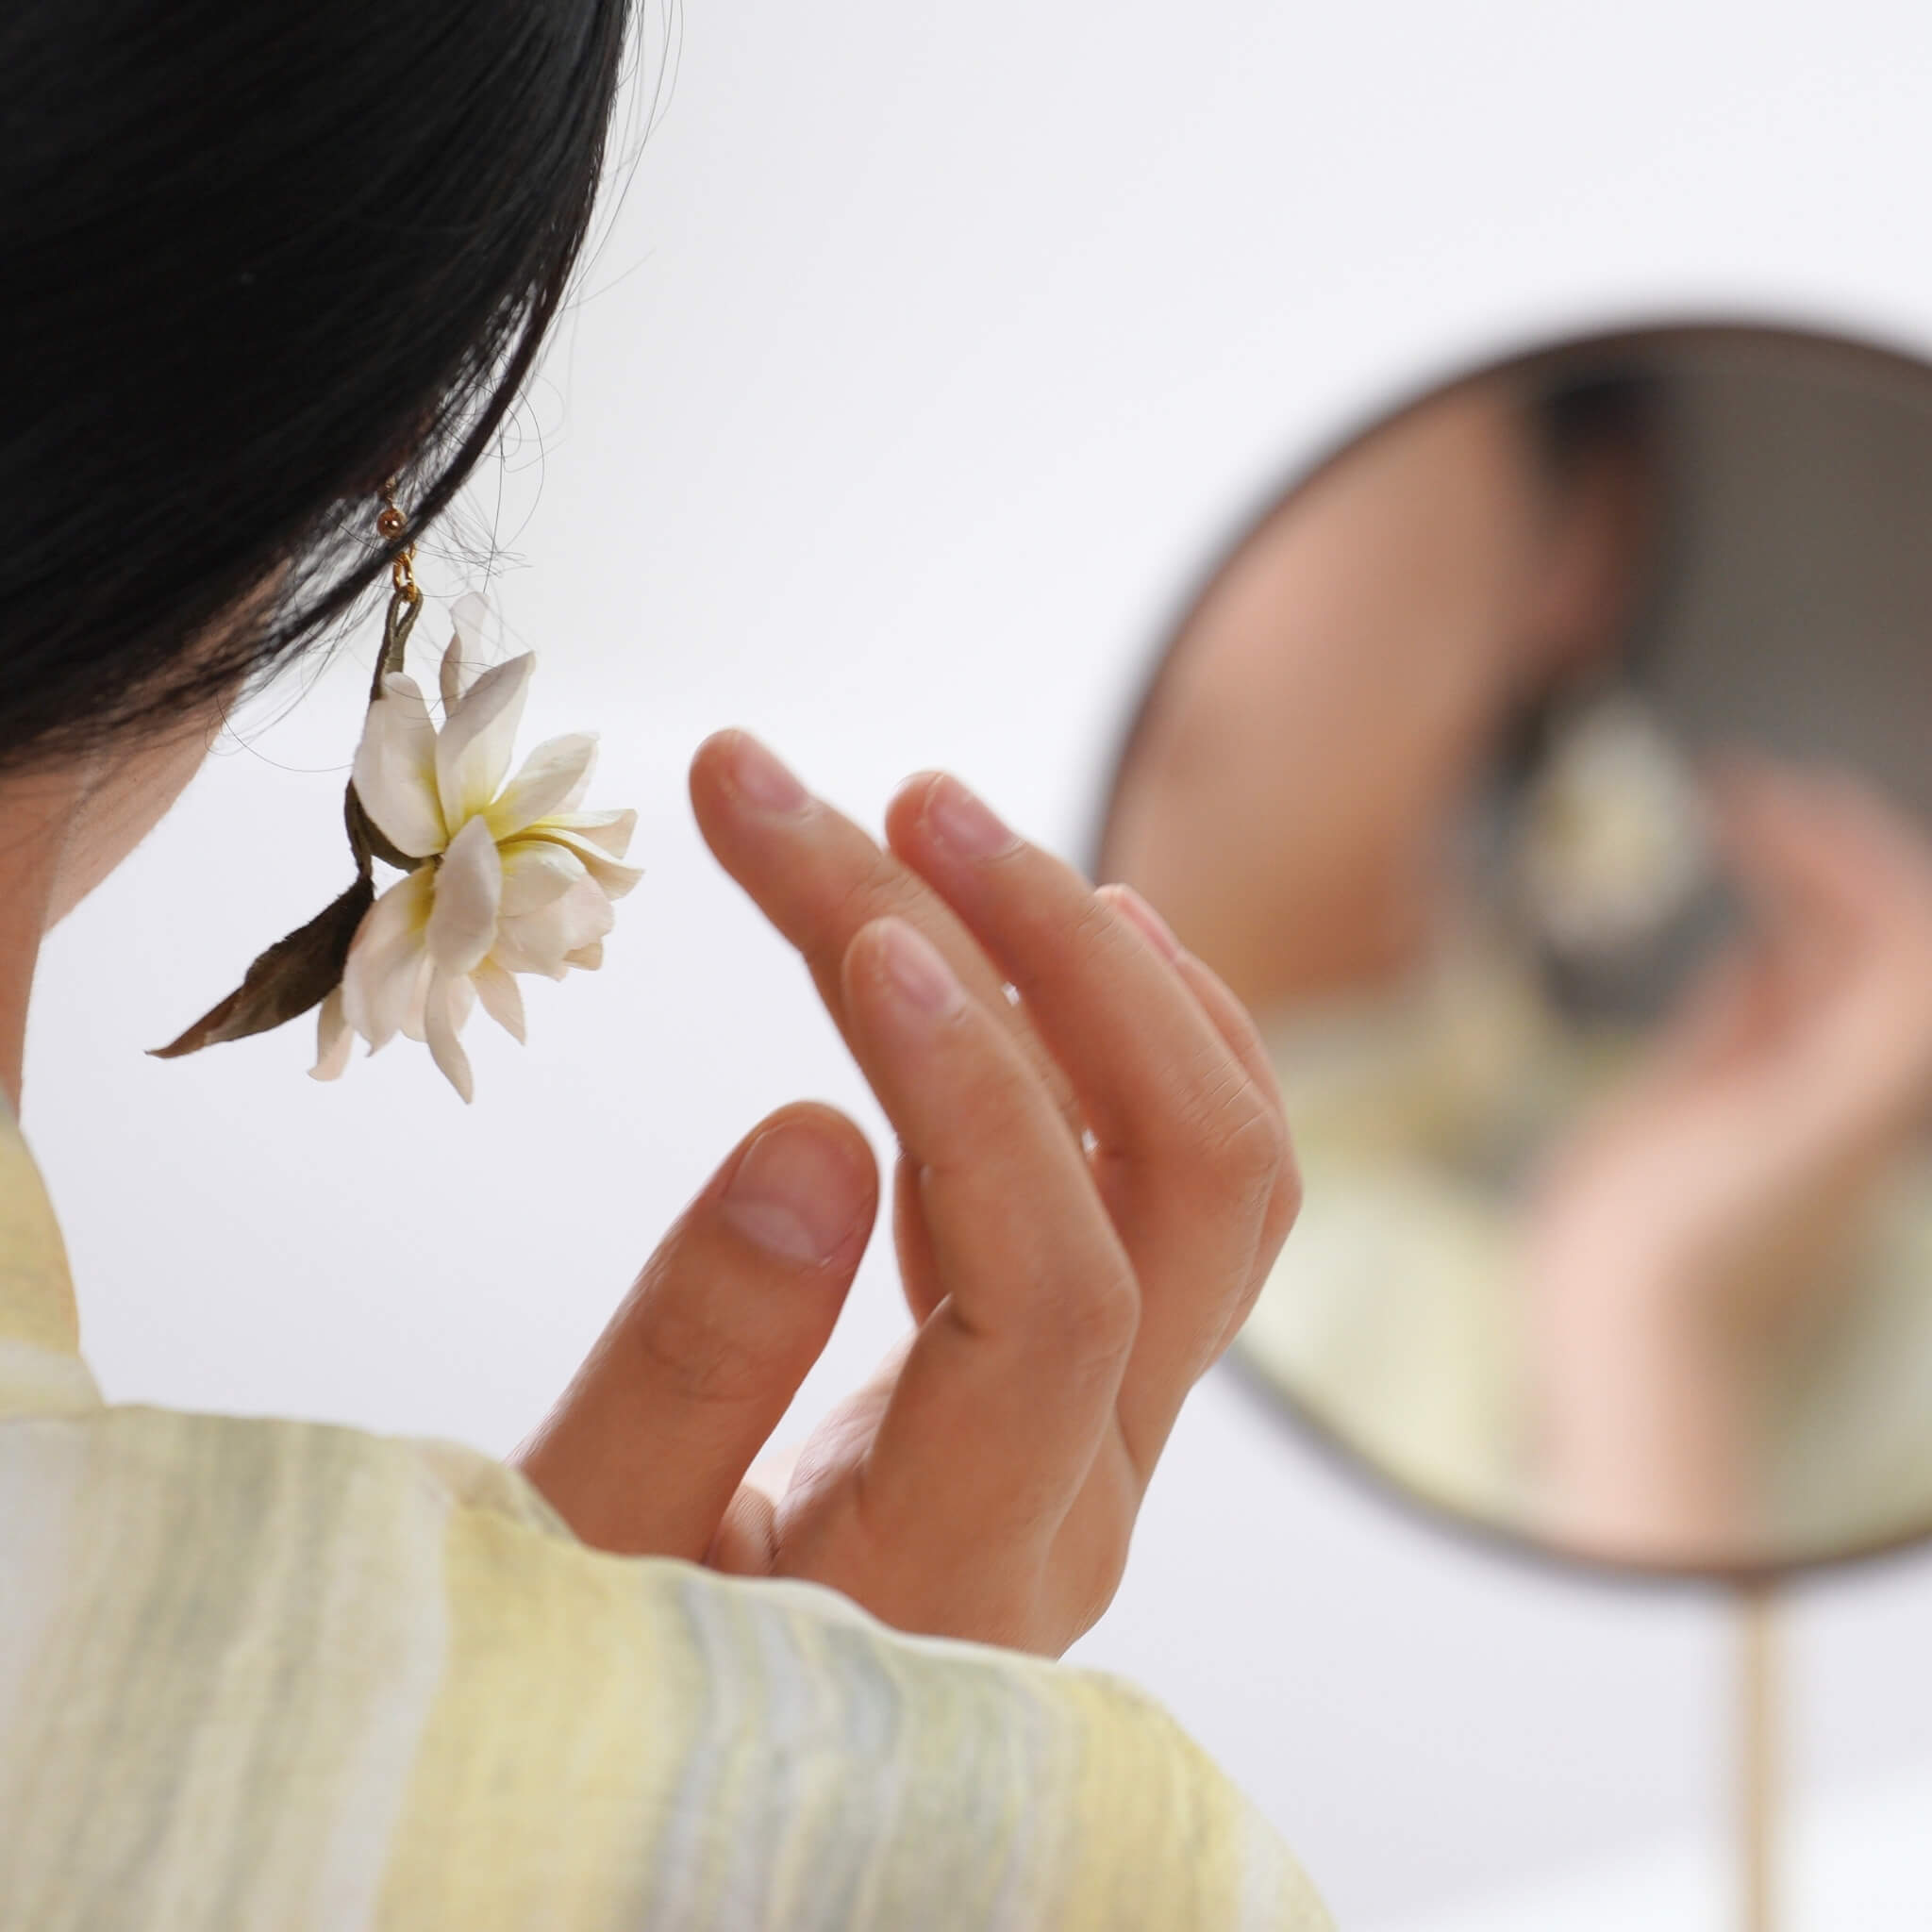
Schritt 13. Bewundere deine Arbeit
Sobald die Ohrstecker-Basen sicher befestigt sind, kannst du deine Chrysanthemen-Ohrringe tragen. 🌸 ! Gehe und schätze dein eigenes Handwerk und präsentiere deine harte Arbeit deinen Freunden und deiner Familie!
Einen Kommentar hinterlassen
Alle Kommentare werden vor der Veröffentlichung moderiert.
Wir erhalten diese Fragen oft von unseren Bastlern – und wir dachten, sie könnten auch dir auf deiner eigenen Ronghua-Reise weiterhelfen!
Mir ist aufgefallen, dass du einen Holzständer benutzt, um die Seide zu spannen – brauche ich so einen?
Der Ronghua-Ständer ist ein sehr hilfreiches Werkzeug, aber für Anfänger nicht unbedingt notwendig. Mit einigen einfallsreichen Alternativen können Sie dennoch großartige Ergebnisse erzielen! Wir haben hier ein kurzes Lehrvideo mit anderen Methoden erstellt:
Was ist die Flüssigkeit, in die man die Blütenblätter taucht?
Das nennen wir die Fixierlösung. Sie können einfach normalen Haarspray verwenden oder Ihre eigene Lösung herstellen, indem Sie weißen Bastelkleber (in unserem Werkzeugset enthalten) mit Wasser im Verhältnis 1:1,15 oder 1:1,2 mischen.
Haben Sie eine Frage?
Sie können uns über unsere Kontaktseite erreichen! Wir helfen Ihnen gerne weiter.
Unser Kundensupport ist von Montag bis Freitag von 8:00 bis 20:30 Uhr erreichbar.Durchschnittliche Antwortzeit: 24 Stunden
Heute sind wir von Informationen so umgeben, dass man leicht vergisst, wie schwierig es einst war, einen Weg zu finden, all das festzuhalten.
Letzte Woche sind wir nach Tengchong gereist, einer kl...
Vielleicht haben Sie den Begriff „Ronghua“ (绒花) noch nie gehört, aber keine Sorge – ich auch nicht, bis vor sechs Monaten! Dieses alte chinesische Kunsthandwerk gibt es seit über tausend Jahren. I...


Einen Kommentar hinterlassen
Alle Kommentare werden vor der Veröffentlichung moderiert.
Diese Website ist durch hCaptcha geschützt und es gelten die allgemeinen Geschäftsbedingungen und Datenschutzbestimmungen von hCaptcha.