


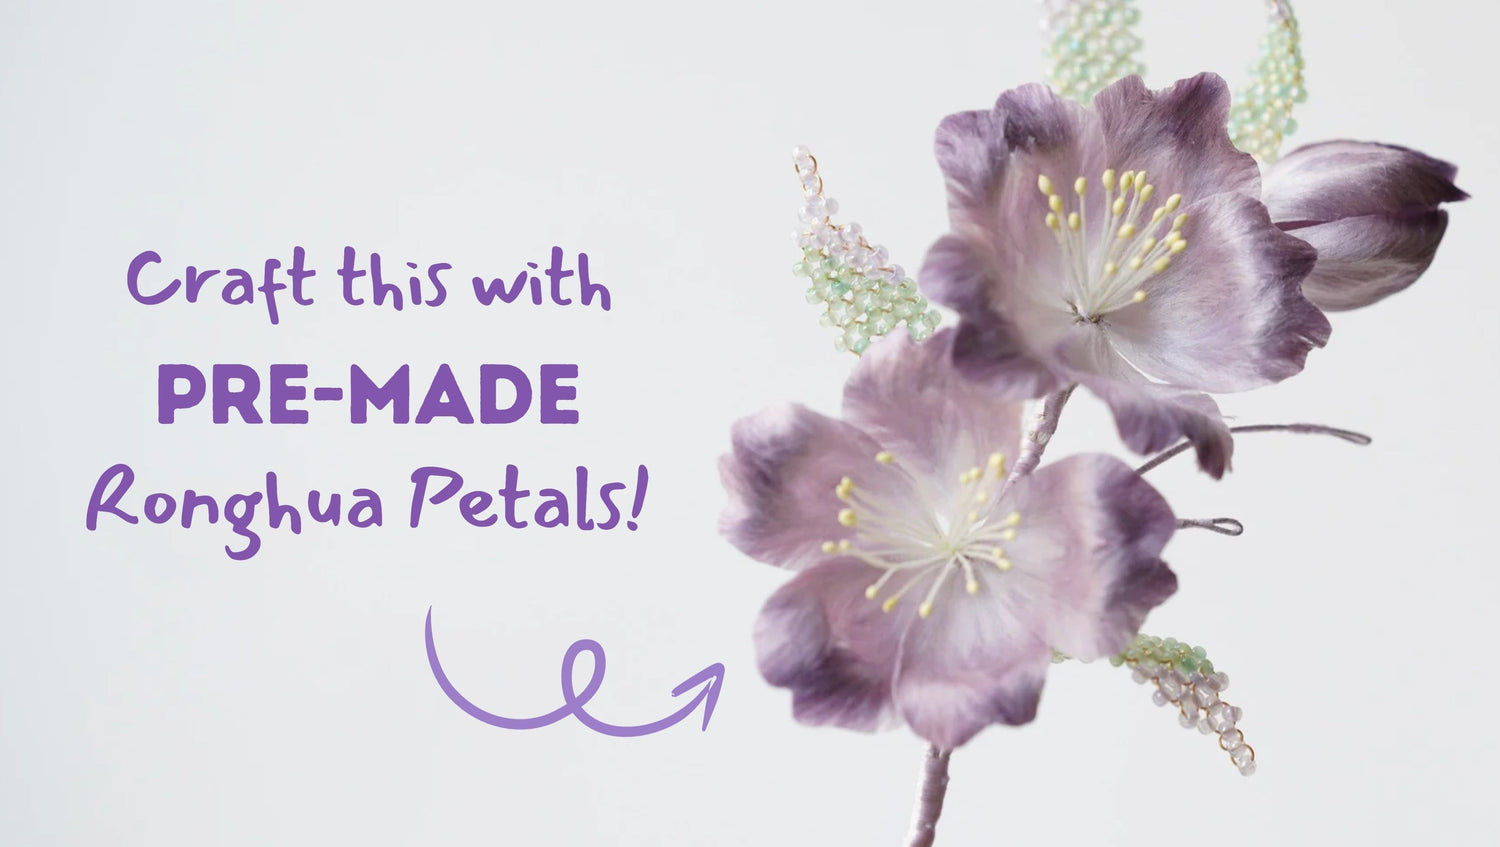
In diesem einfachen DIY-Tutorial zeigen wir Ihnen, wie Sie vorgefertigte Seidenstreifen verwenden, um zarte Blütenblätter zu erstellen, eine realistische Blütenknospe zu formen und alles zu einer atemberaubenden handgefertigten Blüte zusammenzusetzen.
Schritt 1: Herstellung der Blütenblätter 00:00~ 12:18
Gießen Sie etwas Fixierspray oder Haarspray in eine Schale und tauchen Sie die vorgeformten Streifen hinein. Sobald die Seide weich wird, nehmen Sie sie heraus und entfernen Sie mit einer Pinzette überschüssige Feuchtigkeit. Formen Sie dann mit der Pinzette die Seide zu einer Kurve, indem Sie die Oberseite des Streifens nach hinten klappen. Drücken Sie die Seide auf beiden Seiten nach innen und drücken Sie beide Seiten vorsichtig mit der Pinzette, um eine kleine Kurve zu formen. Sie benötigen zehn Blütenblätter wie diese.
Für die Knospenblätter benötigen Sie drei Streifen. Verwenden Sie einen abgerundeten Stab, um sie zu drücken und in eine Kurve zu formen. Drücken Sie die Seide mit den Fingern auf beiden Seiten nach innen, um die Blütenblätter schmaler zu machen. Kneifen Sie die Spitze der Blütenblätter, um eine Spitze zu formen. Sobald die Blütenblätter geformt sind, stecken Sie sie in ein Schaumstoffpolster, aber achten Sie darauf, dass sie nicht zu dicht beieinander liegen, um ein Verkleben zu vermeiden.


Nachdem sie getrocknet sind, schneiden Sie sie entlang der Form der Blütenblätter zu. Die Spitze der Blütenblätter muss in eine kleine herzförmige Kerbe geschnitten werden. Sie benötigen 10 Blütenblätter wie diese, aber die Knospenblätter müssen nicht zugeschnitten werden.

Schritt 2: Zusammenbau der Blütenblätter 12:18~Ende
Fädeln Sie die Perlen wie gezeigt auf den Kupferdraht auf im untenstehenden Abschnitt des Tutorial-Videos.
Schneiden Sie das Blütenzentrum in zwei Hälften und binden Sie es mit Faden zusammen, machen Sie einen Knoten, um ein Aufwickeln des Fadens zu verhindern. Verwenden Sie eine Pinzette, um das Blütenzentrum zu trennen. Eine Blüte besteht aus 5 Blütenblättern. Für jedes hinzugefügte Blütenblatt wickeln Sie den Faden 1–2 Mal. Während Sie zusammensetzen, passen Sie die Position der Blütenblätter an. Wickeln Sie den Kupferdraht mit Faden ein und schneiden Sie den Kupferdraht schräg ab. Dies erzeugt einen natürlichen Übergang von dick zu dünn. Sobald der Faden bis zum Boden gewickelt ist, machen Sie einen Knoten, um ihn zu sichern. Sie müssen zwei Blumen auf diese Weise herstellen.
Die Knospe benötigt kein Blütenzentrum, drücken Sie einfach drei Blütenblätter fest zusammen. Je fester die Knospe, desto besser. Sobald der Faden gewickelt ist, machen Sie am Ende einen Knoten und richten die Blätter aus, um die Knospe fester zu machen. Eine kleine Knospe ist nun fertig. Dann setzen Sie die Blütenblätter und Blätter zusammen, und die Haarnadel ist bereit!


Wenn du dein DIY-Produkt fertiggestellt hast, lade dich ein, uns deine großartige Arbeit zu zeigen und Gutscheine zu erhalten für den Rest unserer DIY-Kits!
INS@lanseichina
Pinterest@lanseichina


Einen Kommentar hinterlassen
Alle Kommentare werden vor der Veröffentlichung moderiert.
Diese Website ist durch hCaptcha geschützt und es gelten die allgemeinen Geschäftsbedingungen und Datenschutzbestimmungen von hCaptcha.