


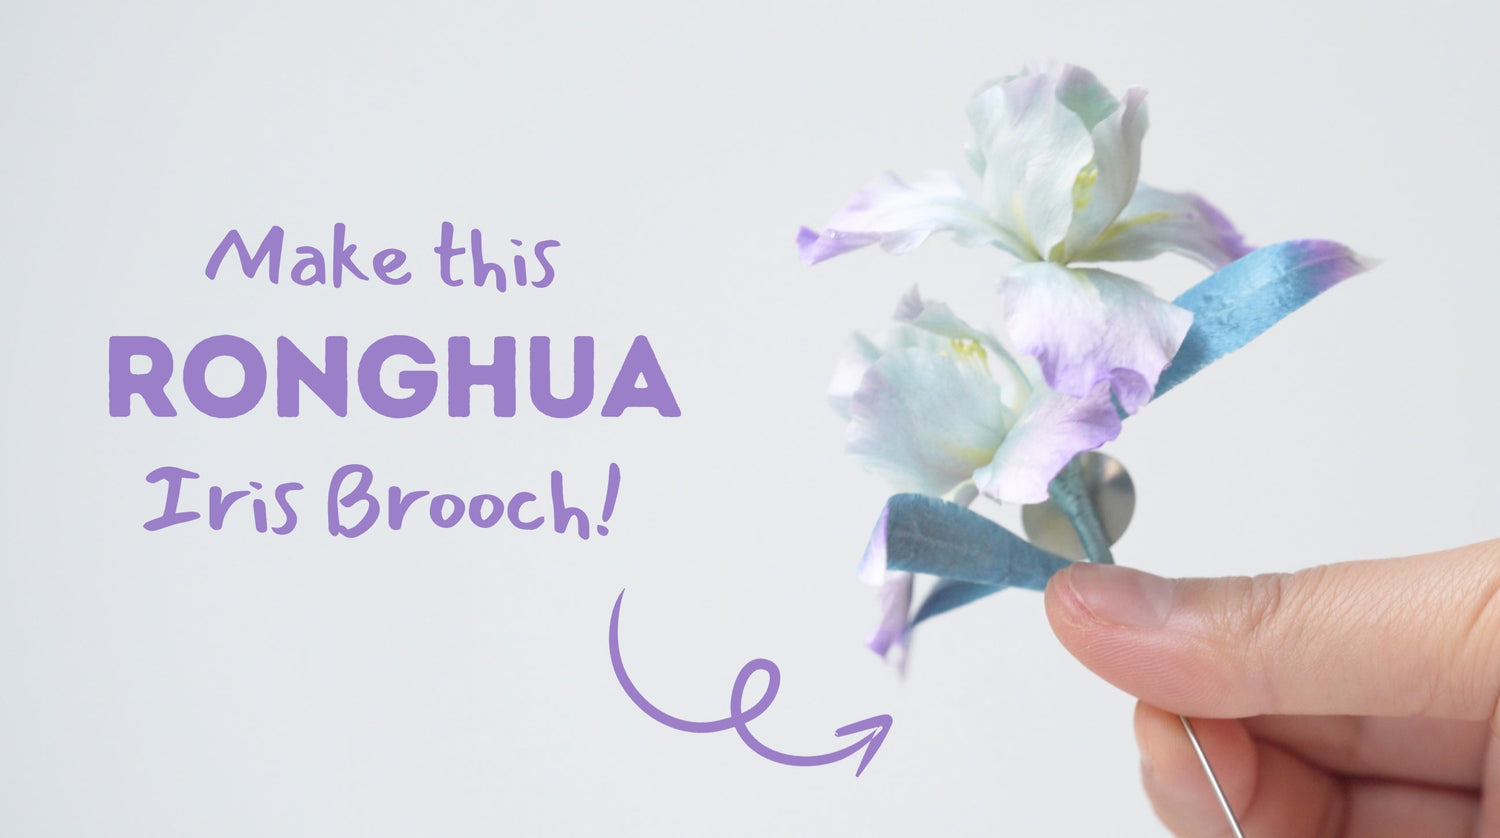
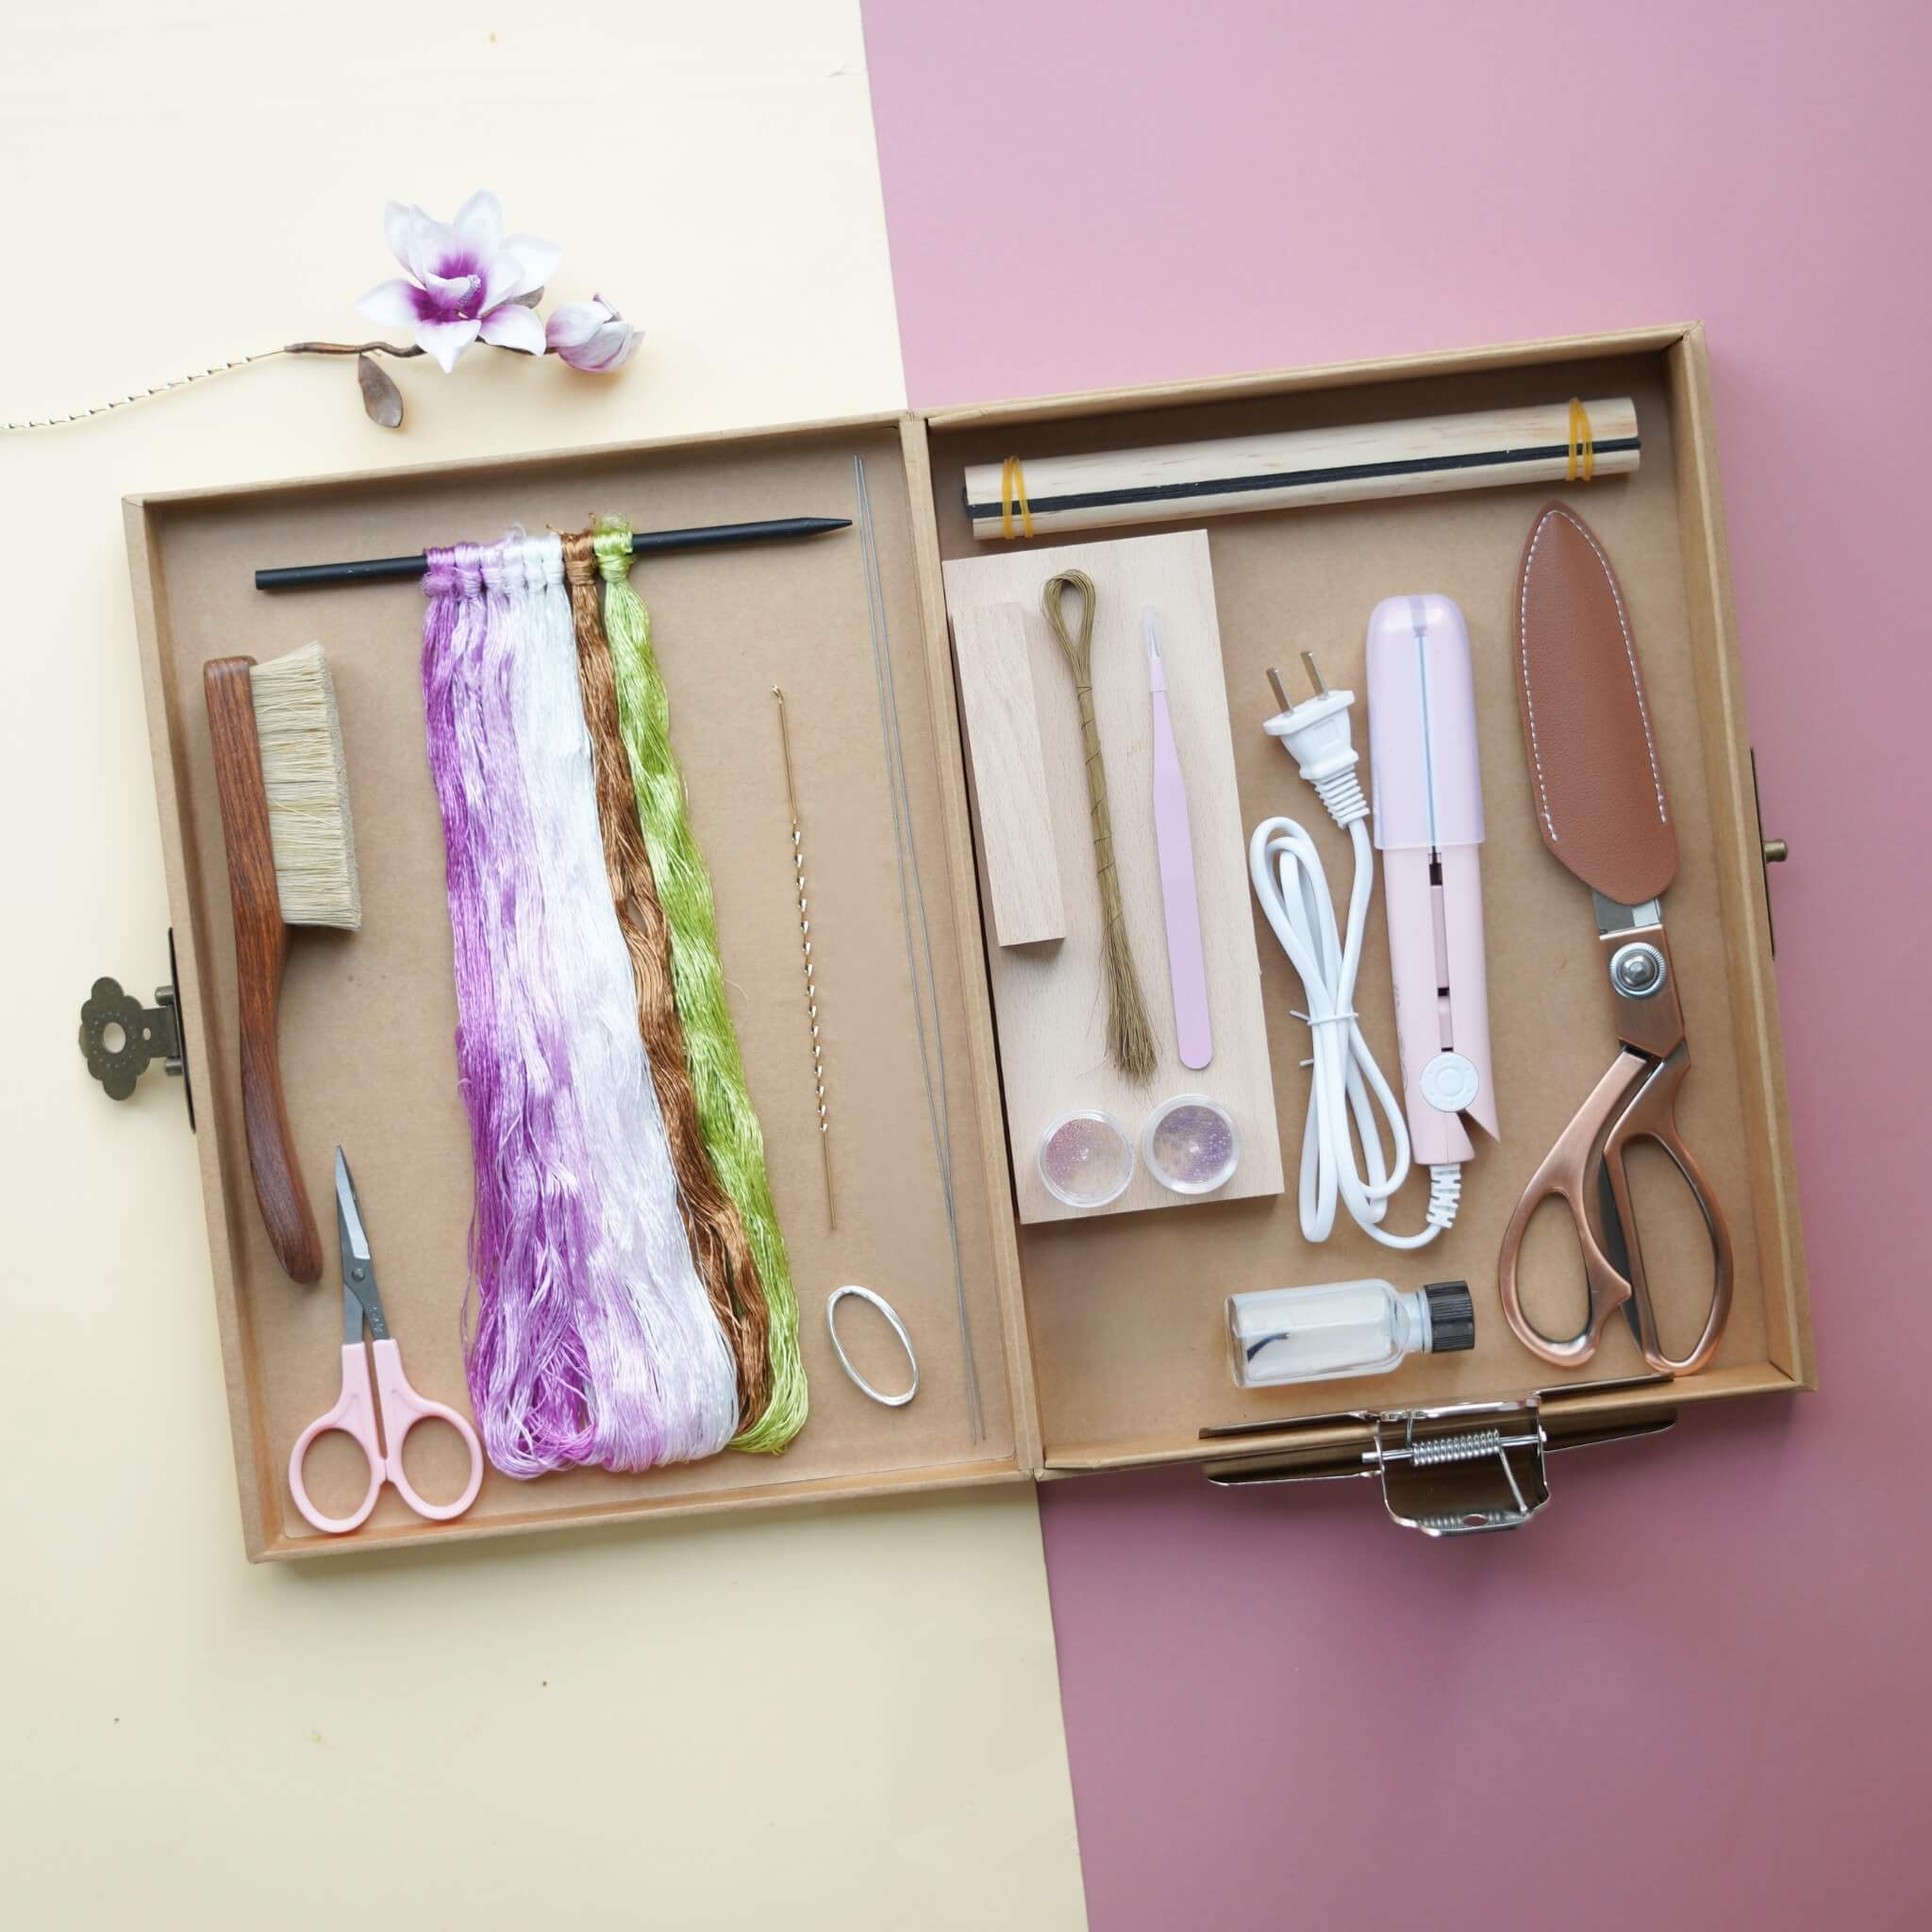
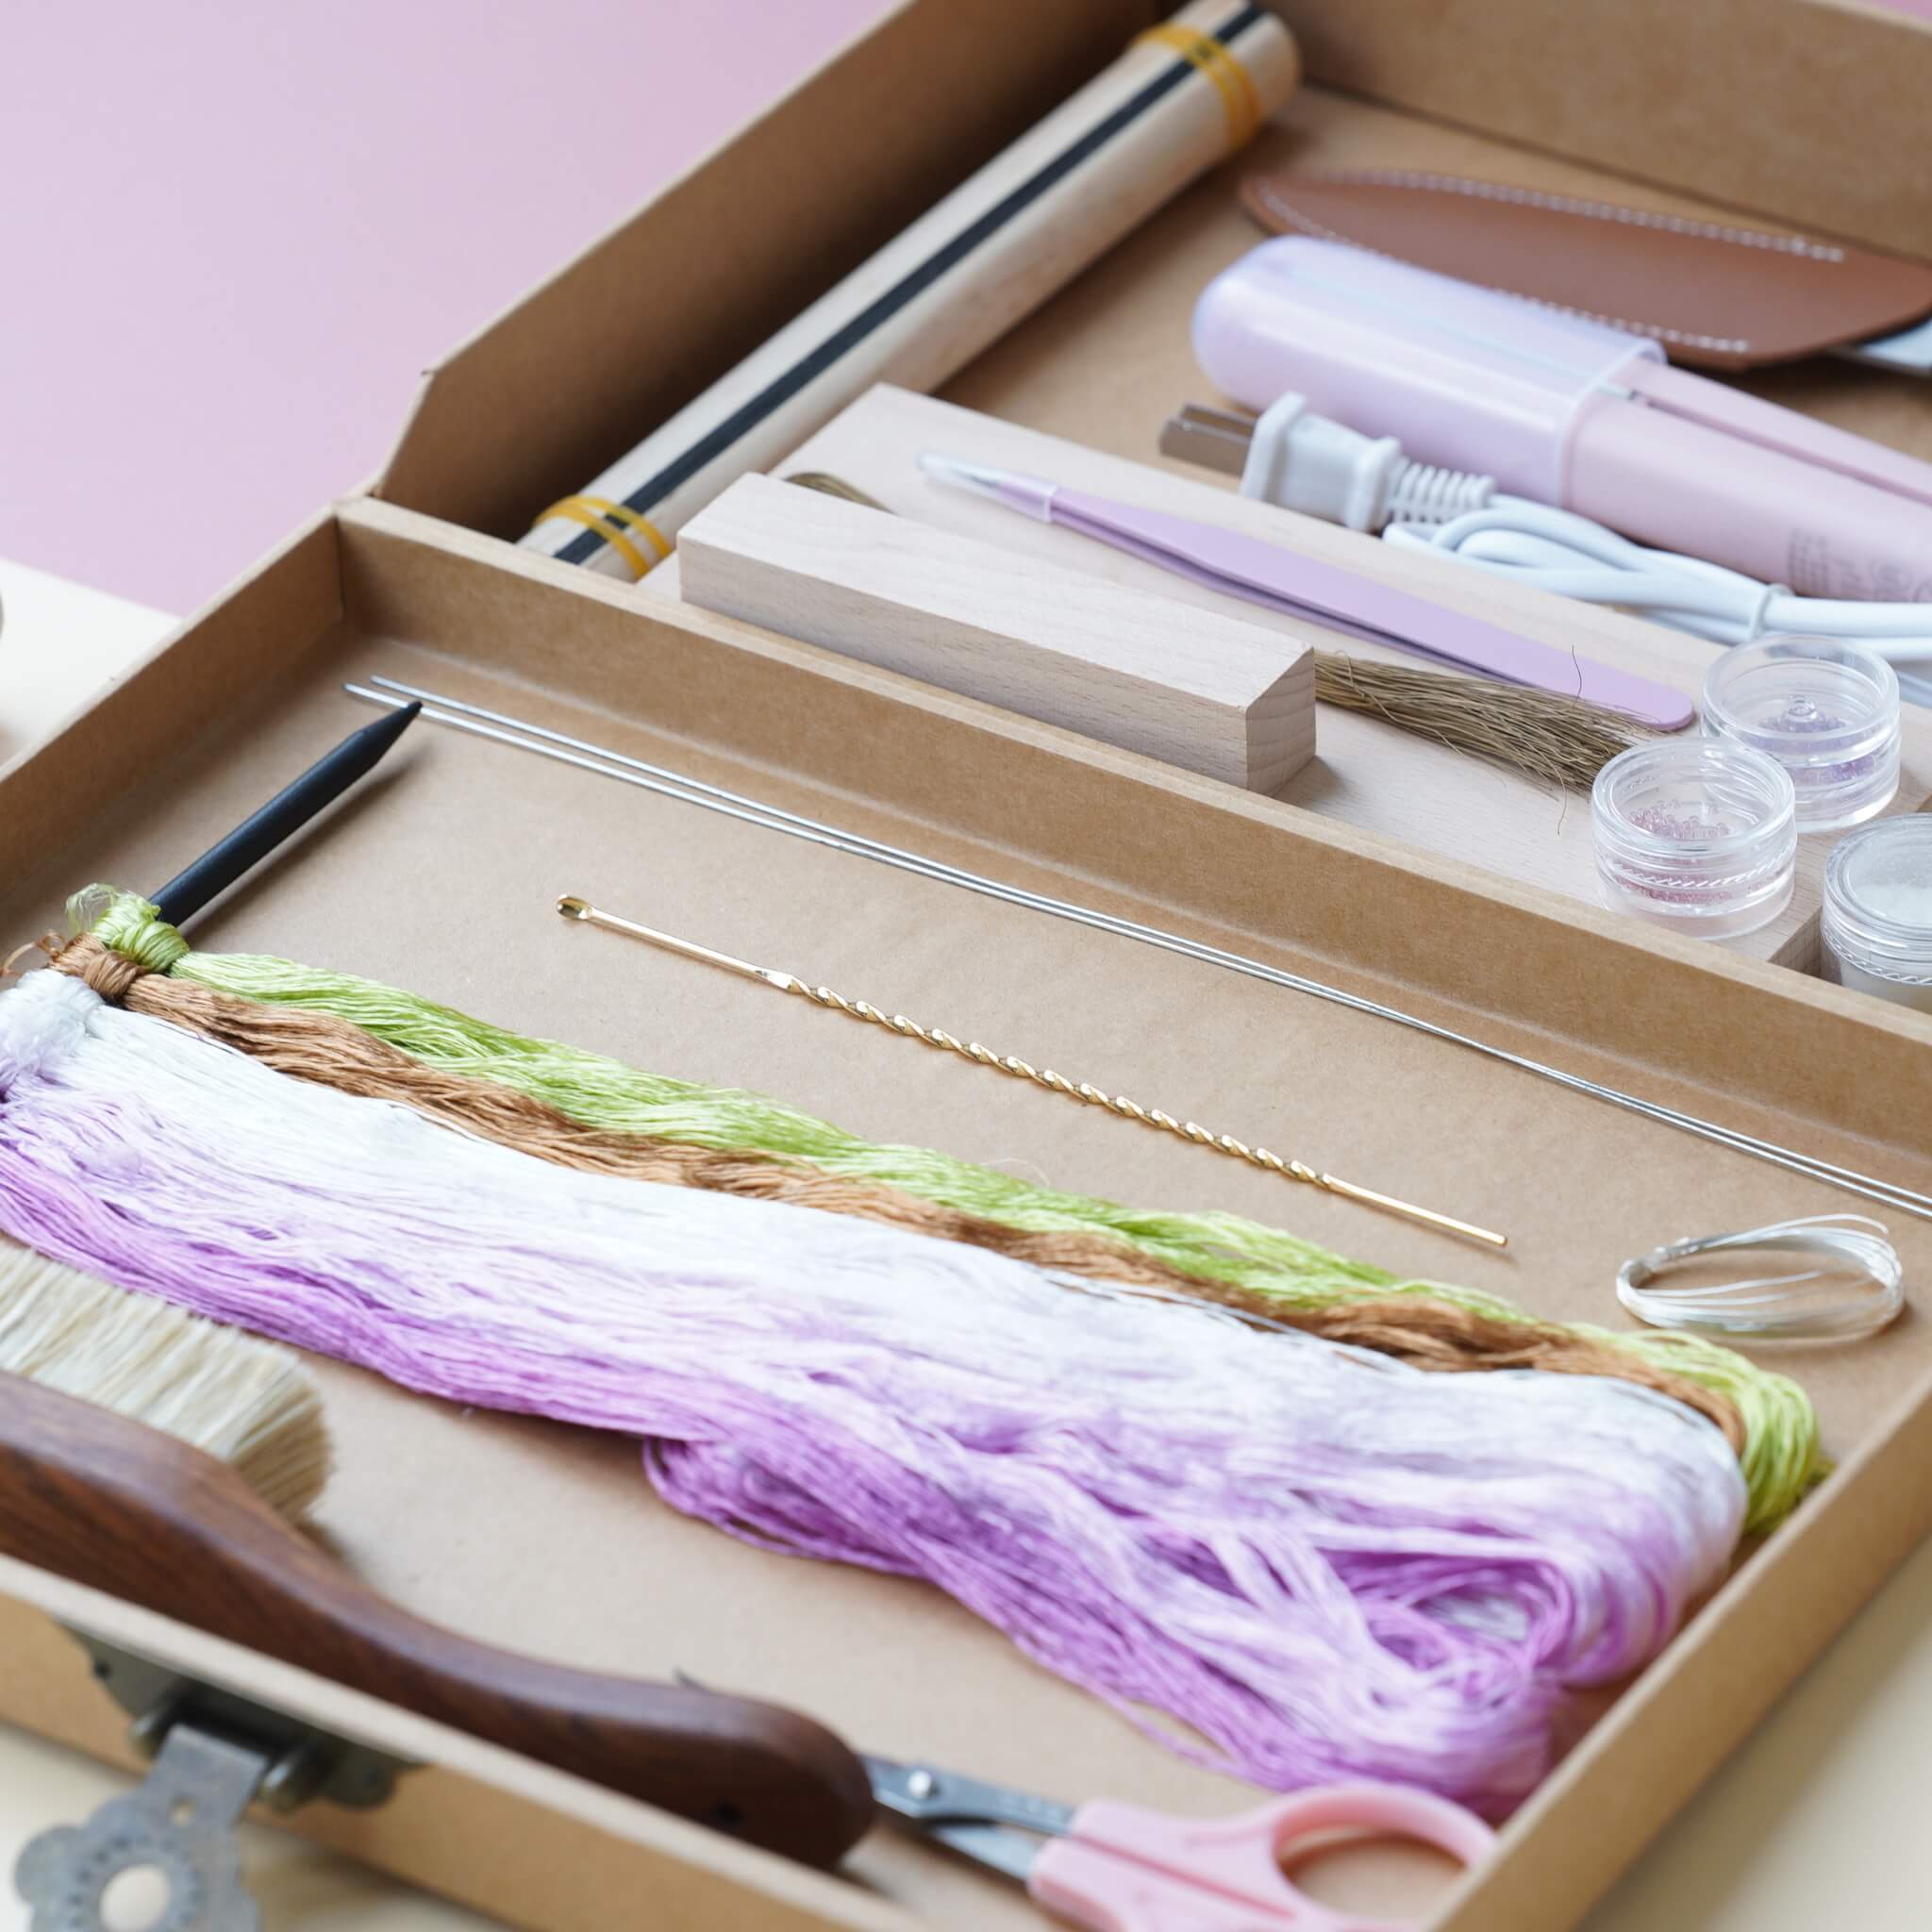
Lernen Sie, wie man mit der traditionellen Ronghua-Technik (Seidenvelours-Blume) eine atemberaubende Irisblume herstellt! In diesem Schritt-für-Schritt-Tutorial führen wir Sie durch die Vorbereitung der Seidenstreifen, das Bürsten, Formen und Zusammenfügen Ihrer eigenen lebendigen Blauen Iris-Brosche.
Schritt 1: Vorbereitung der Blütenblatt-Flauschstreifen 00:00–01:39
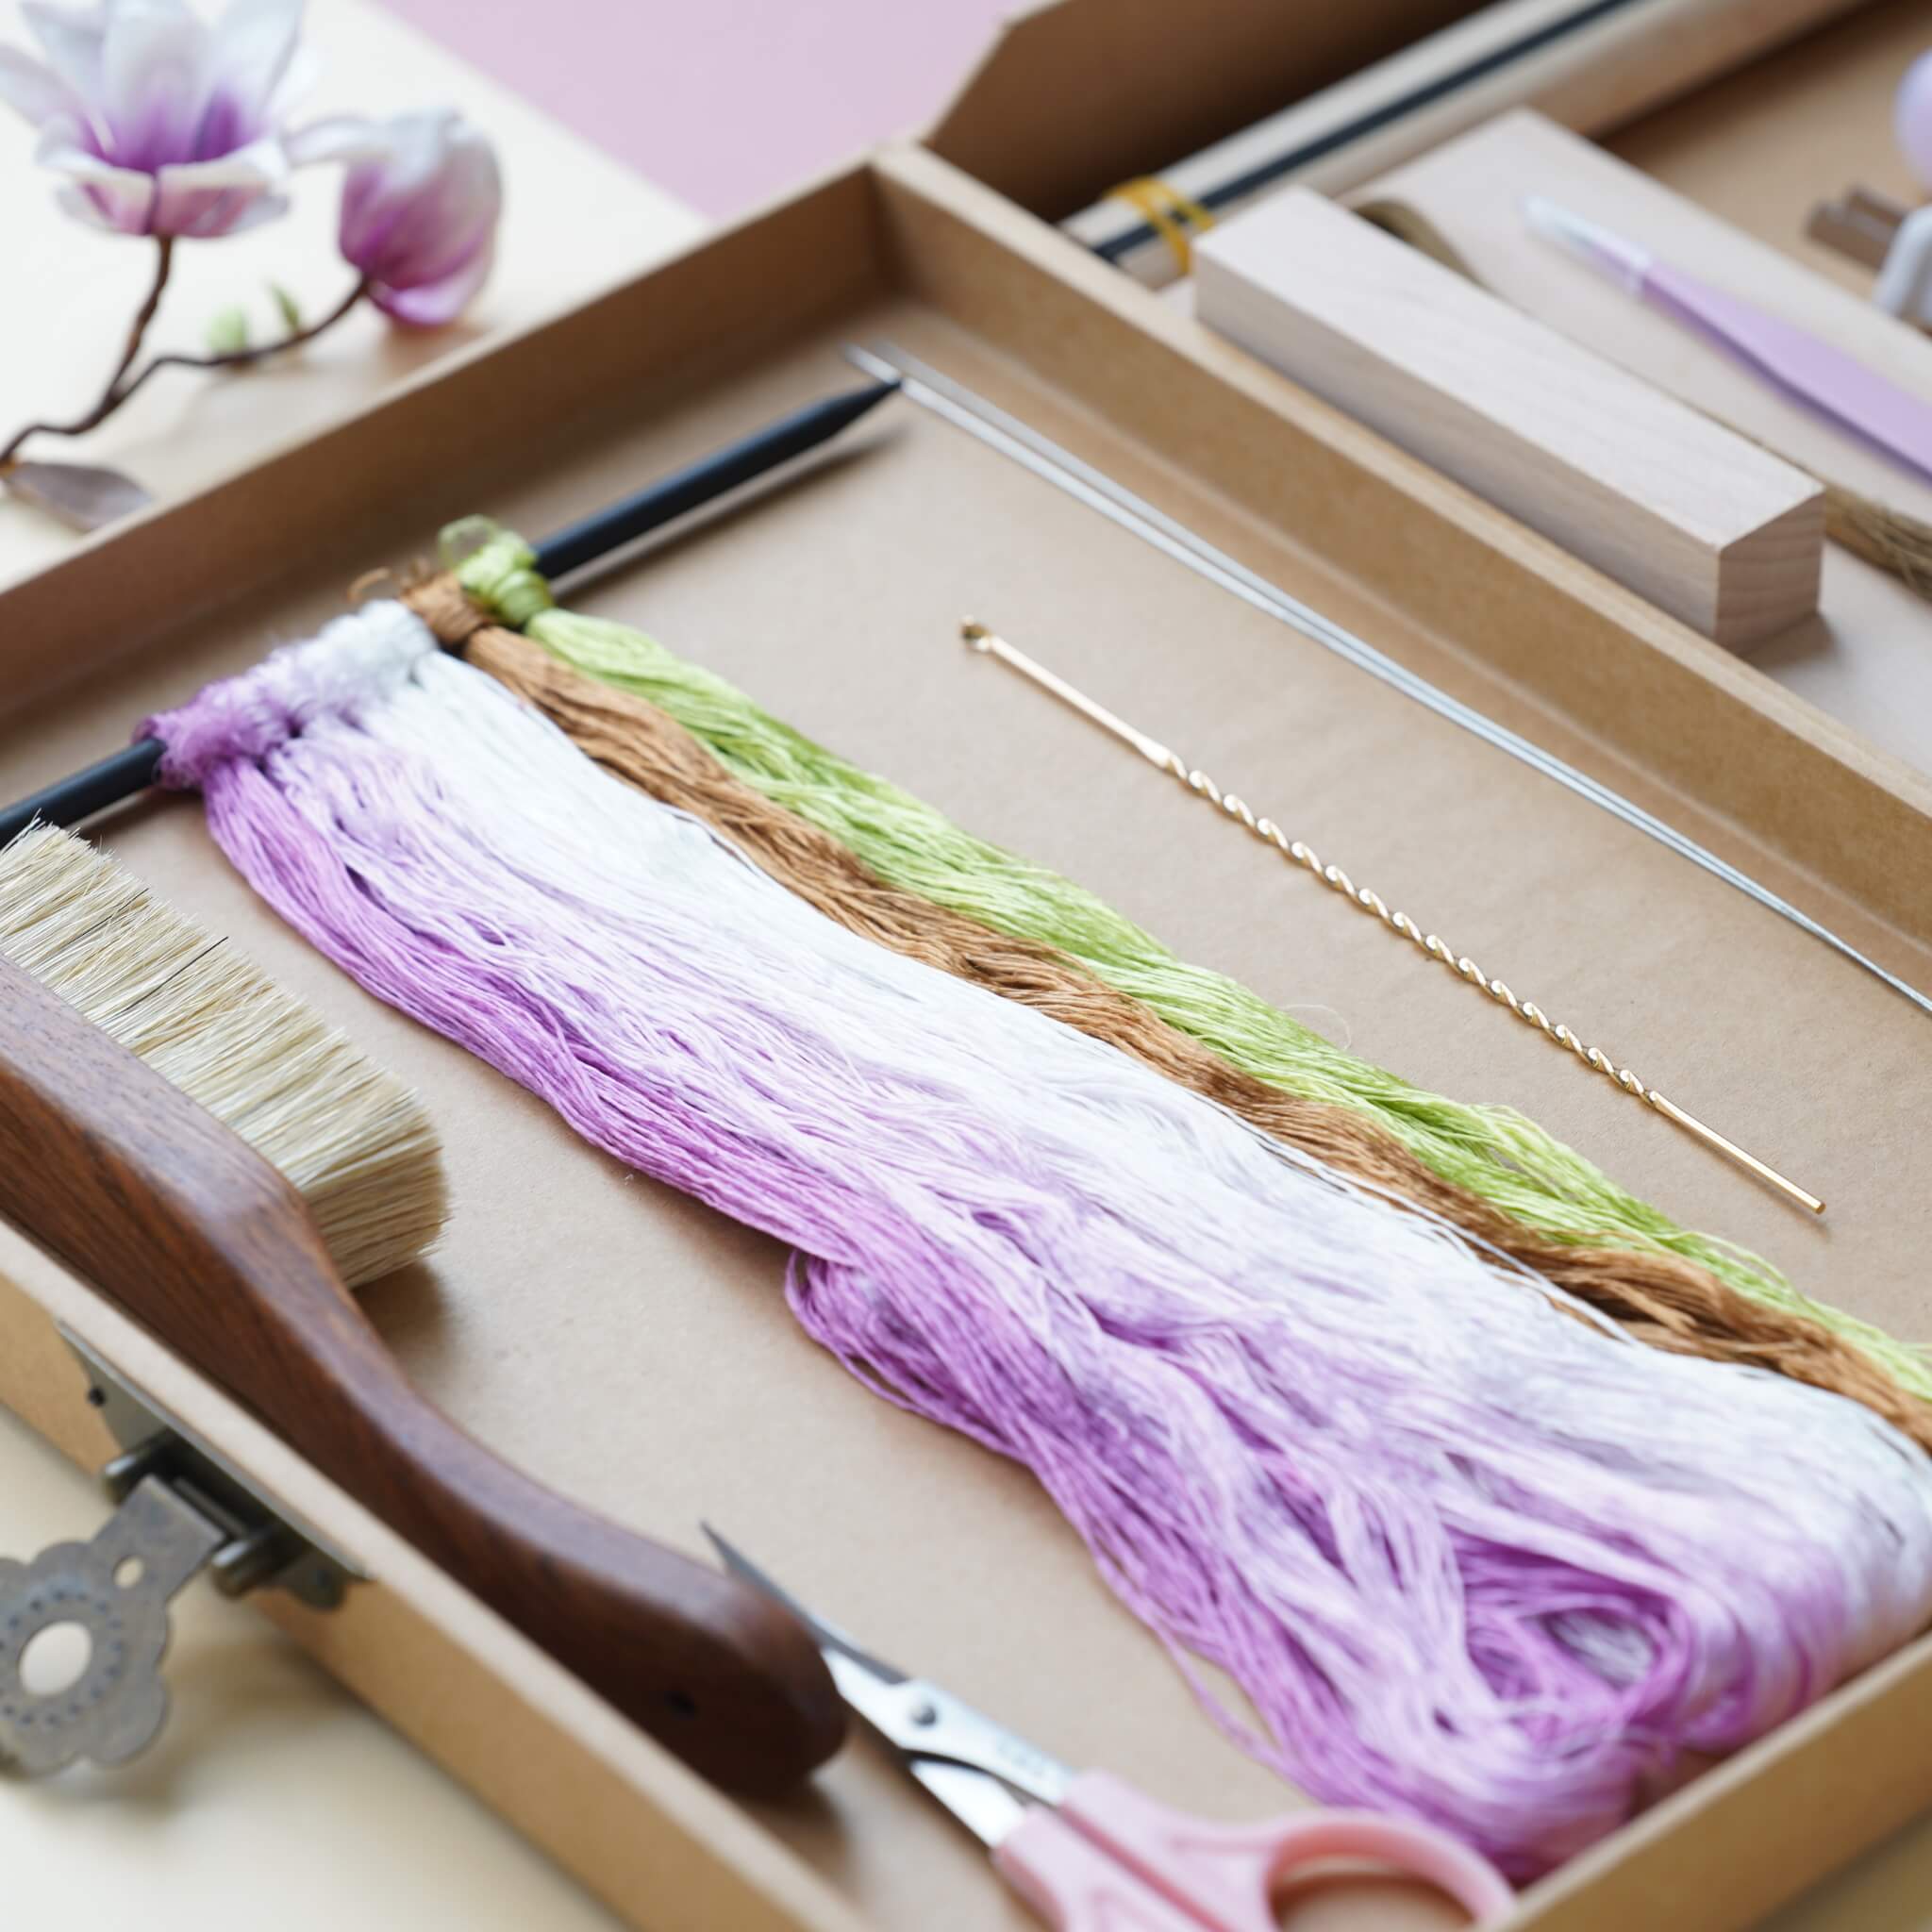
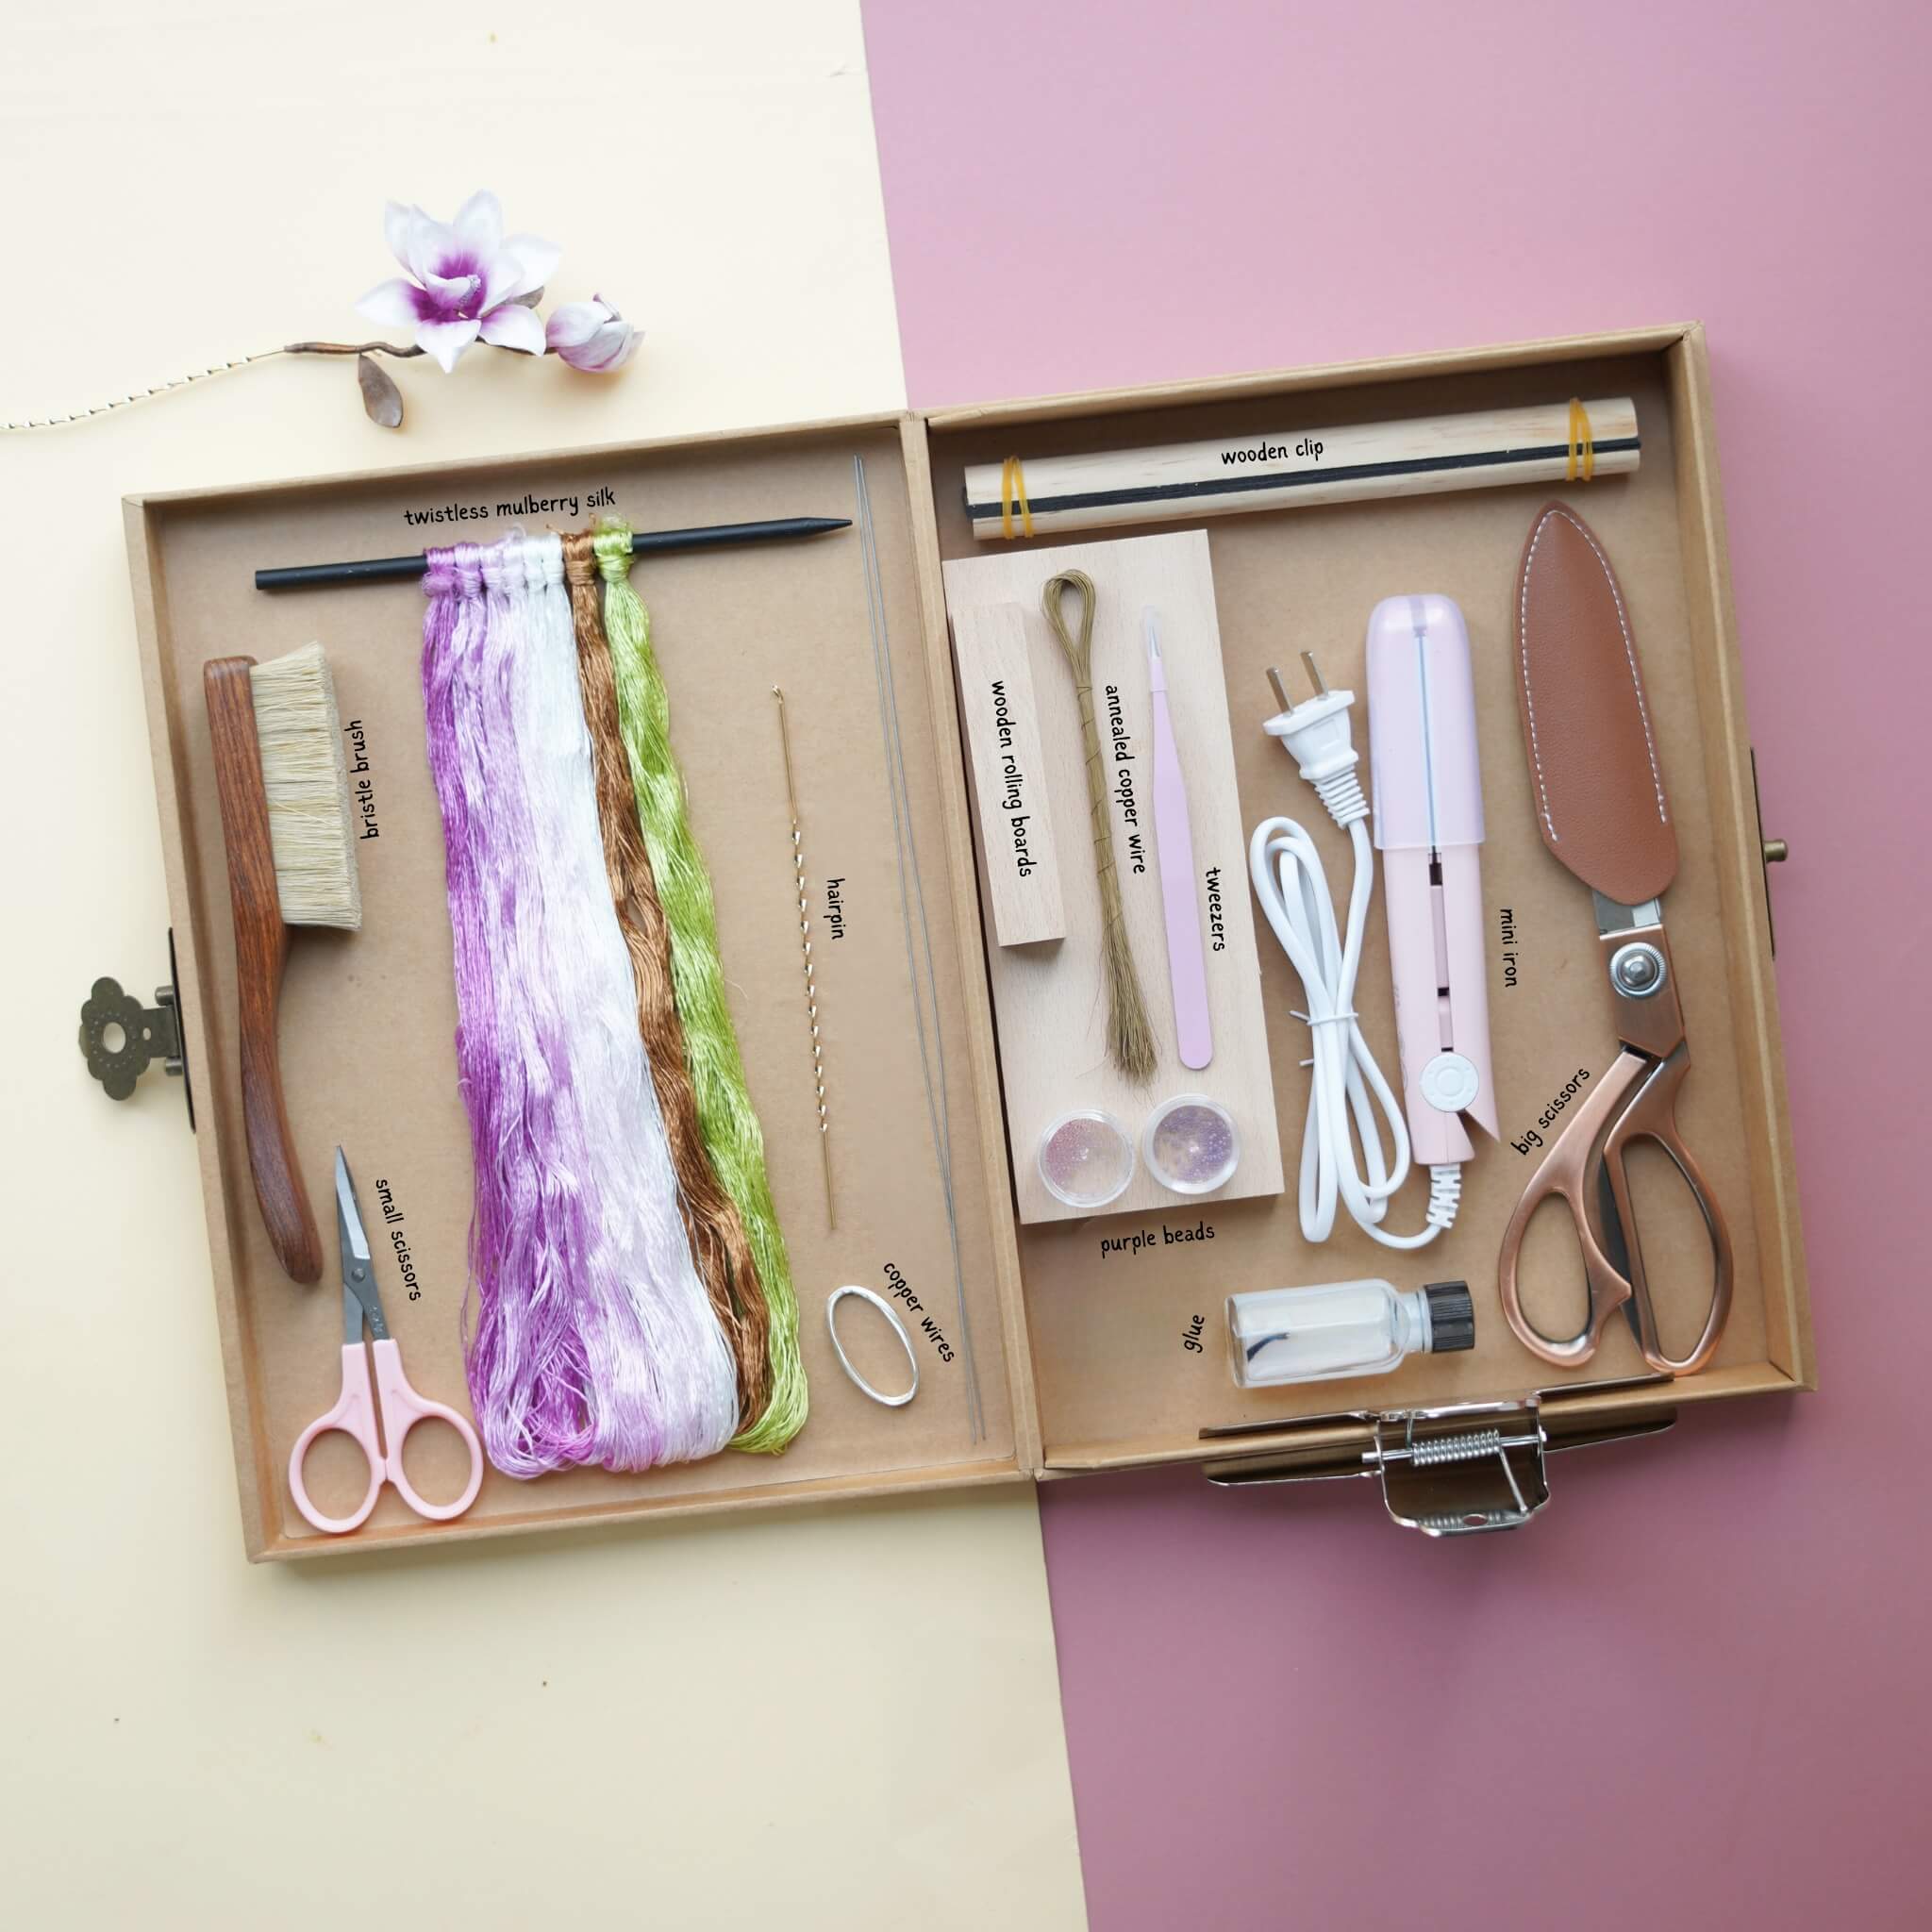
Beginnen Sie damit, den Stickfaden zu schneiden. Teilen Sie die Fäden in Gruppen von sieben und wickeln Sie sie um einen Holzstab. Ordnen Sie die drei Arten von Flauschstreifen wie gezeigt an unterer Abschnitt des Tutorial-Videos.

Schritt 2: Die Streifen bürsten 01:40–03:29
Befestigen Sie die Streifen mit einer bergförmigen Klammer am Rahmen. Sprühen Sie vor dem Kämmen etwas Wasser auf die Fäden, aber nicht zu viel. Ordnen Sie die Fäden und ziehen Sie die Streifen gerade. Halten Sie mit einer Hand die Bürste und kämmen Sie die Fäden. Lassen Sie die andere Hand erst los, wenn die Bürste ganz unten an den Fäden angekommen ist, um Verheddern zu vermeiden. Das Ziel ist es, die Fäden so zu kämmen, dass sie flauschig, glatt und glänzend sind.

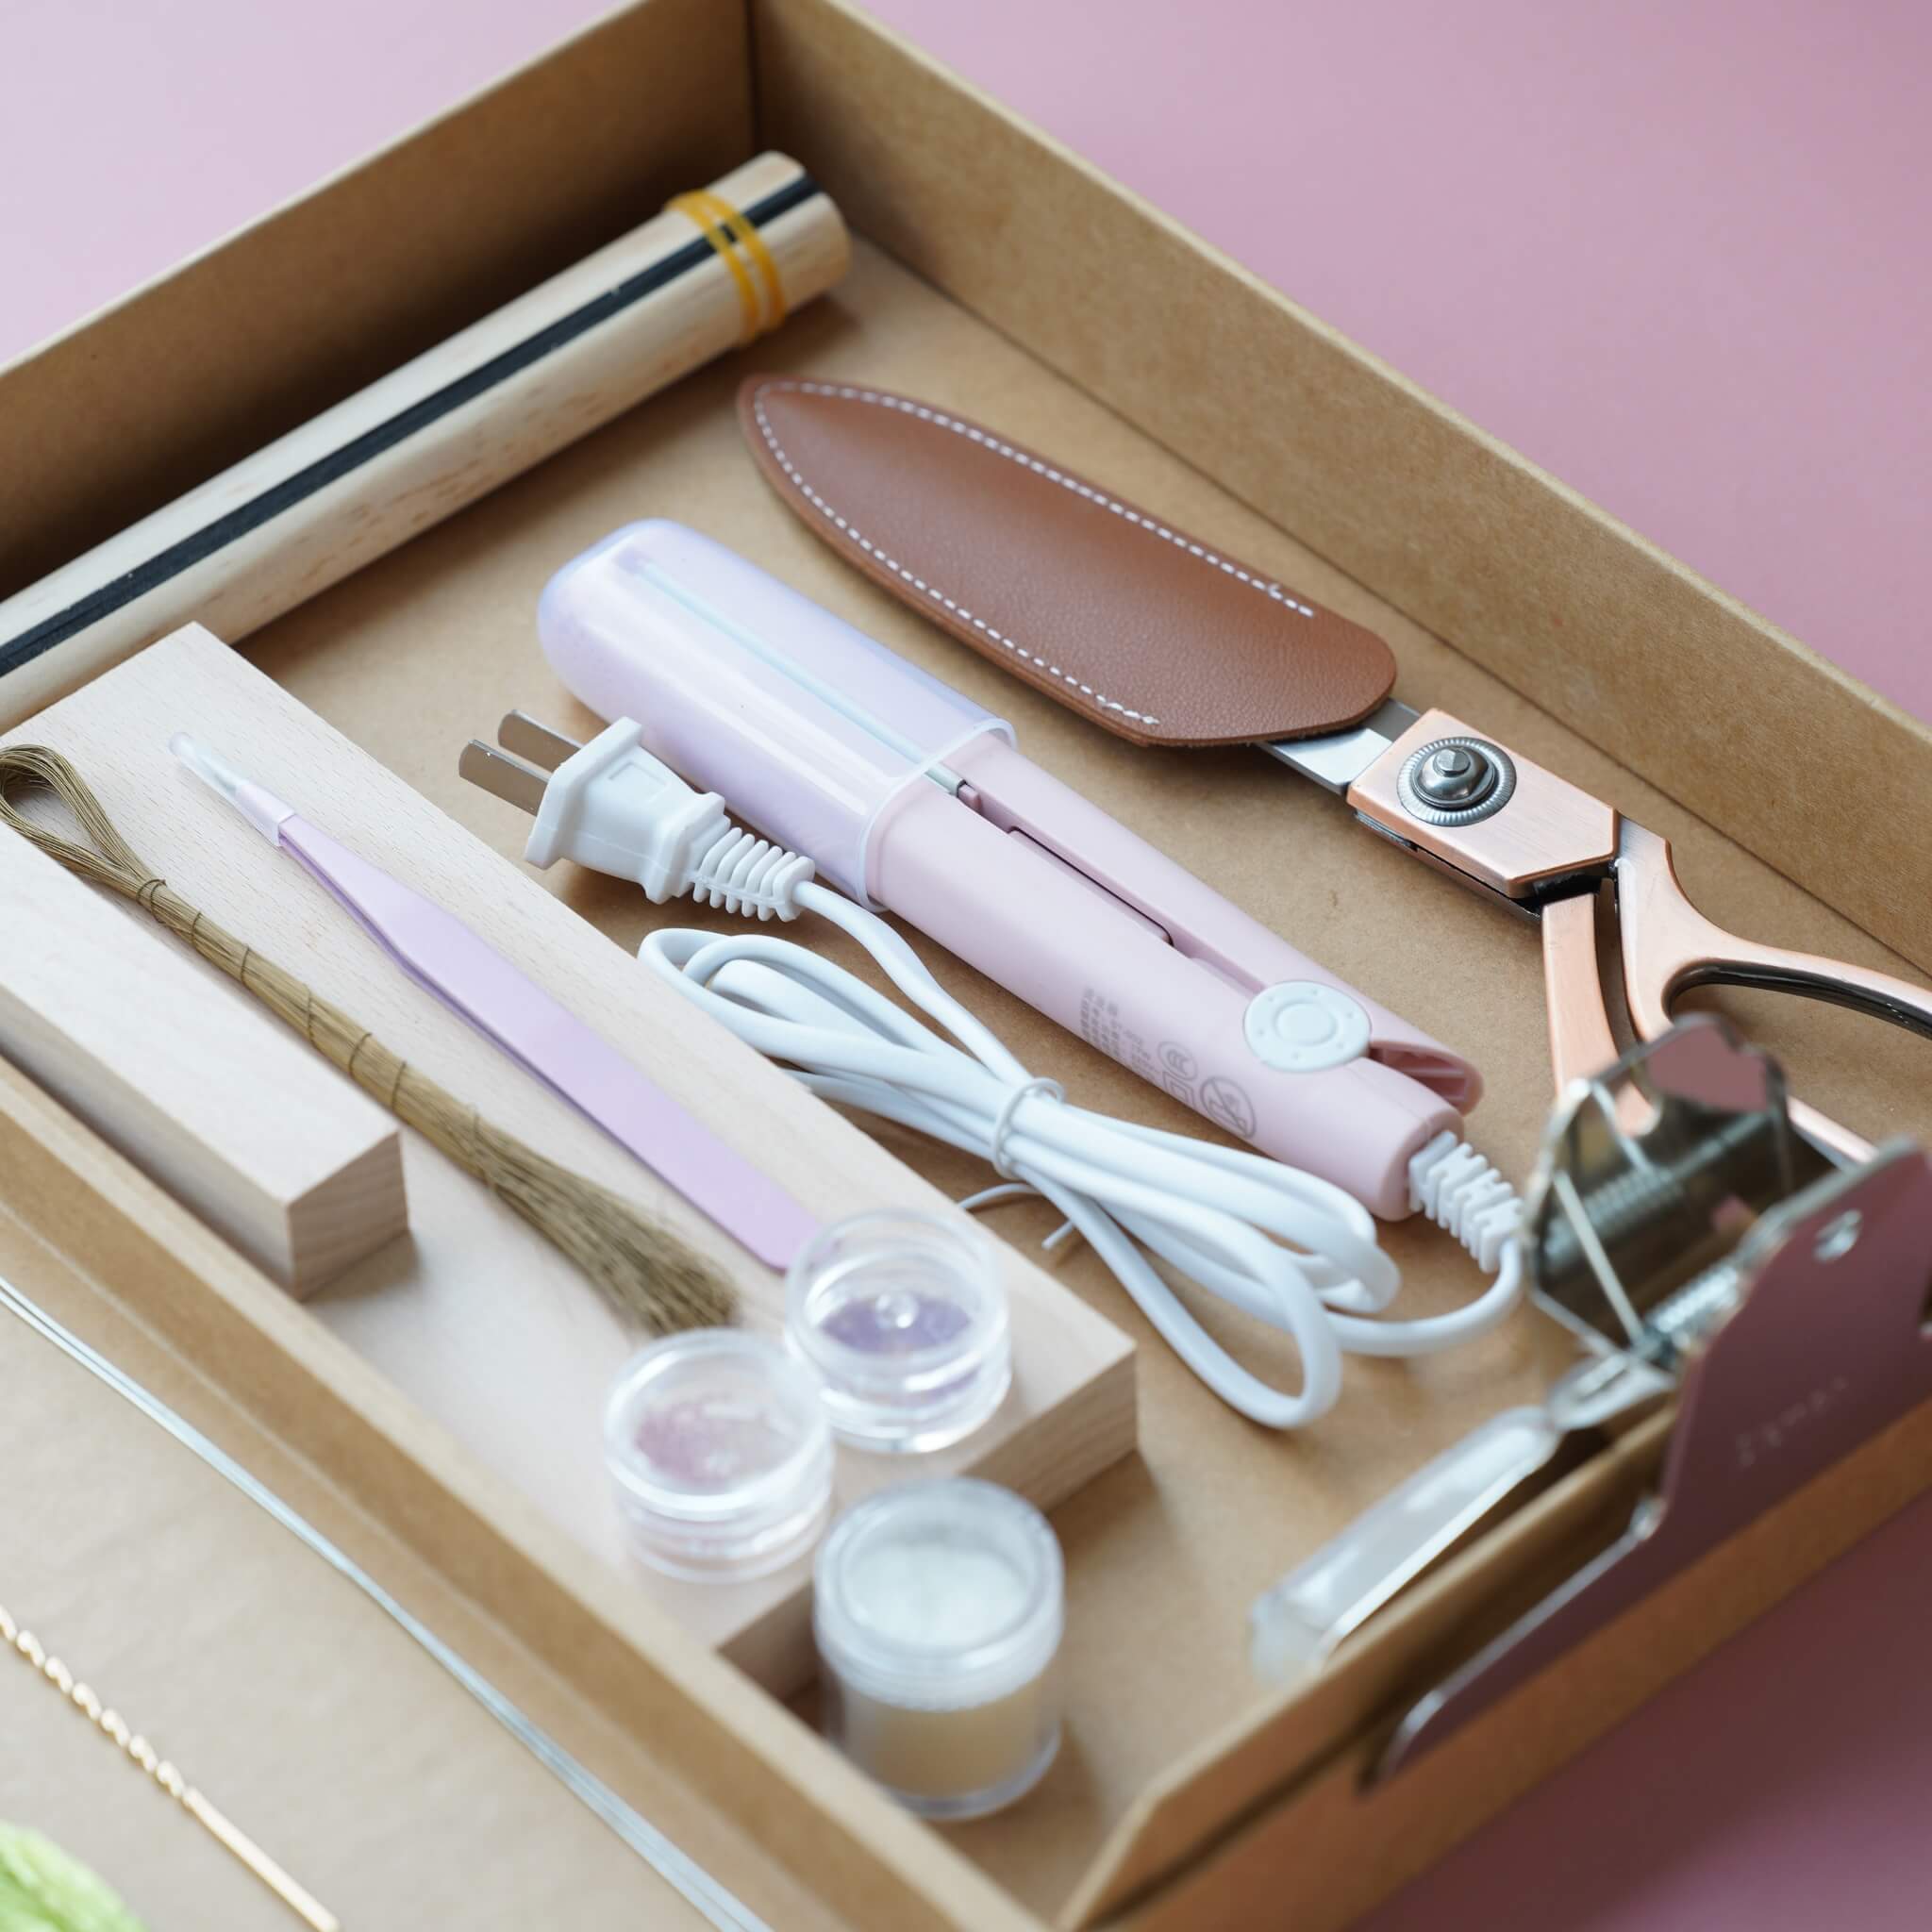
Schritt 3: Kupferdraht verdrehen 03:29–08:11
Bevor Sie den Kupferdraht verdrehen, verwenden Sie eine Holzklammer, um das Ende der Fäden zu sichern. Stellen Sie sicher, dass die Fäden gerade gespannt sind, und passen Sie die Breite der Streifen an, um sicherzustellen, dass sie gleichmäßig sind. Wenn die Streifen locker sind, können Sie den Rahmen nach hinten schieben. Sobald die Streifen richtig eingestellt sind, falten Sie den Kupferdraht in der Mitte und richten ihn gerade aus. Verdrehen Sie die beiden Kupferdrähte fest miteinander für etwa 2-3 cm. Verwenden Sie den Kupferdraht, um die Fäden zu klemmen, und verdrehen Sie dann das andere Ende der beiden Kupferdrähte miteinander. Halten Sie die Enden des Kupferdrahts mit beiden Händen und drehen Sie sie in entgegengesetzte Richtungen. Der Kupferdraht sollte die Kante der Fäden fest umschließen.
Wie gezeigt in den folgenden Bildern, der Abstand zwischen den Kupferdrähten der drei Streifen sollte innerhalb dieser Bereiche liegen: 1,6–2 cm, 1,8–2 cm und 1–1,2 cm.


Schritt 4: Die Streifen rollen 08:11–09:56
Nehmen Sie die Streifen aus der Klammer. Achten Sie beim Schneiden der Streifen darauf, genau in der Mitte der beiden Kupferdrähte zu schneiden. Beim Rollen der Streifen stellen Sie sicher, dass der Kupferdraht in der Mitte der Fäden liegt. Verwenden Sie eine Pinzette, um die Kanten der geschnittenen Streifen ordentlich auszurichten. Nach dem Anpassen drehen Sie den Kupferdraht vorsichtig und ziehen ihn auf dem Rollbrett fest. Achten Sie auf die Richtung des Kupferdrahts – drehen Sie ihn nicht in die falsche Richtung, sonst lösen sich die Fäden.

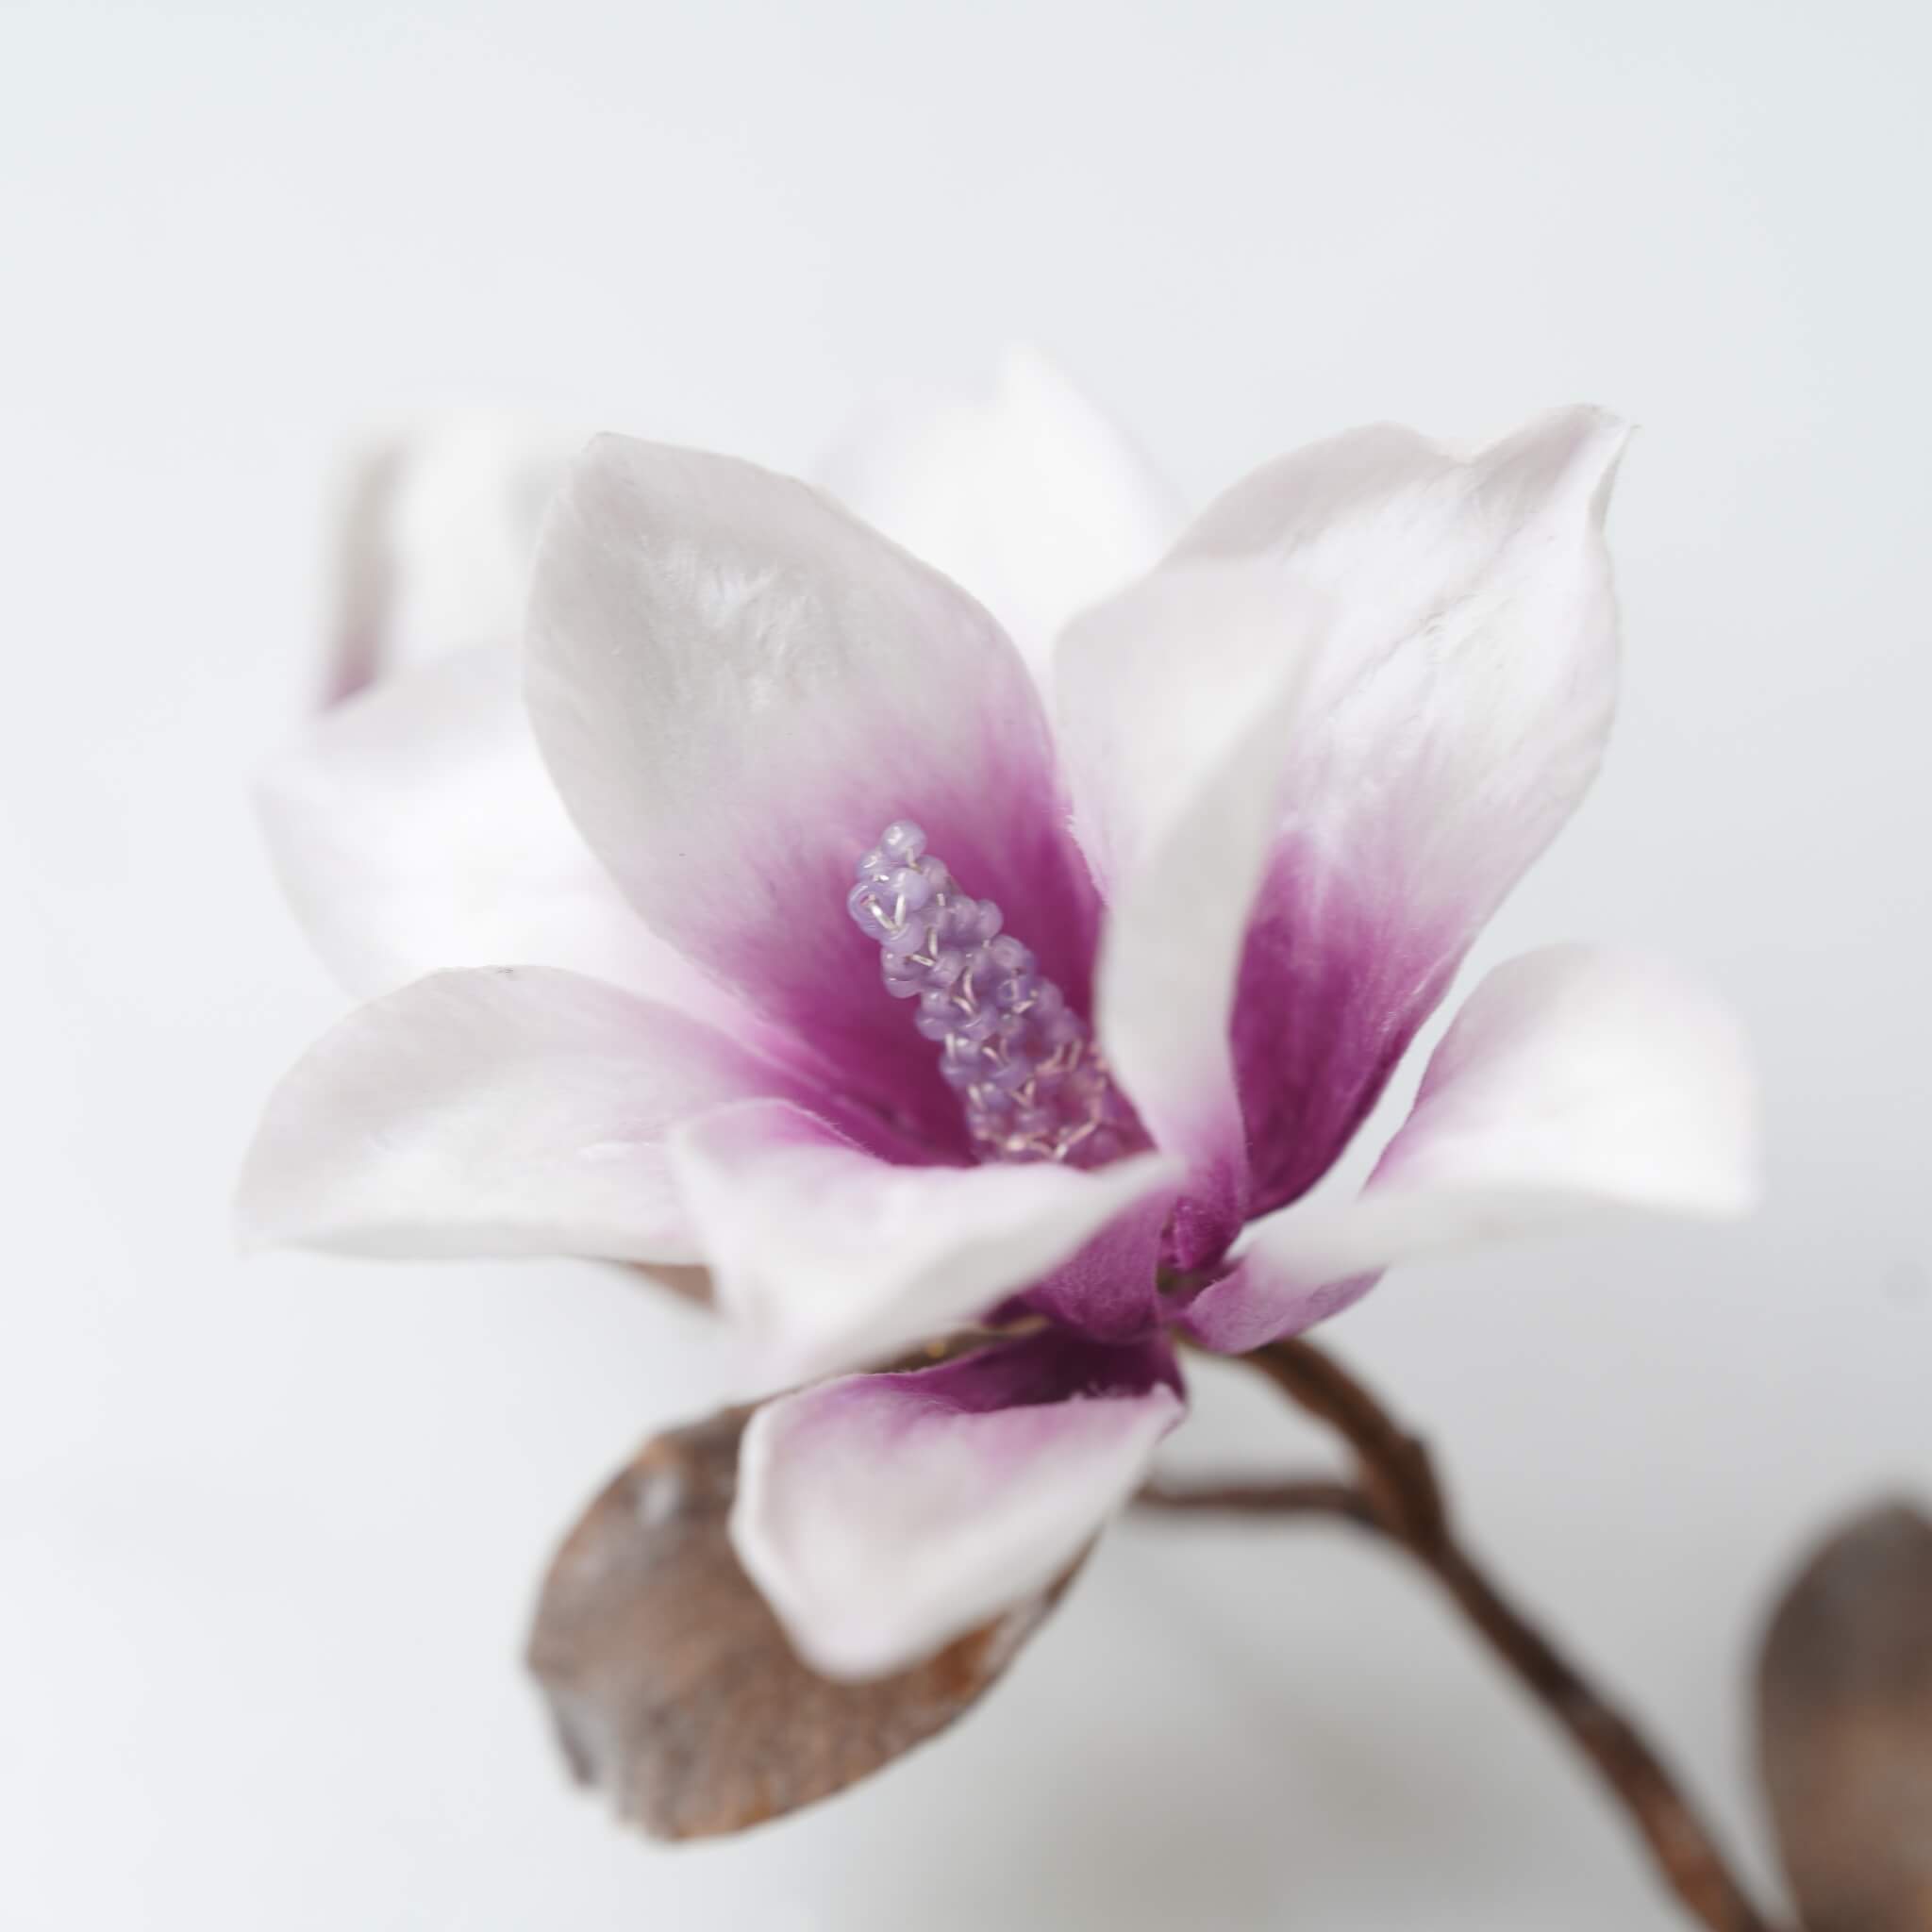
Schritt 5: Die Blütenblätter herstellen 09:57–14:22
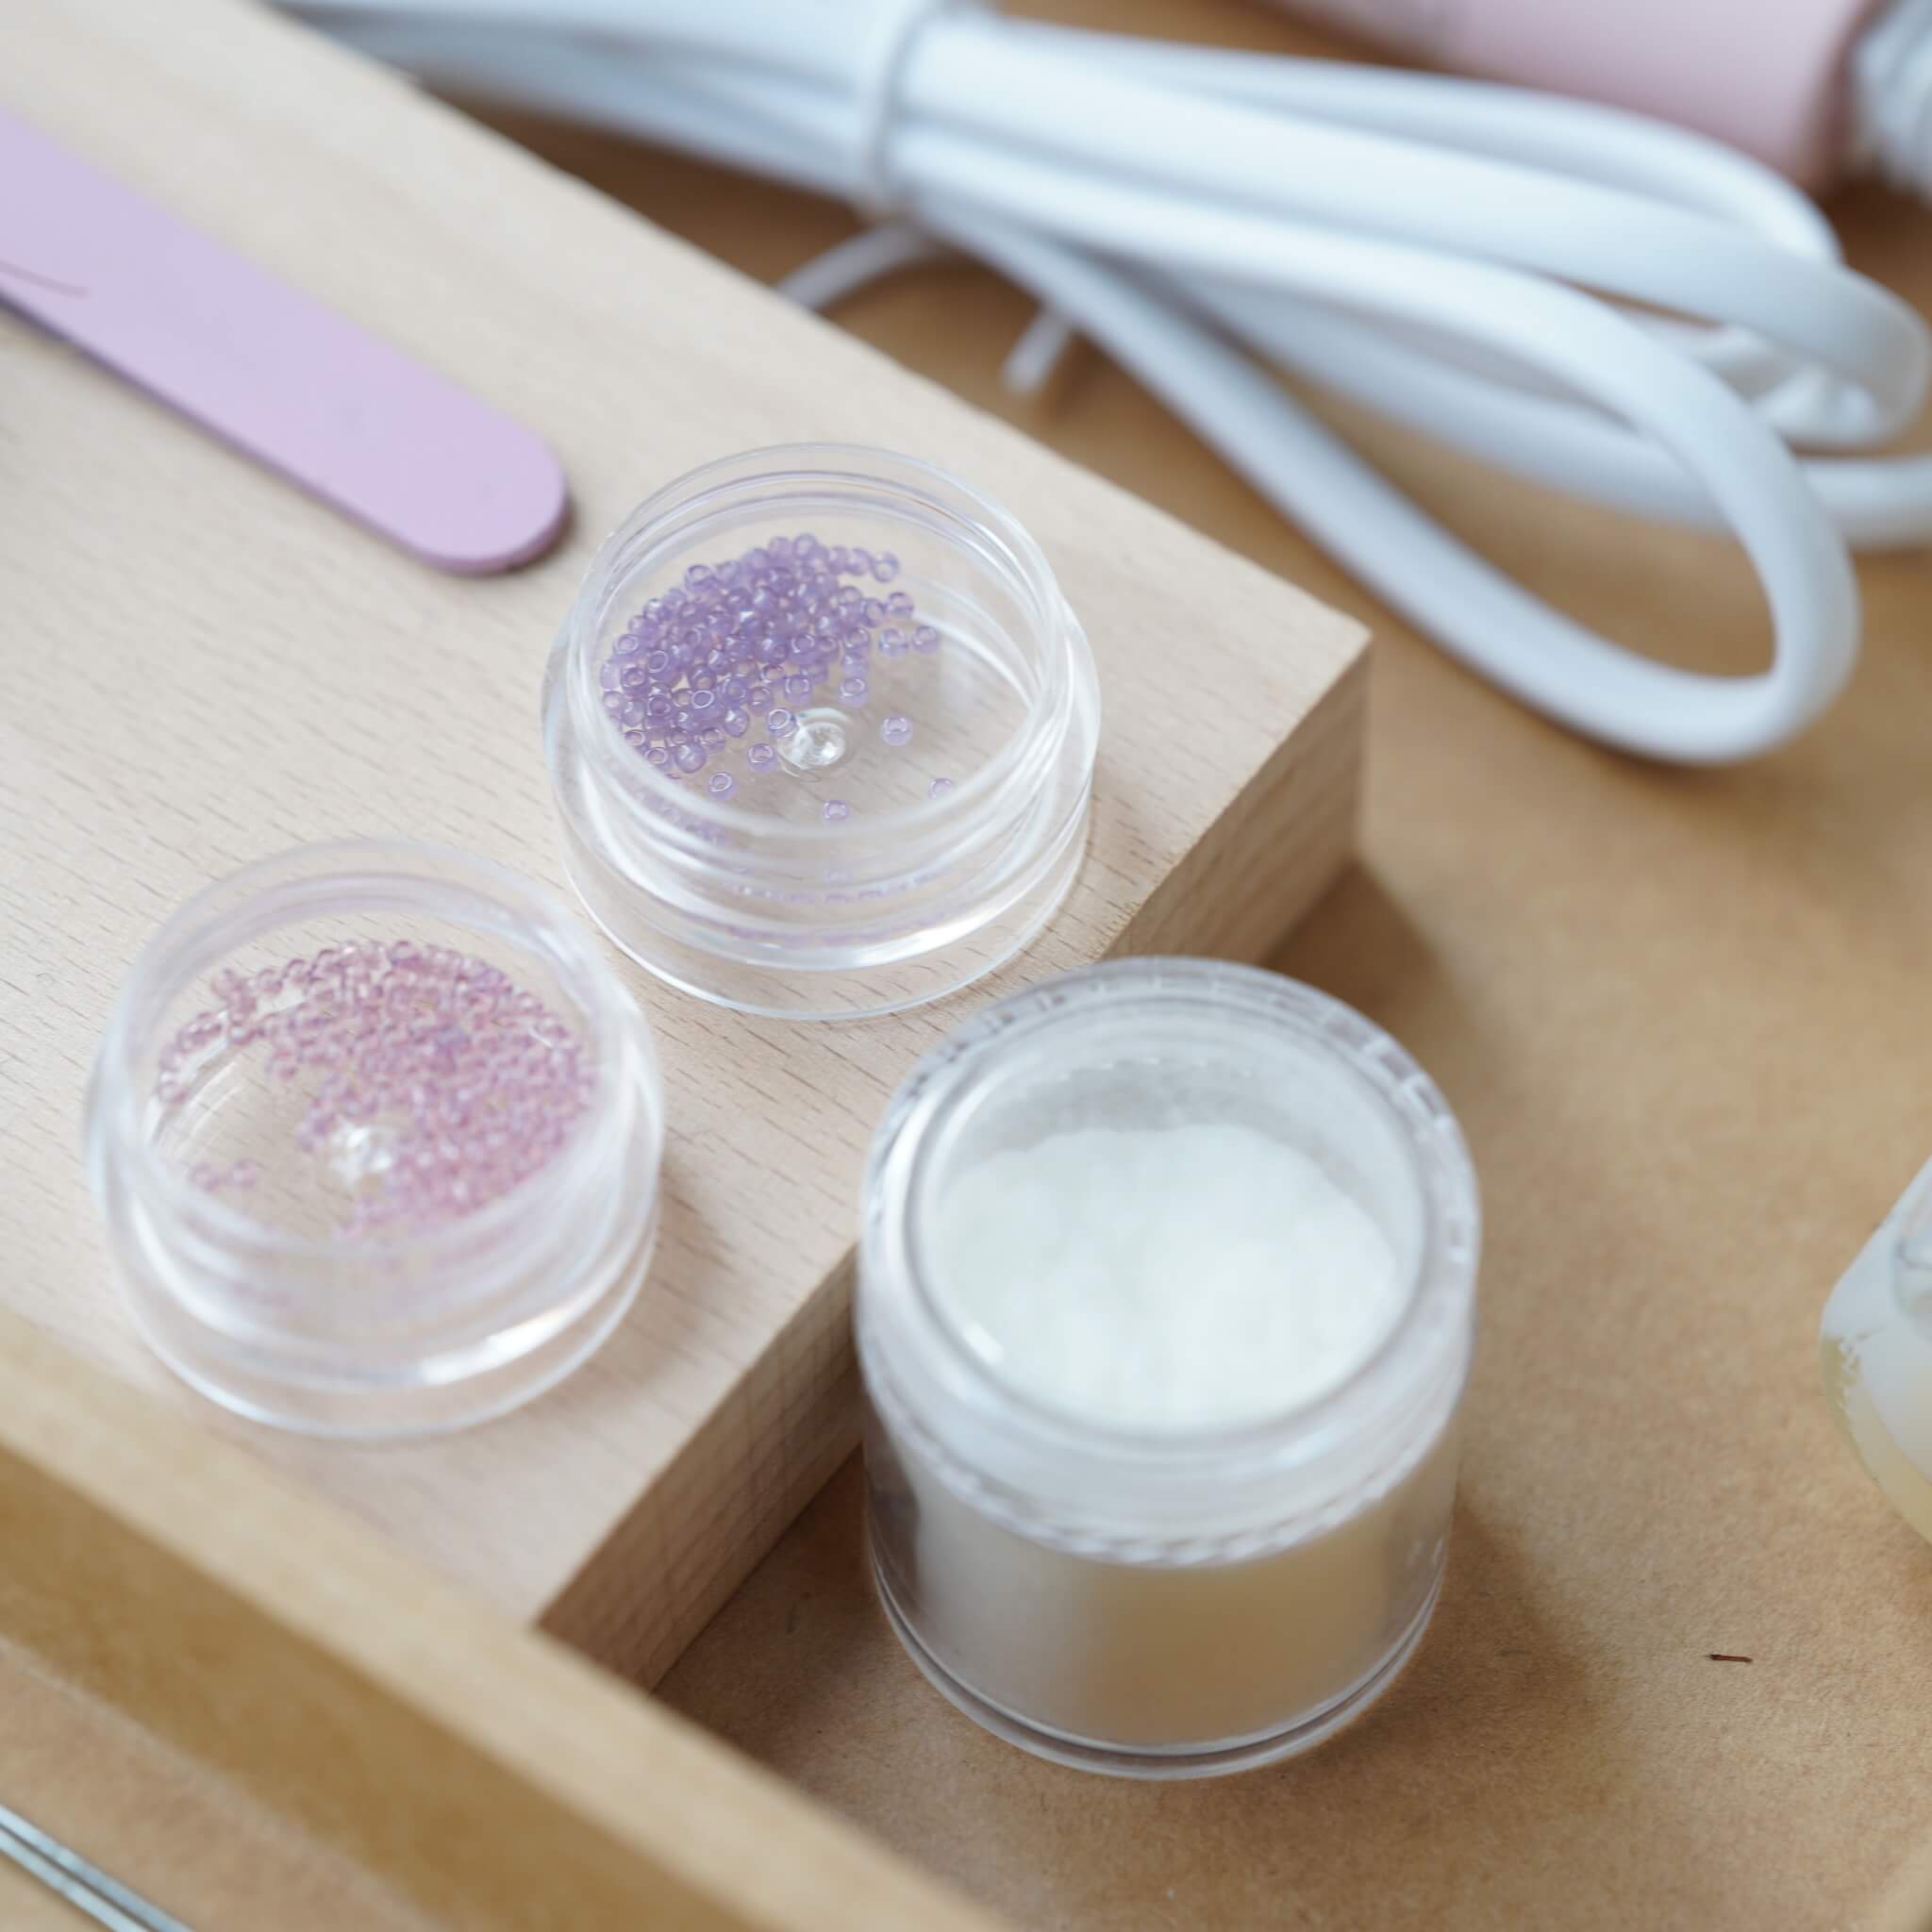
Falten Sie die gerollten Streifen in der Mitte, drehen Sie den Kupferdraht am unteren Ende zusammen und schneiden Sie den Kupferdraht am leichteren Ende ab. Verwenden Sie die Klammer, um alle Streifen zu glätten. Tragen Sie die Formflüssigkeit auf die Streifen auf und entfernen Sie überschüssige Flüssigkeit mit einer Pinzette. Formen Sie zuerst die Blütenblätter zu einer größeren Kurve. Berühren Sie dann mit der Spitze der Pinzette vorsichtig den Rand der Blütenblätter. Die Blütenblätter sind, nachdem sie in der Formflüssigkeit getränkt wurden, sehr weich und leicht formbar. Verwenden Sie eine kleine Menge hellgelber Farbe, um die Blütenblätter zu dekorieren, wobei die Farbsättigung sehr gering sein sollte.
Sobald die Blütenblätter geformt sind, stecken Sie sie in ein Schwammpolster zum Trocknen. Nachdem die Formflüssigkeit getrocknet ist, schneiden Sie ausgefranste Kanten der Blütenblätter ab. Für die Blätter schneiden Sie sie so zu, dass sie in der Mitte breiter und an beiden Enden schmaler sind. Verwenden Sie die Klammer, um die Blätter sanft zu pressen und eine leichte Form zu erzeugen.ht Kurve.


Schritt 6: Blatt- und Blumenmontage 14:22–Ende
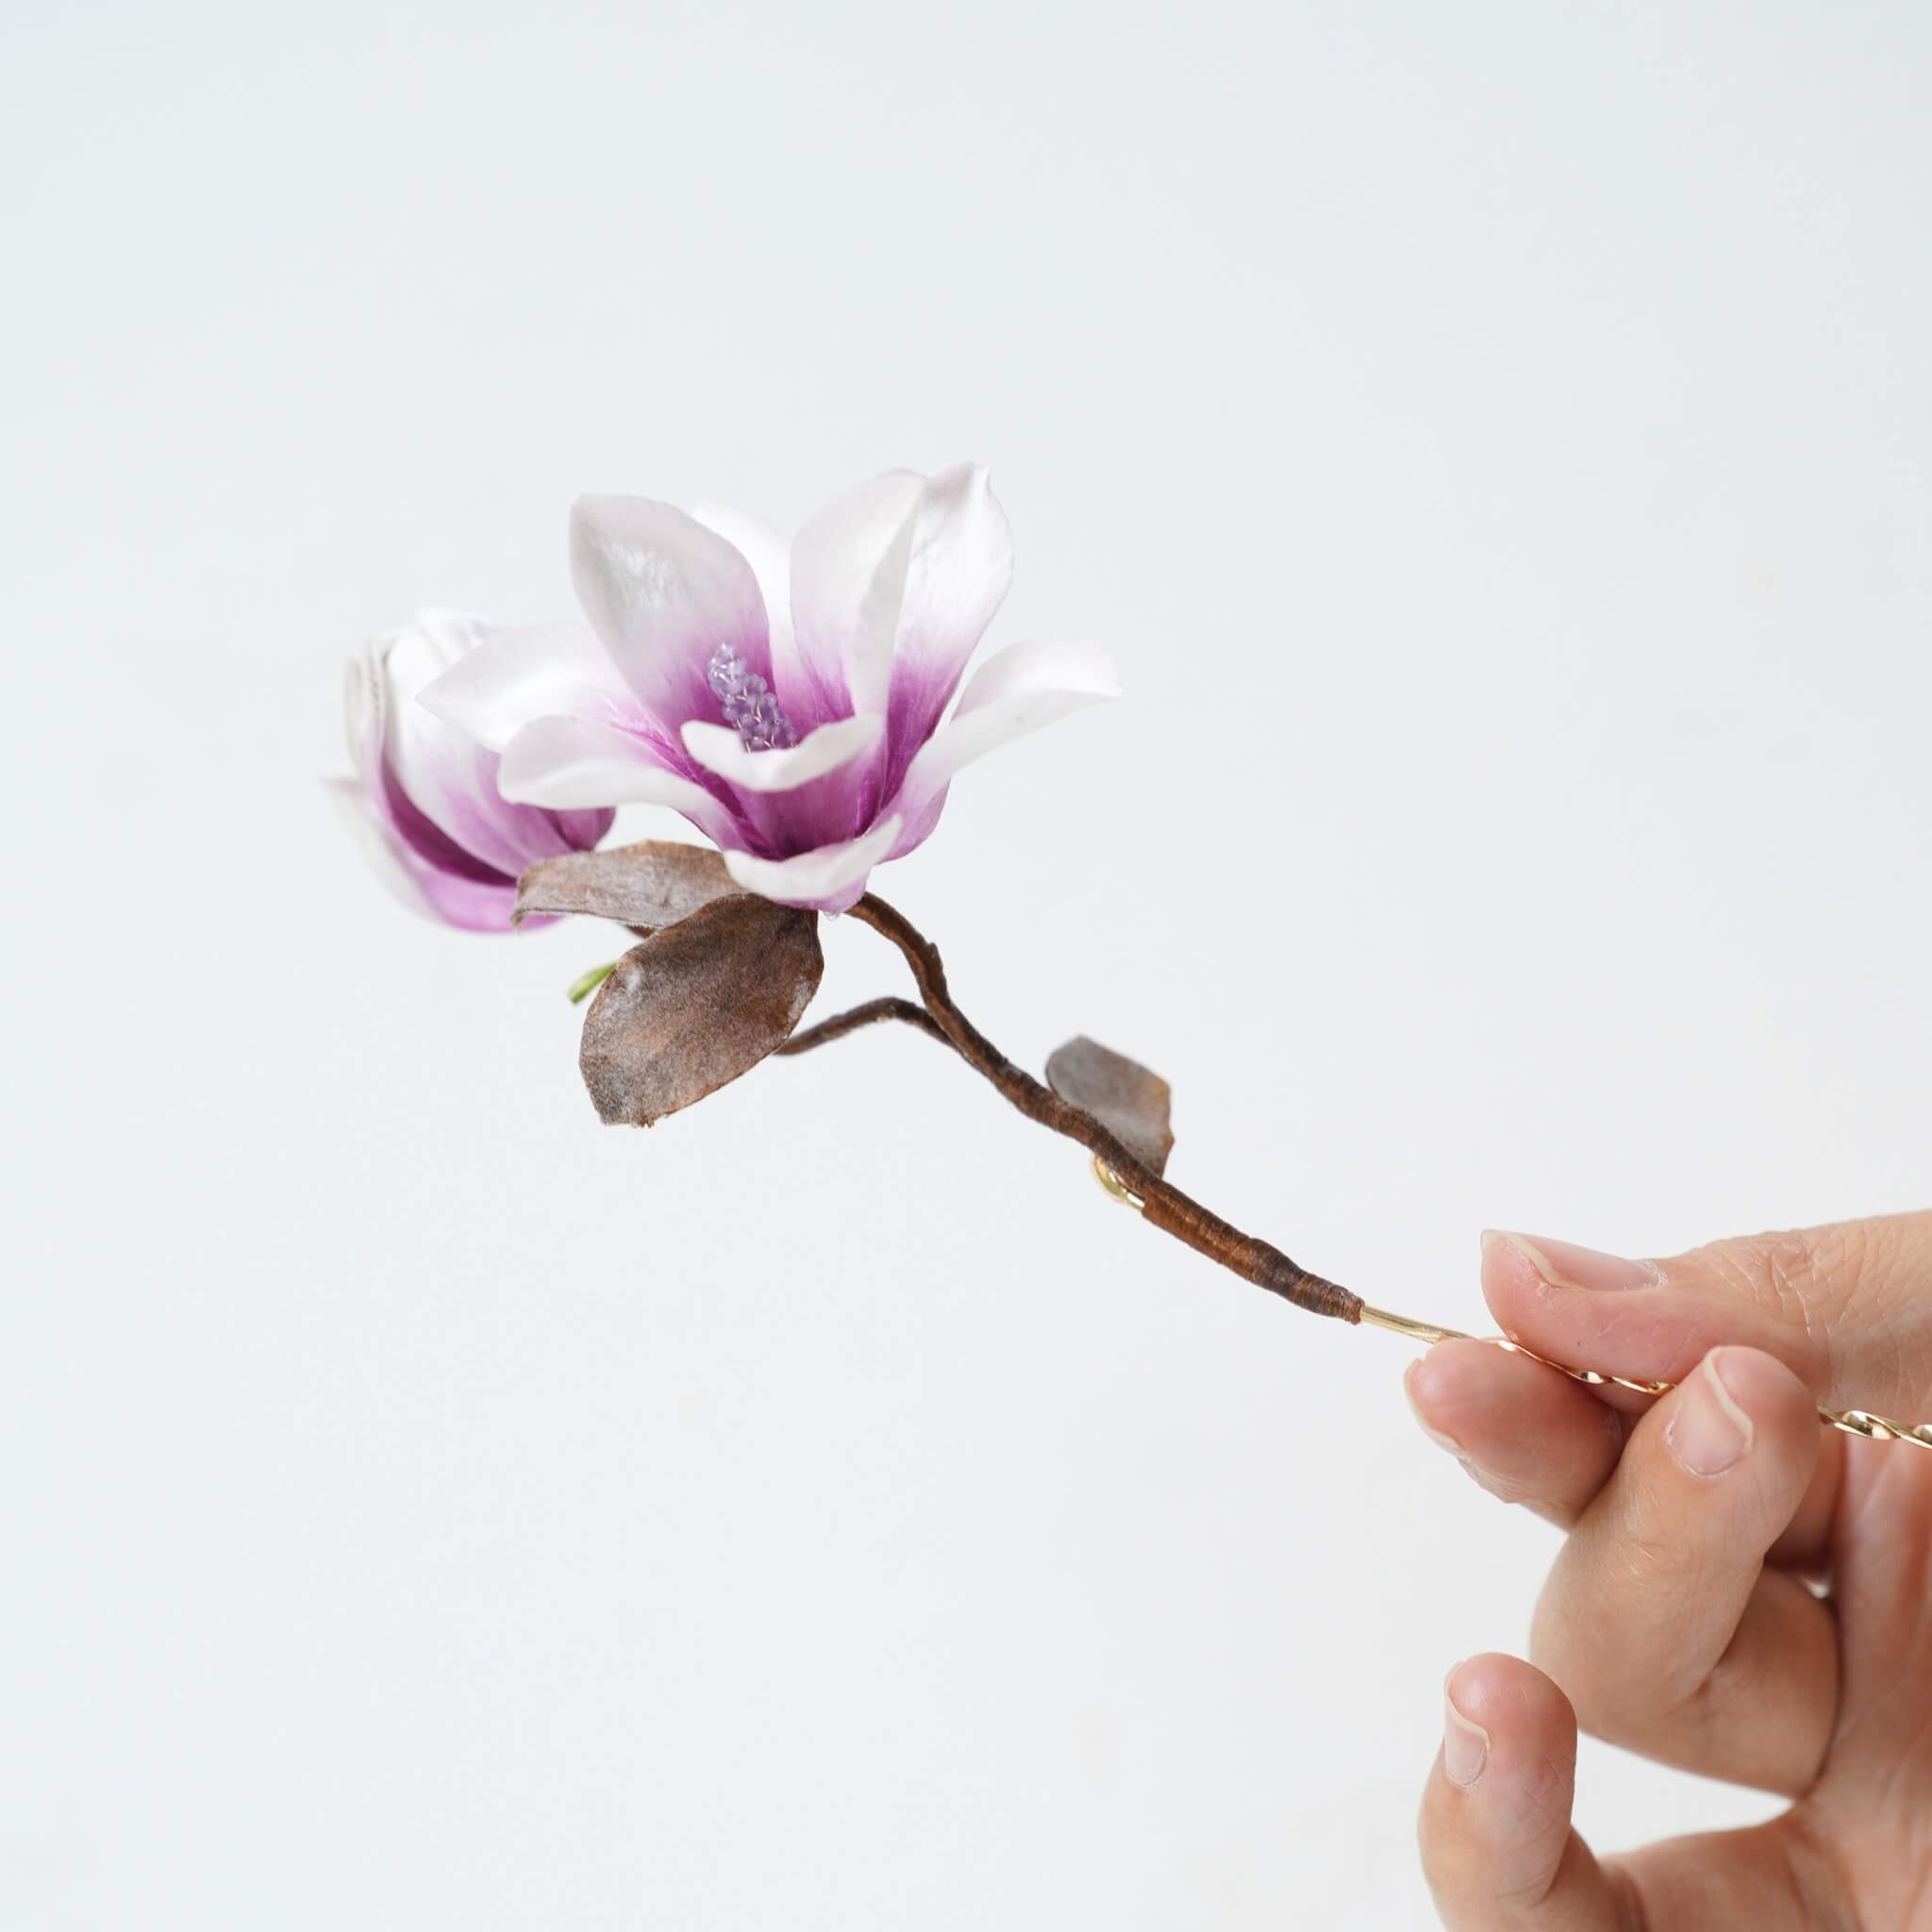
Bereiten Sie den Blütenkern vor und schneiden Sie den unteren Teil des Blütenkerns schräg ab. Verwenden Sie den restlichen Faden, um den Blütenkern fest zu sichern. Die Irisblume besteht aus 6 Blütenblättern. Für die erste Schicht ordnen Sie 3 Blütenblätter nach innen an. Für jedes weitere Blütenblatt sichern Sie es mit Faden. Die zweite Schicht der Blütenblätter sollte nach außen zeigen und die Lücken zwischen den Blütenblättern der ersten Schicht füllen. Wickeln Sie den Kupferdraht am unteren Ende mit Faden ein. Befestigen Sie dann die Blätter und die Blume zusammen. Zum Schluss machen Sie einen Knoten, um die Blume zu vollenden.

Um die Blume zu vervollständigen, befestigen Sie die beiden Irisblumen zusammen, eine höher und eine niedriger. Fügen Sie zwei weitere Blätter hinzu. Schneiden Sie den Kupferdraht am unteren Ende schräg ab und biegen Sie den Kupferdraht mit einer Zange zurück. Wickeln Sie den freiliegenden Kupferdraht weiterhin mit Faden ein. Sobald gewickelt, machen Sie einen Knoten, um ihn zu sichern und sicherzustellen, dass sich der Faden nicht löst.


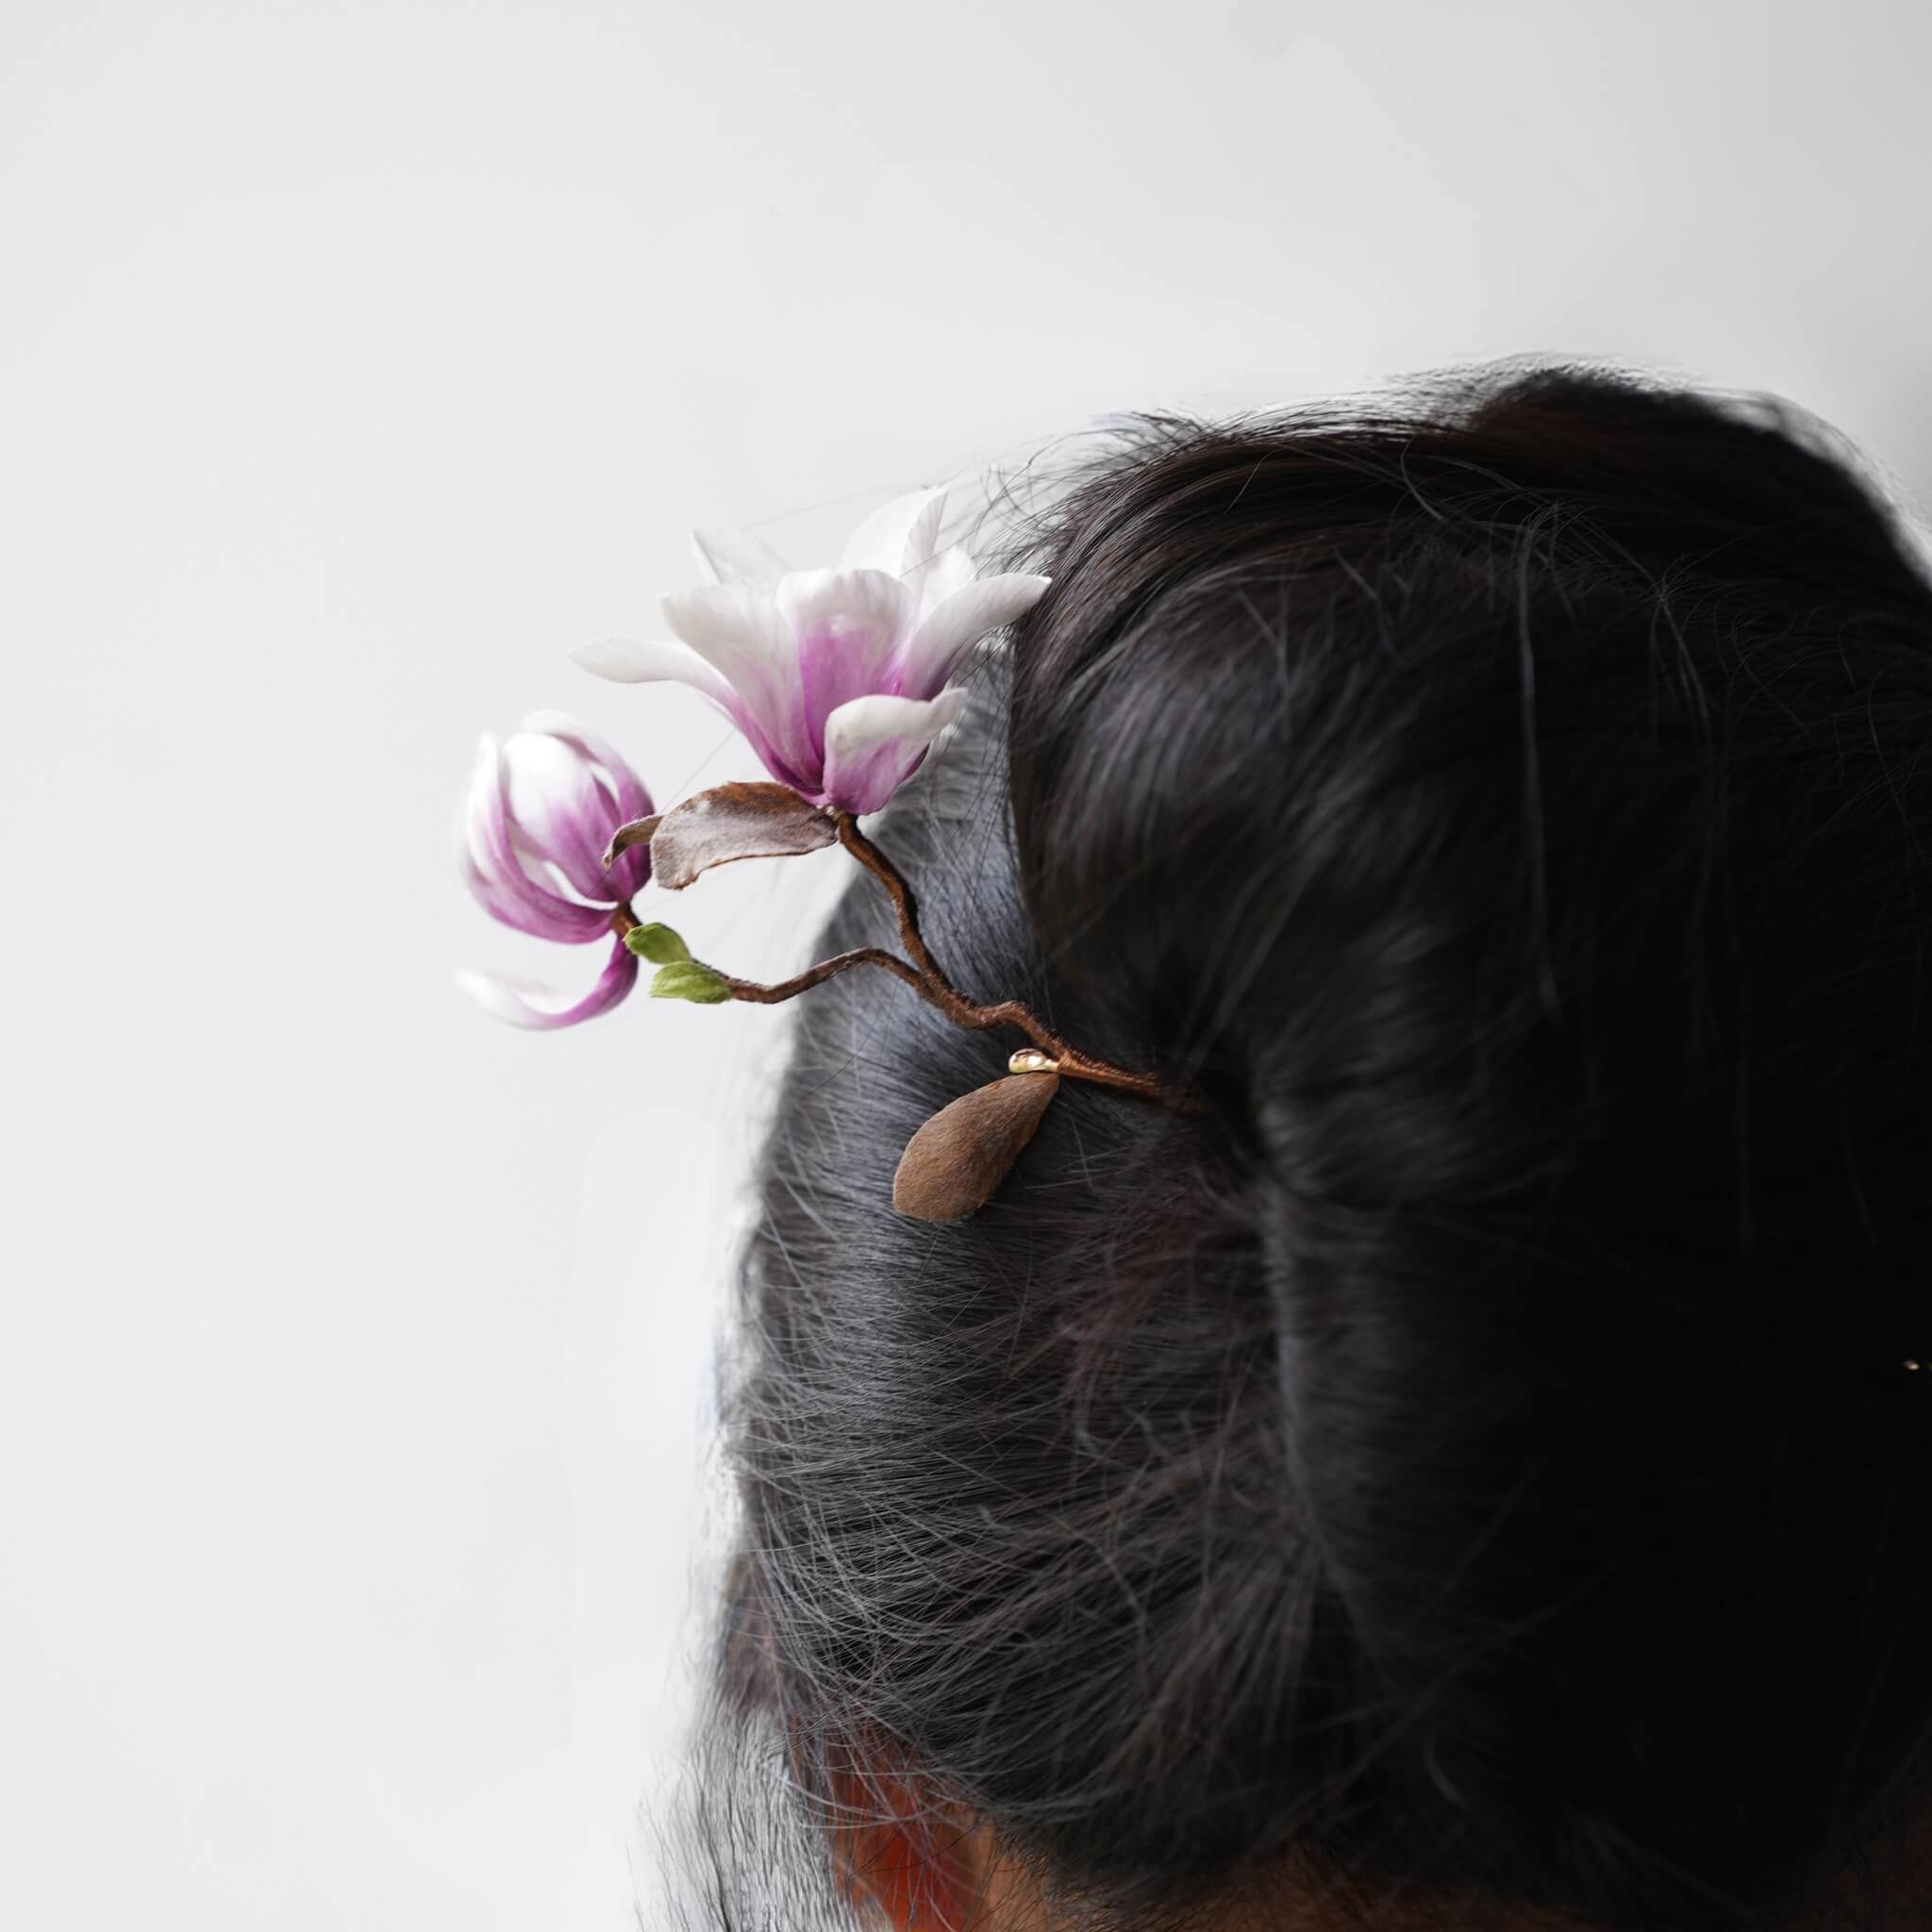
Befestigen Sie die Irisblume und die Brosche zusammen. Schneiden Sie überschüssigen Faden ab und verwenden Sie ein Feuerzeug, um die ausgefransten Kanten abzubrennen. Tragen Sie am Ende etwas Weißleim auf, um ein Verrutschen des Fadens zu verhindern. Fügen Sie einen Tropfen UV-Kleber auf die Blütenblätter hinzu, um Tautropfen zu erzeugen, und härten Sie den UV-Kleber mit einer Lampe aus. Ihre Irisblumen-Brosche ist fertig!

Wenn du dein DIY-Produkt fertiggestellt hast, lade dich ein, uns deine großartige Arbeit zu zeigen und Gutscheine zu erhalten für den Rest unserer DIY-Kits!
INS@lanseichina
Pinterest@lanseichina


Einen Kommentar hinterlassen
Alle Kommentare werden vor der Veröffentlichung moderiert.
Diese Website ist durch hCaptcha geschützt und es gelten die allgemeinen Geschäftsbedingungen und Datenschutzbestimmungen von hCaptcha.