


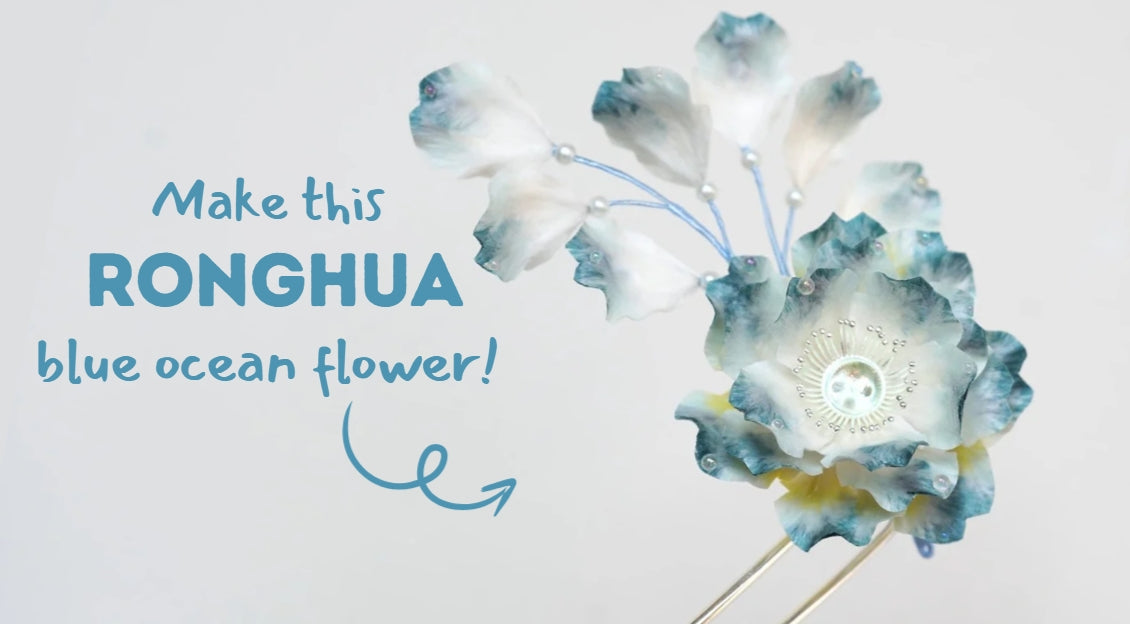
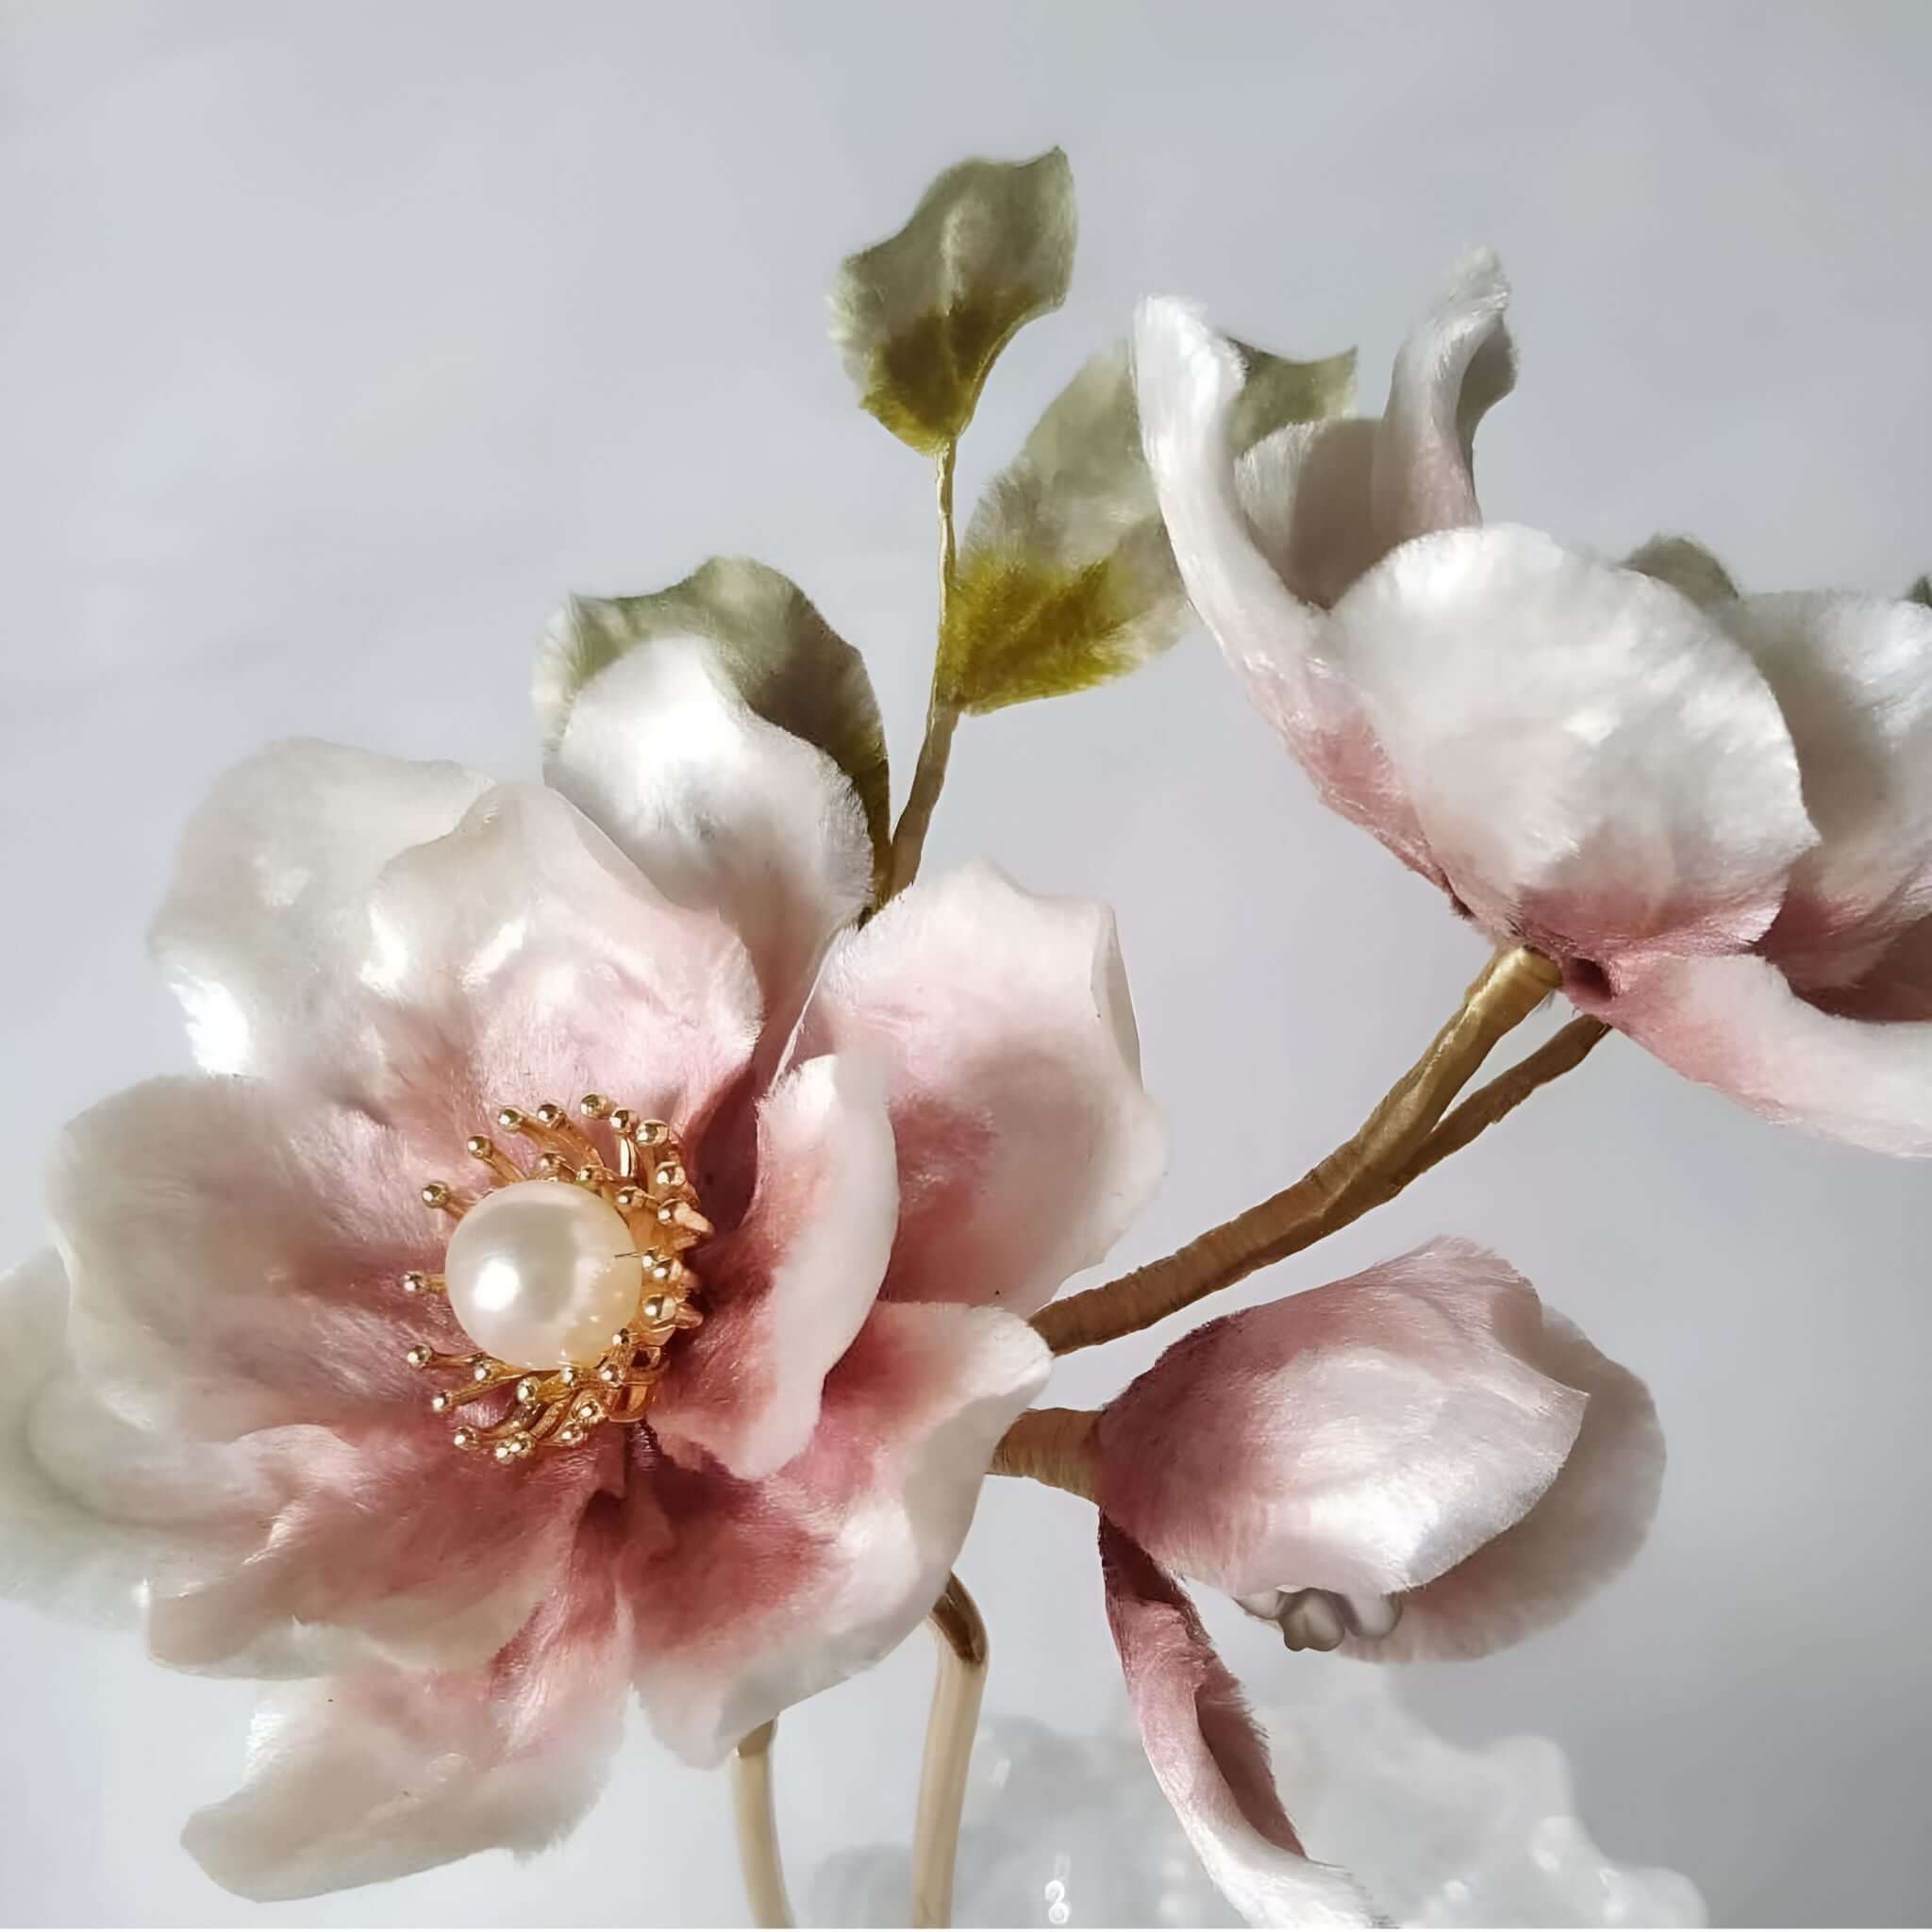
Lerne, wie man blaue Seidenblumen schafft, die vom Meer inspiriert sind, mit der traditionellen Ronghua-Technik (Seidenveloursblumen)! In diesem Schritt-für-Schritt-Anleitung führen wir dich durch das Vorbereiten der Veloursstreifen, das Kämmen, Formen und Zusammensetzen deiner eigenen lebendigen Seidenblumen. Perfekt, um deiner festlichen Dekoration eine handgemachte Note zu verleihen!
Schritt 1: Vorbereitung der Seidenfäden 0:00~1:29
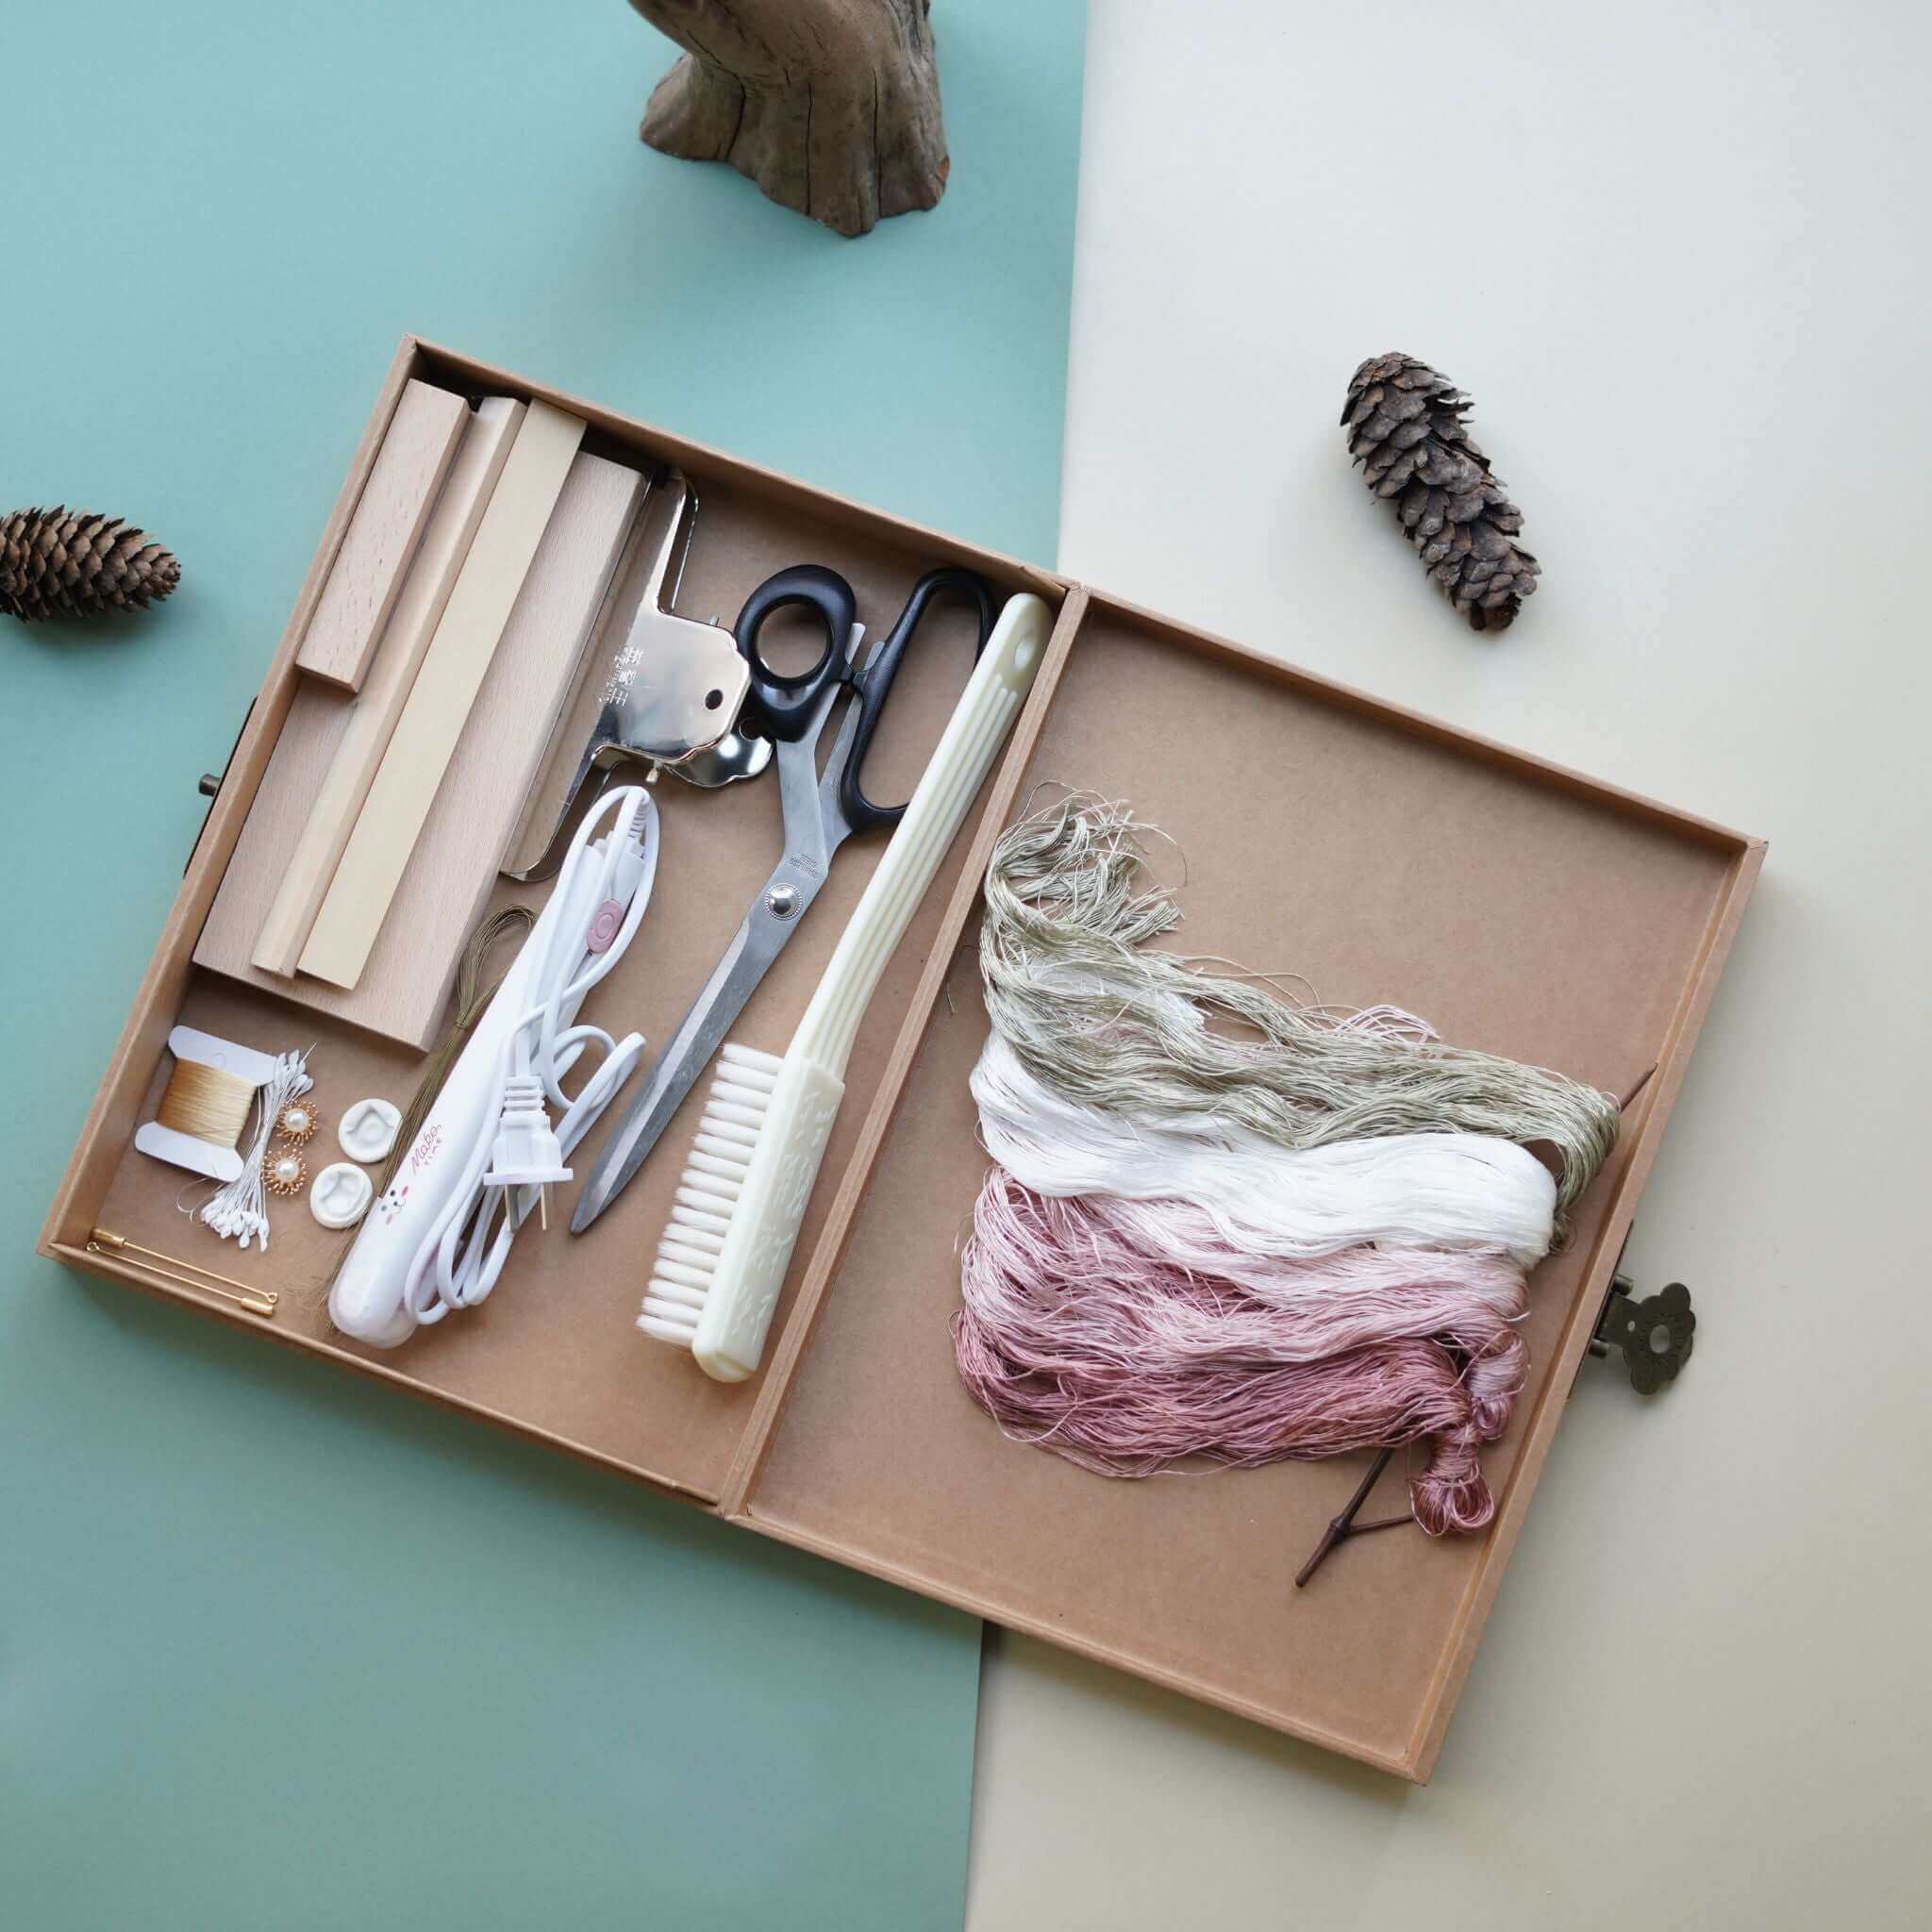
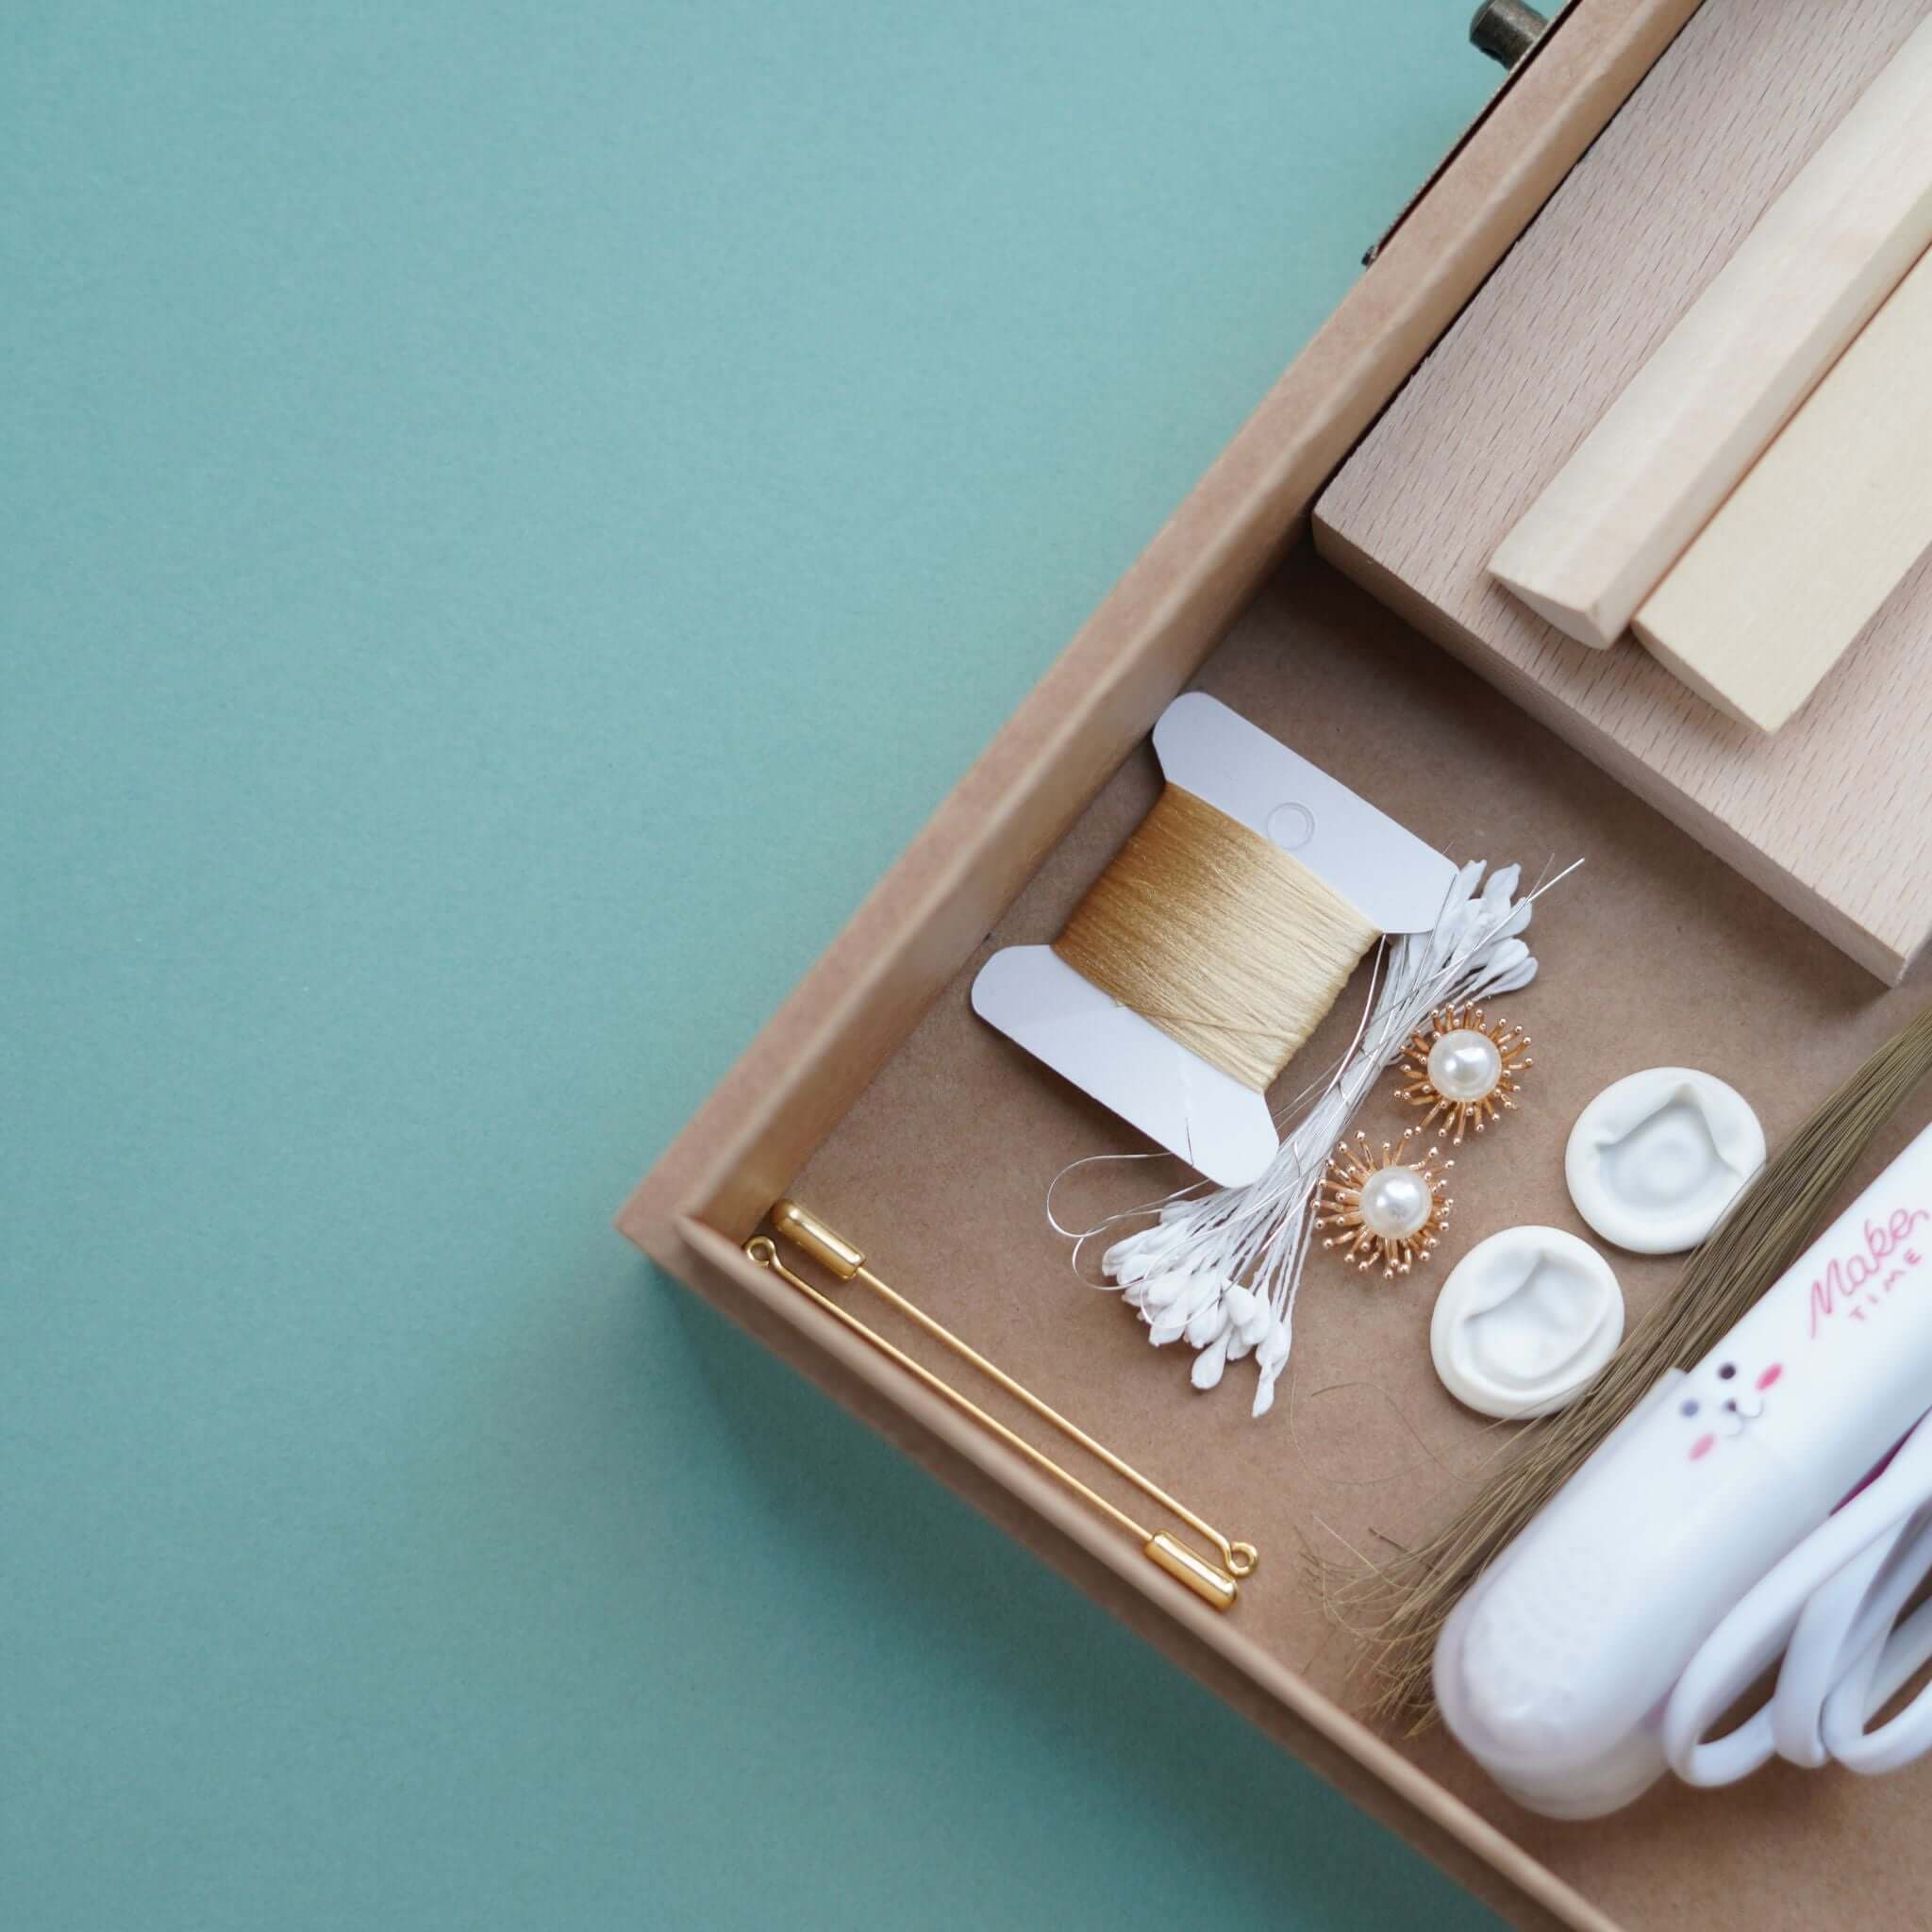
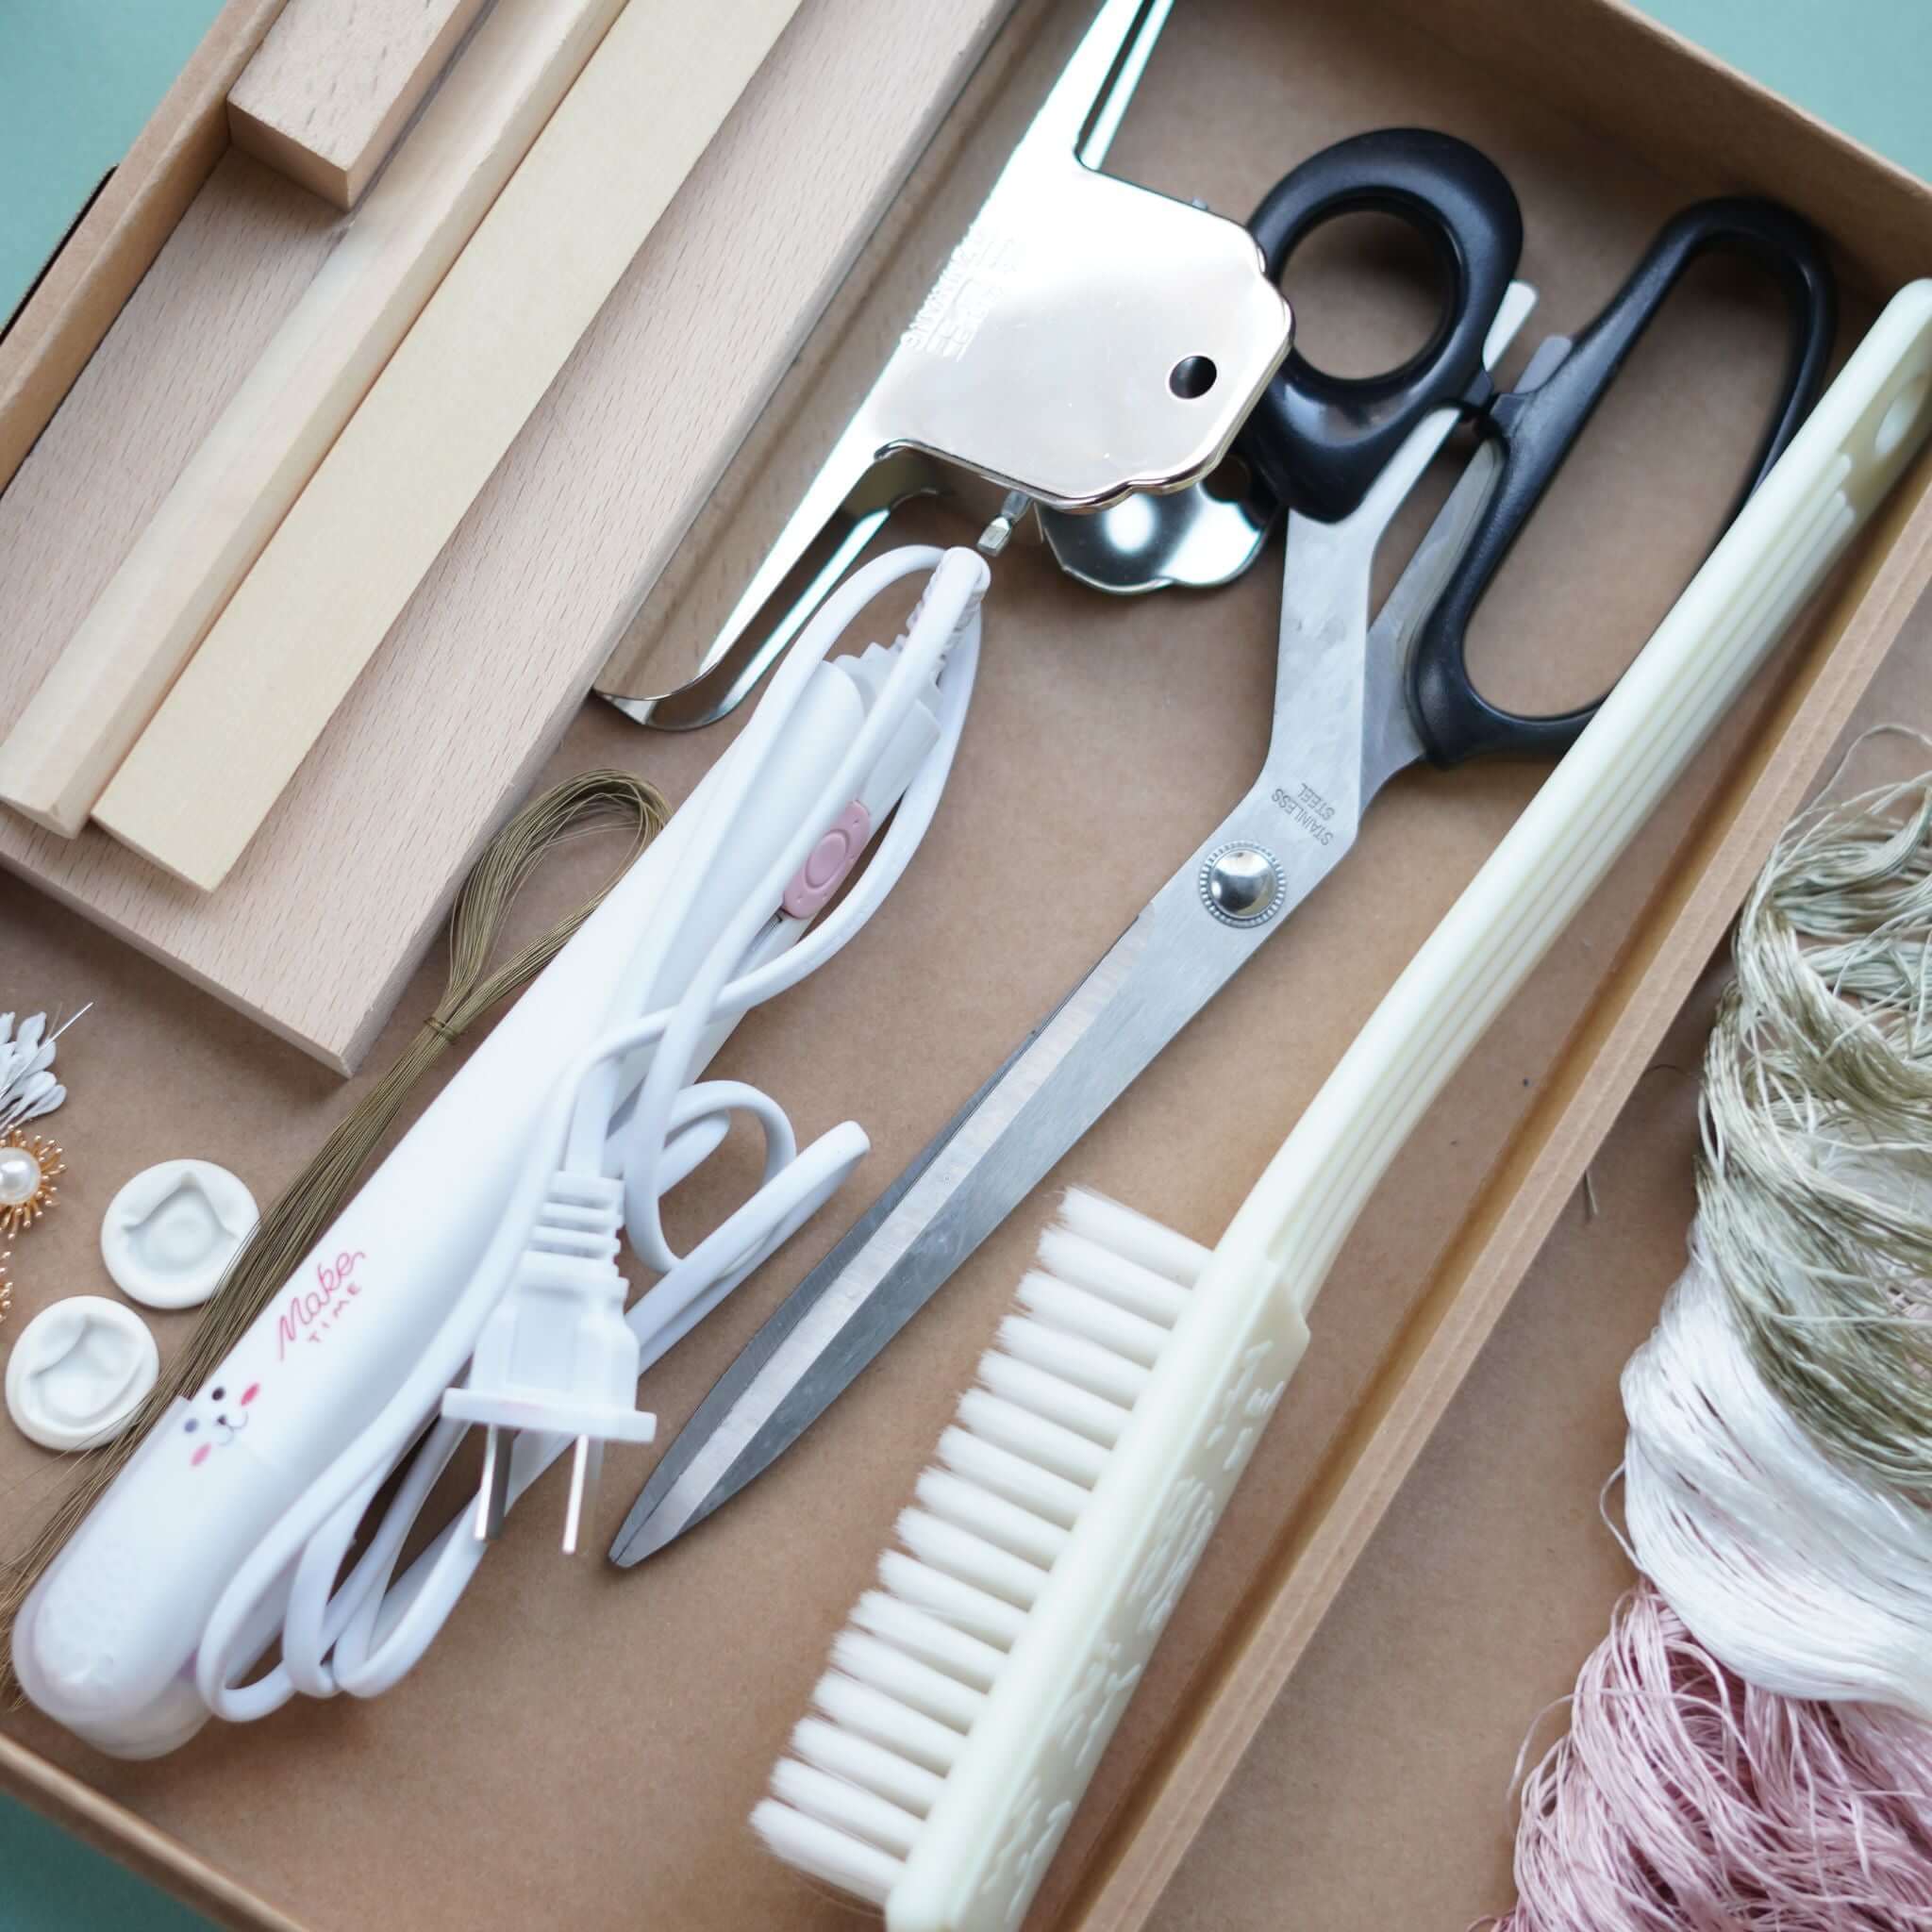
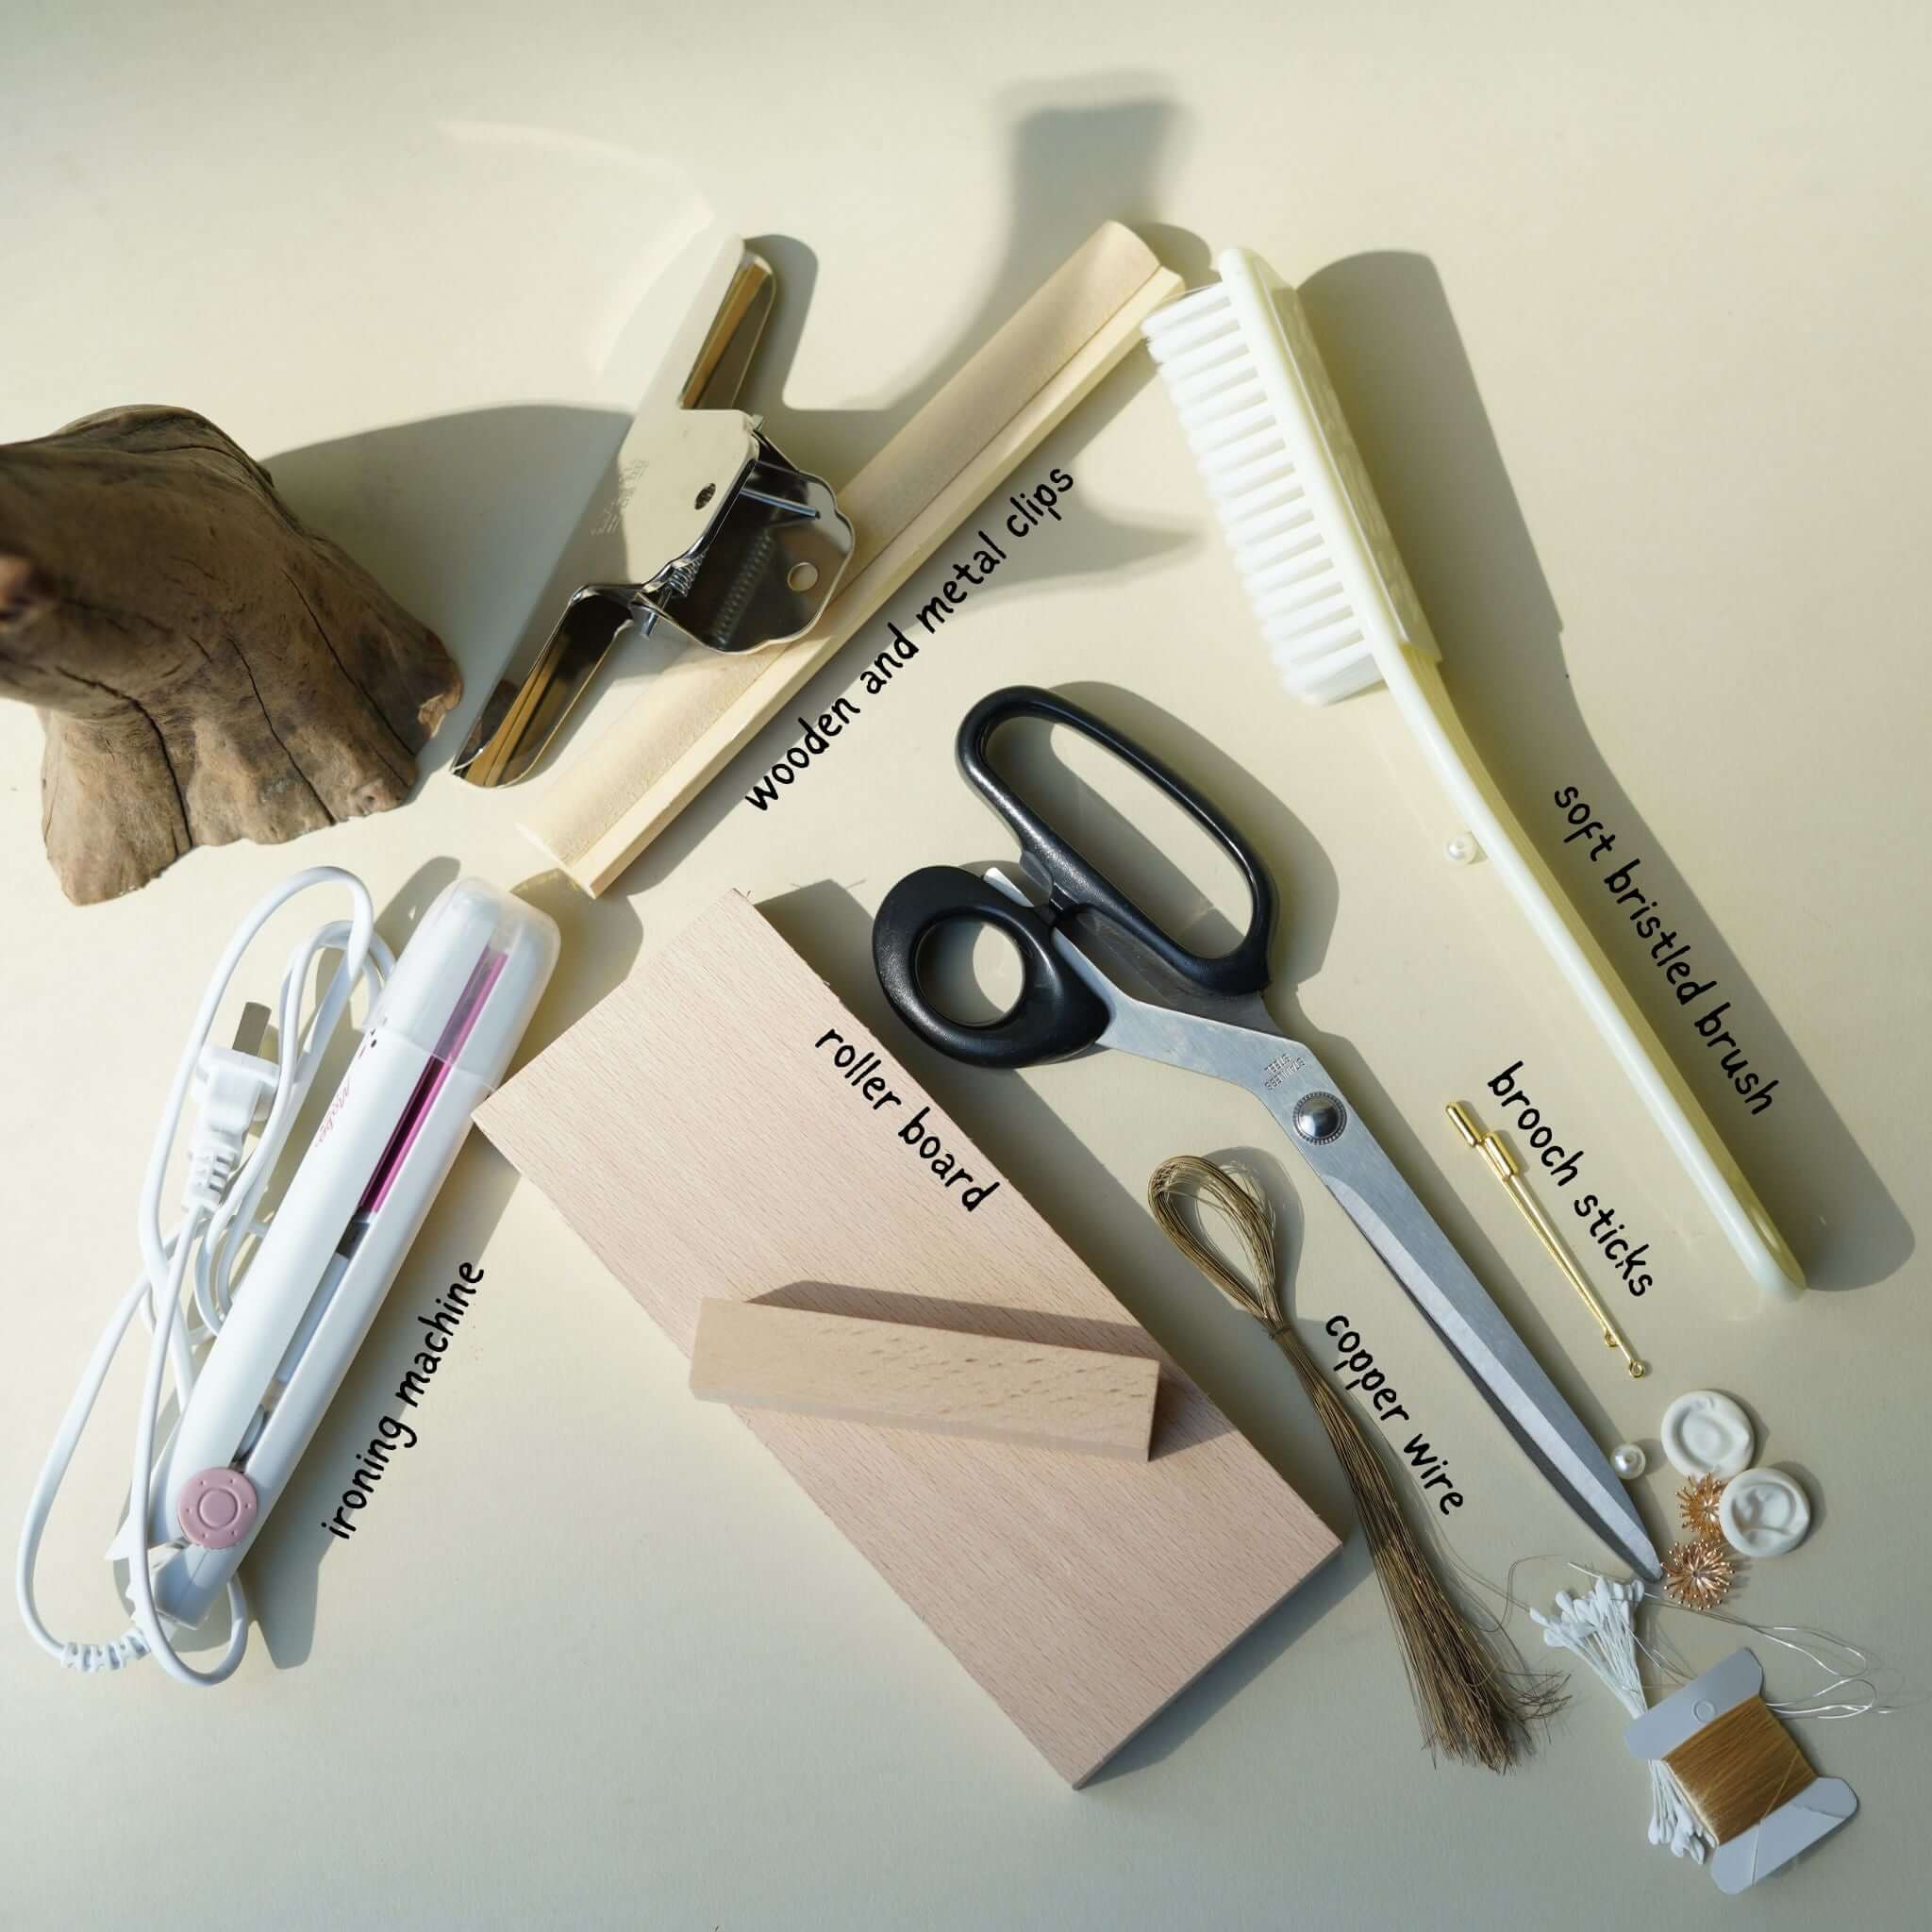
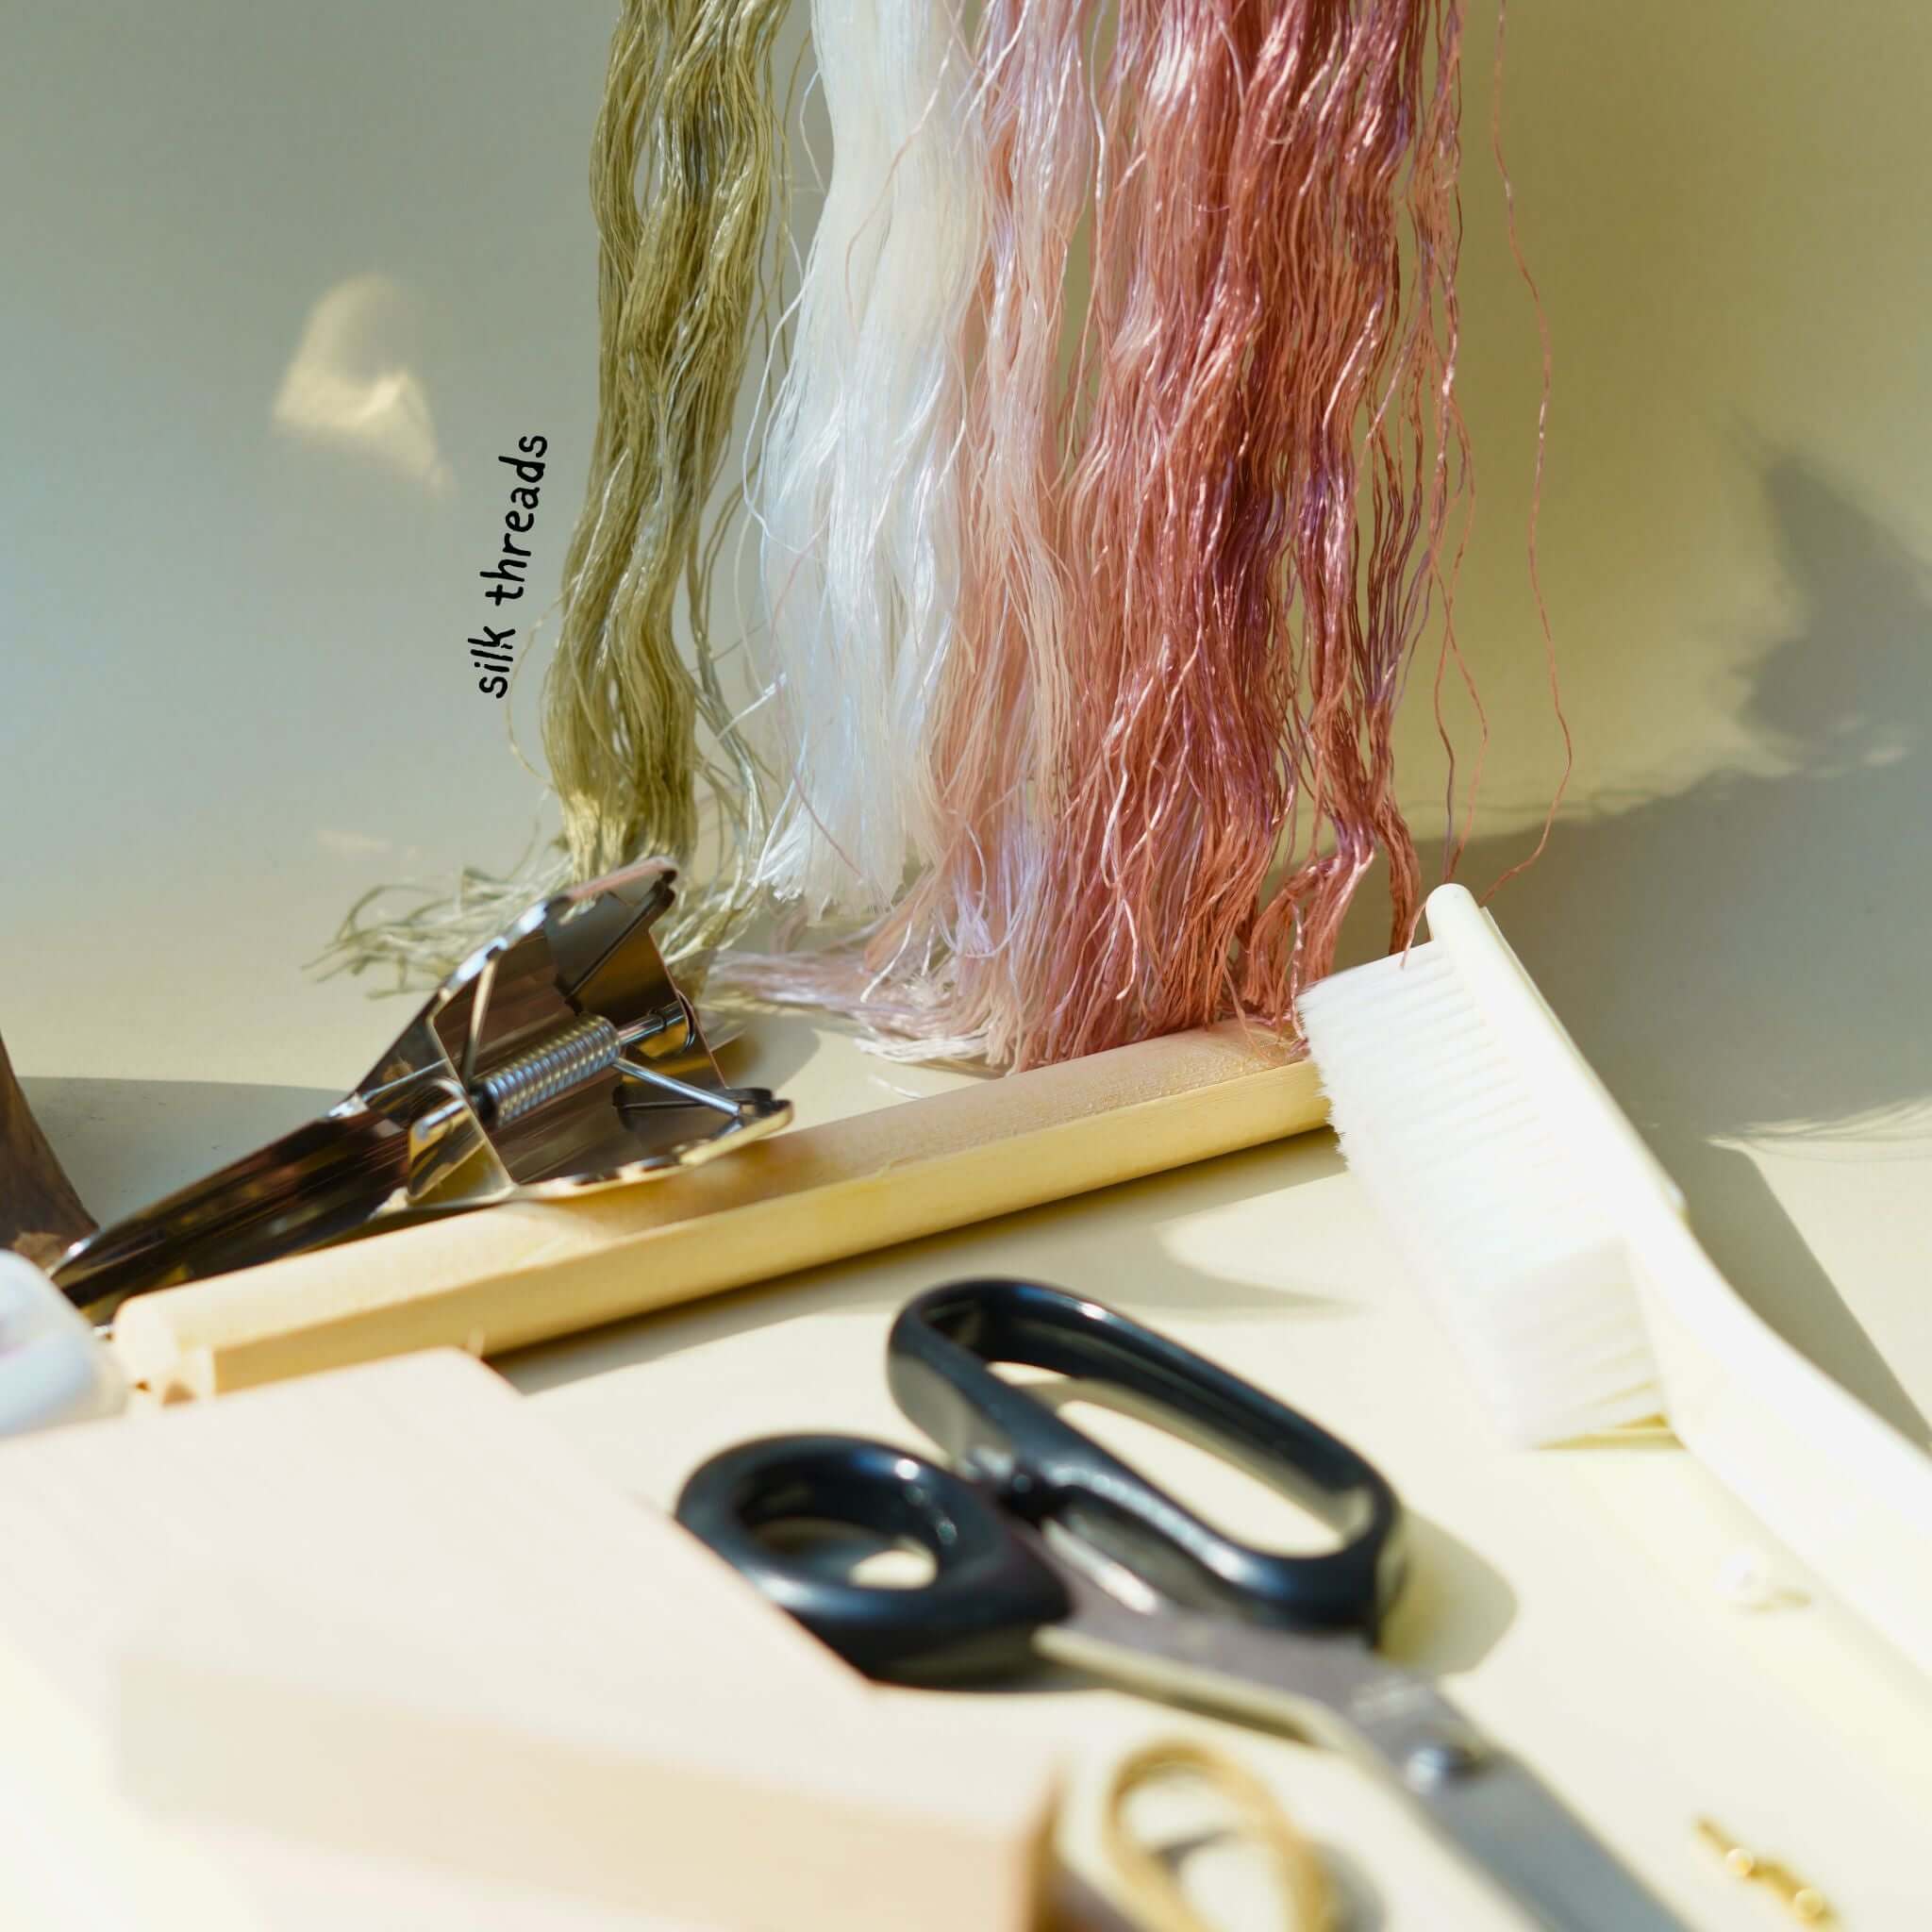
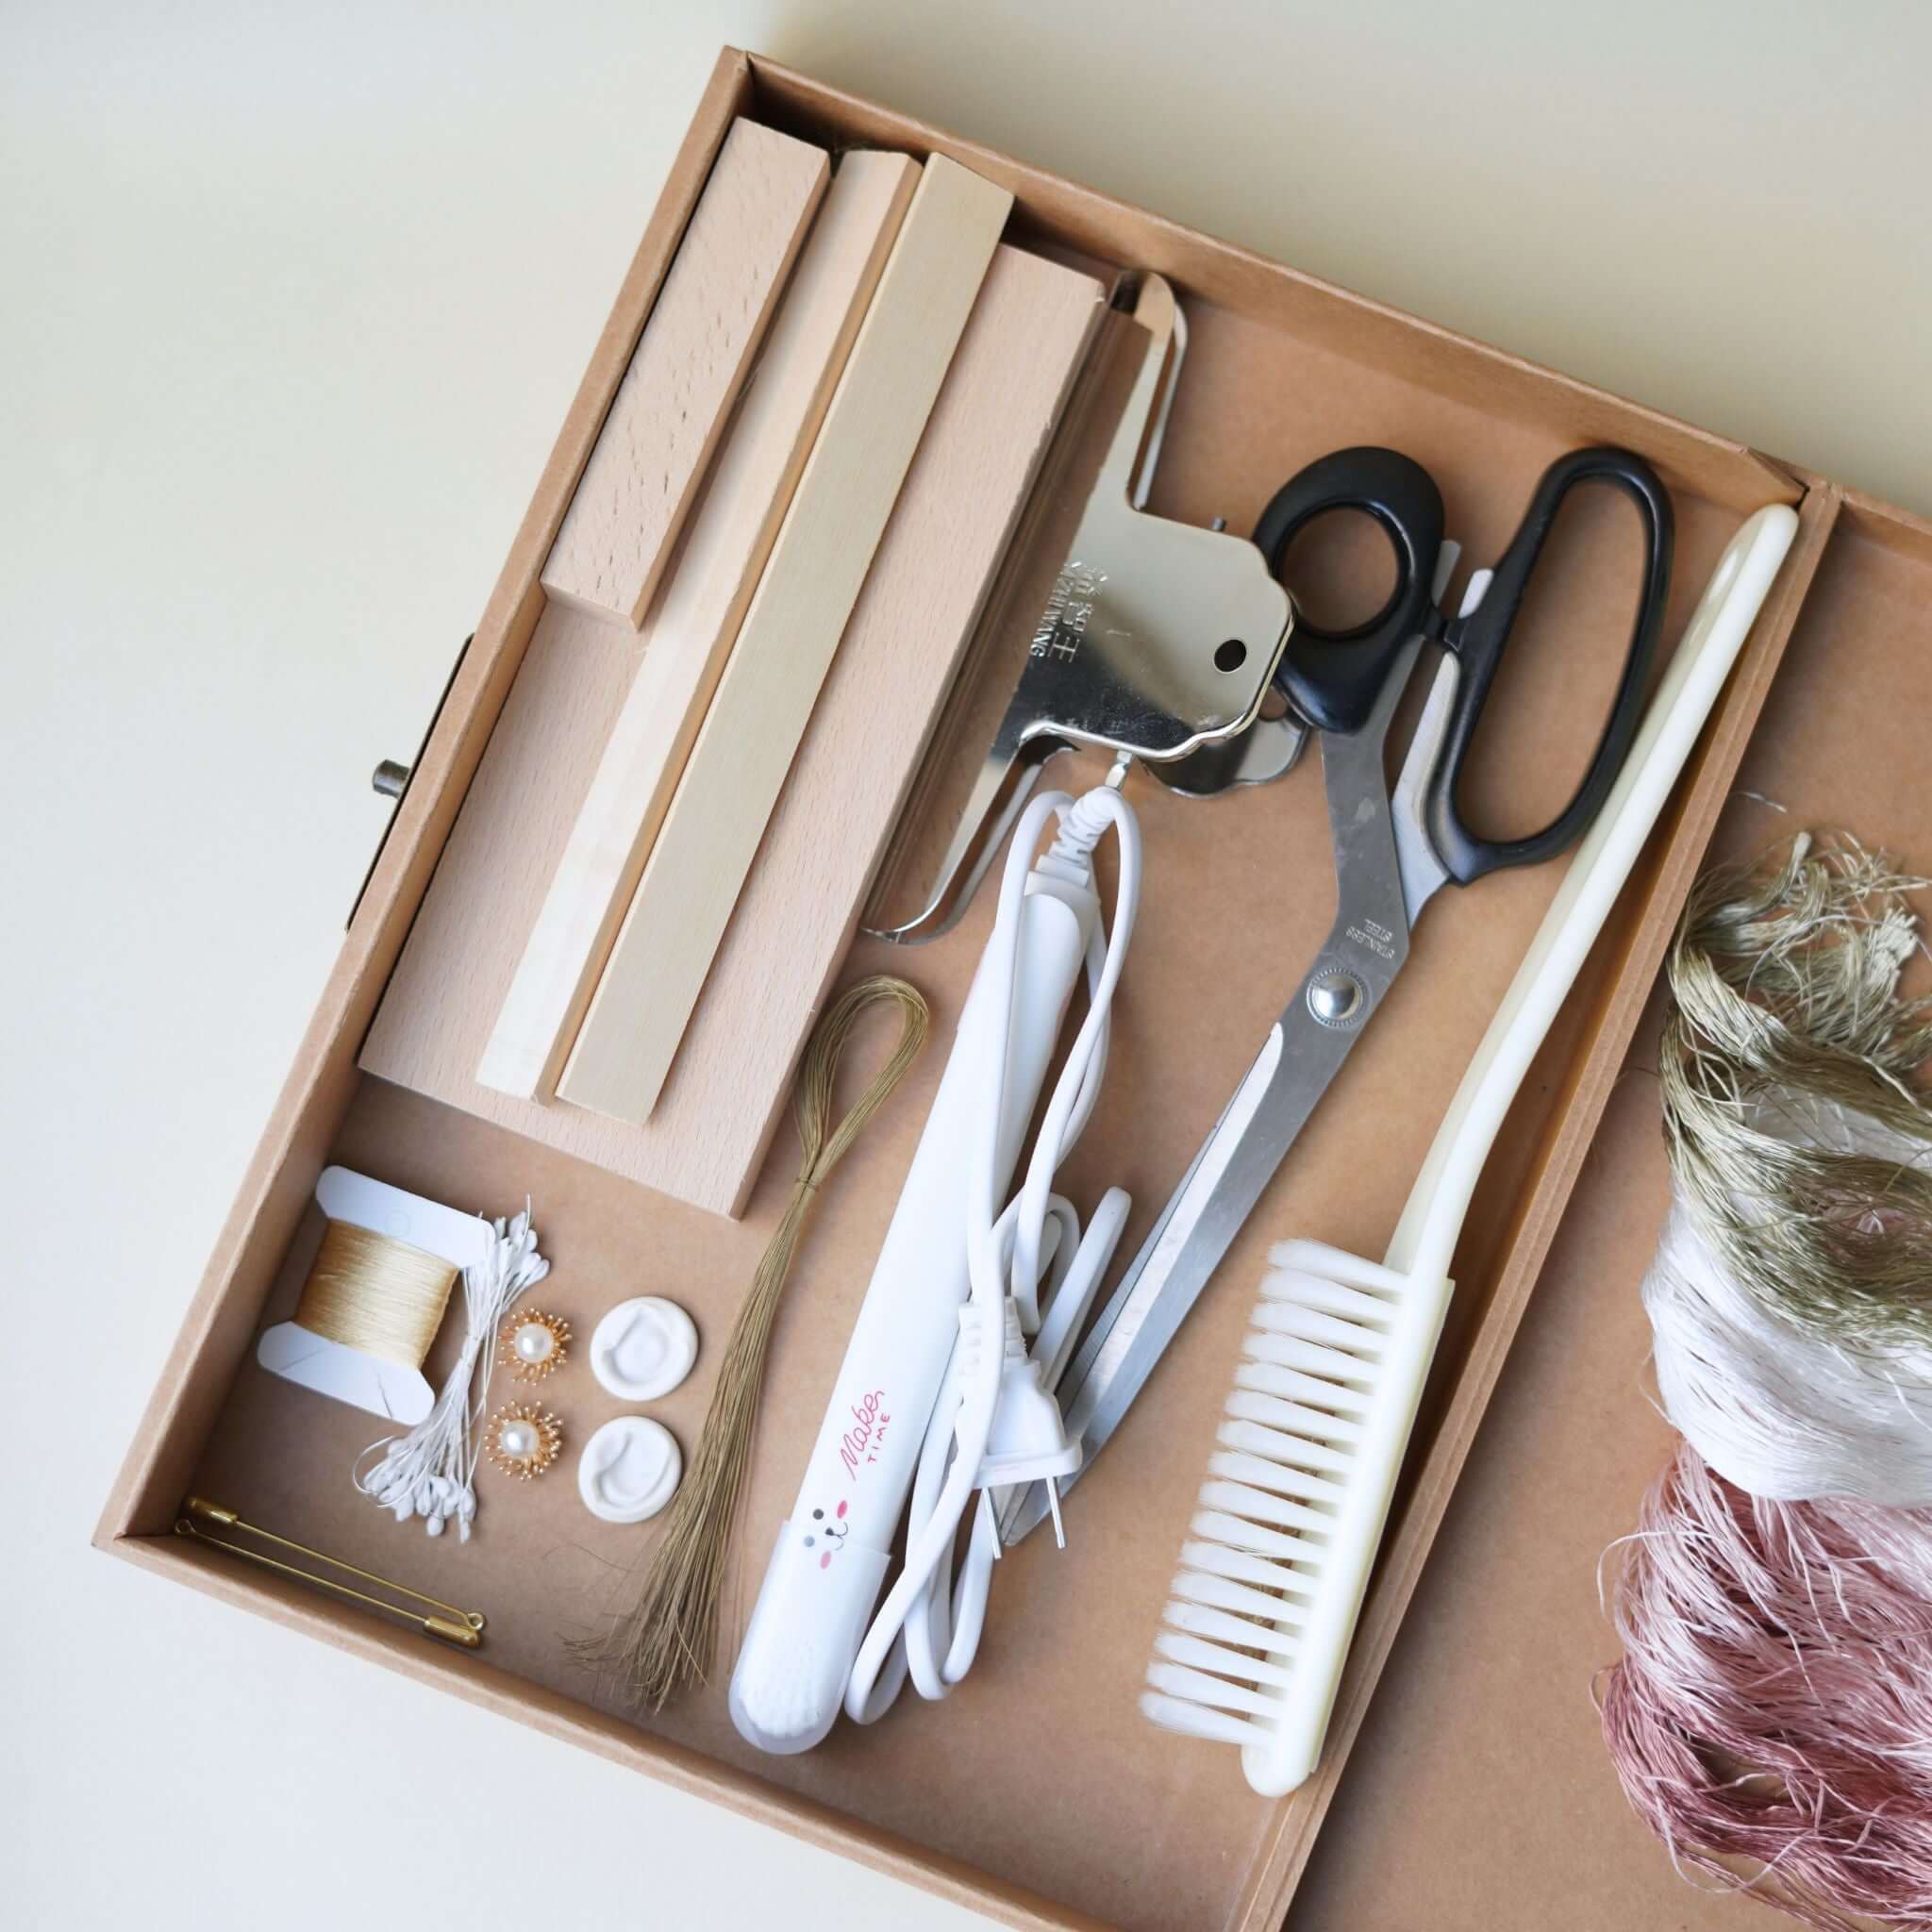
Für dieses Projekt verwenden wir insgesamt 4 Farben Seidenfaden. Zuerst entwirre alle Seidenfäden. Teile die Fäden in Gruppen von je 5 Strängen. Binde die Fäden an einen Stab. Bereite insgesamt 2 Reihen Seidenfäden vor. Befestige die Fäden an einem Gestell. Glätte die Fäden mit den Händen.
Sieh dir das Farbdiagramm unten für die Fadenanordnung und Details zum Kupferdraht an.


Schritt 2: Bürsten der Fäden 1:30~3:03
Beim Bürsten halte mit einer Hand das untere Ende der Fäden fest. Bürste beide Seiten, vorne und hinten. Der einzige Unterschied zwischen den beiden Reihen ist die Fadenanordnung; alle anderen Schritte sind gleich. Wenn die Fäden kraus werden, besprühe sie leicht mit Wasser. Bürste, bis die Fäden fluffig und seidig sind. Nach dem Bürsten befestige die Fäden am Rand eines Tisches oder Gestells.

Schritt 3: Anbringen des Drahtes 3:04~4:59
Benutze eine bergförmige Klammer, um die Fäden festzuhalten – sie müssen straff bleiben. Nimm weichgeglühten Kupferdraht und richte ihn gerade. Drehe die zweite Hälfte des Drahtes fest zusammen. Lege die Fäden in die Mitte des Drahtes. Verdrehe die beiden Kupferdrähte links miteinander. Halte beide Enden der Fäden und drehe den Draht in entgegengesetzte Richtungen. Du kannst Magnesiumpulver verwenden, um ein Abrutschen zu verhindern. Halte einen Abstand von etwa 1,2 - 1,5 cm (siehe Ronghua-Anleitung) zwischen den Drähten, und die Breite sollte gleichmäßig sein. Entferne die Klammer, nachdem alle Drähte befestigt sind.

Schritt 4: Schneiden und Ausrichten der Seidenstreifen 5:00~6:43
Lege den Seidenstreifen flach auf deine Handfläche. Schneide den Streifen sauber in einem Zug (schneide nicht den Draht). Richte die Kanten ordentlich aus, sodass der Draht genau in der Mitte liegt. Drehe den Draht immer in die richtige Richtung – eine Umkehrung lockert den Draht. Benutze ein Fadenrollbrett, um den Seidenstreifen zu straffen.

Schritt 5: Glätten und Formen der Blütenblätter 6:44~10:14
Nach dem Straffen glätte den Streifen mit einer Pinzette. Falte den Streifen in der Mitte und drehe den Draht. Drücke den Streifen mit einer Klammer flach, immer von hinten nach vorne, nicht von oben nach unten. Schneide die unteren Drähte sauber ab. Tauche die Streifen in Haarspray (Stylingflüssigkeit) und entferne den Überschuss. Stecke die Streifen in einen Schwammpolster zum Trocknen an der Luft, wobei die Blütenblätter auseinander liegen, damit sie nicht zusammenkleben. Nach dem Trocknen klemme sie erneut, um die Blütenblätter glatter zu machen.

Schritt 6: Zuschneiden der Blütenblattformen 10:15~13:41
Schneide ungleichmäßige Blütenblattkanten. Schneide eine dreieckige Kerbe oben und an beiden Seiten jedes Blütenblattes. Wiederhole dies für alle Blütenblätter. Tauche die Blütenblätter erneut in Stylingflüssigkeit, um Kurven zu formen. Benutze eine Pinzette, um die Kurven zu kneifen und wellige Ränder zu erzeugen. Lasse sie an der Luft auf einem Gestell trocknen.
Du musst mindestens 18 innere Blütenblätter (ohne gelbe Seidenfäden) und 7 äußerste Blütenblätter (mit gelben Seidenfäden) für die spätere Phase anfertigen.

Schritt 7: Zusammensetzen des Blütenzentrums 13:42~14:36
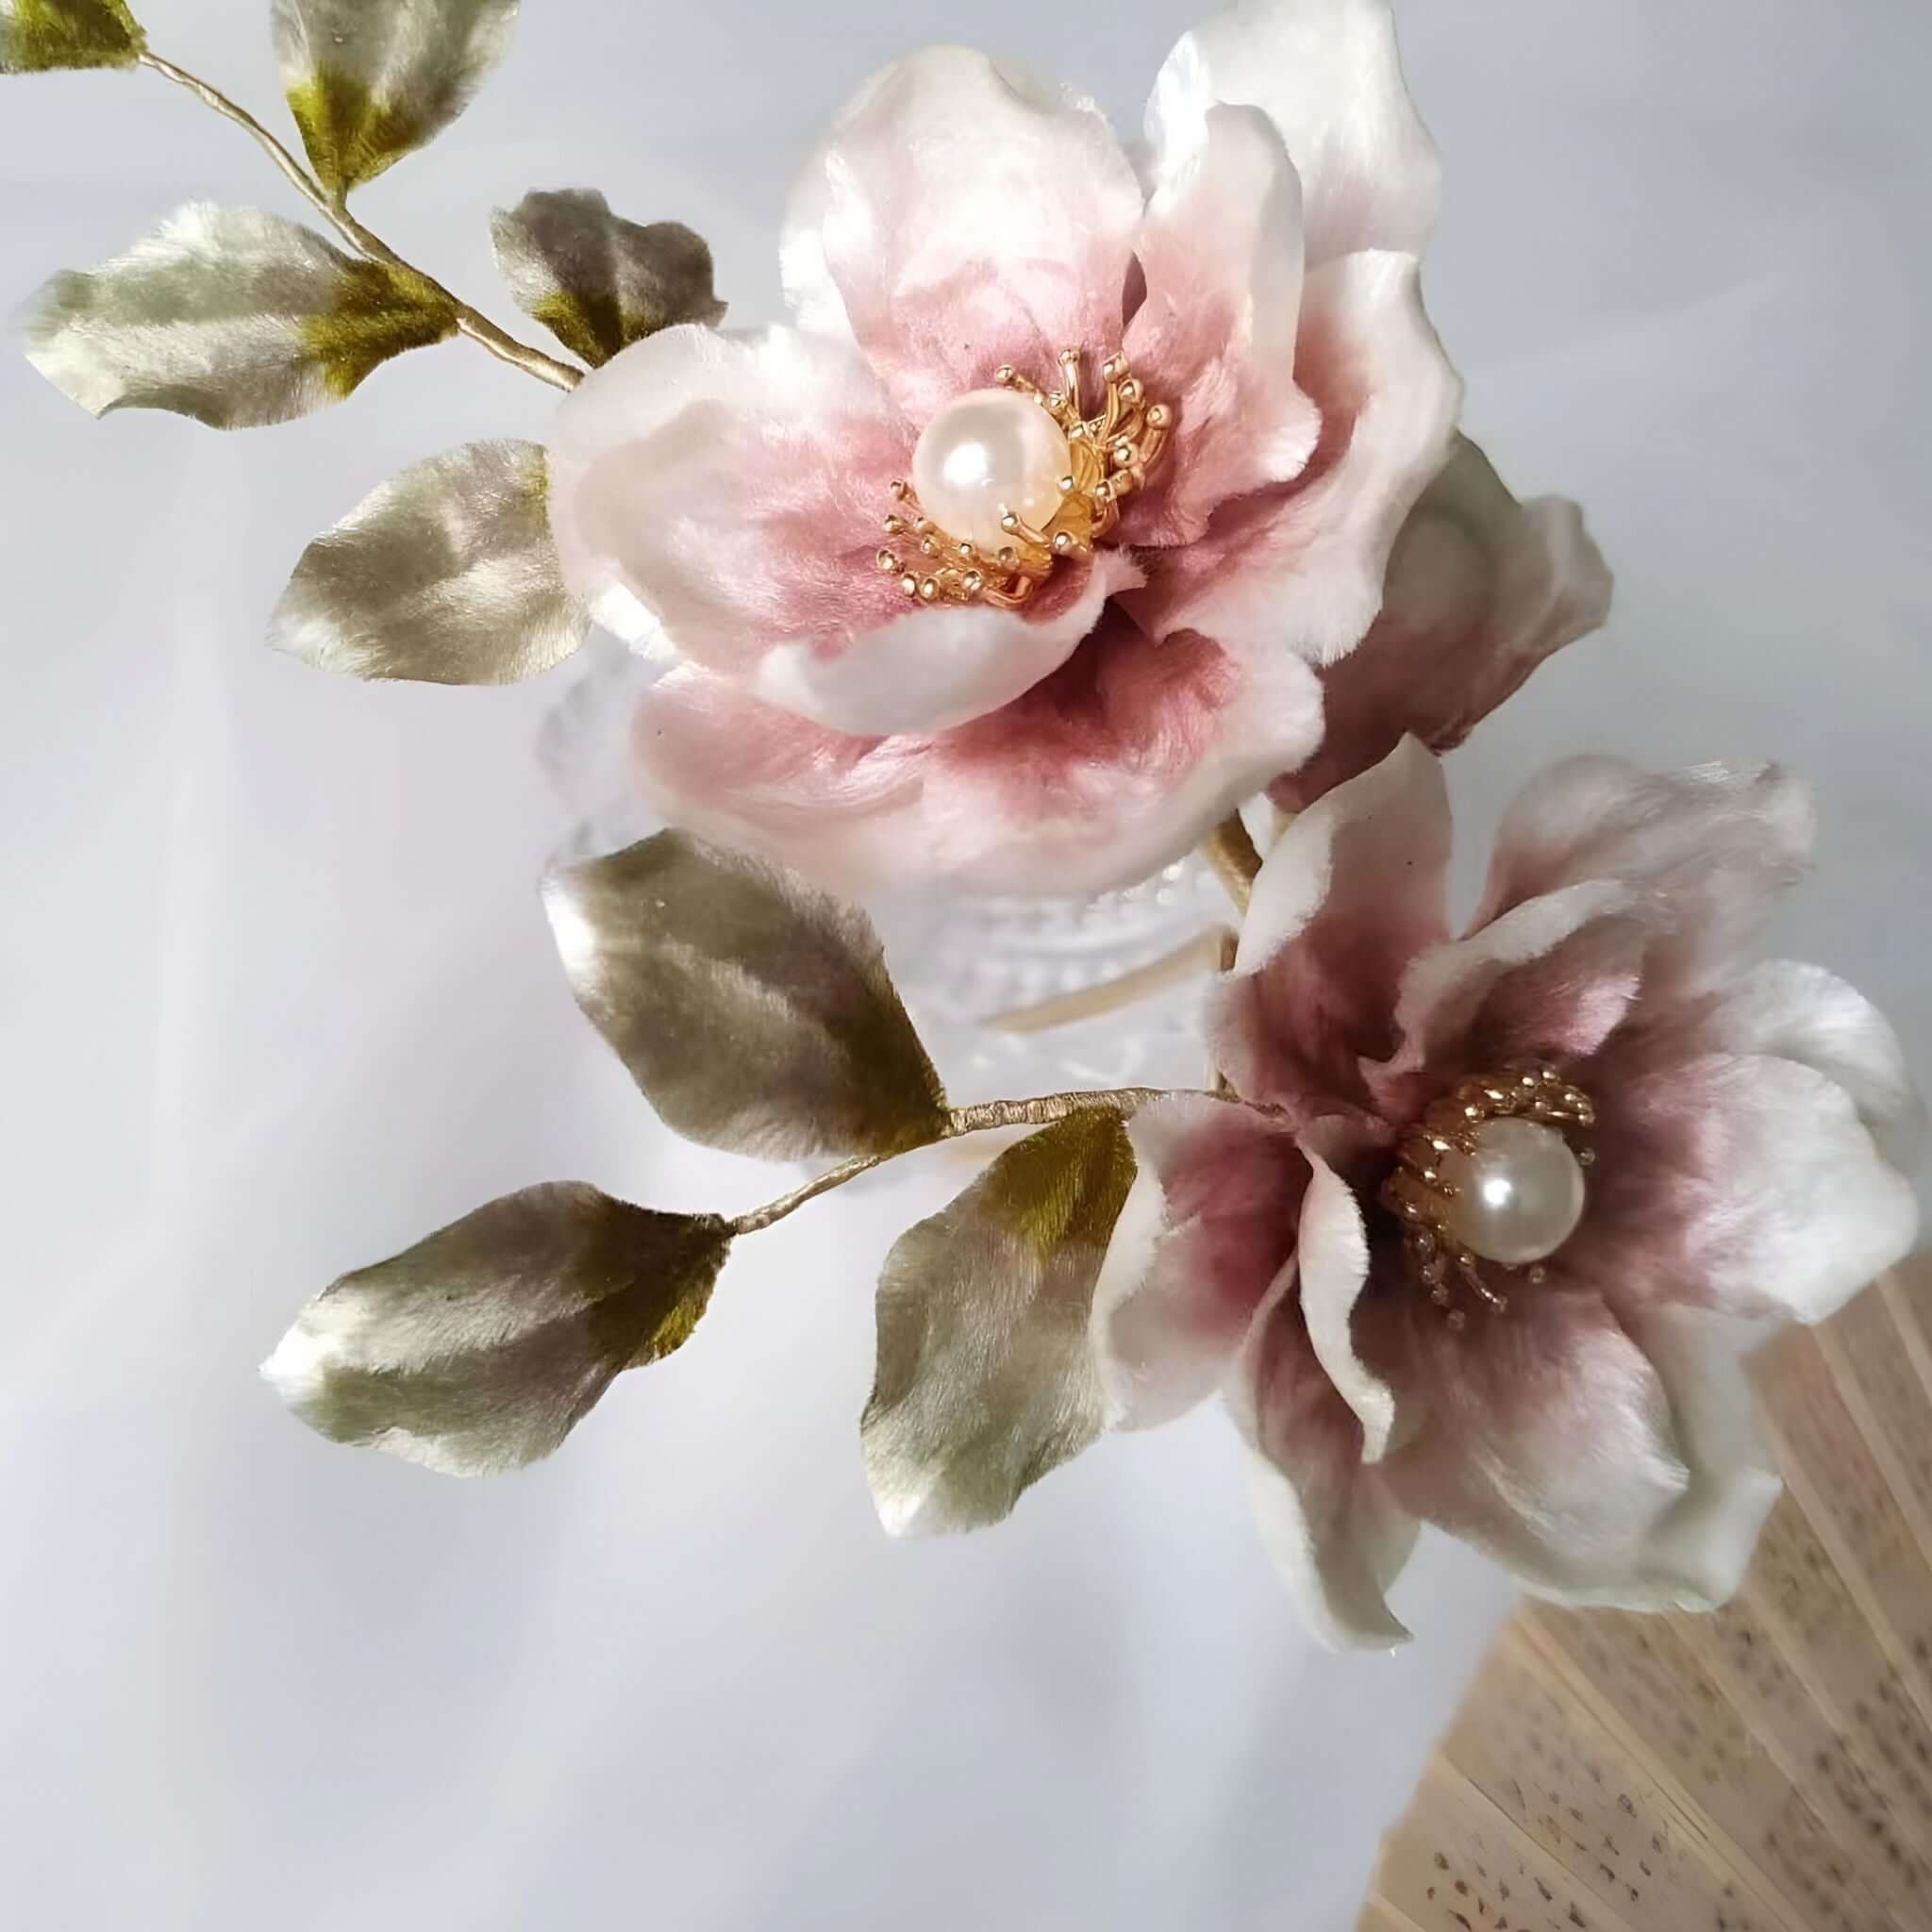
Schneide ein Stück Kupferdraht ab und führe es durch das Loch in der Blütenbasis. Drehe es fest zusammen. Trage Kleber in die Mitte auf und befestige eine Perle.

Schritt 8: Anbringen der Blütenblätter 14:37~16:40
Befestige die Seidenfäden und das Blütenzentrum zusammen. Die Blüte hat 3 Blütenschichten: Schicht 1: 5 Blütenblätter. Schicht 2: 6 Blütenblätter (versetzt zu Schicht 1). Schicht 3: Gelbe Blütenblätter, insgesamt 7. Vermeide Überlappungen; ordne sie mit kleinen Abständen an.

Schritt 9: Anfertigen zusätzlicher kleiner Blütenblätter 16:41~21:09
Bereite 7 einzelne Blütenblätter auf dieselbe Weise vor. Trage Kleber an der Basis auf und befestige Perlen. Setze diese Blütenblätter mit kleinen Abständen zusammen. Verbinde zwei Blütenblätter und befestige sie dann an der Hauptblüte.

Schritt 10: Endmontage 21:10~24:28
3 cm um den Stiel. Schneide überschüssigen Seidenfaden ab. Biege den umwickelten Abschnitt und wickle weiter, bis alle Drähte bedeckt sind. Wenn der Faden ausgeht, knote ihn ab, um abzuschließen. Befestige die fertige Blüte am Hauptschmuckstück (z. B. Haarnadel oder Brosche). Befestige sie fest, wickele eng und ohne Lücken. Benutze einen gefalteten Draht oder Seidenfaden als Einfädelhilfe, um die Enden zu verbergen.

Schritt 11: Anpassen und Fertigstellen 24:29~Ende
Passe die Position der Blütenblätter für ein natürliches Aussehen an. Die hier hergestellten Blütenblätter reichen für zwei Blumen – eine kann für eine Haarnadel verwendet werden.


Anleitung abgeschlossen – jetzt bist du dran, deine eigene Seidenblume zu fertigen!
Wenn du dein Bastelwerk fertiggestellt hast, lade dich ein, deine großartige Arbeit mit uns zu teilen und Gutscheine für unsere weiteren Bastelsets zu erhalten!
INS@lanseichina
Pinterest@lanseichina


Einen Kommentar hinterlassen
Alle Kommentare werden vor der Veröffentlichung moderiert.
Diese Website ist durch hCaptcha geschützt und es gelten die allgemeinen Geschäftsbedingungen und Datenschutzbestimmungen von hCaptcha.